There really is a place that serves a
One Pound Brioche Doughnut
Need I say more?
Would you eat one?

Use the best quality ingredients you can for amazing cookies.
Ingredients:
Add the butter and sugars, stir to combine. Add eggs and vanilla, mix until smooth.
In a separate bowl combine:
Add to sugar and butter mixture; stir to combine. Do not over mix.
Mix in:
Use a small scoop to make even size cookies. Space 2 inches apart. Sprinkle the tops of each cookie with Maldon Flaked Salt, if desired.
Bake 350°F for 15 minutes or until the edges are golden brown. Let cookies sit on the pan for a few minutes to “set up” before moving the cookies to cooling rack.
Make sure you hide some for yourself because they go fast!

Chocolate Almond Peanut Butter Cups

Making gelee Pate de Fruit

Strawberry Cheesecake rhubarb compote with hemp seed crisp
De-constructed Strawberry Cheesecake with Rhubarb Compote

Chocolate Chia Seed Pudding with Toasted Almonds
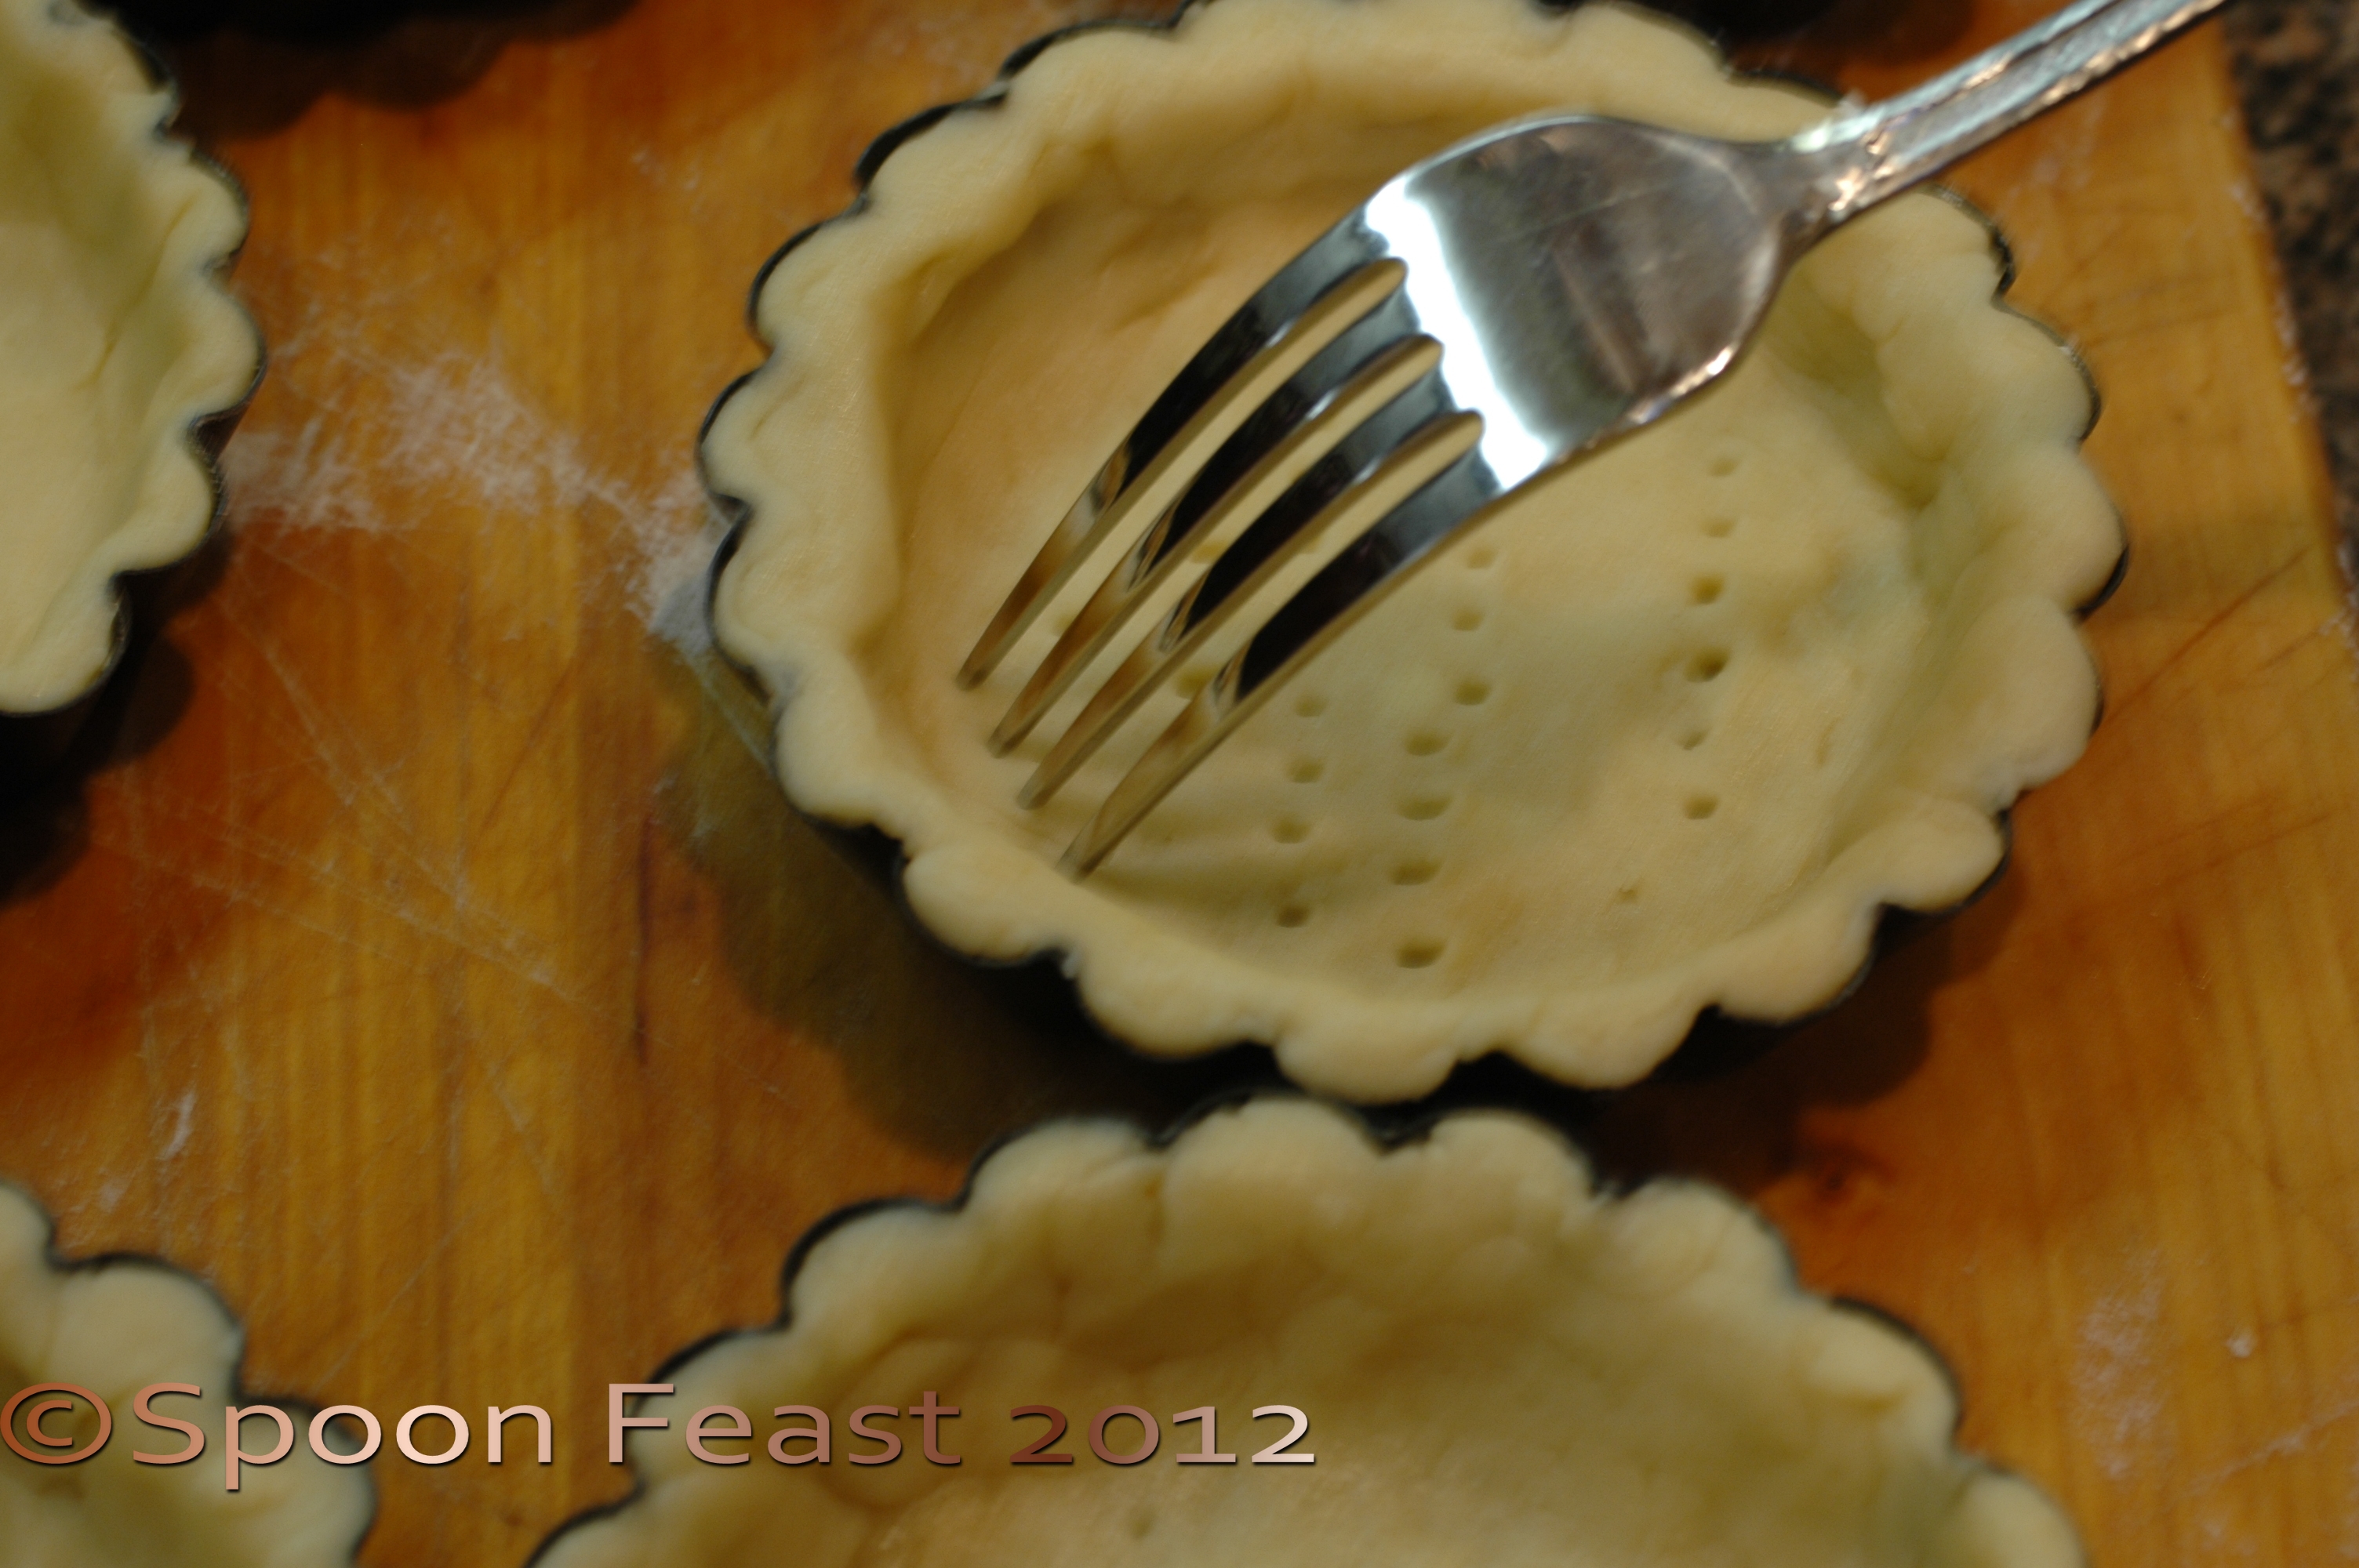
Easy tart and pie crust
An Easy Crust for Pies and Tarts

Fig and almond tart

A delicious Green Tomato Pie

Cherry Hand Pies
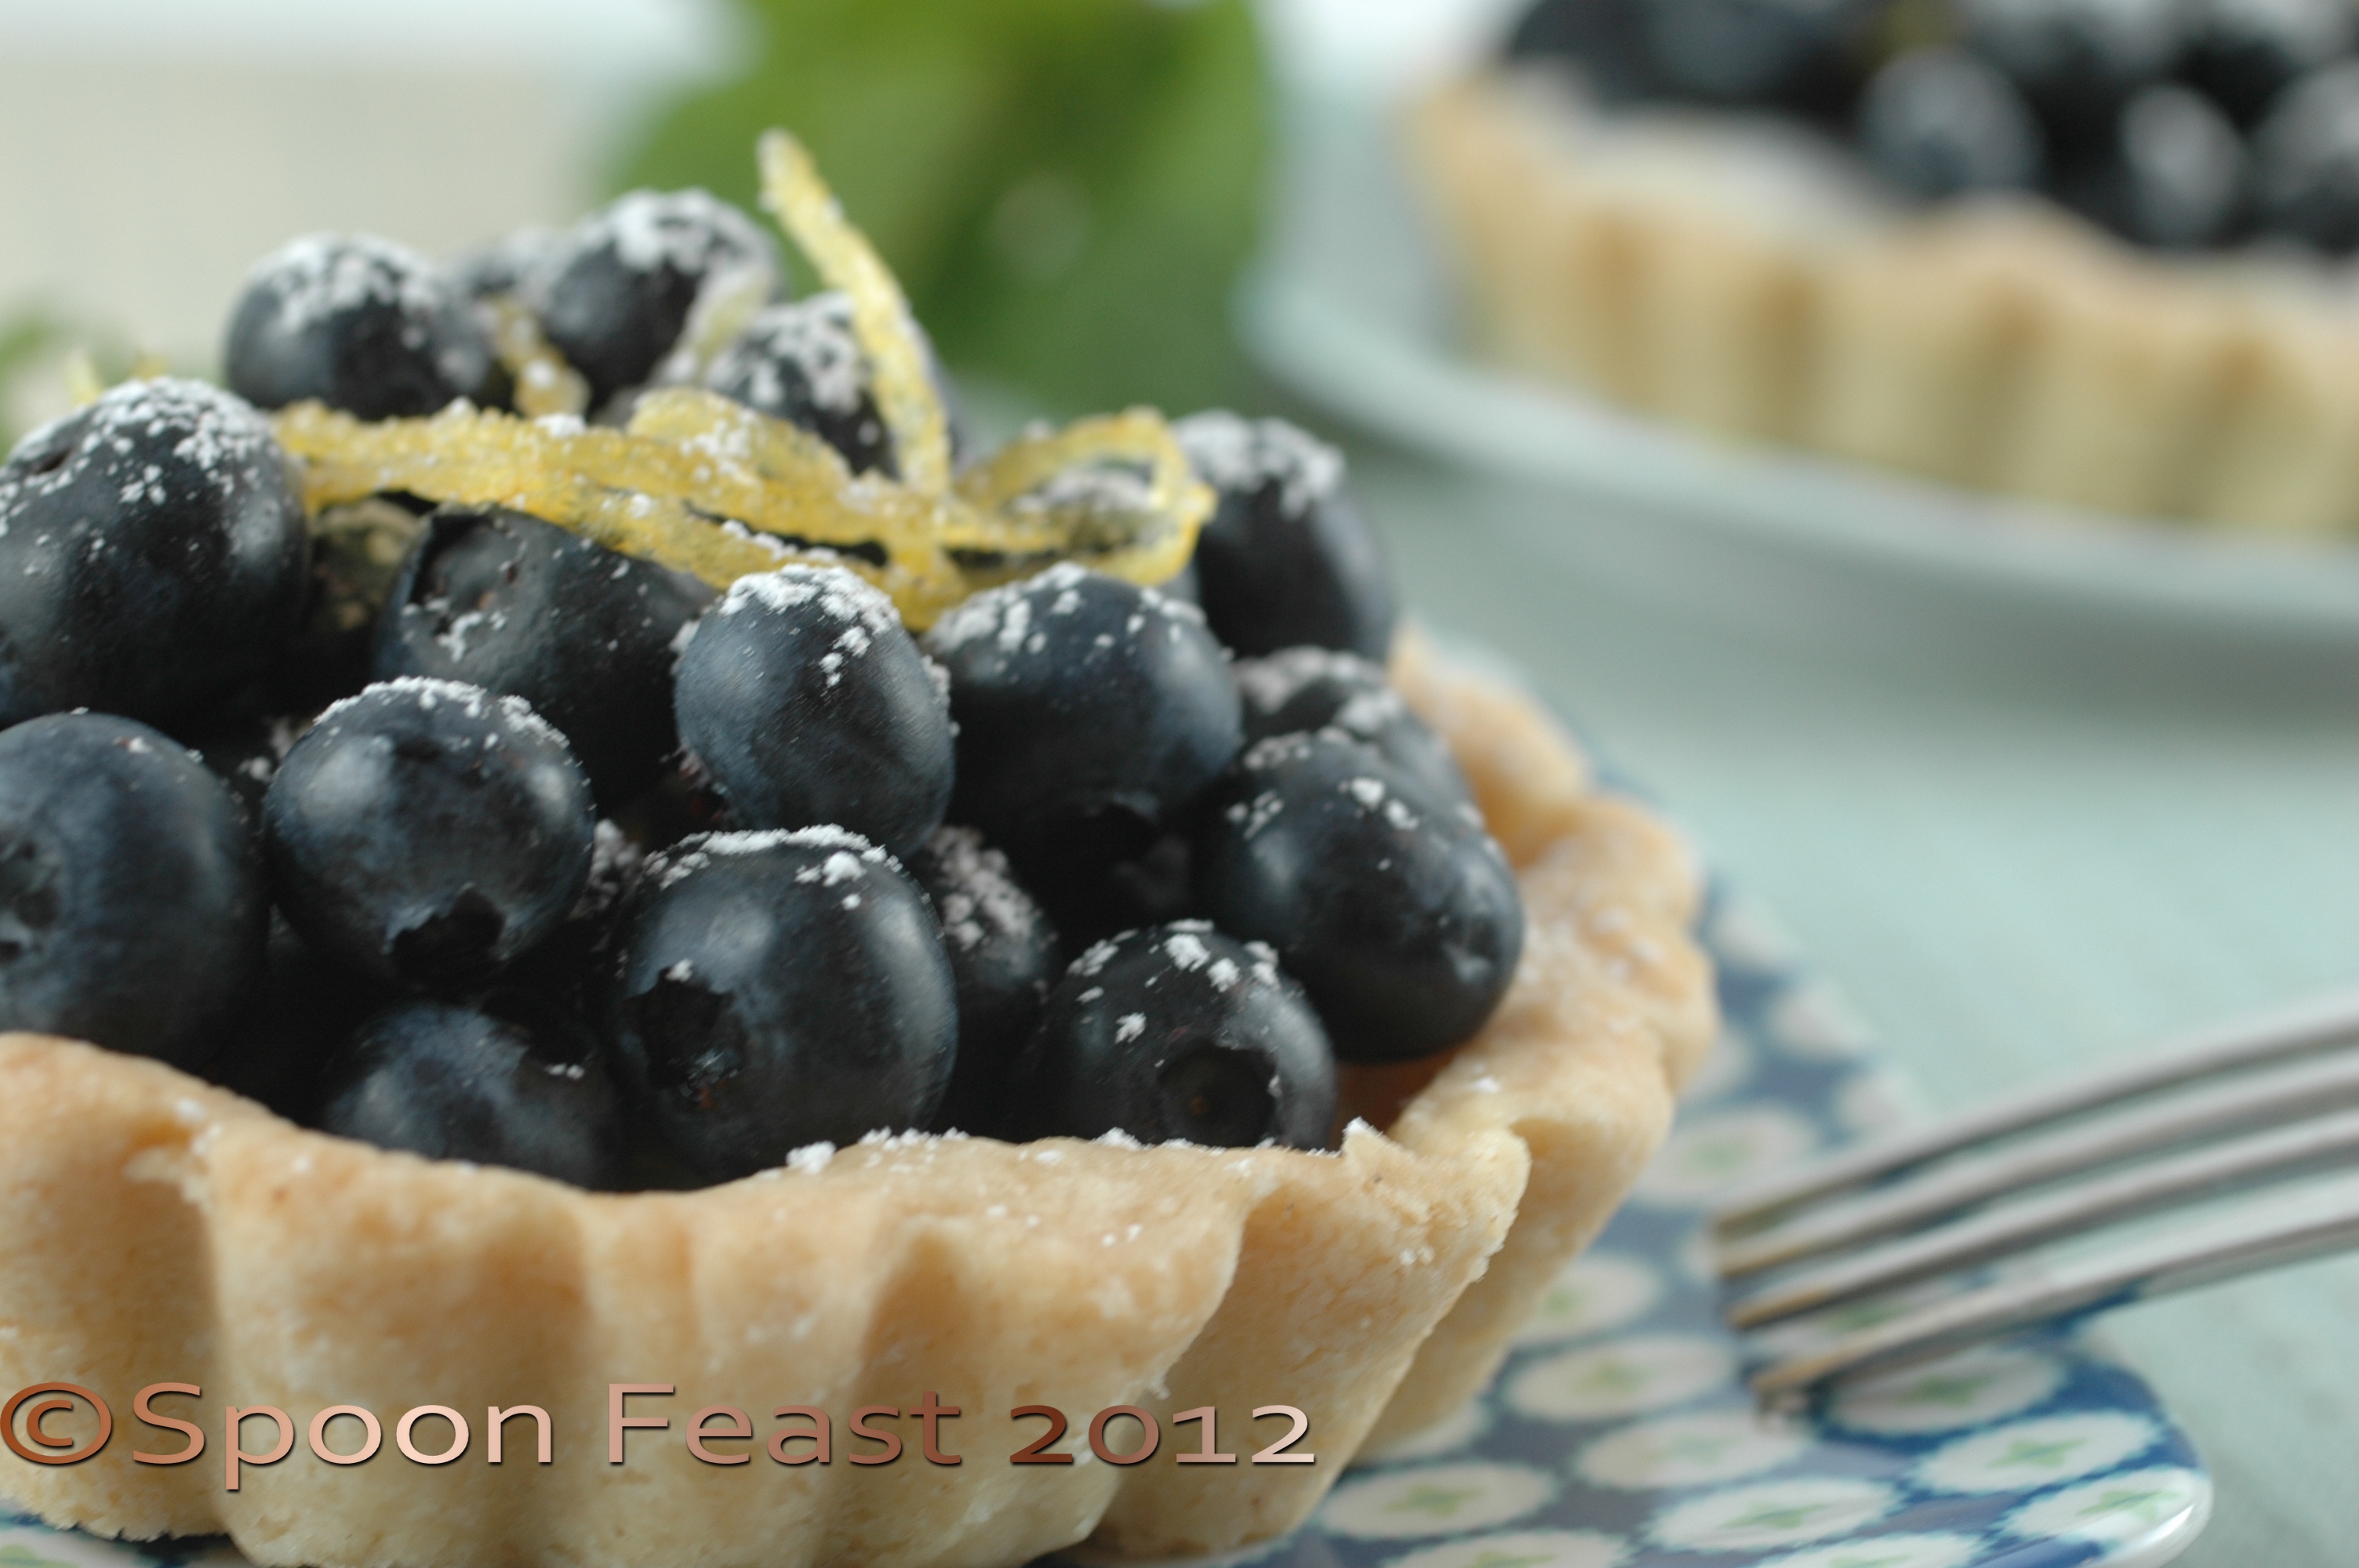
Lemon Blueberry Tarts

Nut Crusted Fresh Fruit Tart

Applesauce Cake

Gluten Free Almond Cake
Versatile Gluten-Free Almond Cake

Quince and Gingerbread

Oatmeal Cranberry Bars
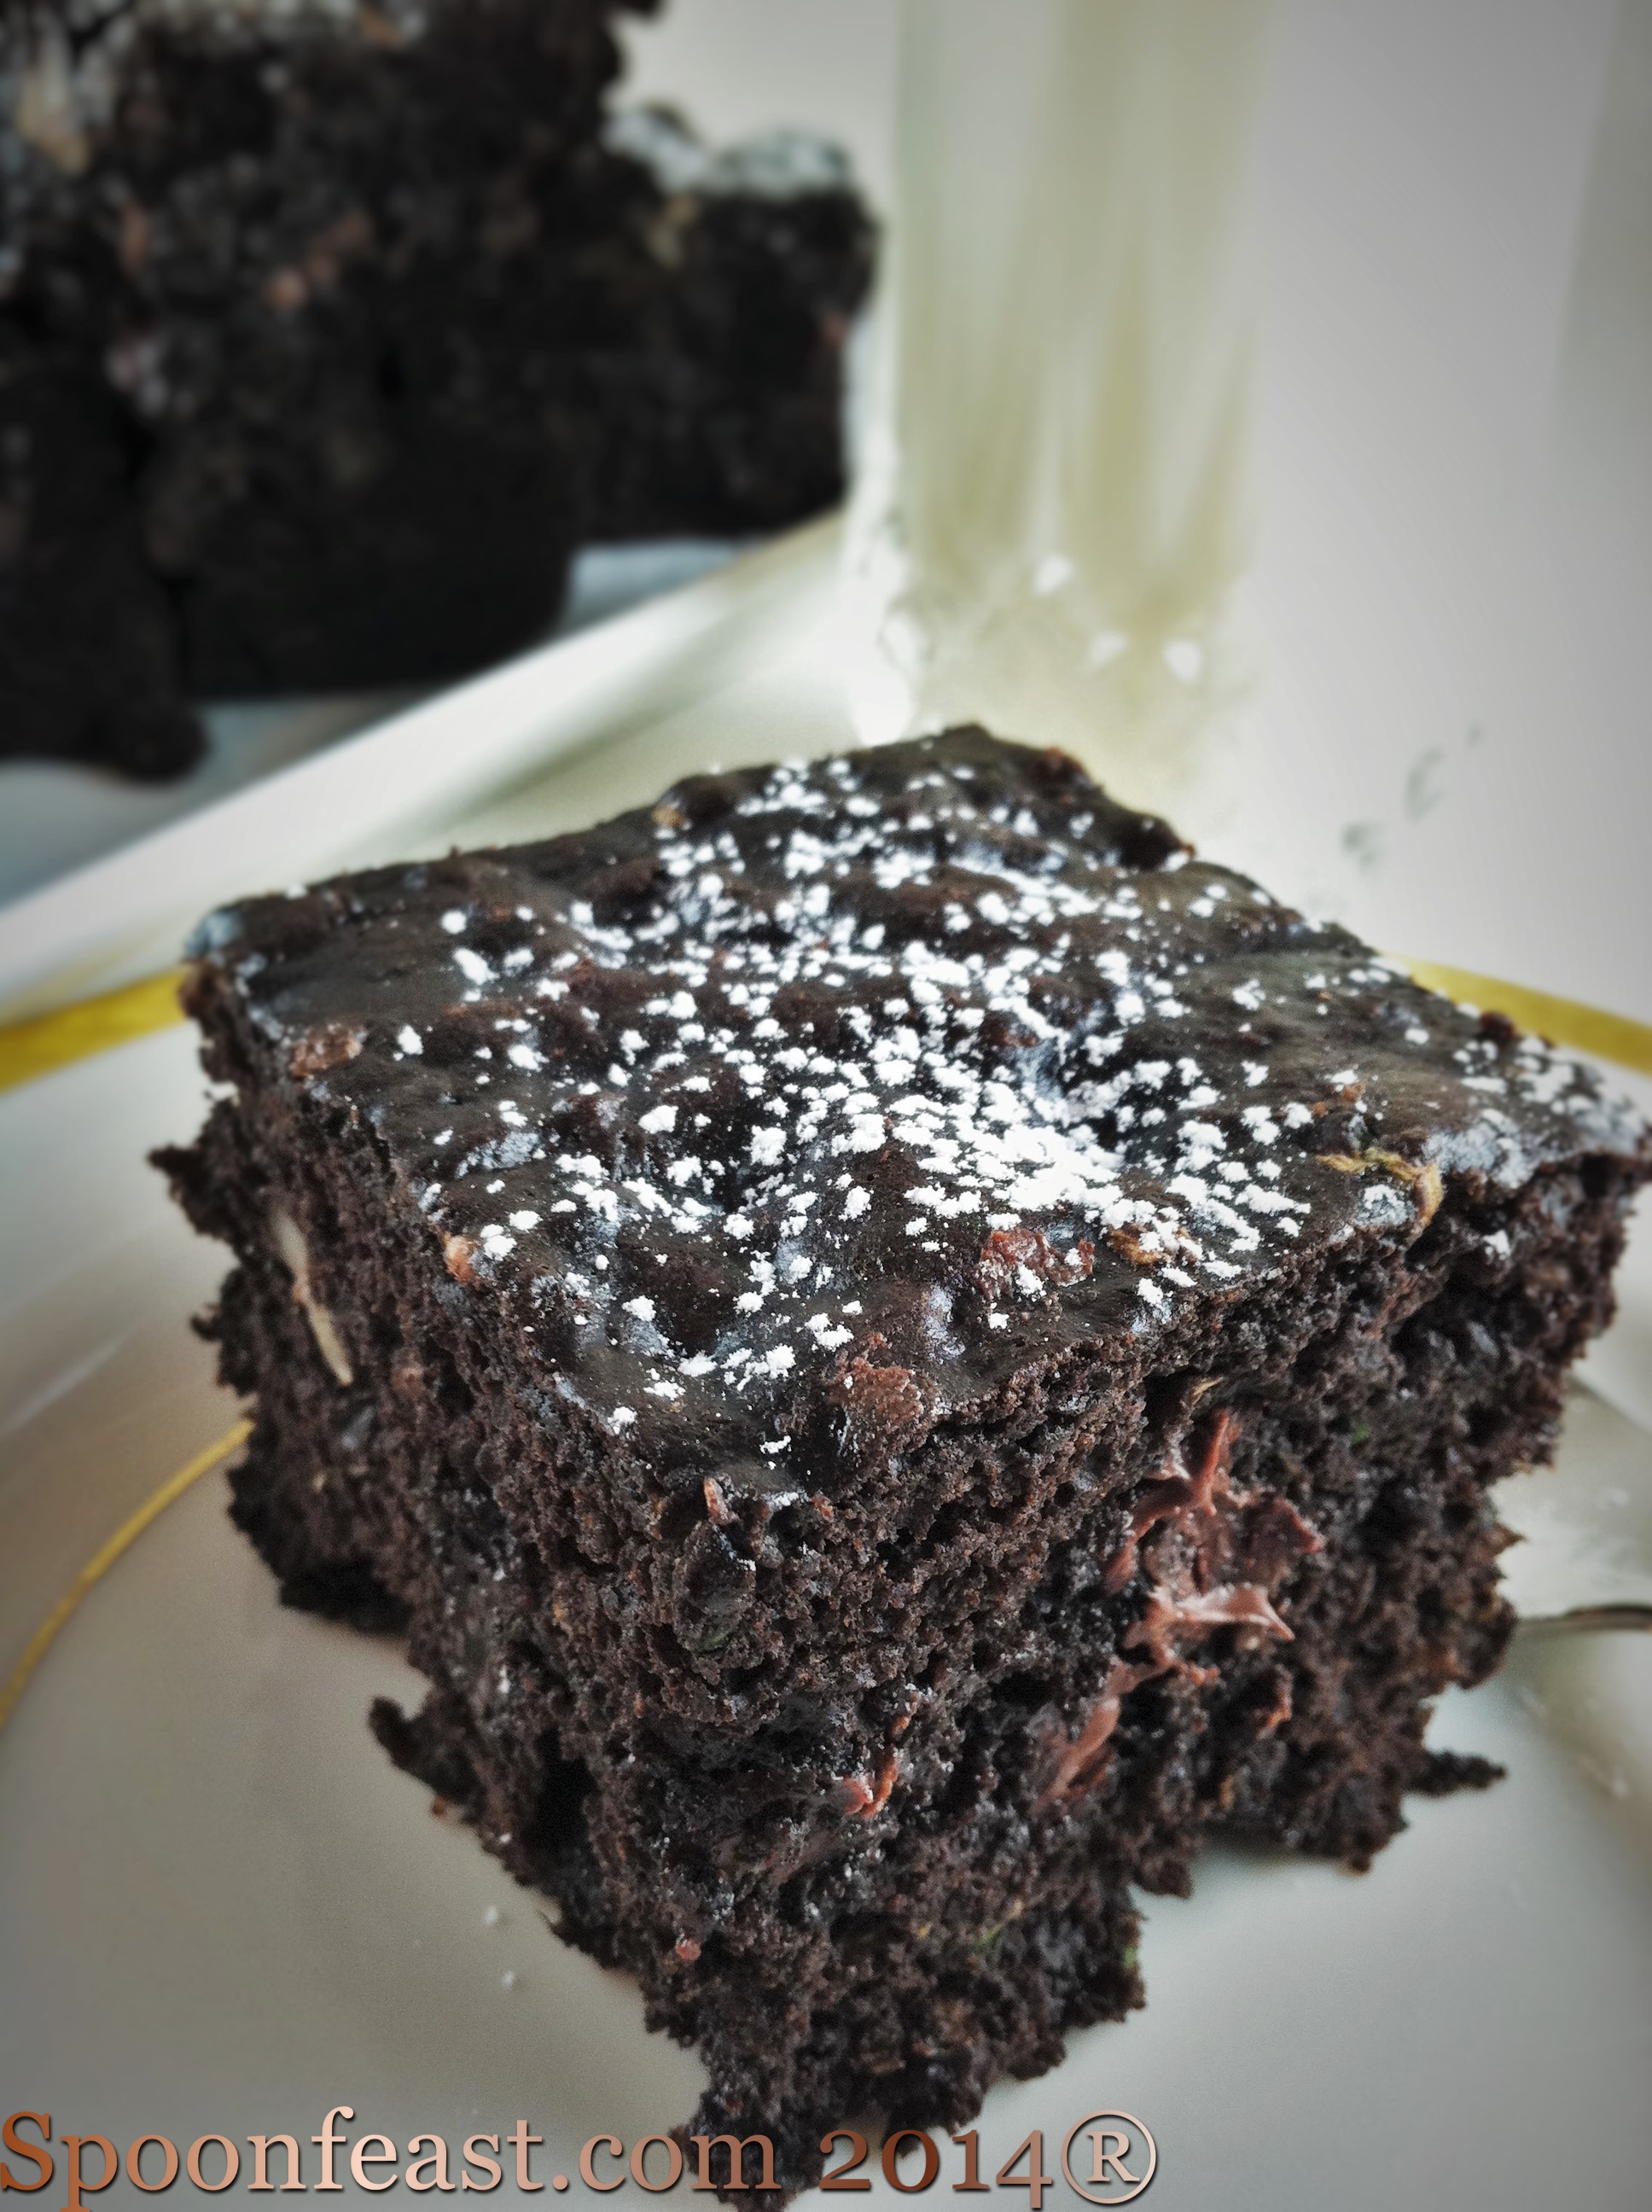
Zucchini brownies

Raw Almond Date Cranberry Cookies
Rather than “raw” let’s call them “No Bake”
Almond Date, Cranberry Lime No Bake Cookies
Cinnamon, Almond, Pistachio Danish Ring

Serve warm Apple Dumplings with whipped cream and caramel sauce. A few fresh berries add color to the plate.
Pineapple, Chestnut, Caramel upside Down Cake
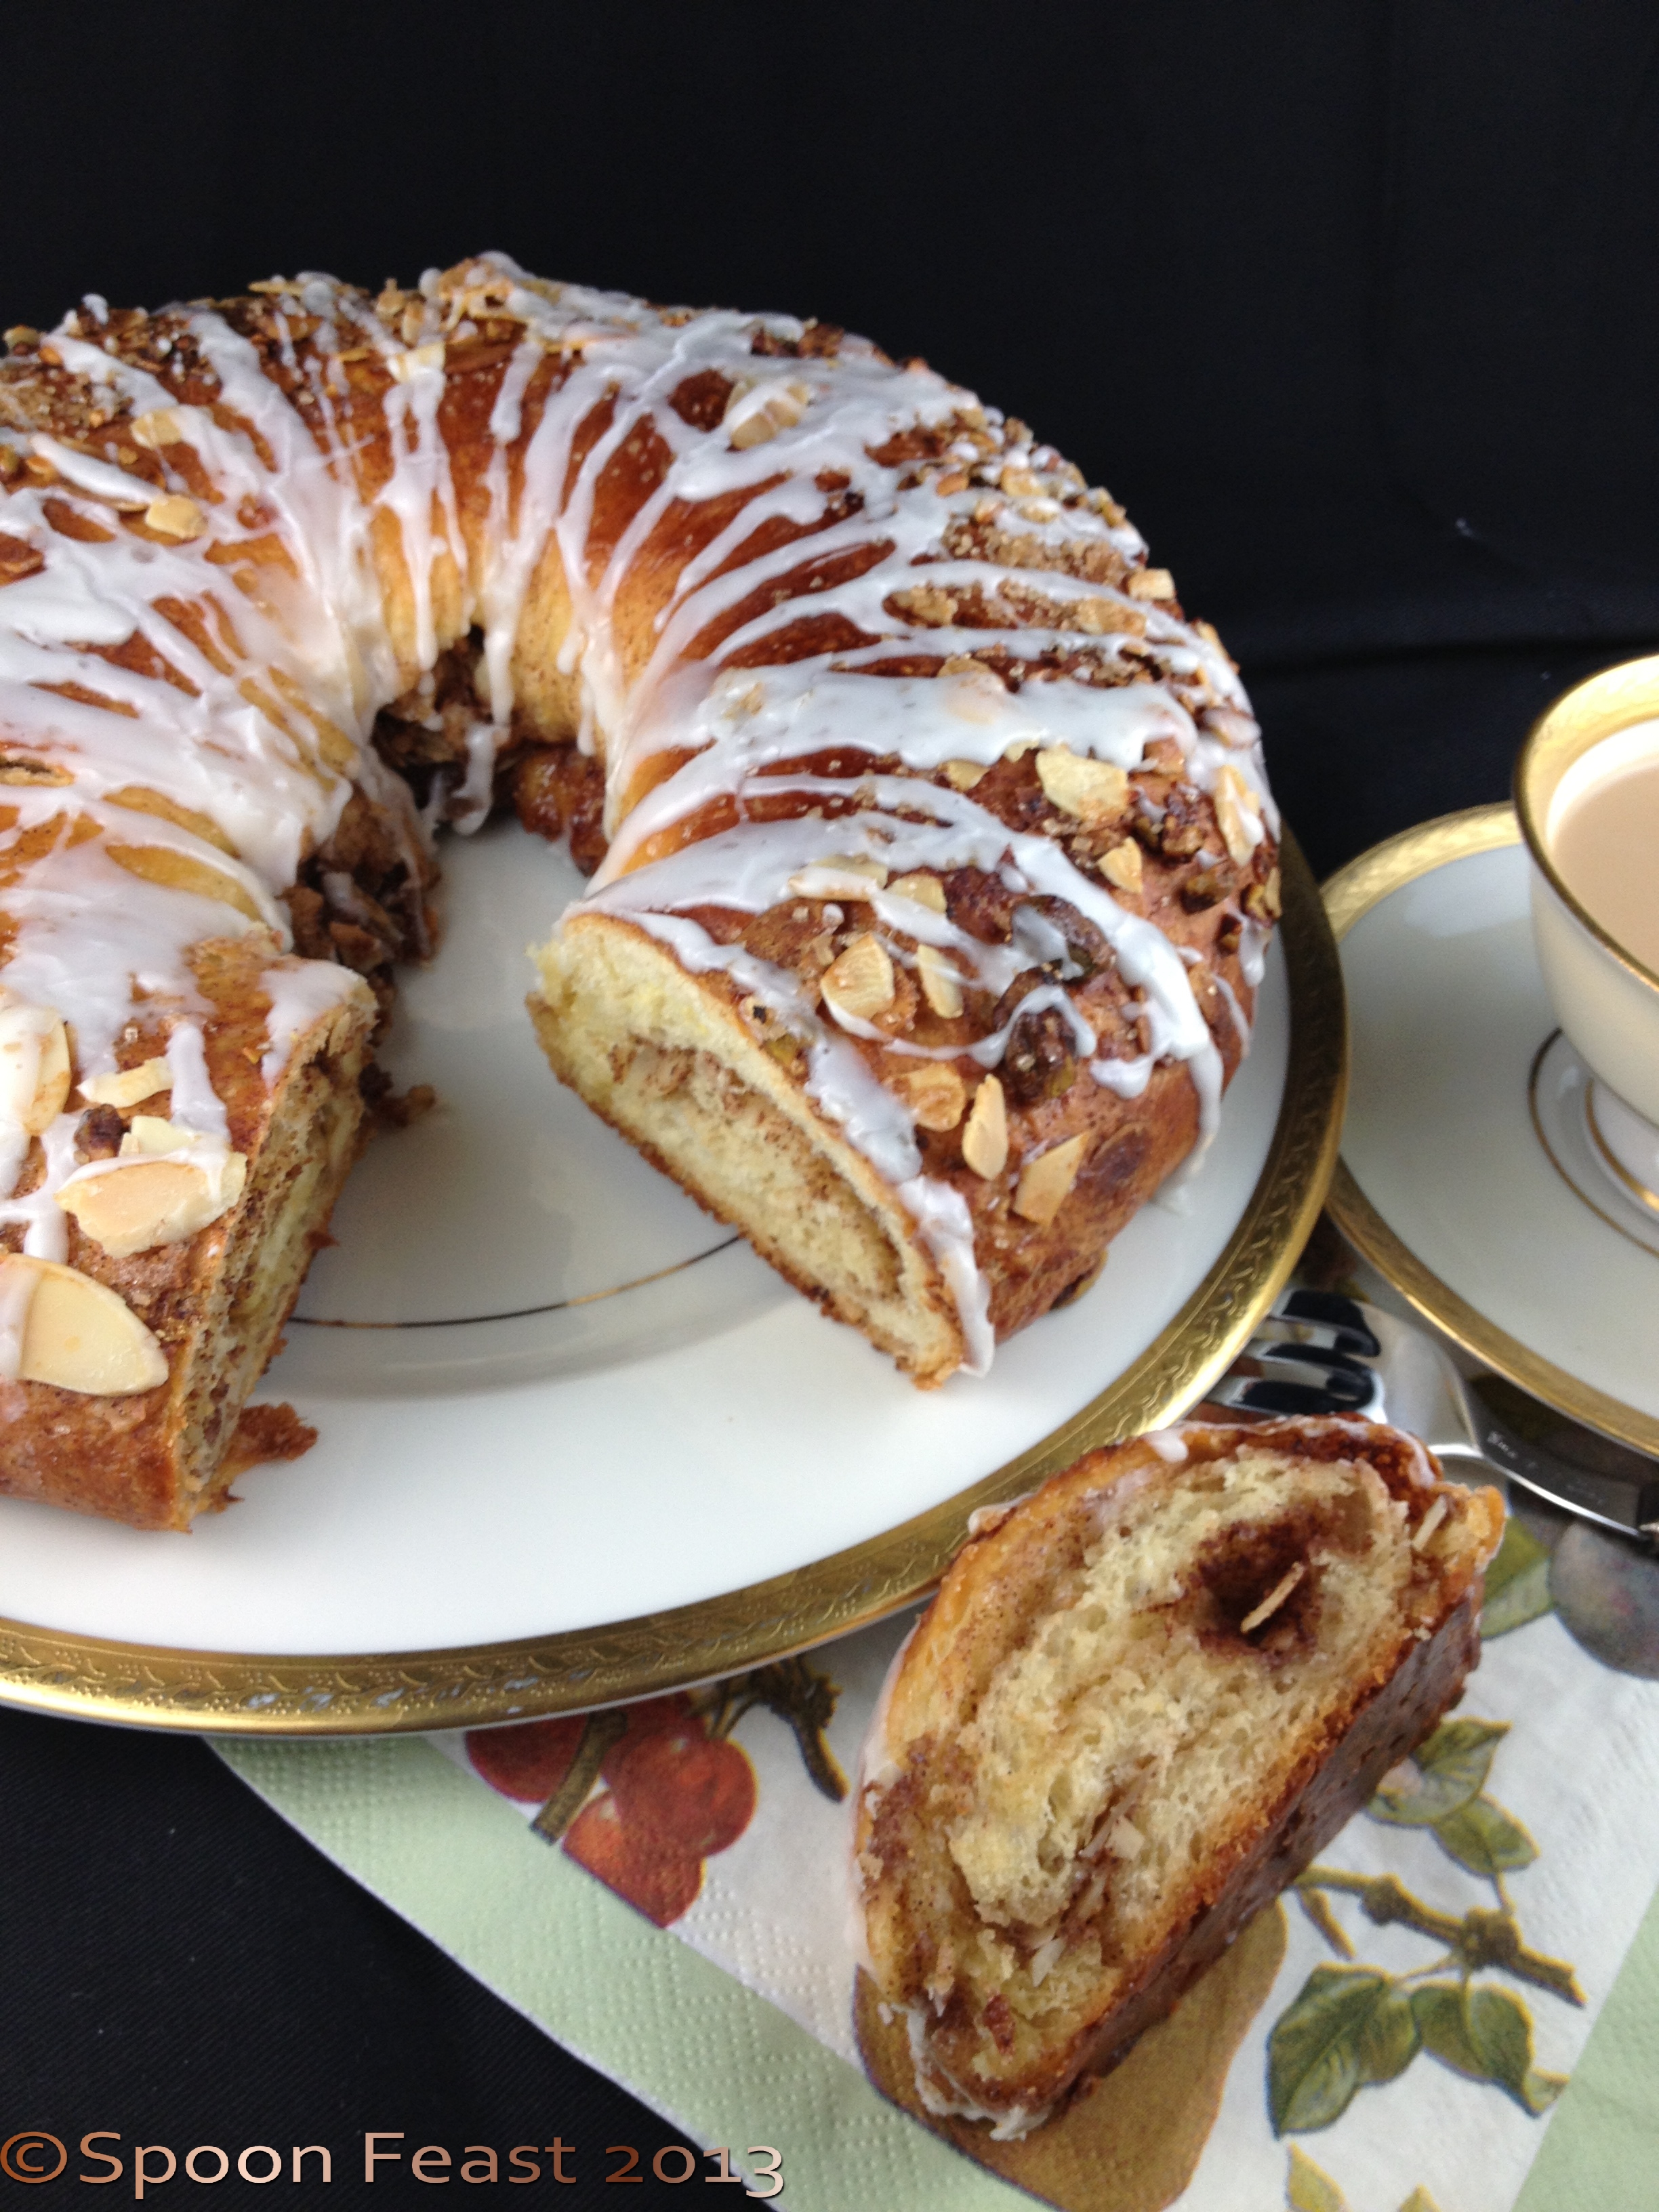
Cinnamon Almond Danish Ring
#holidaybaking #desserts #makedessertsathome #dessertrecipes #gettingfat
Chocolate Almond Peanut Butter Cups
Use honey to sweeten, dark cocoa powder and nut butters, that’s about it.
Remember Reese’s? Same concept, only much more healthy!
Use fresh ground nut butters, if you can. Certainly do not use any that have added sugars! The labels should read ground peanuts or ground almonds.
Read the labels on your cocoa, it should be pure raw cocoa for best benefits
Toast your own nuts, it’s easy and you are doing the process.
Add dry milk powder or protein powder for added nutritional boost. I like to use maca powder for this.
Using dry milk powder will also help them hold shape better when at room temperature.
Extra virgin coconut oil please. Or grass-fed butter, but that’s a lot and it would be decadent but certainly not vegan.
Before you begin, line a mini-muffin tin with pleated paper liners. It is important to use paper liners as you’ll need it to hold them while eating.
Make two layers, chocolate first as it needs to firm up before adding the top layer.

Use mini-muffin tins.
Fill cups half way with chocolate mixture
Using a double boiler, melt the coconut oil, honey and almond butter until smooth. Realize that it won’t be totally smooth due to the nuts you may choose to use.
Rub the cocoa powder and maca powder through a mesh strainer to remove any lumps. Add a pinch of salt to the dry ingredients.
Fold the almonds into the dry ingredients
Fold melted coconut oil mixture into the cocoa powder mixture, stir to totally incorporate; add vanilla and salt and stir well.
Fill each of the paper-lined muffin tins half way up with the chocolate mixture. Be careful not to dribble along the edges so the final product has a clean appearance. Work carefully.
Once filled half way, pop the tray into the freezer to firm up while you make the next mixture.

Add the peanut butter layer, top with toasted nuts before freezing
Sliced toasted almonds to garnish the tops
Melt everything over a double boiler until everything has melted. Depending on the texture you chose, it may be smooth or lumpy.
Remove the chocolate cups from the freezer, fill each cup with the peanut butter mixture to the rim of the paper.
Sprinkle the top of each cup with toasted almonds and a piece of Maldon salt if desired.
Freeze for a couple of hours before serving.
These are best served frozen or extremely cold. if serving as finger food, leave the paper on, if plating a dessert with them, remove the paper. They will become rather soft as they remain in room temperature.
If a firmer room temperature texture is desired, add 1/2 cup dry milk powder to each mixture. This will boost nutritional value as well.

Irresistible Chocolate Almond Peanut Butter Cups
Chocolate Almond Peanut Butter Cups
#vegandessert #peanutbuttercups #healthypeanutbuttercups #chocolatealmondpeanutbuttercups #honey #honeydesserts #nutbutter #chocolatealmond
#glutenfree #musteatnow #healthytreats #healthydesserts
There’s been a stir lately about chia seed pudding and this recipe for Chocolate Chia Seed Pudding with Toasted Almonds is one of the best I’ve tasted. Yum, Chocolate!
When I first bought the bag of chia seeds, honestly, I had no idea how I was going to use them.
I kept having flashbacks of smearing the soaked, slimy seeds over a rough damp terra-cotta pot shaped into some absurd shape. In college, my roommate and I had some; mine was an animal that grew chia fur, my roommate had a head that grew chia hair.
I think this is my favorite though:
But enough of silliness, on with the recipe! Best part is the seeds aren’t sprouted for the pudding.
The thing about chia seeds are they absorb quite a bit of liquid compared to their dried mass. This thickens products they are used in and results in a bit of an off-putting gelatinous substance. Hold your judgement.
The chia seed has good nutritional value providing omega 3 fatty acids, protein, fiber, magnesium, potassium, calcium and zinc. It’s a powerhouse of good nutrition.
Chocolate Chia Seed Pudding with Toasted Almonds
Yield: 1-1/2 cups
Mix the dry ingredients together so there are no lumps.
Mix the wet ingredients together; add a small amount of liquid to the dry ingredients. Stir this until it makes a smooth batter-like paste. Fold the rest of the liquids into the dry ingredients and mix well.
Dry cocoa powder does not combine easily with the milk if you just add everything all at once. There could be lumps of dry cocoa in the finished pudding which would be kinda yucky. SO add just a bit of milk and stir it in to get the cocoa wet and lump free before adding all of the milk.
Cover and set aside then stir every 20 minutes 3 times.This ensures the seeds are not clumping and will hydrate correctly.
Then put the covered pudding into the fridge for at least 2 hours or overnight.
To serve, fold in toasted almonds, reserving some for the top garnish. Spoon the pudding into a small bowl or cup, sprinkle with a few toasted almonds on top, add a small mint leaf and a berry or two if you have any on hand.
You can use any milk you prefer, even half and half but that sort of defeats the “healthy” part of this recipe. If you choose coconut milk, read the label and make sure of the ingredients before you buy it.
You can add spices like ginger, cardamom, cinnamon, use almond extract or orange or raspberry extract for flavor enhancement.
Leave the nuts out, add fruit or nothing instead.

Chocolate Chia Seed Pudding with Toasted Almonds
Since I had to taste this while writing about it, I didn’t realize I ate the majority of the dish and now have to make more to photograph the final plate up. Duh! It’s like the time I walked into the kitchen and ate the photo shoot. I dream of having a staff to help keep things straight!
Nut Crusted Fruit Tart Re-Visited was in the make as we ate the first tart.
So delicious, we started talking how we could modify the recipe.

The second Nut Crusted Fruit Tart
This is how we changed it.
Keeping in mind the ratio is 1 cup dried fruit to 1 cup nuts, the possibilities are limitless!
This time we used:

Look at that crust! I love how the cranberries and pistachios look!
This made a beautiful crust! Just process it all in a food processor and press it into your pan. The consistency should hold together when your squeeze a bit of the mixture in your hand. If it doesn’t, add more dried fruit until it holds together.
This time we had a bit of each of these fruits on hand:
This time I photographed how to lay in the bananas.
Tyler asked if the bananas could be substituted but the role they play is to provide a nice base for the fruit to lay on also, to absorb some of the juices. The bananas also mimic the custard, pastry cream or marzipan filling on traditional fruit tarts. Here’s how you lay the bananas in the pan.

Flatten the bananas into the pan, cut side down.
We were short on strawberries for the puree, so we pureed a mango instead. I think kiwi puree would look amazing!
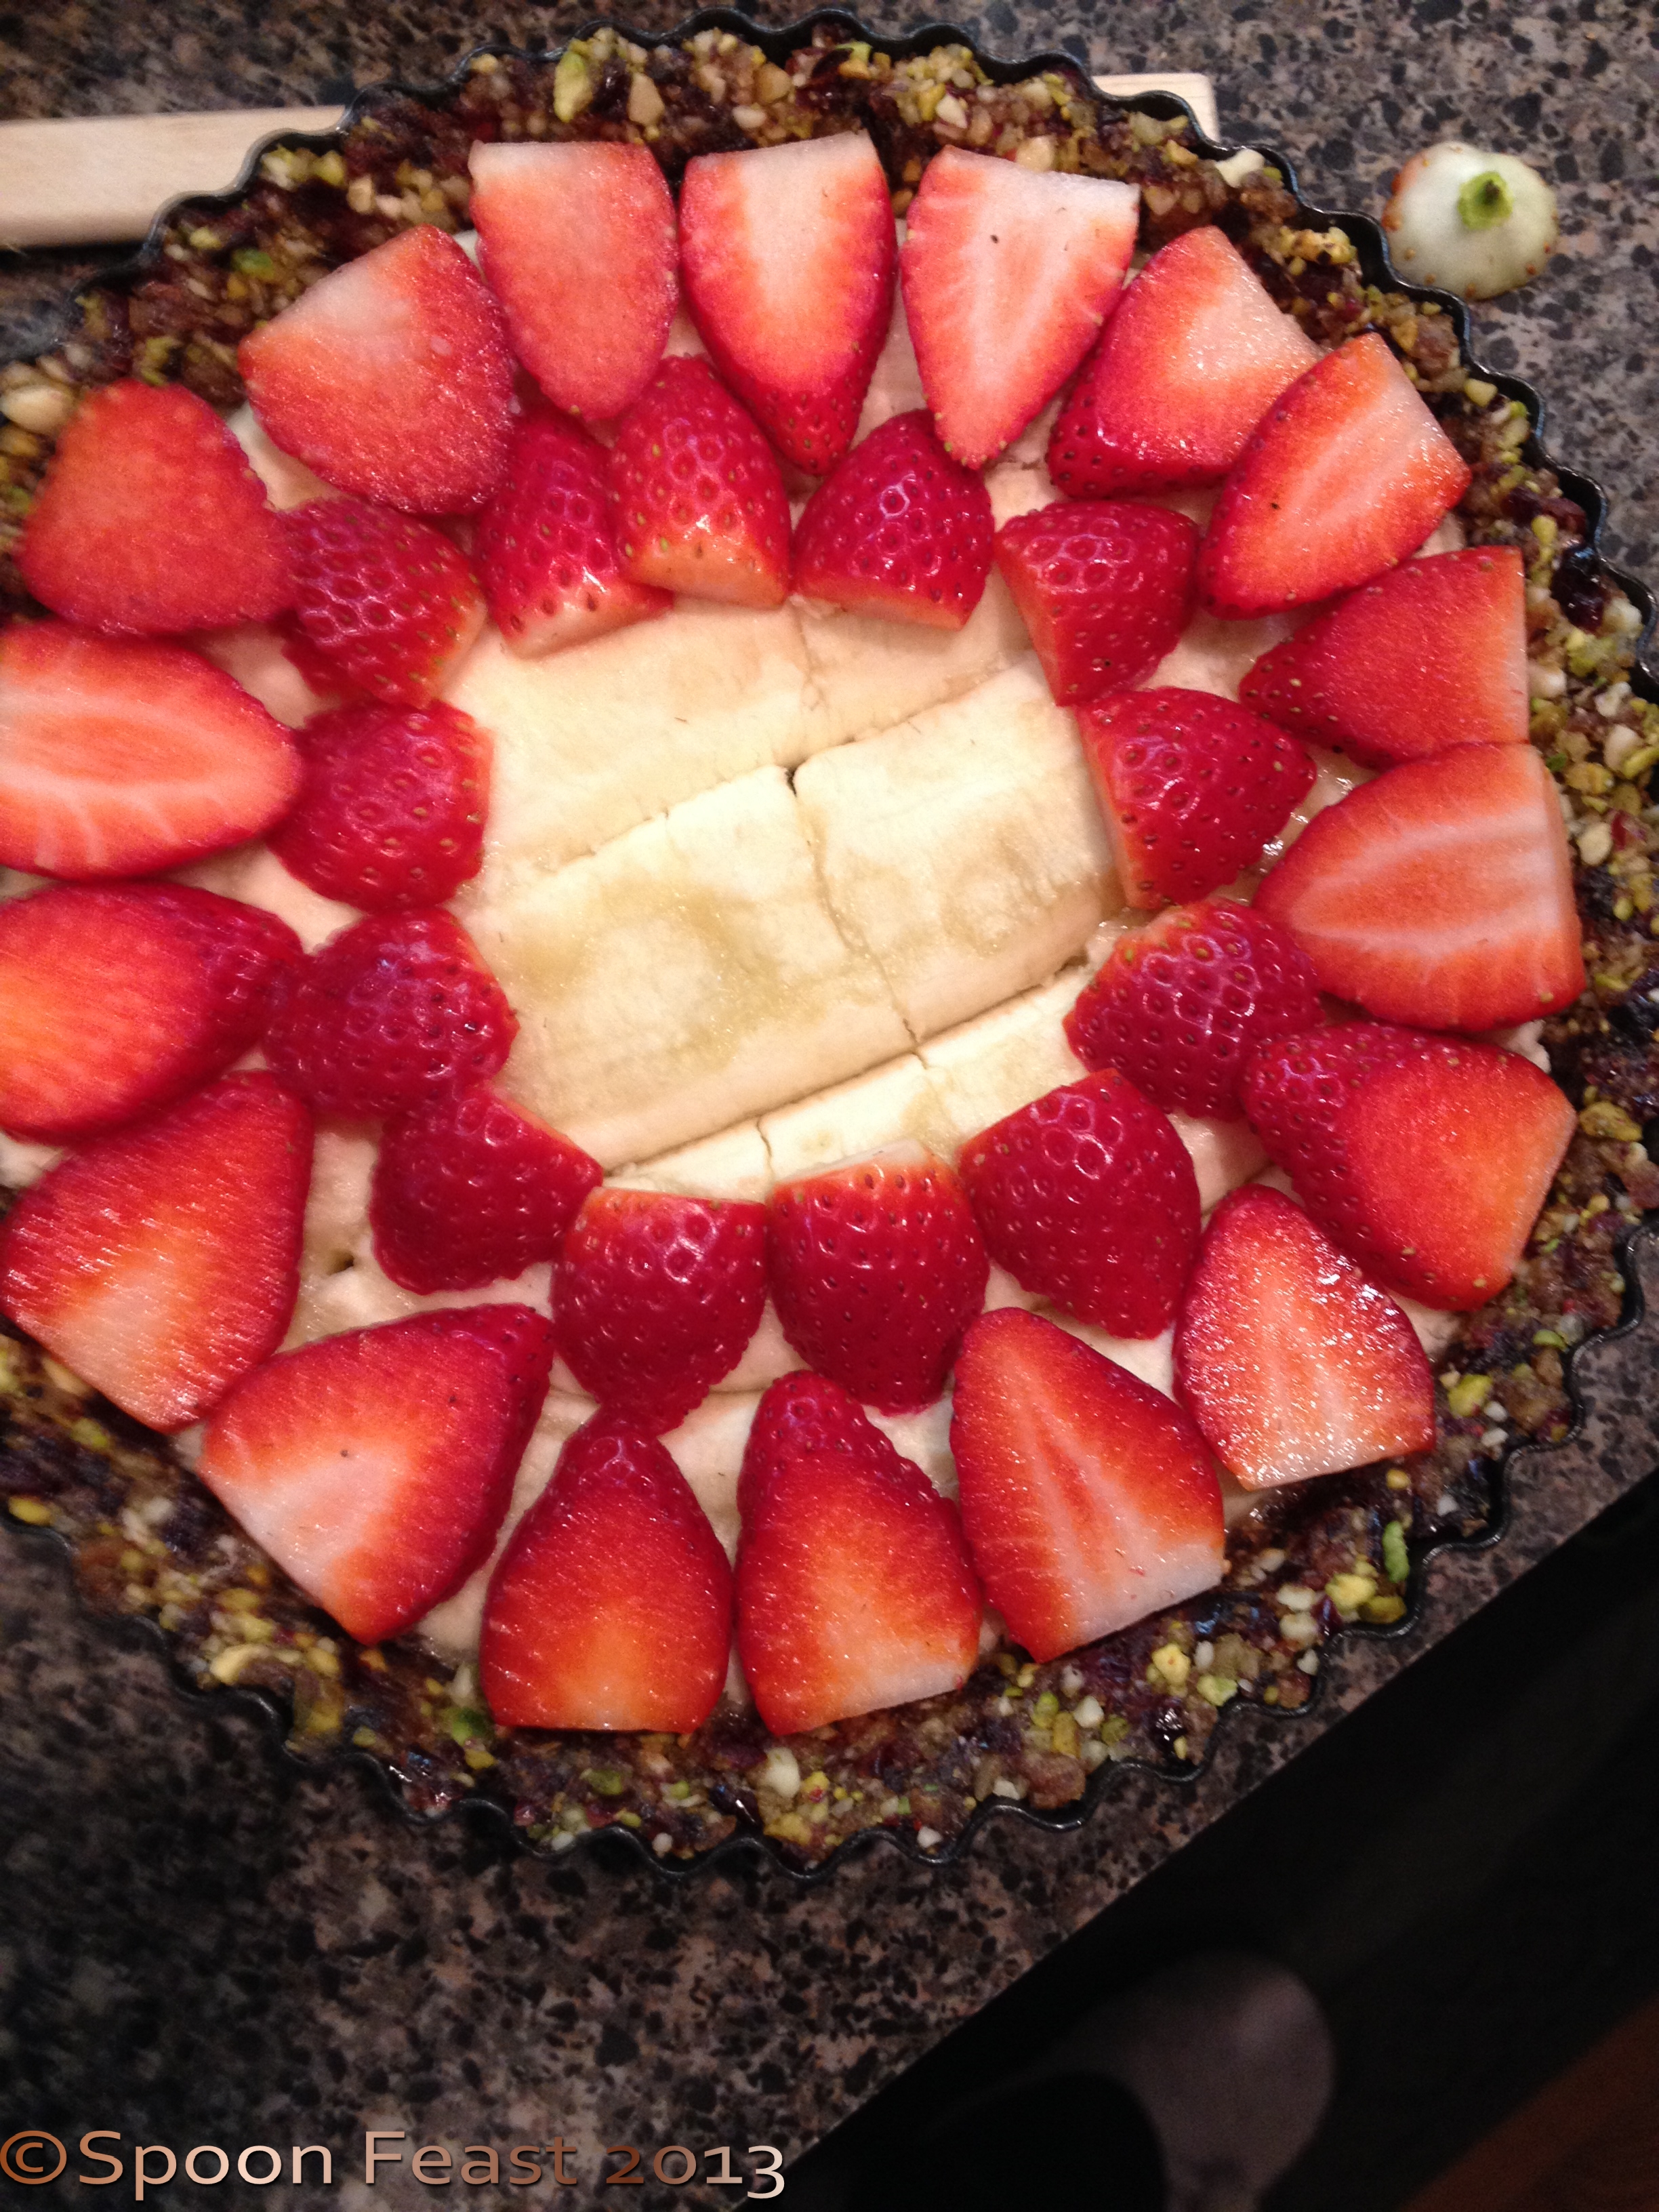
Place strawberries on top of the bananas

Add the puree the edge with raspberries and blackberries
On top of the bananas, we placed sliced strawberries, then poured the mango puree over the top of the tart. Then we placed raspberries and blackberries around the edge, a ring of blueberries, then a ring of blackberries, leaving the center open to show the brilliant mango color in the center.

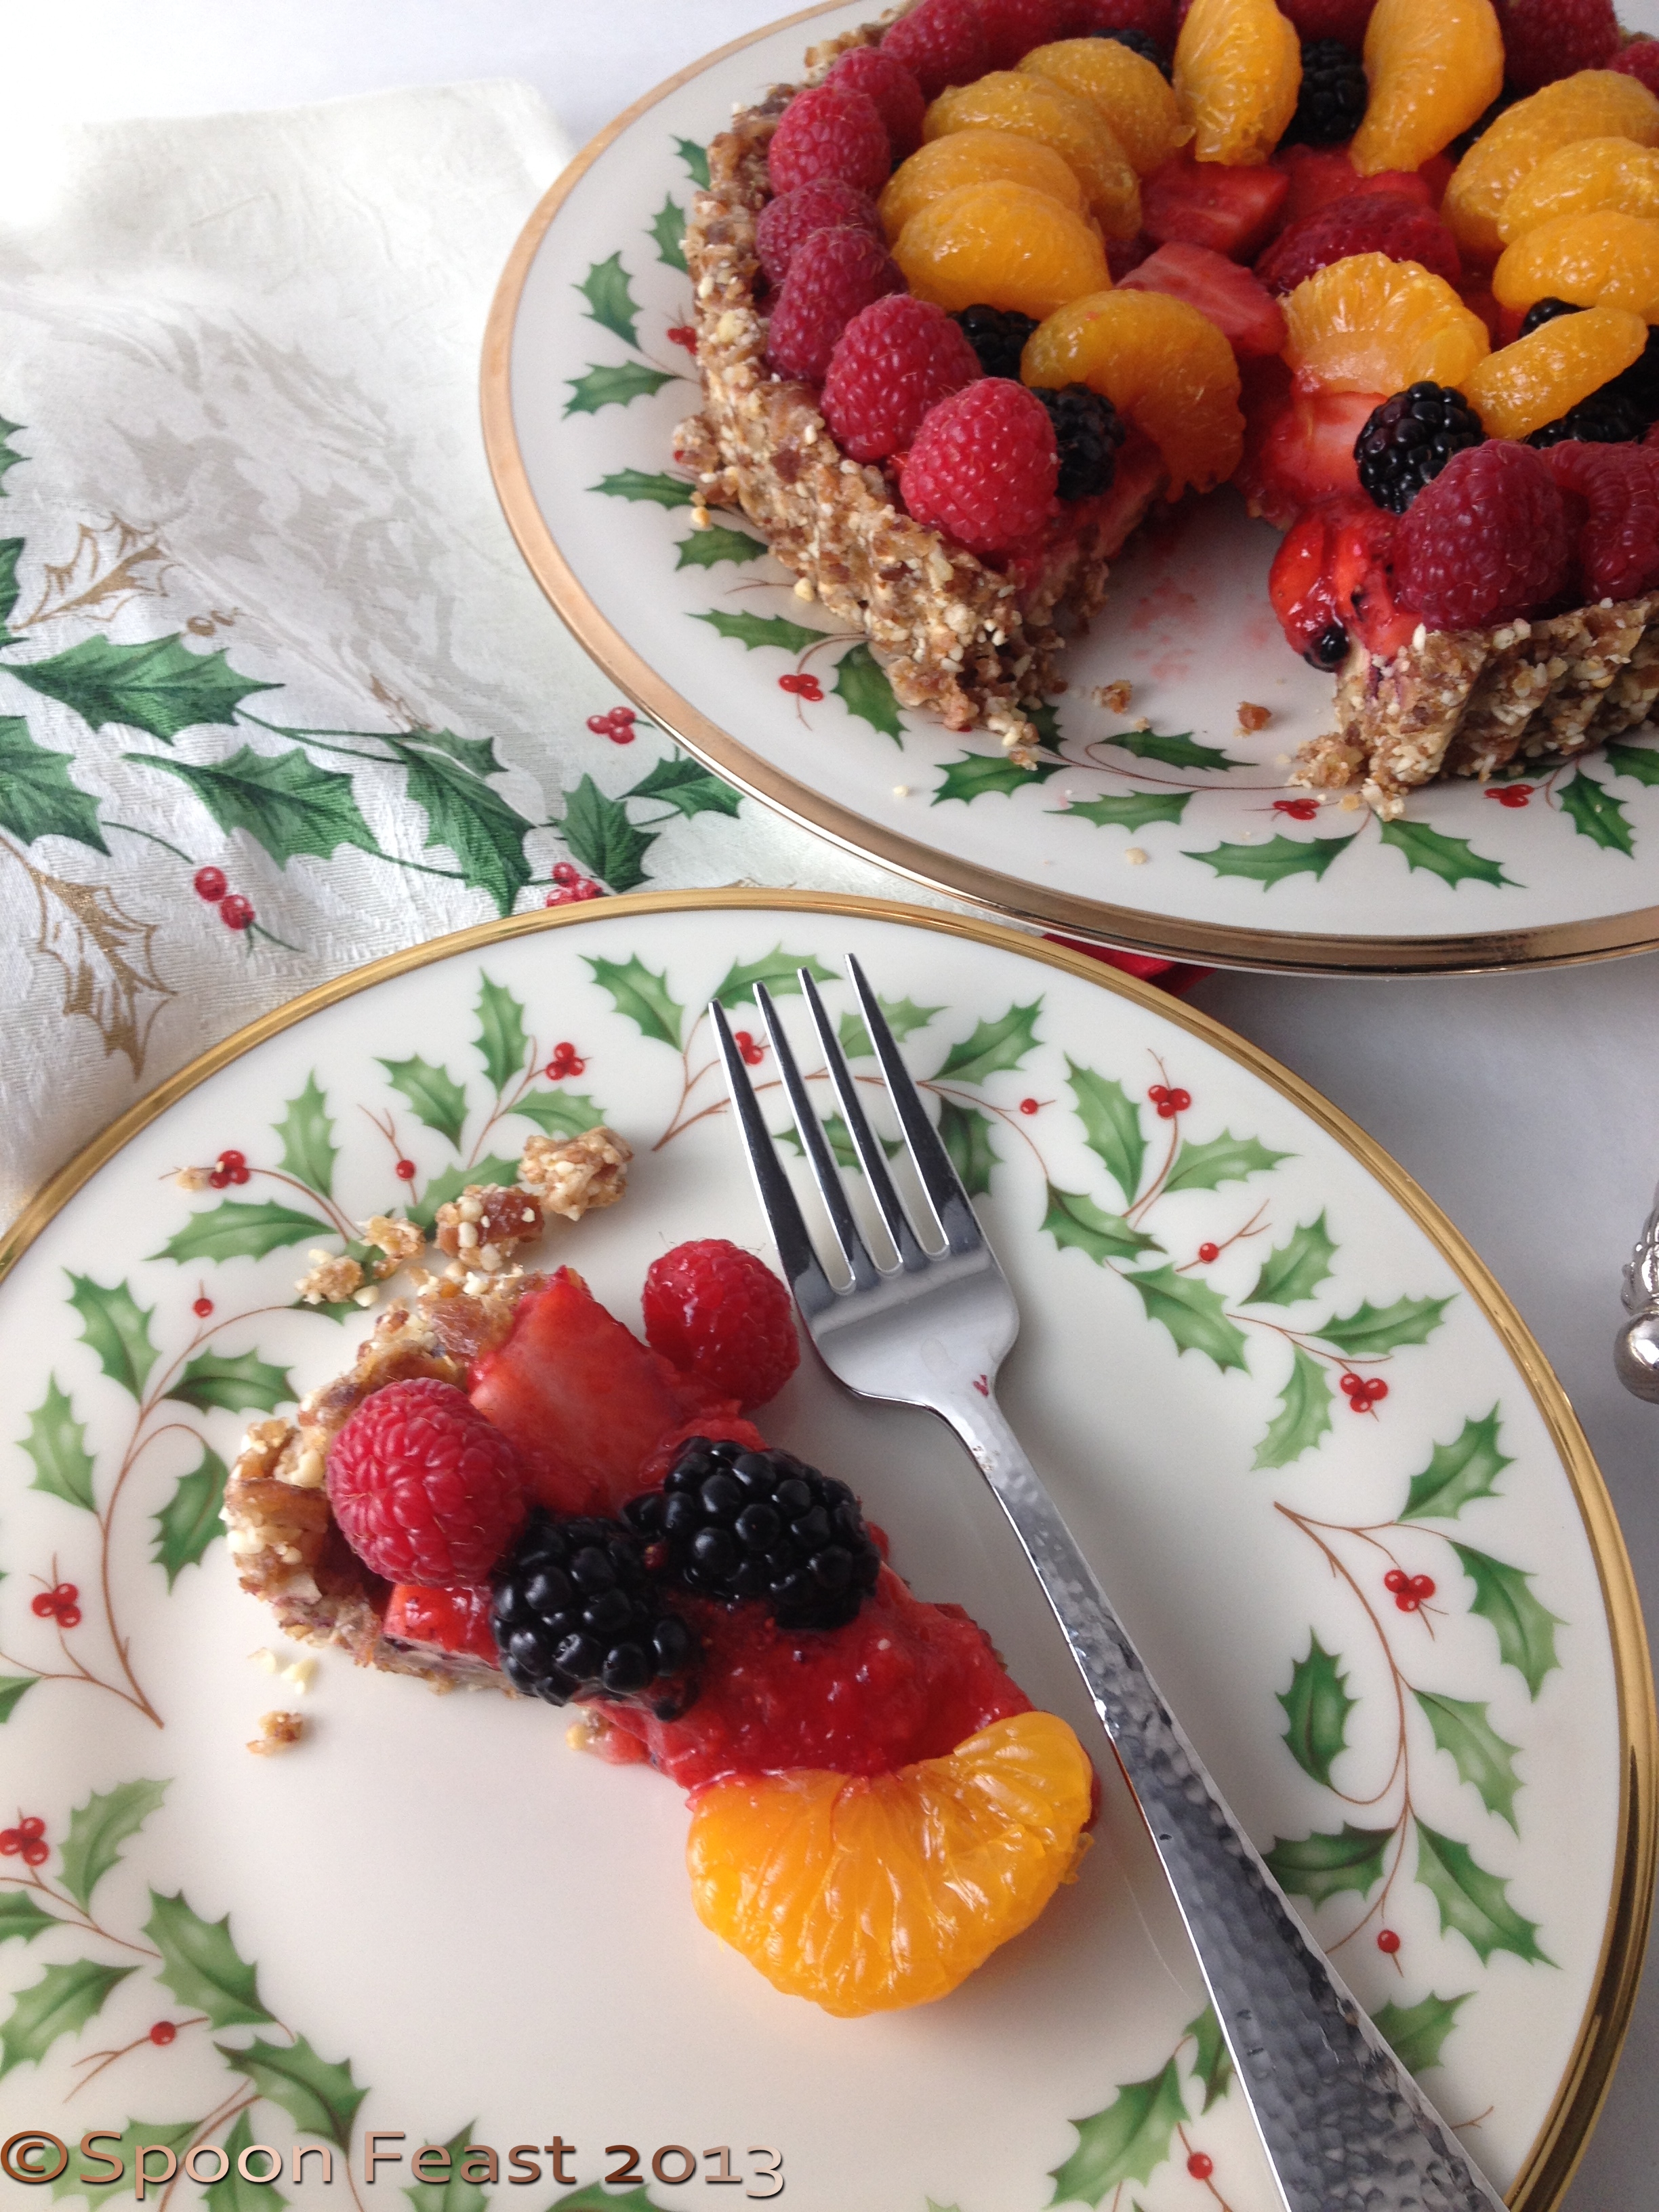
A nice slice!
To maintain a healthy dish, instead of adding that tempting dollop of whipped cream, use Greek yogurt flavored with honey and vanilla instead. And if mint was growing outside now, I’d also add a mint leaf or two.
Here’s the thing about this tart:
No cooking! All you need to make this is a knife, cutting board, a food processor large or small, a tart or pie pan.
Since Tyler is moving back on campus next semester, he will use his Kitchenaid “Handy-Chopper” which is a nice small convenient unit.
Tyler has decided to use this as his signature go-to dish. I think his roommates will be impressed.

Nut crusted Fruit Tart with Mango Puree
Nut Crusted Fresh Fruit Tart
This Nut Crusted Fruit Tart was presented to me by my son who is home for the holidays; “Hey, Mom, I’d like to make this!”
“Did I mention I was dairy, fat, meat and caffeine-free in my diet now?” he asked. Alrighty now, time to adapt and modify the menus .
This is a tart he wanted to make for a while now, but lacking a food processor, he brought the recipe home so he could finally make it. Well actually, “we” made it. I helped with the crust and he did the rest.
It is quite simple and goes together rather quickly. It chills for at least an hour, overnight would be best. If you can wait that long.
We used a fluted tart pan with a removable bottom, but you can use a pie tin as well.
You will also need a food processor. There isn’t enough “stuff” for a blender to function properly, especially when pureeing the 4 ounces of strawberries.
 Nut Crusted Fruit Tart
Using a food processor, process the crust ingredients until chopped fine and sticky. After processing the crust, use the same bowl and blade to puree the strawberries. (Saves clean up!)
Press the crust into the pan, press firmly along edges and into the curve of the pan. Make sure the sides are thick enough to 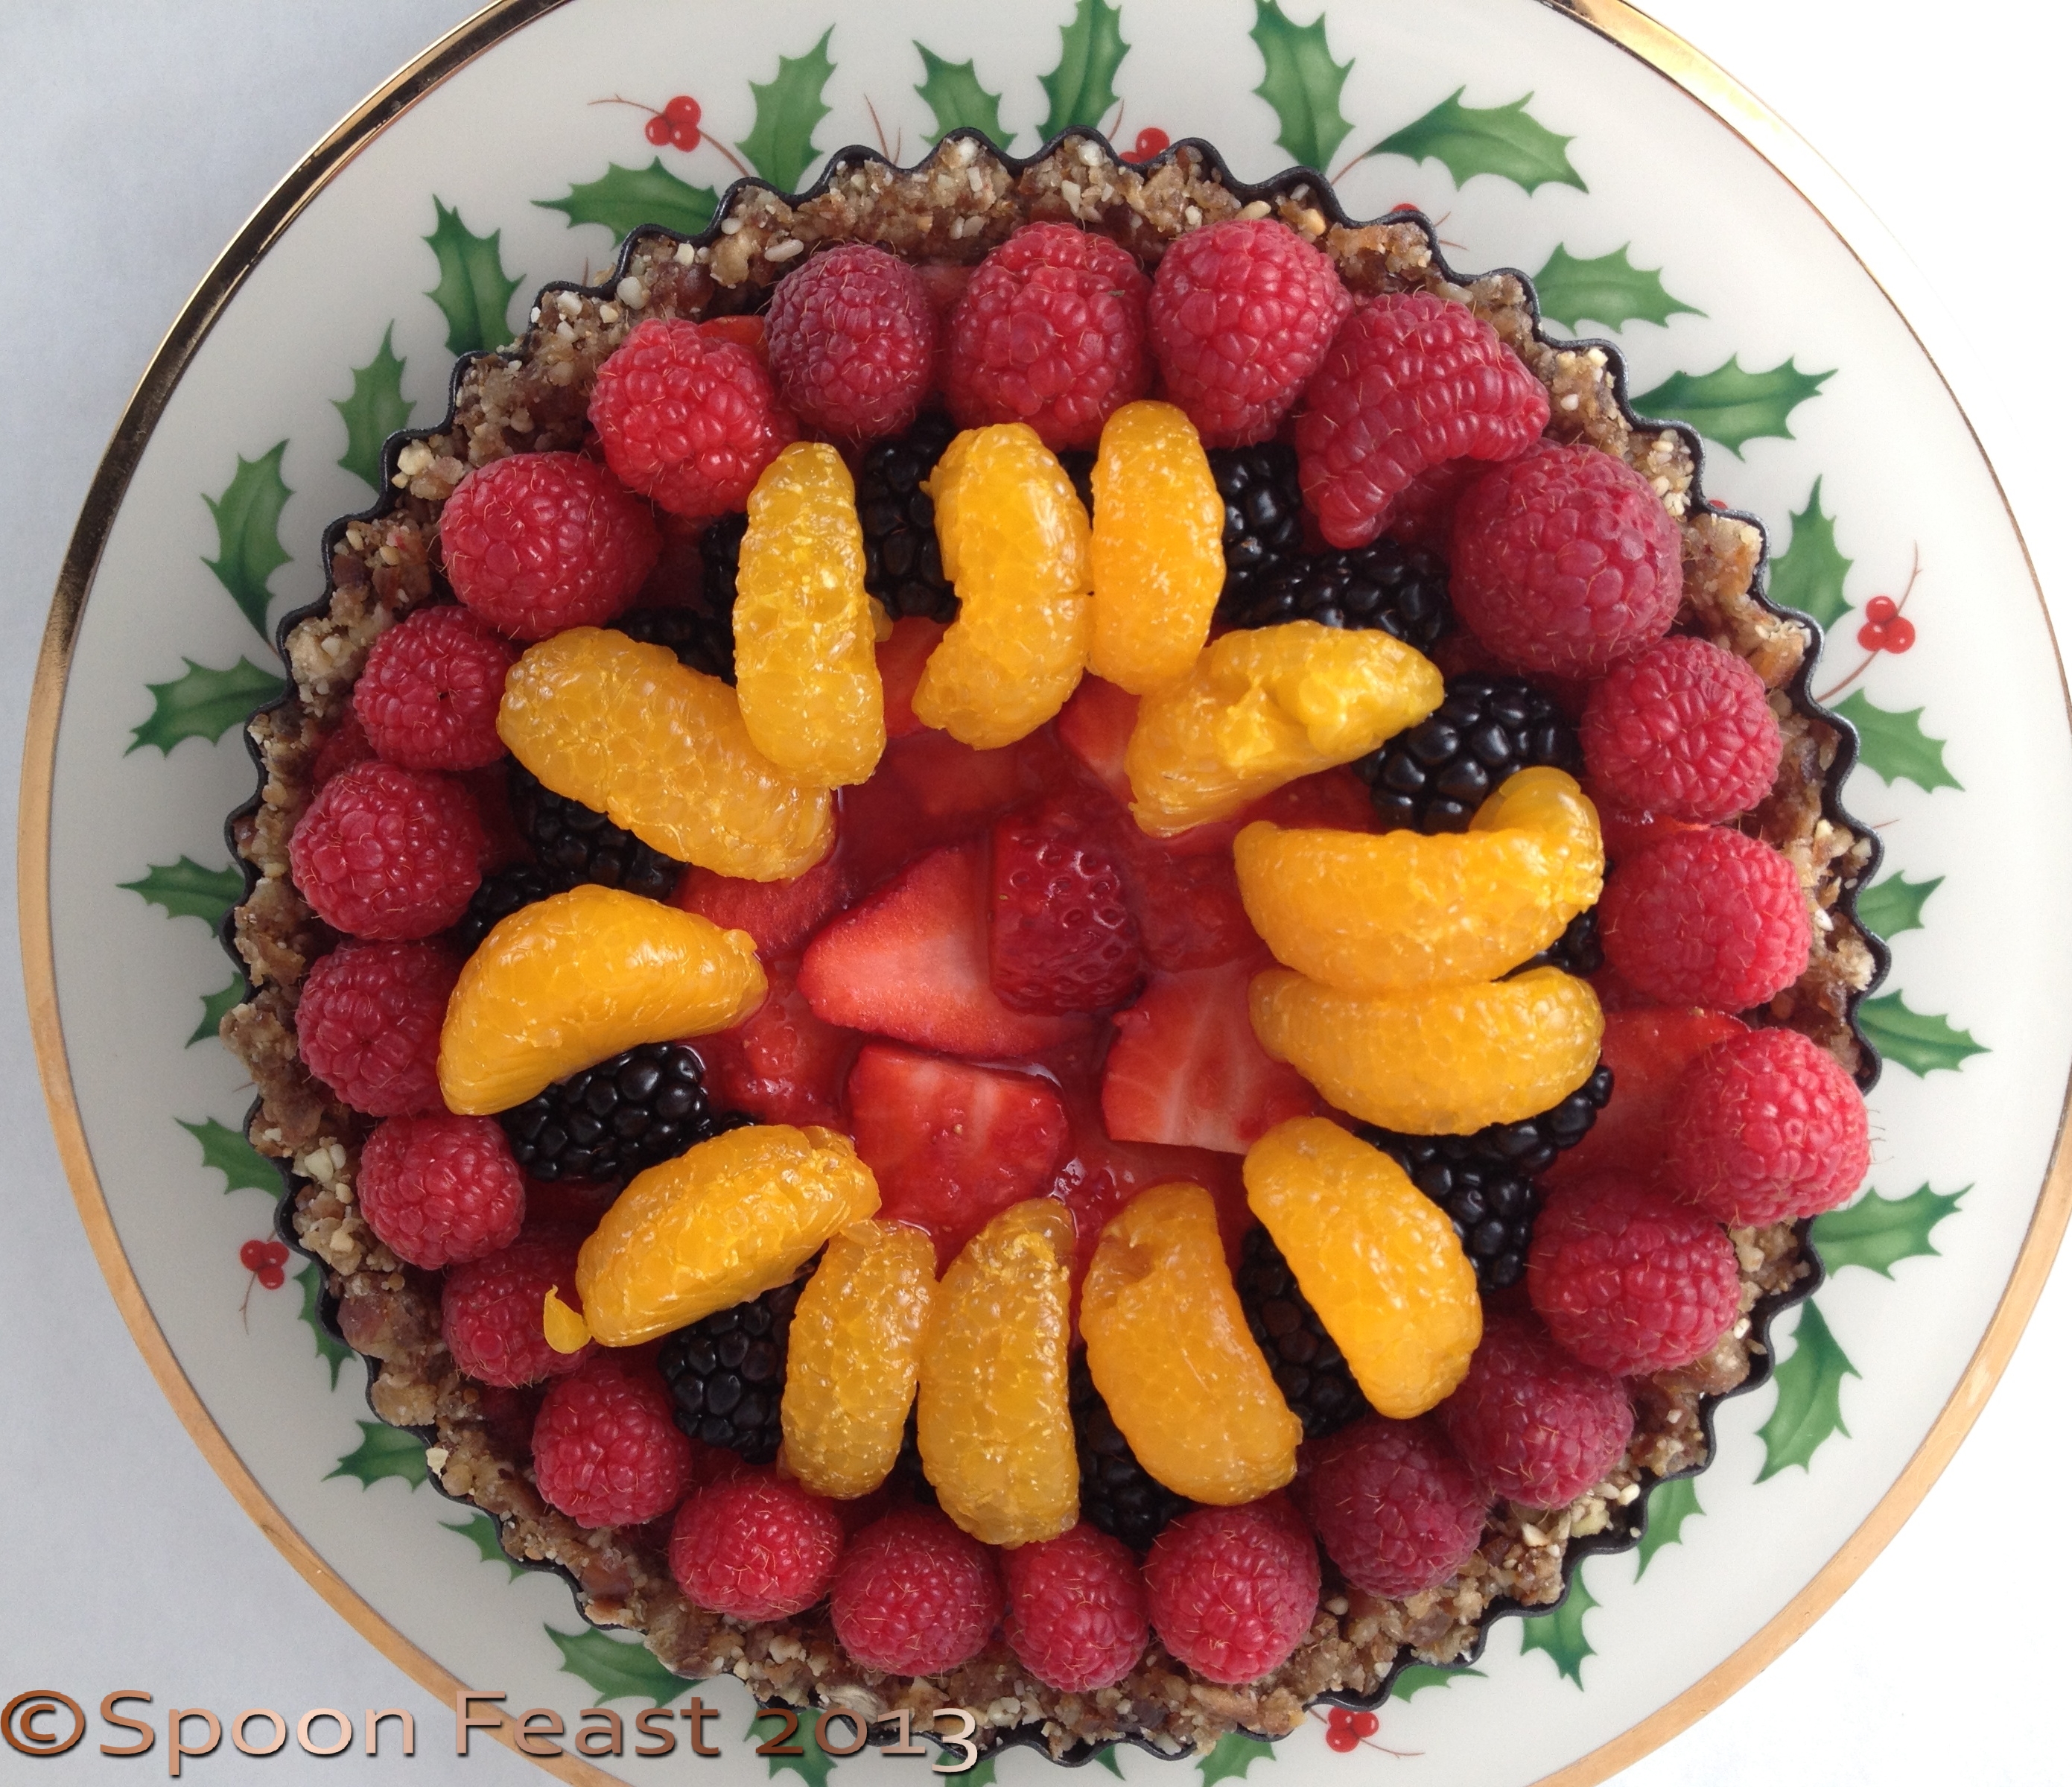 support themselves when removed from the pan.
Line the bottom of the crust with the bananas cut lengthwise, cut side down. Gently press the bananas into place along the edge and bottom.
Top bananas with sliced strawberries, then pour the strawberry puree over the top, filling in any spaces or gaps.
Place fresh raspberries along the entire outer rim of the tart; then place halved blackberries and mandarin oranges in a decorative manner.
Cover with plastic wrap and refrigerate at least one hour, preferably overnight, before slicing and serving.
This is fast, easy, delicious and makes an impressive dessert for anyone, even vegans. It might work for those on a raw food diet as long as the friction from the food processor doesn’t count as “heat”. I don’t think it gets hot enough to qualify for that.
No added fat except what is naturally found in nuts, no added sugar, no baking! And it tastes delicious.
Please let us know what you think.
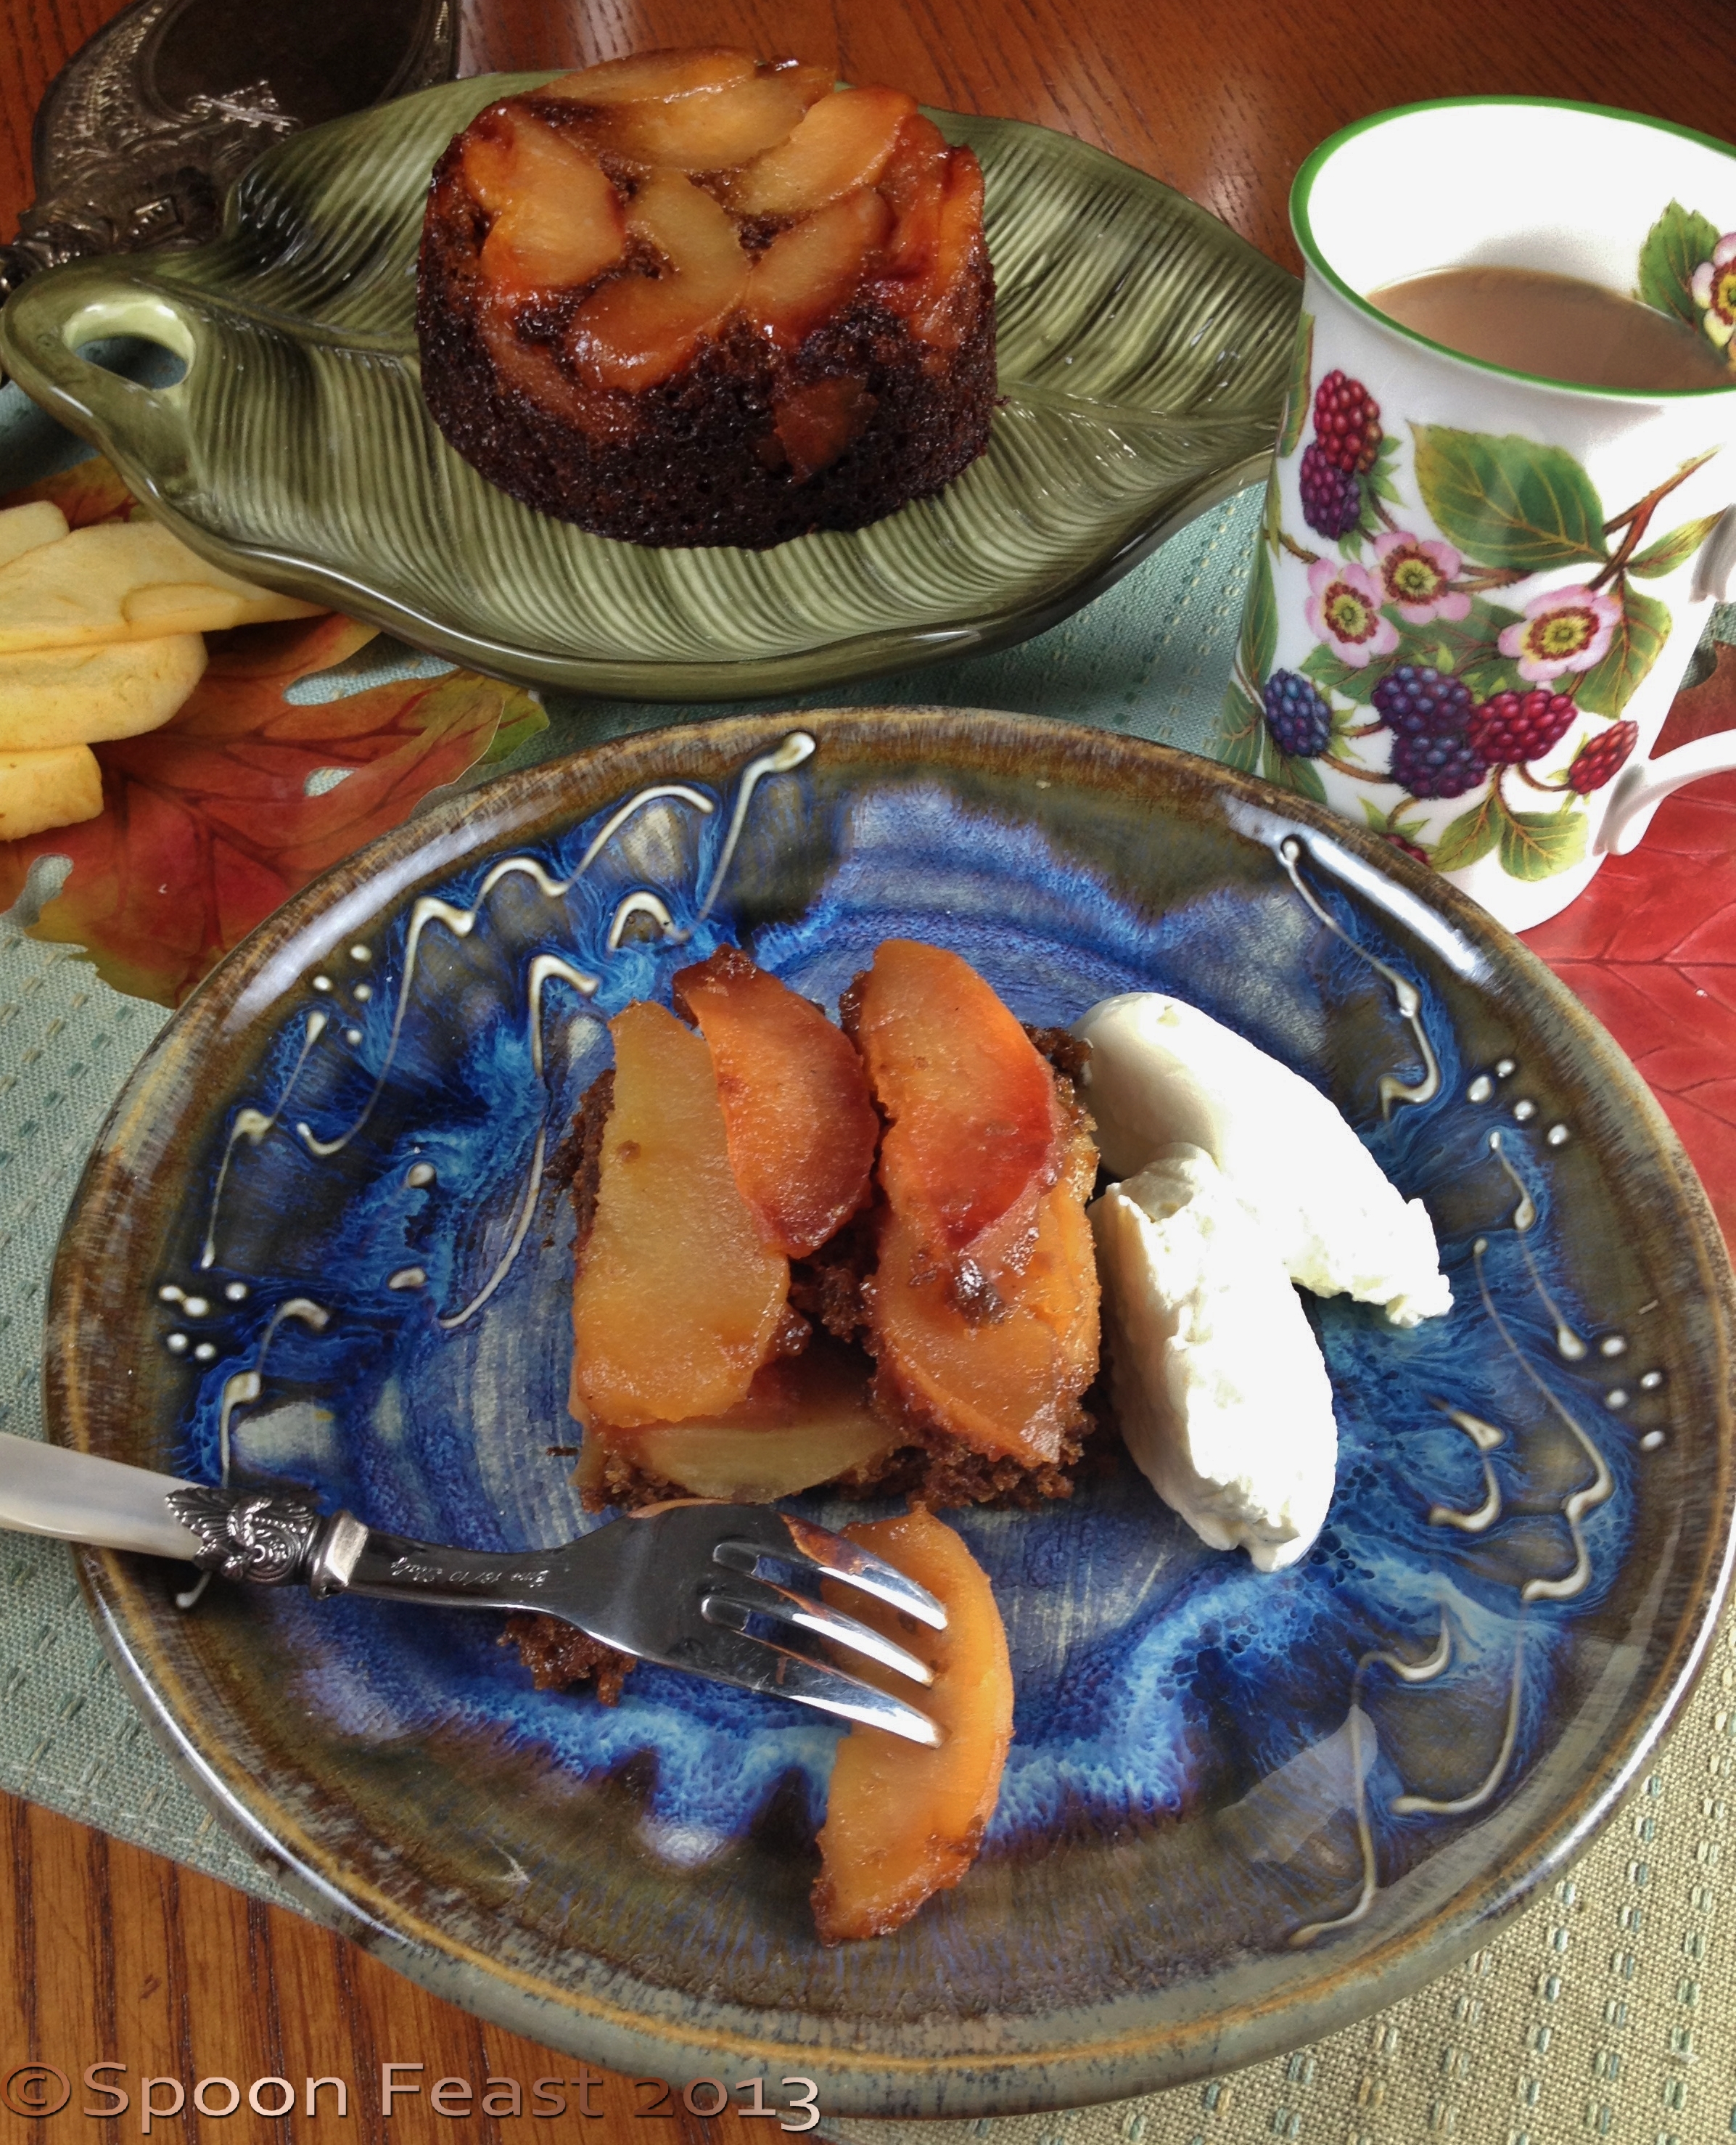
Quince and Gingerbread make such a nice treat! This is like an upside down cake and it tastes so delicious.
In the fall, I like to keep a bowl of fall fruit on the table for not only display, but for nibbling as well. I like to have some quince in the bowl as they give off a lovely fruity aroma when ripe.
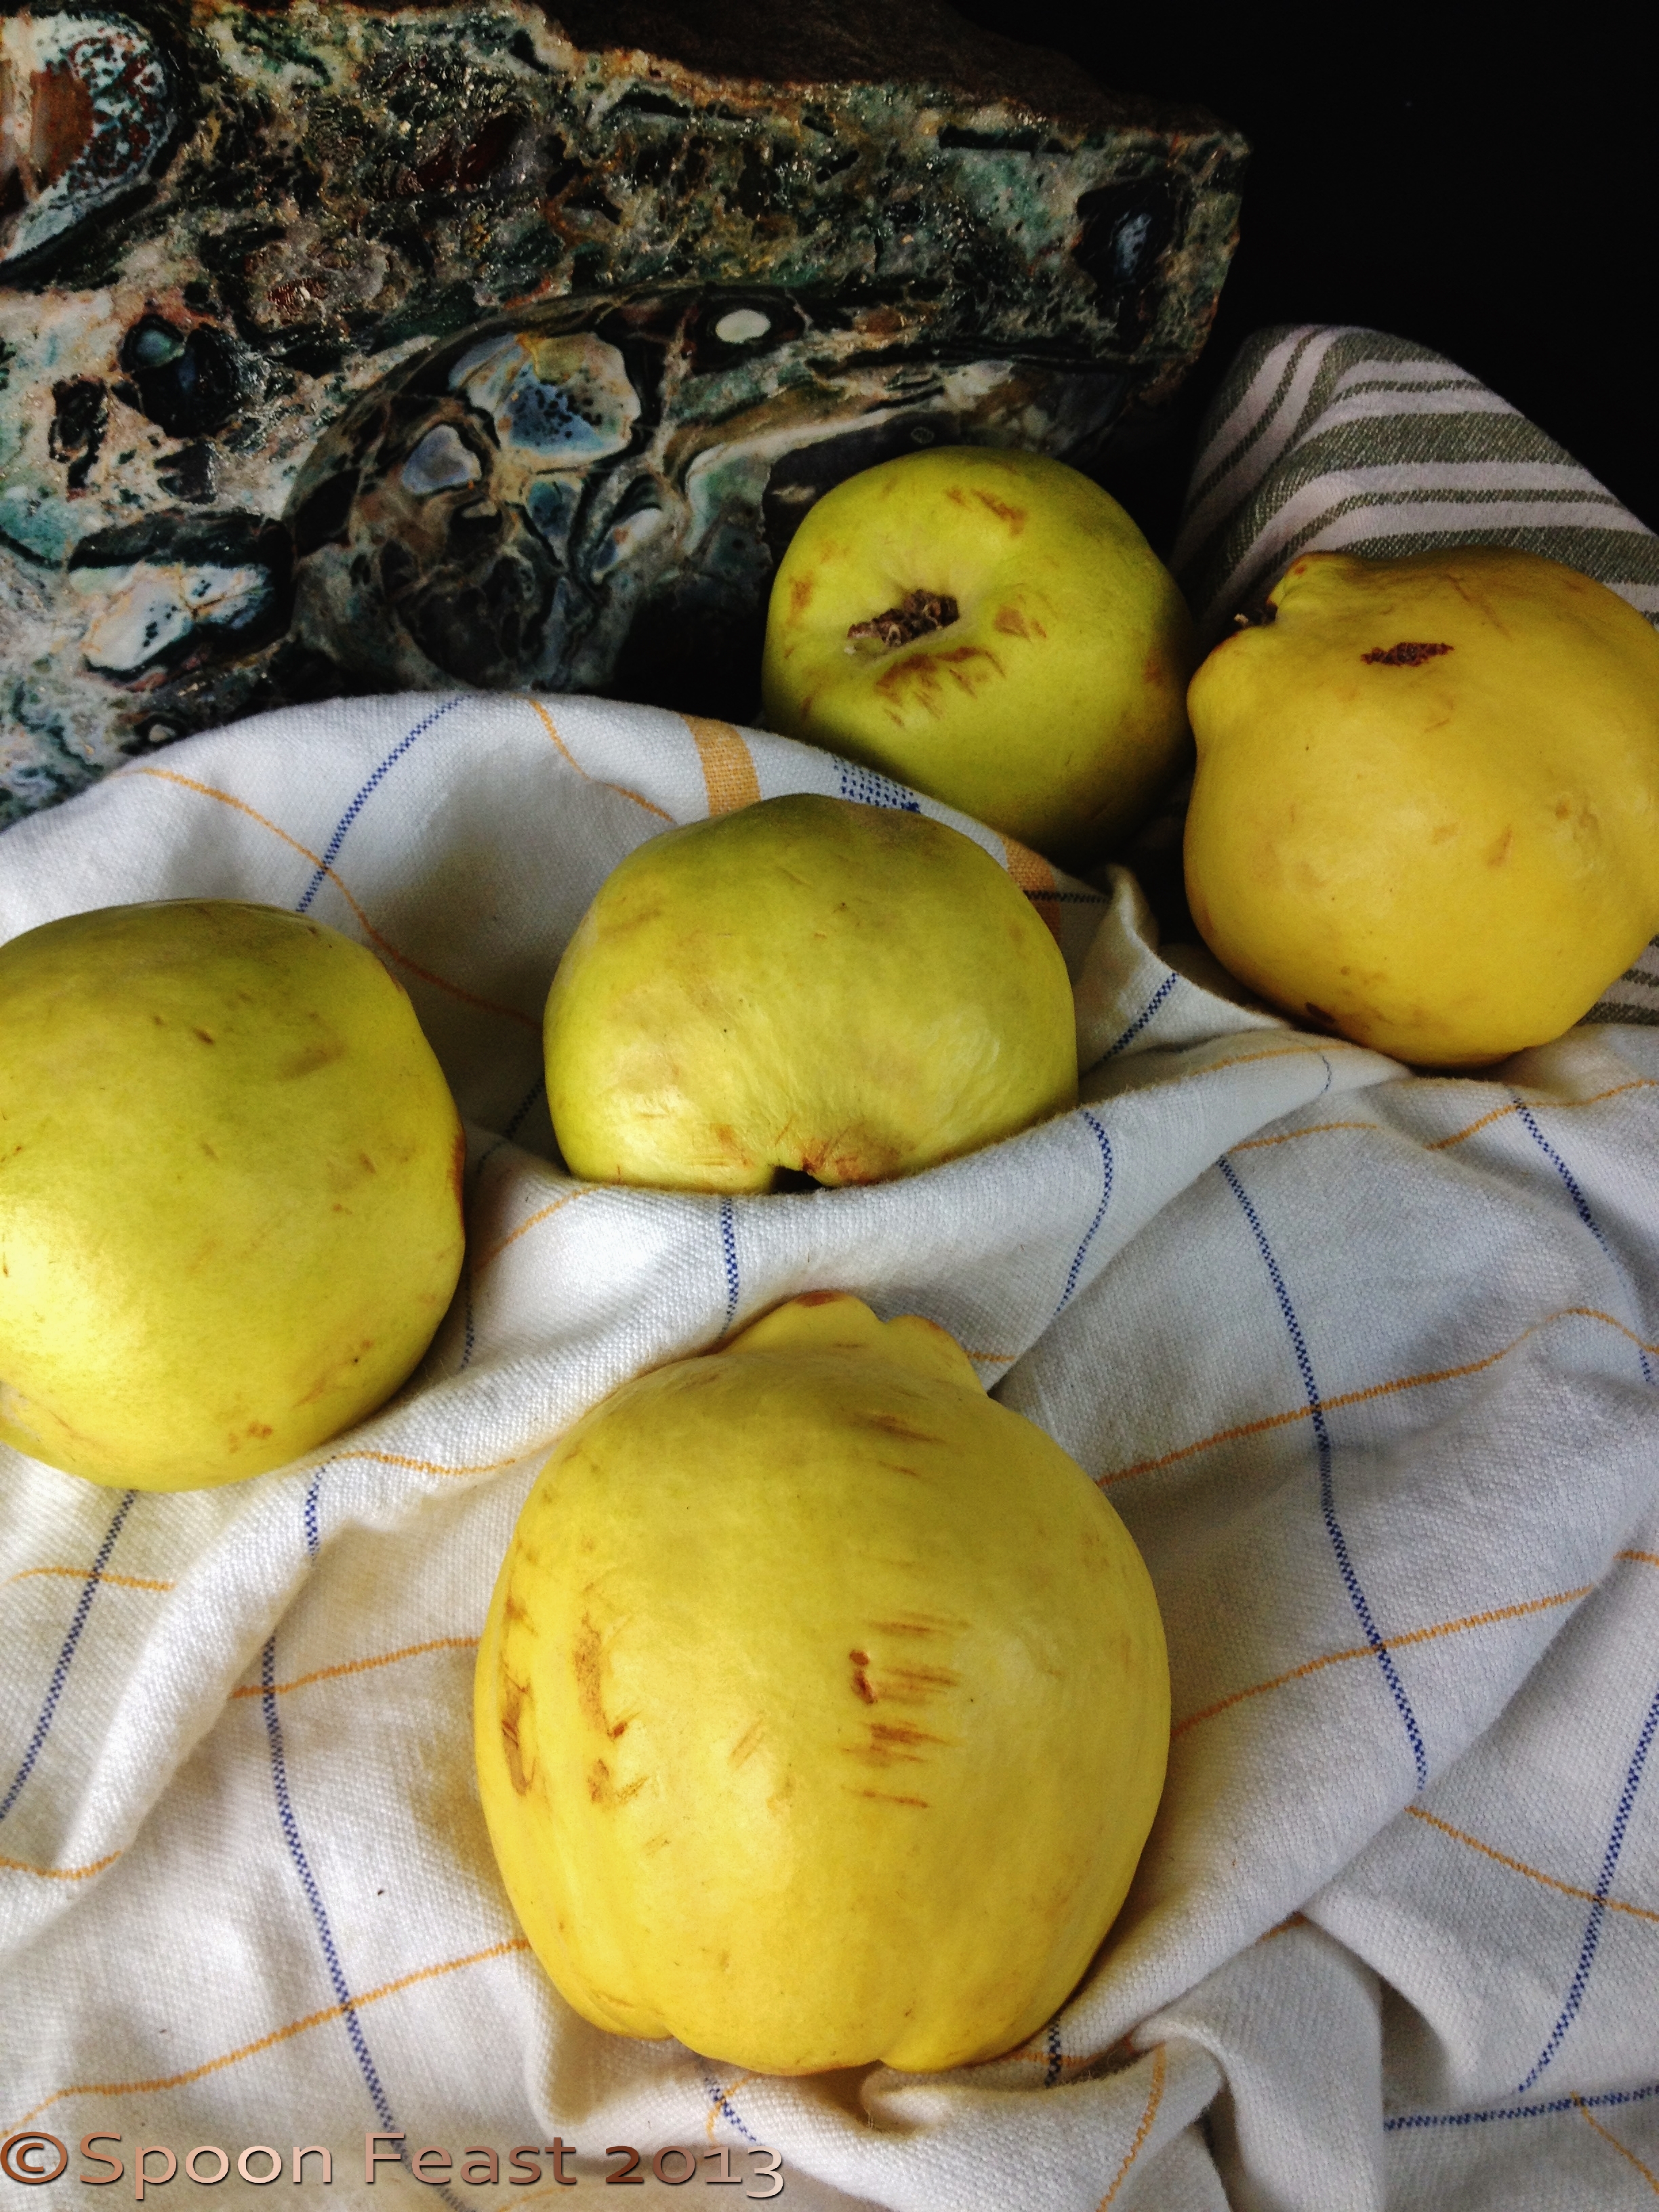
Ripening Quince
Quince are similar to a cross between an apple and a pear. They look like fat flat-bottomed pears. Quince are green when unripe and soften to a creamy yellow when ripe. The aroma is also a clue to ripeness. The aroma is captivating and inspires poems – The Owl and the Pussy Cat by Sir Edward Lear has the two dining on “mince and slices of quince”, cooked slices of course.
Inedible raw, unlike apples or pears, quince take on a lovely mellow flavor and maintain the sweet grainy pear-like texture when cooked. Unlike most apples, quince hold on to their shape when cooked. They don’t turn brown when sliced as apples do.
If you can’t find Quince, you can substitute apples and or pears if you like.
Place the water and sugar into a large saute pan, bring to a boil, stir and let boil until the sugar begins to become a light golden brown. Add the butter and the quince, stir to coat then simmer for 8-10 minutes, until the quince are tender and cooked through.
Set aside to cool slightly.
Butter the inside of a, 8″ cake pan or what ever cake pan you want to use. I baked some in large (really large) ramekins and another in a square pan. Whatever pan you use, be sure you have a plate large enough to invert the finished cake onto after baking. (More on this later)
You can choose to use pan spray rather than butter for the pan. This ensures the cake will turn out easily when done.
Pour and place the quince mixture into the bottom of the prepared pan. If you like, arrange the fruit in a decorative manner as this will be the top of the cake when done.
Once the quince are cooling in the prepared pan, make the gingerbread.
Quince and Gingerbread
Add the molasses to the boiling water and stir in the baking soda. Allow this to cool while putting the rest of the cake together.
In a mixing bowl, mix then set aside:
In the bowl of an electric mixer, cream:
Cream the sugar and butter for about 3 minutes, add 1 large egg yolk and vanilla; process until smooth.
On low-speed, add the flour mixture alternating with the water and molasses mixture. Scrape down the sides of the bowl several times. Mix the batter until smooth.
Pour the batter over the quince in the pan. Bake in a 350°F oven for 30-40 minutes, until a toothpick inserted into the cake comes out clean.
Remove the cake from the oven, allow to cool for 15 minutes. Place a plate on top of the pan and then invert the two so the cake comes out of the pan onto the plate.
To do this maneuver easily, place a kitchen towel, folded long way, on the counter top. Place the warm cake pan on the towel, put the plate you want to invert the cake onto upside down on top of the cake pan. Fold the ends of the towel over the cake pan and the plate. hold tightly, pick it up and flip it over and set it down. slide the towel out from under the plate, then lift off the cake pan and voila! The upside down cake should be correctly displayed.
Serve with whipped cream or vanilla yogurt while still slightly warm.
Ginger has the ability to warm from the inside, the baked sweet and tart quince provide a comforting fall dessert, just perfect when the air gets nippy. I love this with a nice cup of tea.
Quince and Gingerbread
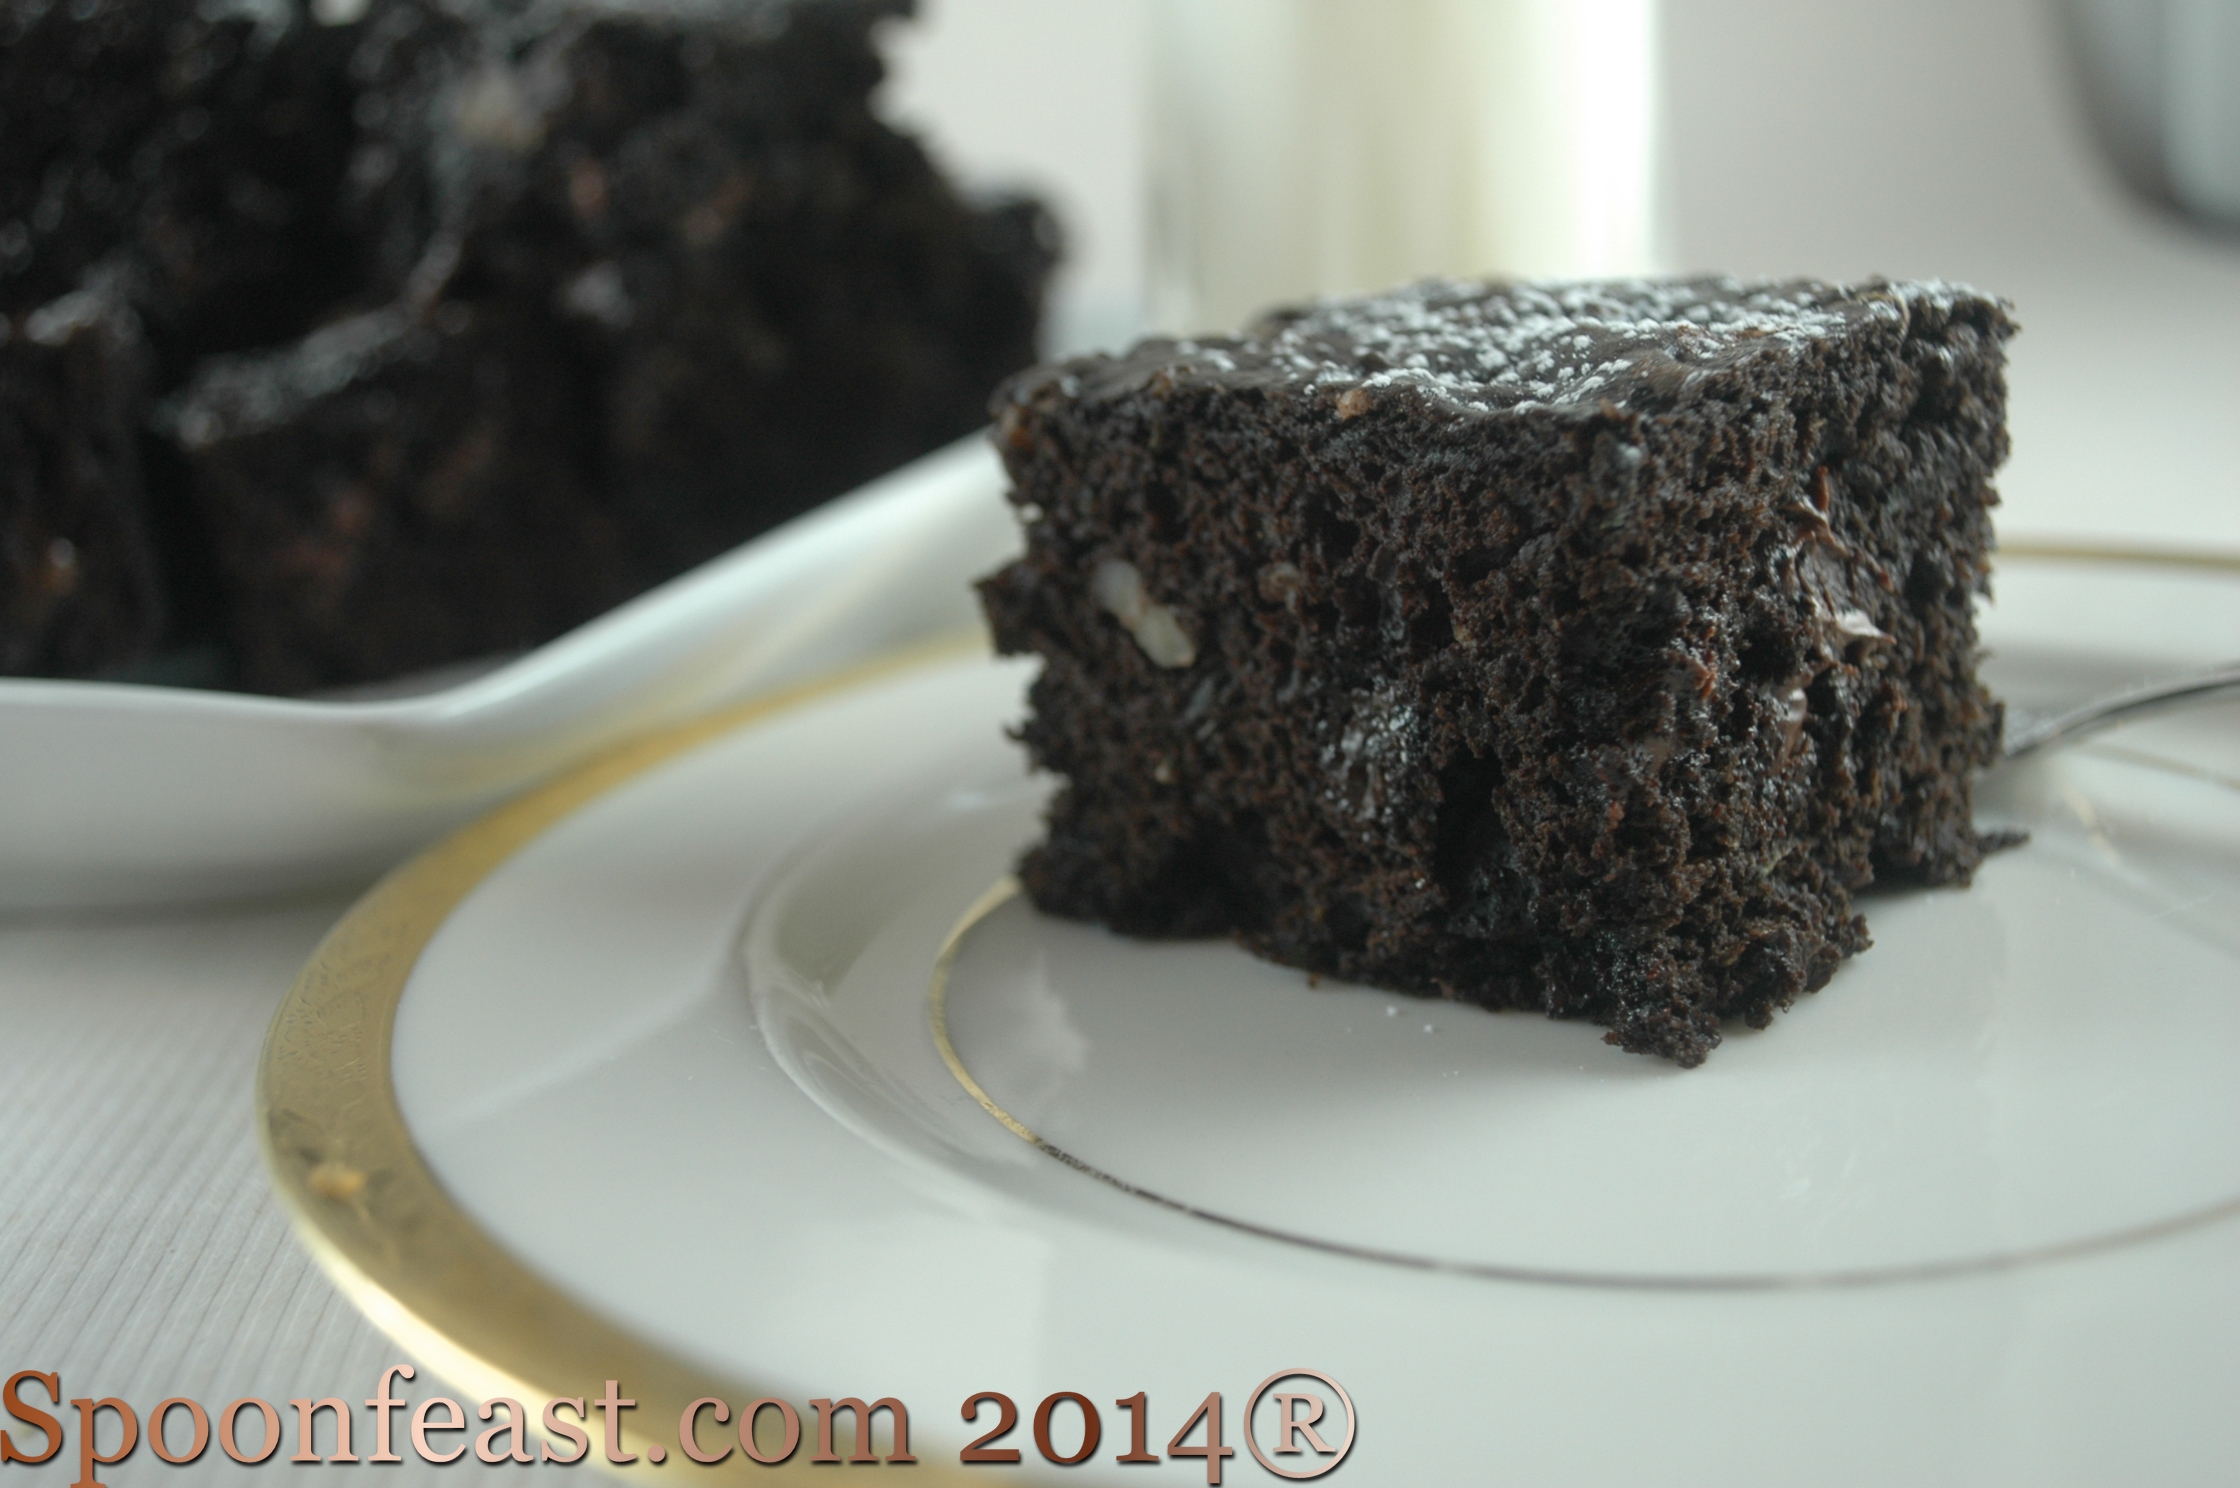
Zucchini Brownies are a great way of adding vegetables to your families diet. Unless you tell them zucchini is in the mix, they simply won’t know. The secret here is to finely shred the zucchini so it ‘melts’ while baking. You can’t expect it to be undetectable if you put big chunks in the mix.
This is a great way to get some vegetables into your meat and potato family members.
This recipe follows the formula of replacing the fat in the recipe with vegetables. The shredded zucchini adds the required moisture that creates the most gooey, fudgy brownies; you won’t believe they are full of zucchini.
 Zucchini Brownies
Pre-heat oven to 350°F.
Butter a 9 x 9 baking dish.
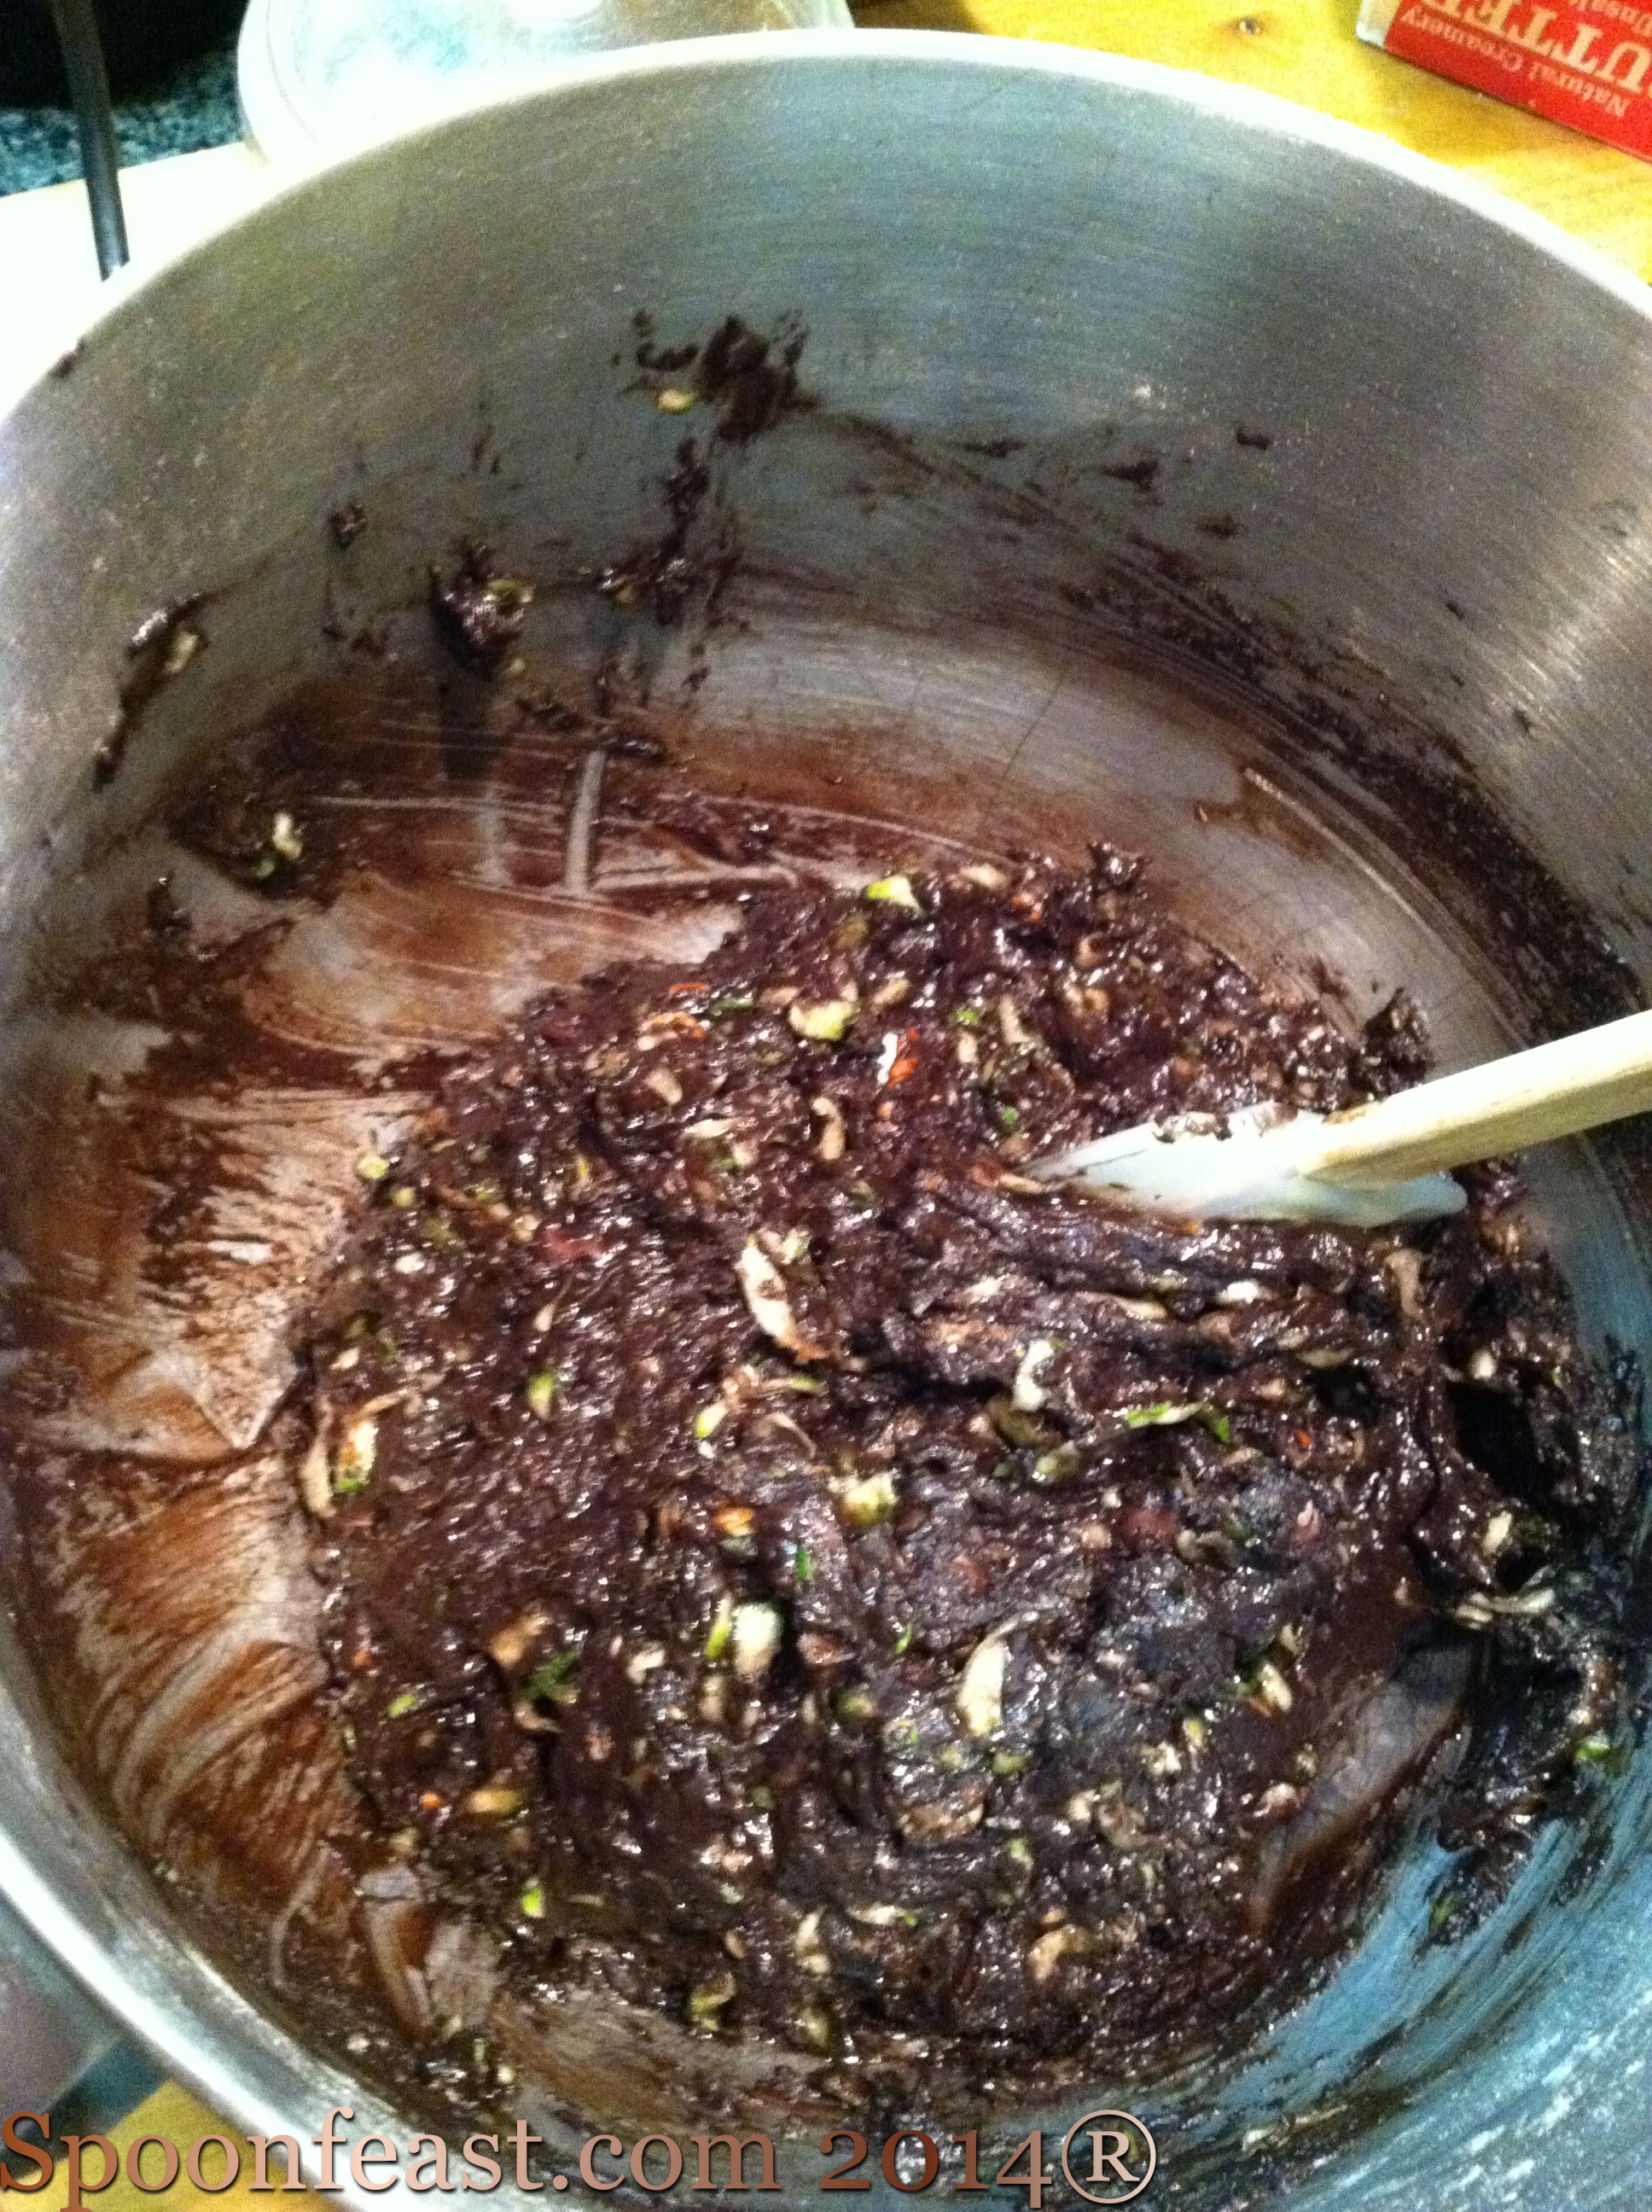
Combine sugars, egg and vanilla in a mixing bowl on medium speed.
Fold in zucchini.

Shred Zucchini
Combine dry ingredients in a separate bowl.
Add flour mixture to zucchini mixture on low-speed, mixing only long enough to combine the ingredients.
Spoon the mixture into the prepared baking dish, smoothing it evenly in the dish.
All mixed together with the Shredded Zucchini
Bake at 350°F for 30-35 minutes. Remove the brownies from the oven and cool on a rack.
Cut and remove from pan after the brownies have cooled to room temperature.
