
I made Fresh Goat Cheese!
Fresh Goat Cheese!
Actually I was surprised at how quick and easy it actually was to make. Having the right equipment and getting good milk are key.
I get most of my supplies from The New England Cheese Making Supply which is a great resource for everything cheese.
Ever since I returned from the cheese making workshop a few weeks ago, my hands have been looking forward to getting into some milk.
First I had to find a source for good, clean, fresh goat milk for goat cheese and I still need to source Jersey cows for their milk for other cheese. For now, I have goat!
I LOVE the “barnyard” flavor of a strong goat cheese. While in France, I fell in love with Pouligny St. Pierre goat cheese which is a creamy smooth aged amazing bit of heaven to put into your mouth. It is my goal and intention to make some of that here, but obviously with the “terroir” of North Carolina.
OK, so here’s how I made this batch of Fresh Chevre:
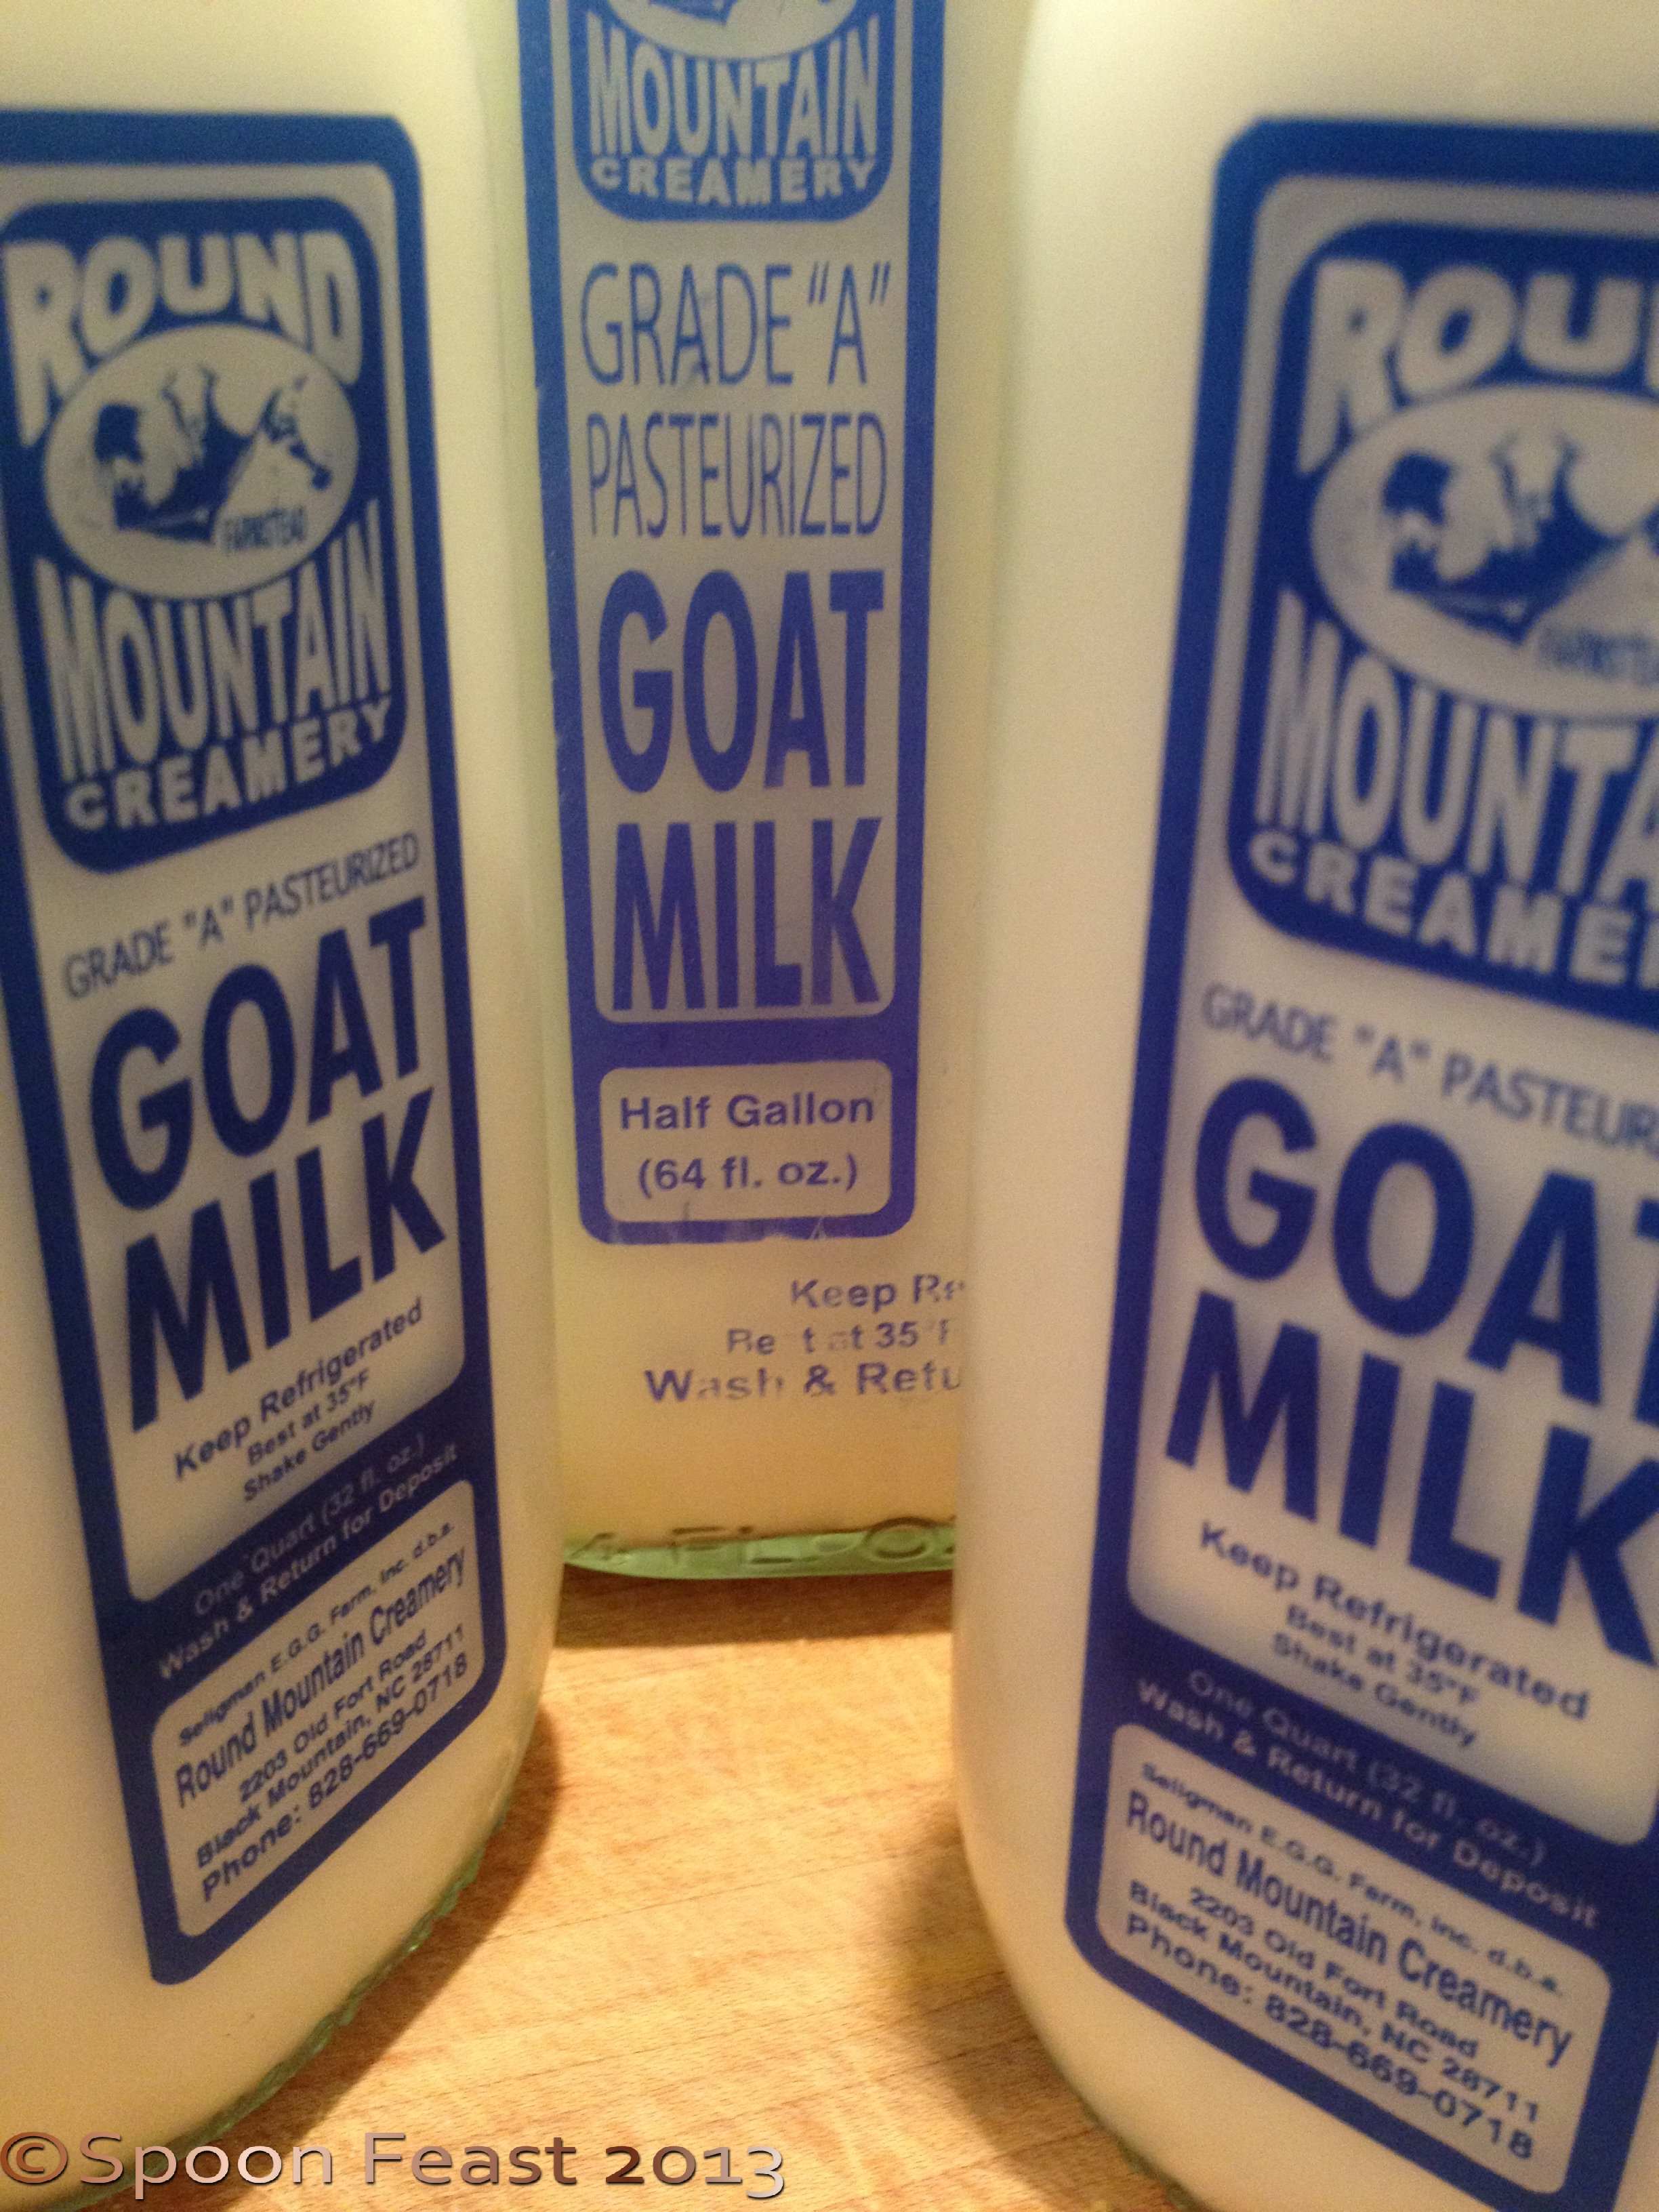
I started with one gallon of fresh Goat Milk from Round Mountain Creamery in Black Mountain, NC. The milk comes in glass bottles, which I love!
Order a batch of CHEVRE culture from New England Cheese Making Supply. One packet will culture one gallon of milk, so plan what you want to make. I never seem to order enough.
Additionally if your milk is pasteurized (PLEASE find milk that is low temp processed as Ultra-Pasteurized milk does not work for making cheese) you will need 1/4 teaspoon of calcium chloride per gallon of pasteurized, cold-stored milk.
In my next batch, I want to ripen it for a few weeks so I will be adding other cultures for different effects.
Equipment needed:

2 large pots; the small one holds 1 gallon easily. I can use the larger pot for larger batches. Just need to find a pot to nest it inside of for a reasonable price.
2 large stock pots: the one the milk goes into needs to be stainless steel (Non-reactive)
The second one needs to be large enough to make a double boiler or bain marie, the first needs to nestle into the large one so you can heat the milk easily and slowly.
A good thermometer: You NEED to be in control of temperatures, not too high or too low.
Cheese Muslin, butter muslin, closely woven cheese cloth– the normal loose woven is way too loosely woven. Invest in a yard or two, wash it and use it over and over.
Use cold water to remove any cheese particles, then hand wash. Rinse and boil it in a pot with some baking soda for 5-10 minutes, rinse and hang to dry. It will be fresh and good to go for the next round of cheese!
Here is how to make the cheese:
Wash and sanitize everything!! Have a pot of boiling/simmering water to drop cheesecloth, molds, tools into to sanitize them before they come into contact with cheese.
Pour the milk into the pot, place it over the water (about 80°F). Warm the milk to 72-78°F.
Please be aware that this will feel cold to the touch, this is not warm milk, just milk warmed from refrigeration to 72-78 degrees.
Open 1 packet of the Chevre culture and sprinkle it over the top of the milk. Allow it to hydrate for 2-5 minutes before stirring it into the milk.
 Add 1/4 teaspoon calcium chloride is using cold-stored pasteurized milk.
Allow this to sit undisturbed for 6-12 hours. This is the hardest part as you want to go see what is happening and you want it to hurry up and do its thing. But be patient, it takes time.
This batch sat for 8 1/4 hours before testing the cleave of the curd. When it is ready to test, you should see a thin layer of whey over the curd and a slight separation from the sides of the pot.

Testing the cleavage break
Insert a knife or a spoon, slightly on the surface, the curd should cleave clean and the whey that floats into the separation should be clear.
Carefully lift the curds with a strainer into a colander lined with cheese muslin. Be sure to place the colander over a large bowl to catch the whey.
Gently fold the cheesecloth over the curds and allow them to drain for 6-12 hours again, depending upon your desired finished texture. Less time for sweeter cheese, more for tangy cheese. The longer the whey stays in contact with the curd, the more tangy it gets.
You must be very careful NOT TO PRESS the curds. Allow them to drain gently at this point. The whey should be clear dripping, if it is cloudy, you are losing milk fat and your cheese will be dry.
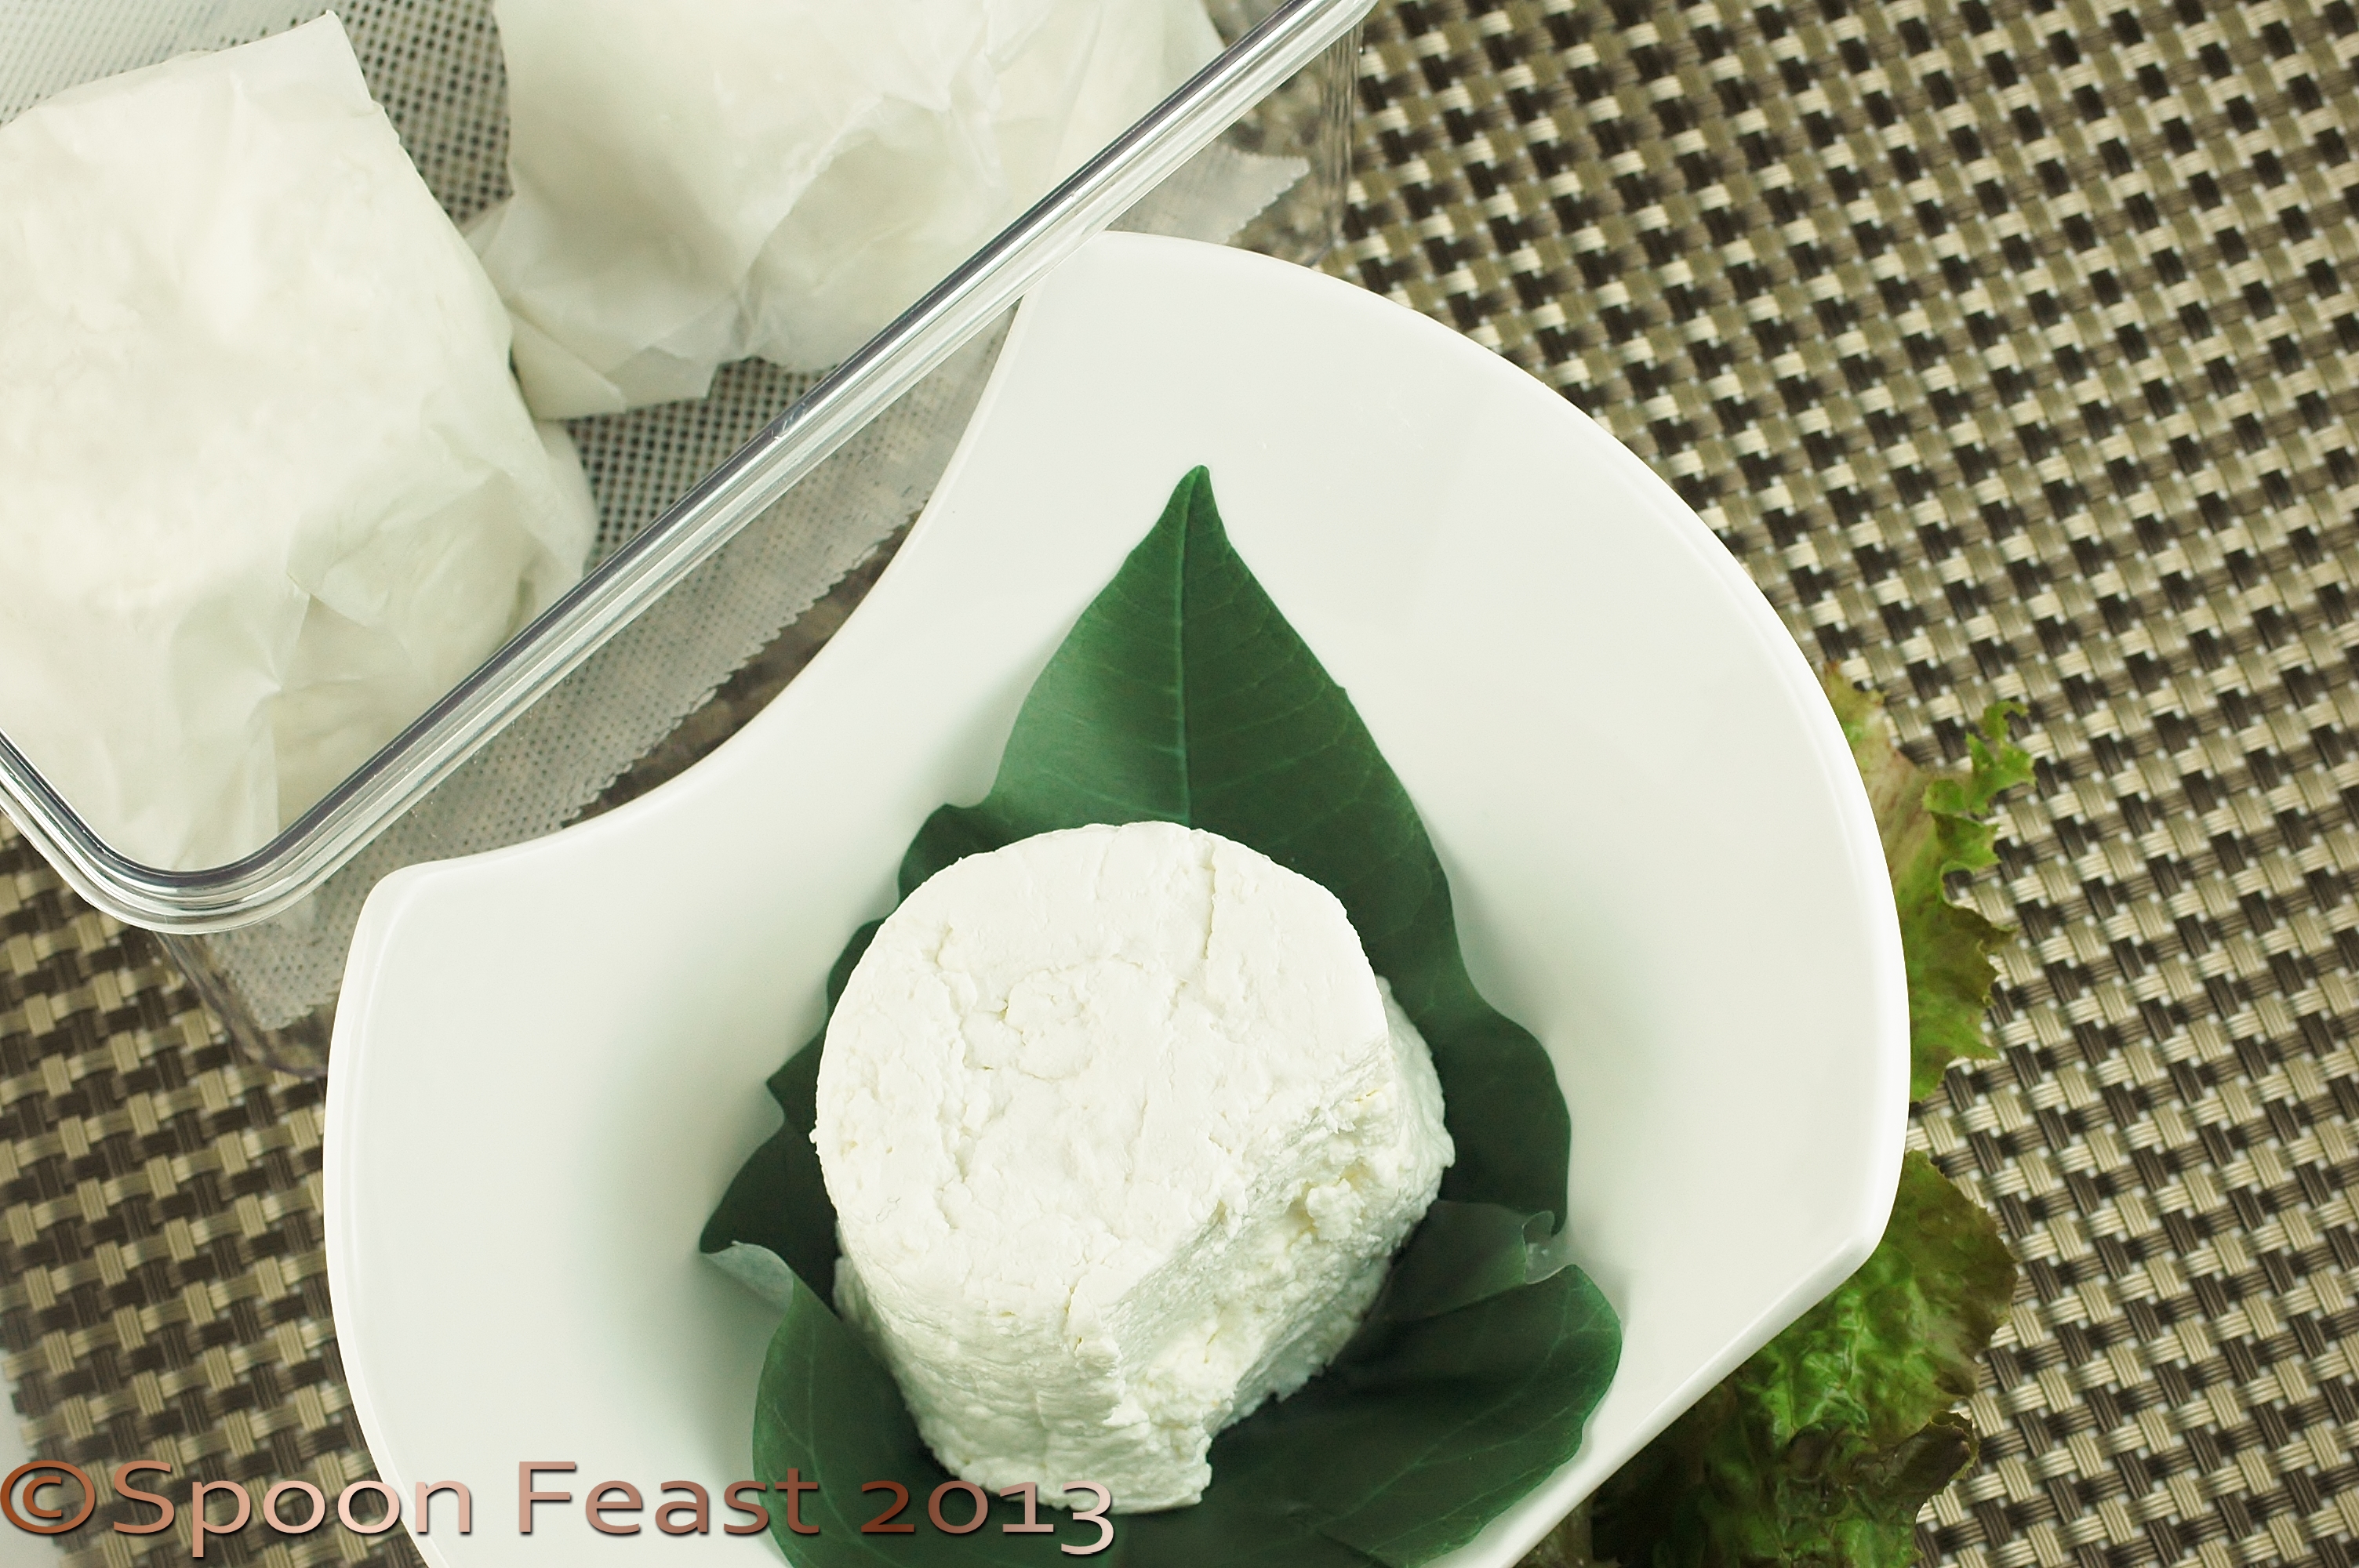
You can also put it into molds at this point if you are using a mold. It will result in a smoother sided end product.
Control the room temperature and the curd temperature to maintain as close to 72-78°F as possible. I let the curds form while still in the bain marie as the water in the host pot will maintain the temperature of the curd mass.
I usually let this happen overnight while sleeping. The next day is such a surprise!
Unfold the cheesecloth and reveal your fresh cheese! Now it is time to salt. For this batch, 1.5-2 teaspoons of non-iodized cheese salt.
You can consider the cheese finished at this point but this is also where you can be a bit creative.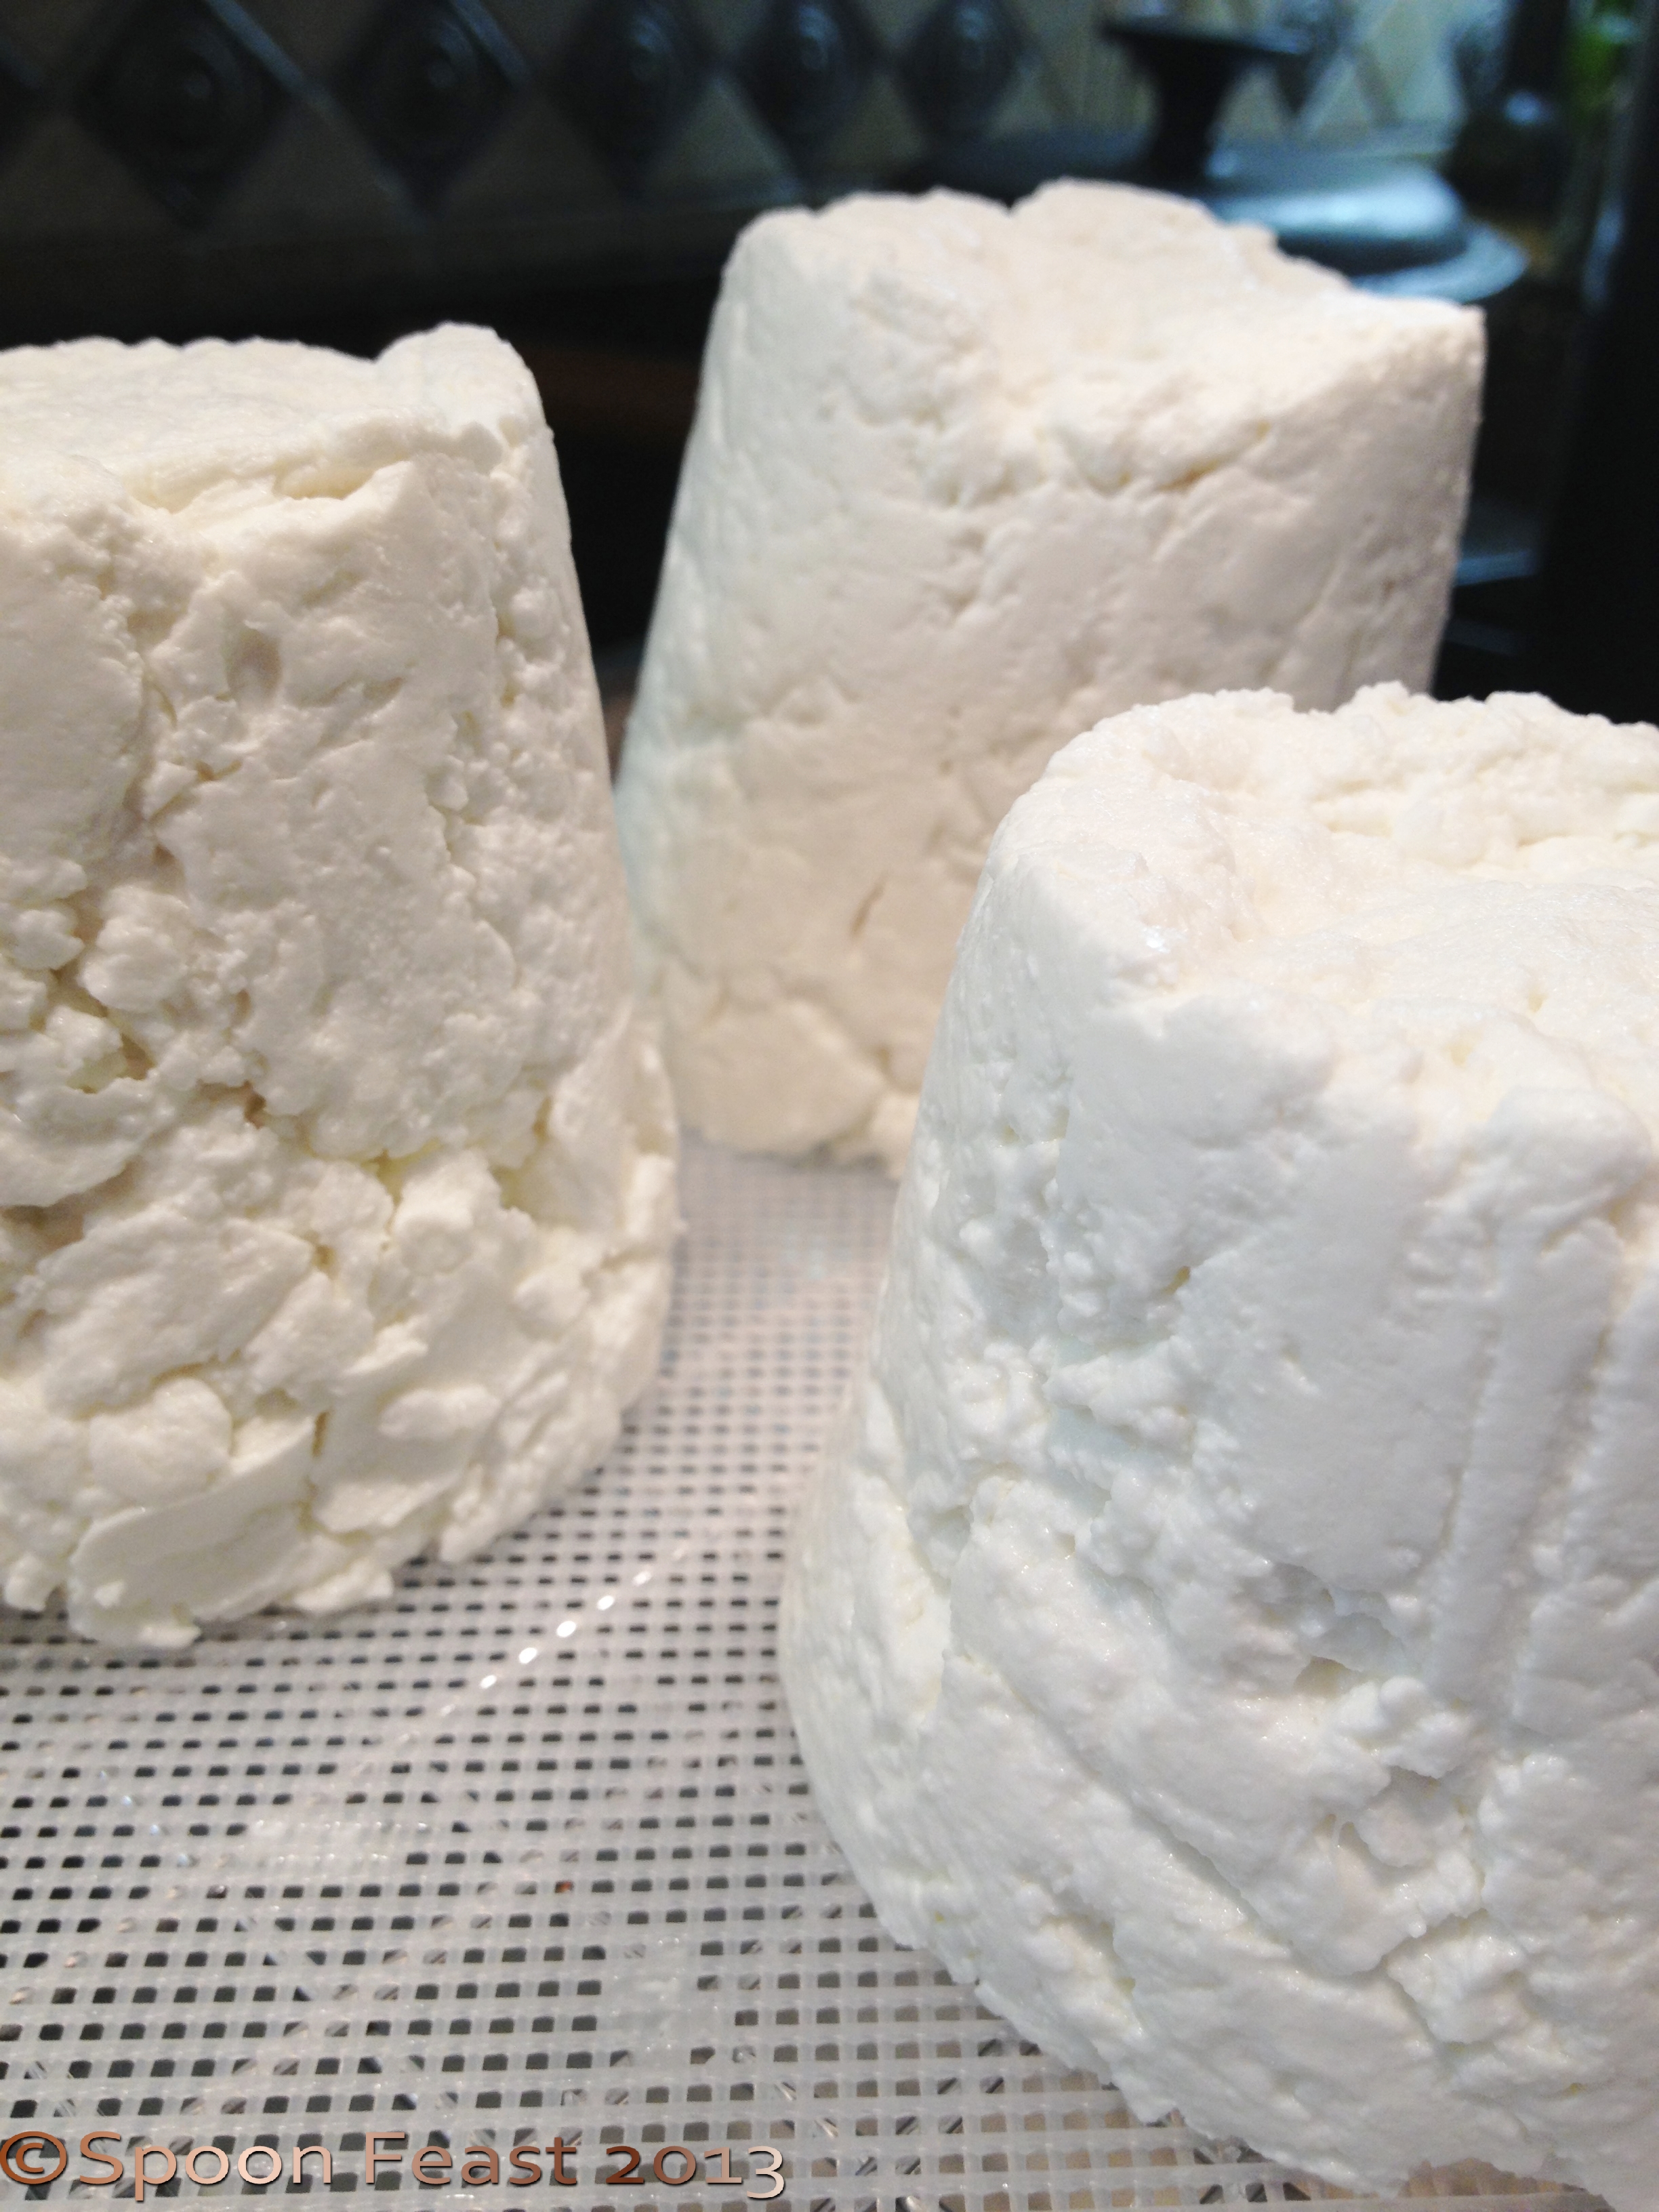
As you fold in the salt, also consider adding other flavors like herbs, minced garlic or shallots or onions, crushed peppercorns, ash, use your imagination.
 Store your fresh goat cheese in a bowl or tub and consume within 10 days. Refrigerate the cheese, but allow it to come to room temperature before serving to allow all the wonderful flavors to come through.
A Word About Seasonings:
Please use dried seasonings and herbs due to the risk of bacterial contamination that may be introduced by using fresh herbs and seasonings. If you use fresh, be sure to eat the cheese soon. It can’t hang out for a while like plain cheese.
A Word About Food Safety:
The temperature the milk gets processed is in a temperature range that is smack dab in the extreme temperature danger zone. Everything you use needs to be “sterilized” in the boiling water bath before it comes in contact with the curds or milk. I cover my curd formation and the curd draining with a glass lid (so I can see what is going on!) to prevent anything falling or flying into the curd mass.
Since my kitchen is FULL of wild yeast from all the bread I make, the introduction of wild yeast is totally possible. This could have a spoiling effect on the curd. This is another reason I boil things before they touch the milk/curds.
The hardest part is WAITING! I strongly suggest you get to a farmers market and buy some goat milk and try this. It is easy, very tasty and you will feel so good about making a tasty goat cheese you’ll make more.
If you do make any cheese, take notes on the temperatures, conditions, milk etc so you can repeat successful processes. Most of all remember DO NOT USE Ultra-Pasteurized milk!
So that’s Fresh Chevre in a nut shell. There is a lot of information out there on making cheese. I’m really just starting and am looking forward to making more!
Please let me know how you do if you make some fresh Goat Cheese!
Related articles
- Say Cheese! (perfectprospect.wordpress.com)
- Suffolk Show and Venezuelan Cheese (sciapoddairy.wordpress.com)
- Ricotta Cheese (bakingbarkingboxing.wordpress.com)

Thanks for a great tutorial, I thought it would be much more difficult 😀
Cheers
CCU
The hardest thing is waiting! just as about exciting as watching paint dry so, have other things to do. Thanks Uru!
yum, I adore goats cheese, It’s great to know how it’s made. Thanks for posting 🙂
Thanks Lisa, I hope you try making it someday!
Pingback: Eating Local | Spoon Feast
Pingback: In My Kitchen October 2013 | Spoon Feast
Pingback: Quick and Tasty Summer Lunch | Spoon Feast