Series: How to Cook a Thanksgiving Meal: Desserts

If an elaborate dessert table is on your menu, look no further.

Molded Desserts:

Chocolate Almond Peanut Butter Cups

Chocolate Almond Peanut Butter Cups

Chocolate Almond Butter Cups

Chocolate Pate

Pate de Fruit et Pate du Vin

Making gelee Pate de Fruit

Making gelee Pate de Fruit

Custard Based:

Strawberry Cheesecake rhubarb compote

Strawberry Cheesecake rhubarb compote with hemp seed crisp

De-constructed Strawberry Cheesecake with Rhubarb Compote

Chocolate Chia Seed Pudding

Chocolate Chia Seed Pudding with Toasted Almonds

Chocolate Chia Seed Pudding with Toasted Almonds


Pies and Tarts:

Easy tart and pie crust

Easy tart and pie crust

An Easy Crust for Pies and Tarts

Fig, Almond Frangipani Tart

Fig and almond tart

Fig and almond tart

A delicious Green Tomato Pie

A delicious Green Tomato Pie

Green Tomato Pie

Cherry Hand Pies

Cherry Hand Pies

Hand Pies

Lemon Blueberry Tarts

Lemon Blueberry Tarts

Lemon Blueberry Tarts

Nut Crusted Fruit Tart

Nut Crusted Fresh Fruit Tart

Nut Crusted Fresh Fruit Tart

Cakes and Brownies:

Applesauce Cake

Applesauce Cake

Applesauce Oatmeal Cake

Gluten Free Almond Cake

Gluten Free Almond Cake

Versatile Gluten-Free Almond Cake

Quince and Gingerbread

Quince and Gingerbread

Quince and Gingerbread

Oatmeal Cranberry Bars

Oatmeal Cranberry Bars

Zucchini Brownies

Zucchini brownies

Zucchini brownies

Cookies:

Raw Almond Date Cranberry Cookies  Rather than "raw" let's call them "No Bake"

Raw Almond Date Cranberry Cookies
Rather than “raw” let’s call them “No Bake”

Almond Date, Cranberry Lime No Bake Cookies

Cranberry Oatmeal Bars

Glazed Lemon Shortbread

Pumpkin Snicker-doodles

Something Special:

Cinnamon, Almond, Pistachio Danish Ring

Serve warm  Apple Dumplings with whipped cream and caramel sauce. A few fresh berries add color to the plate.

Serve warm Apple Dumplings with whipped cream and caramel sauce. A few fresh berries add color to the plate.

Pineapple, Chestnut, Caramel upside Down Cake

Cinnamon Almond Danish Ring

Cinnamon Almond Danish Ring

Warm Apple Dumplings


 Have Fun!

#holidaybaking #desserts #makedessertsathome #dessertrecipes #gettingfat


Green Tomato Pie or “Pied Green Tomatoes”

Final Harvest!

Final Harvest!

With a frost settling in, everyone is scrambling to gather whatever tomatoes are left on the vines.

Faced with a basket of lovely green orbs, here’s what I decided to make with them.

"Pied" Green Tomatoes!Be sure the tomatoes are hard and show no signs of ripening or else they will turn to mush when cooked.

Green Tomato Pie or “Pied” Green Tomatoes

  • 4 cups peeled and cut green tomatoes
  • juice from 1/2 lemon
  • zest from 1 lemon
  • 1 teaspoon cinnamon
  • 1 teaspoon kosher salt
  • 1/4 teaspoon ground cloves
  • 1/4 teaspoon ground nutmeg
  • 1/4 cup raisins
  • 3/4 cup granulated sugar
  • 2 tablespoons instant tapioca
  • 2 Tablespoons butter
  • Pie crust for top and bottom crusts

Use a peeler to remove the skin from the tomatoes. Because they are green, the traditional method of blanching them in boiling water, shocking and then peeling does not work. The green tomatoes are hard, like an apple, so peel them as you would apples. No need to remove seeds, as the seeds are hardly developed.

Chop the tomatoes into bite sized pieces. Put them into a sauce pot with the lemon juice, lemon zest, and salt; bring to a simmer over low heat.

Chopped Green Tomatoes simmering for pie filling

Chopped Green Tomatoes simmering for pie filling

You will notice a lot of juice being released by the tomatoes. Add the cinnamon, nutmeg and cloves.

Stir this mixture often. When you see it come to a boil, add the sugar and simmer for 5-6 minutes. You want the tomatoes to become tender but not mushy.

Add the butter and instant tapioca to the simmering tomato mixture, remove from heat and cool. The tapioca thickens the juices as it cools. You want the mixture to be cool when you put it into the pastry shell.

While the tomato filling is cooling, make your pie dough, roll it out and line your pie tins or tart shells. If using already made (store-bought dough) prepare your pie pans.

Pre-heat your oven to 435°F while you fill the pie shell.

Fill the shells with the cooled tomato filling. Be sure to cut vents into the top crust. Seal the edges of the crust; brush the top with milk and sprinkle with sugar. I like to use raw sugar for the larger crystals.

Green Tomato Pie in the oven

Green Tomato Pie in the oven

Bake in the pre-heated oven for 45 minutes or until the crust is golden brown and the filling is bubbly. You may need to add a foil shield around the crust edge to prevent it from getting too brown. Do this only after the edges are browned already, not when you first put the pie into the oven.

Additionally, place the pie on a sheet pan to catch any drips that may bubble out of the pie during baking. The sheet pan is easier to clean than the oven.

Believe it or not, I couldn’t find a single solitary pie tin of any kind in my kitchen! I used to be a pie making queen. Where are they? All I could find is the fluted tart pans. So I had to use them and put a top crust on anyway. I tried a strusel topping but I didn’t care for the flavor combination with the filling. So I suggest you use a top crust.

If you have a bunch of green tomatoes hanging around, try this pie. It tastes like apple pie made with Granny Smith Green Apples, the texture is the same too.

Whip up some whipped cream, add a dash of cinnamon and serve.

I still have a full basket of green tomatoes so next I’ll be making my Dad’s Green Tomato Chow Chow. Watch for the recipe!

In the meantime, make a Green Tomato Pie. You’ll be pleasantly surprised!

A delicious Green Tomato Pie

A delicious Green Tomato Pie

Another delicious slice of Green Tomato Pie

Another delicious slice of Green Tomato Pie

Green Tomato Pie

Green Tomato Pie

An Easy Crust for Pies and Tarts

Here is a super simple dough to use for pies and tarts. One key to working with any tart dough is to keep it cold. This allows the fat to melt while baking which creates light, flaky crusts.

Plum Blackberry Almond Tart

With lots of holiday events approaching, here is a simple basic approach to a nice pie or tart dough.

If you want a double crust, double the recipe. This only makes 1 crust.

Easily done by hand, you can also use a food processor, just pulse the ingredients without the water, add water, bit by bit to make the dough mass. You may use all the water, only some or you may need more. It depends on how much moisture your flour holds.

Easy Pie or Tart Crust

  • 1 cup all-purpose flour
  • 1 tablespoon sugar
  • 1 teaspoon salt
  • 3 ounces cold butter, cut into small cubes
  • 3 – 5 tablespoons ice-cold water

If creating the crust by hand, combine the salt and sugar with the flour. Cut the cubed butter into the flour using a pastry cutter, two knives or a fork.

English: A dough blender; also called a pastry...

English: A dough blender; also called a pastry blender. (Photo credit: Wikipedia)

Cut the fat into the flour

When the mix resembles a coarse mixture (you still want to see some globs of butter, don’t make it smooth) add the ice-cold water tablespoon by tablespoon.

The mass should come together. Only use as much water as you need to bring the ball together. You may need more water or less water. This is why you add it bit by bit.

Add enough water to just bring the dough ball together when you squeeze it.
You want to see blobs of fat in the dough, not smooth.

Press the dough into a ball and place it between 2 pieces of plastic wrap. Press it into a disk.

Refrigerate until cold.

Roll the dough between sheets of plastic wrap

Roll the chilled dough out to the size you need while it is still in between the wrap. This makes it easier to handle and is much easier to clean up too.

Remove one side of the plastic wrap. Position the dough over the pie or tart pan and press it into place.

Alternatively, you can press the dough into the pan and then chill while you prepare the filling.

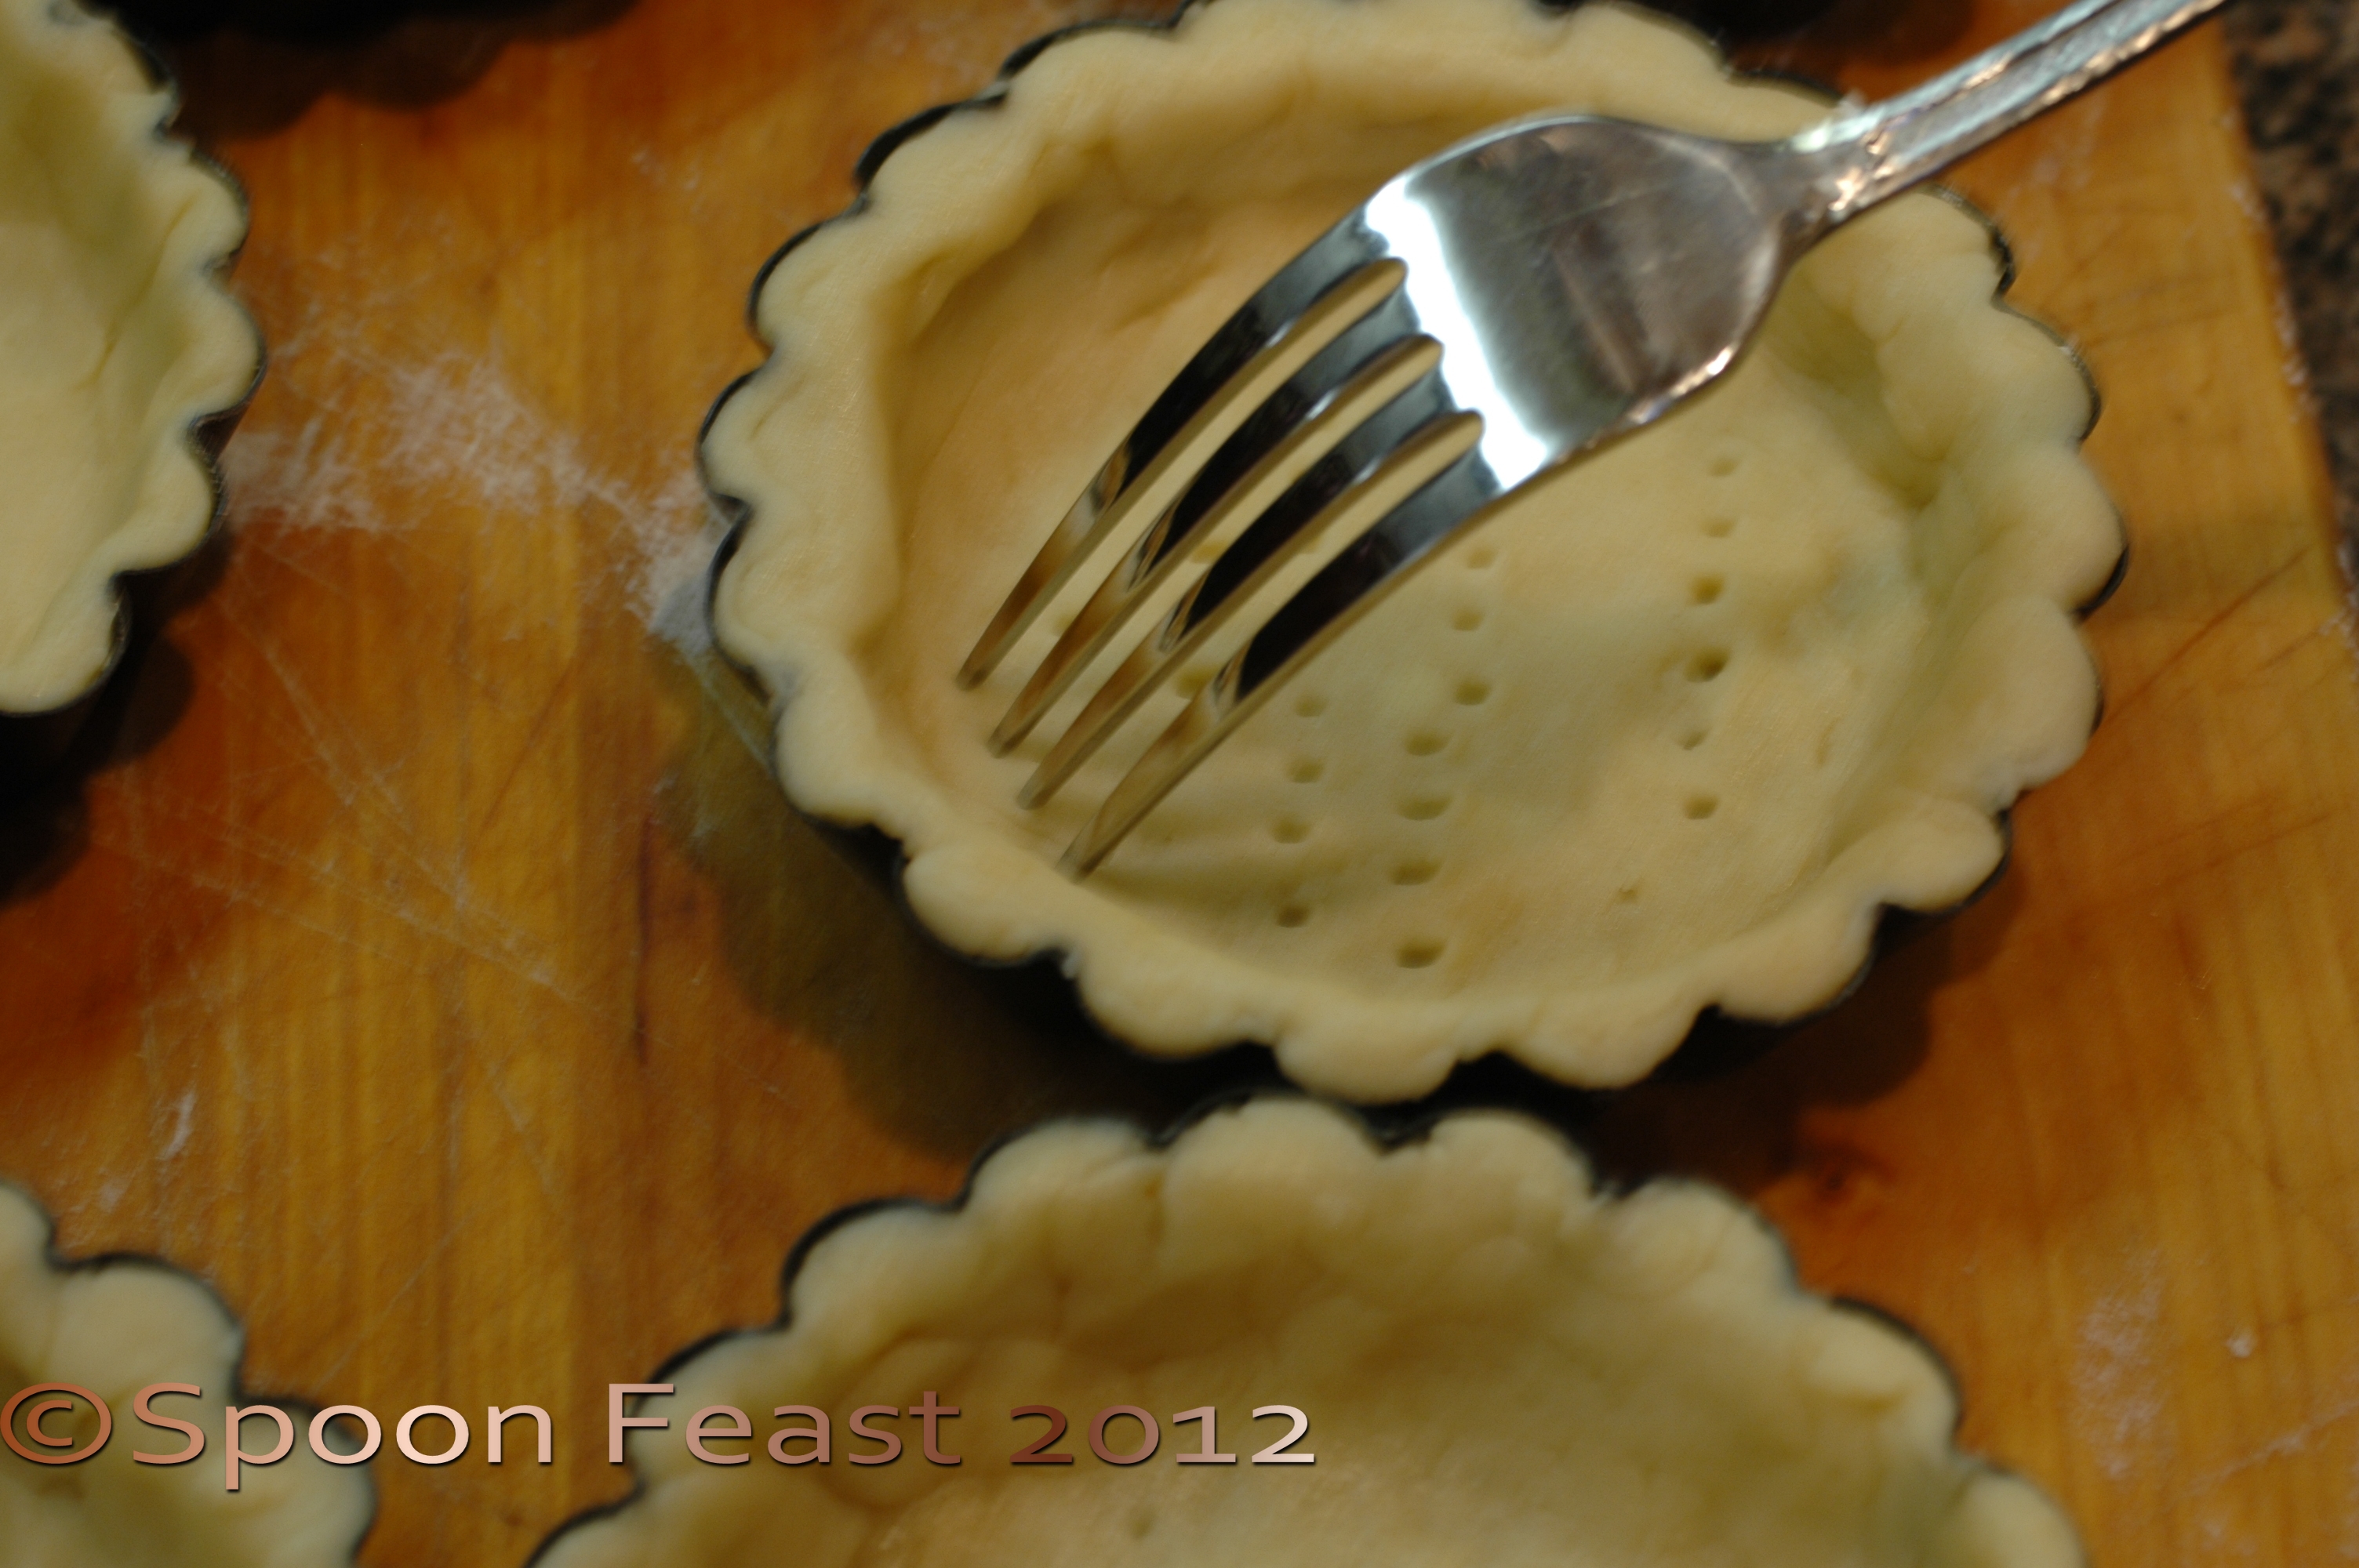
Much easier is to use the fluted tart pans with the removable bottoms. Press the dough into the tart pan. Make sure you have at least 1/4 inch at the sides and at the curve of the pan so it is strong enough to stand on its own when the pan is removed.

Small fluted tart shells ready for filling

The fluted edge pans give all your tarts such a professional finished look, they are so worth the investment. Since they come in many sizes, you can make large tarts or small individual ones and any size in between.

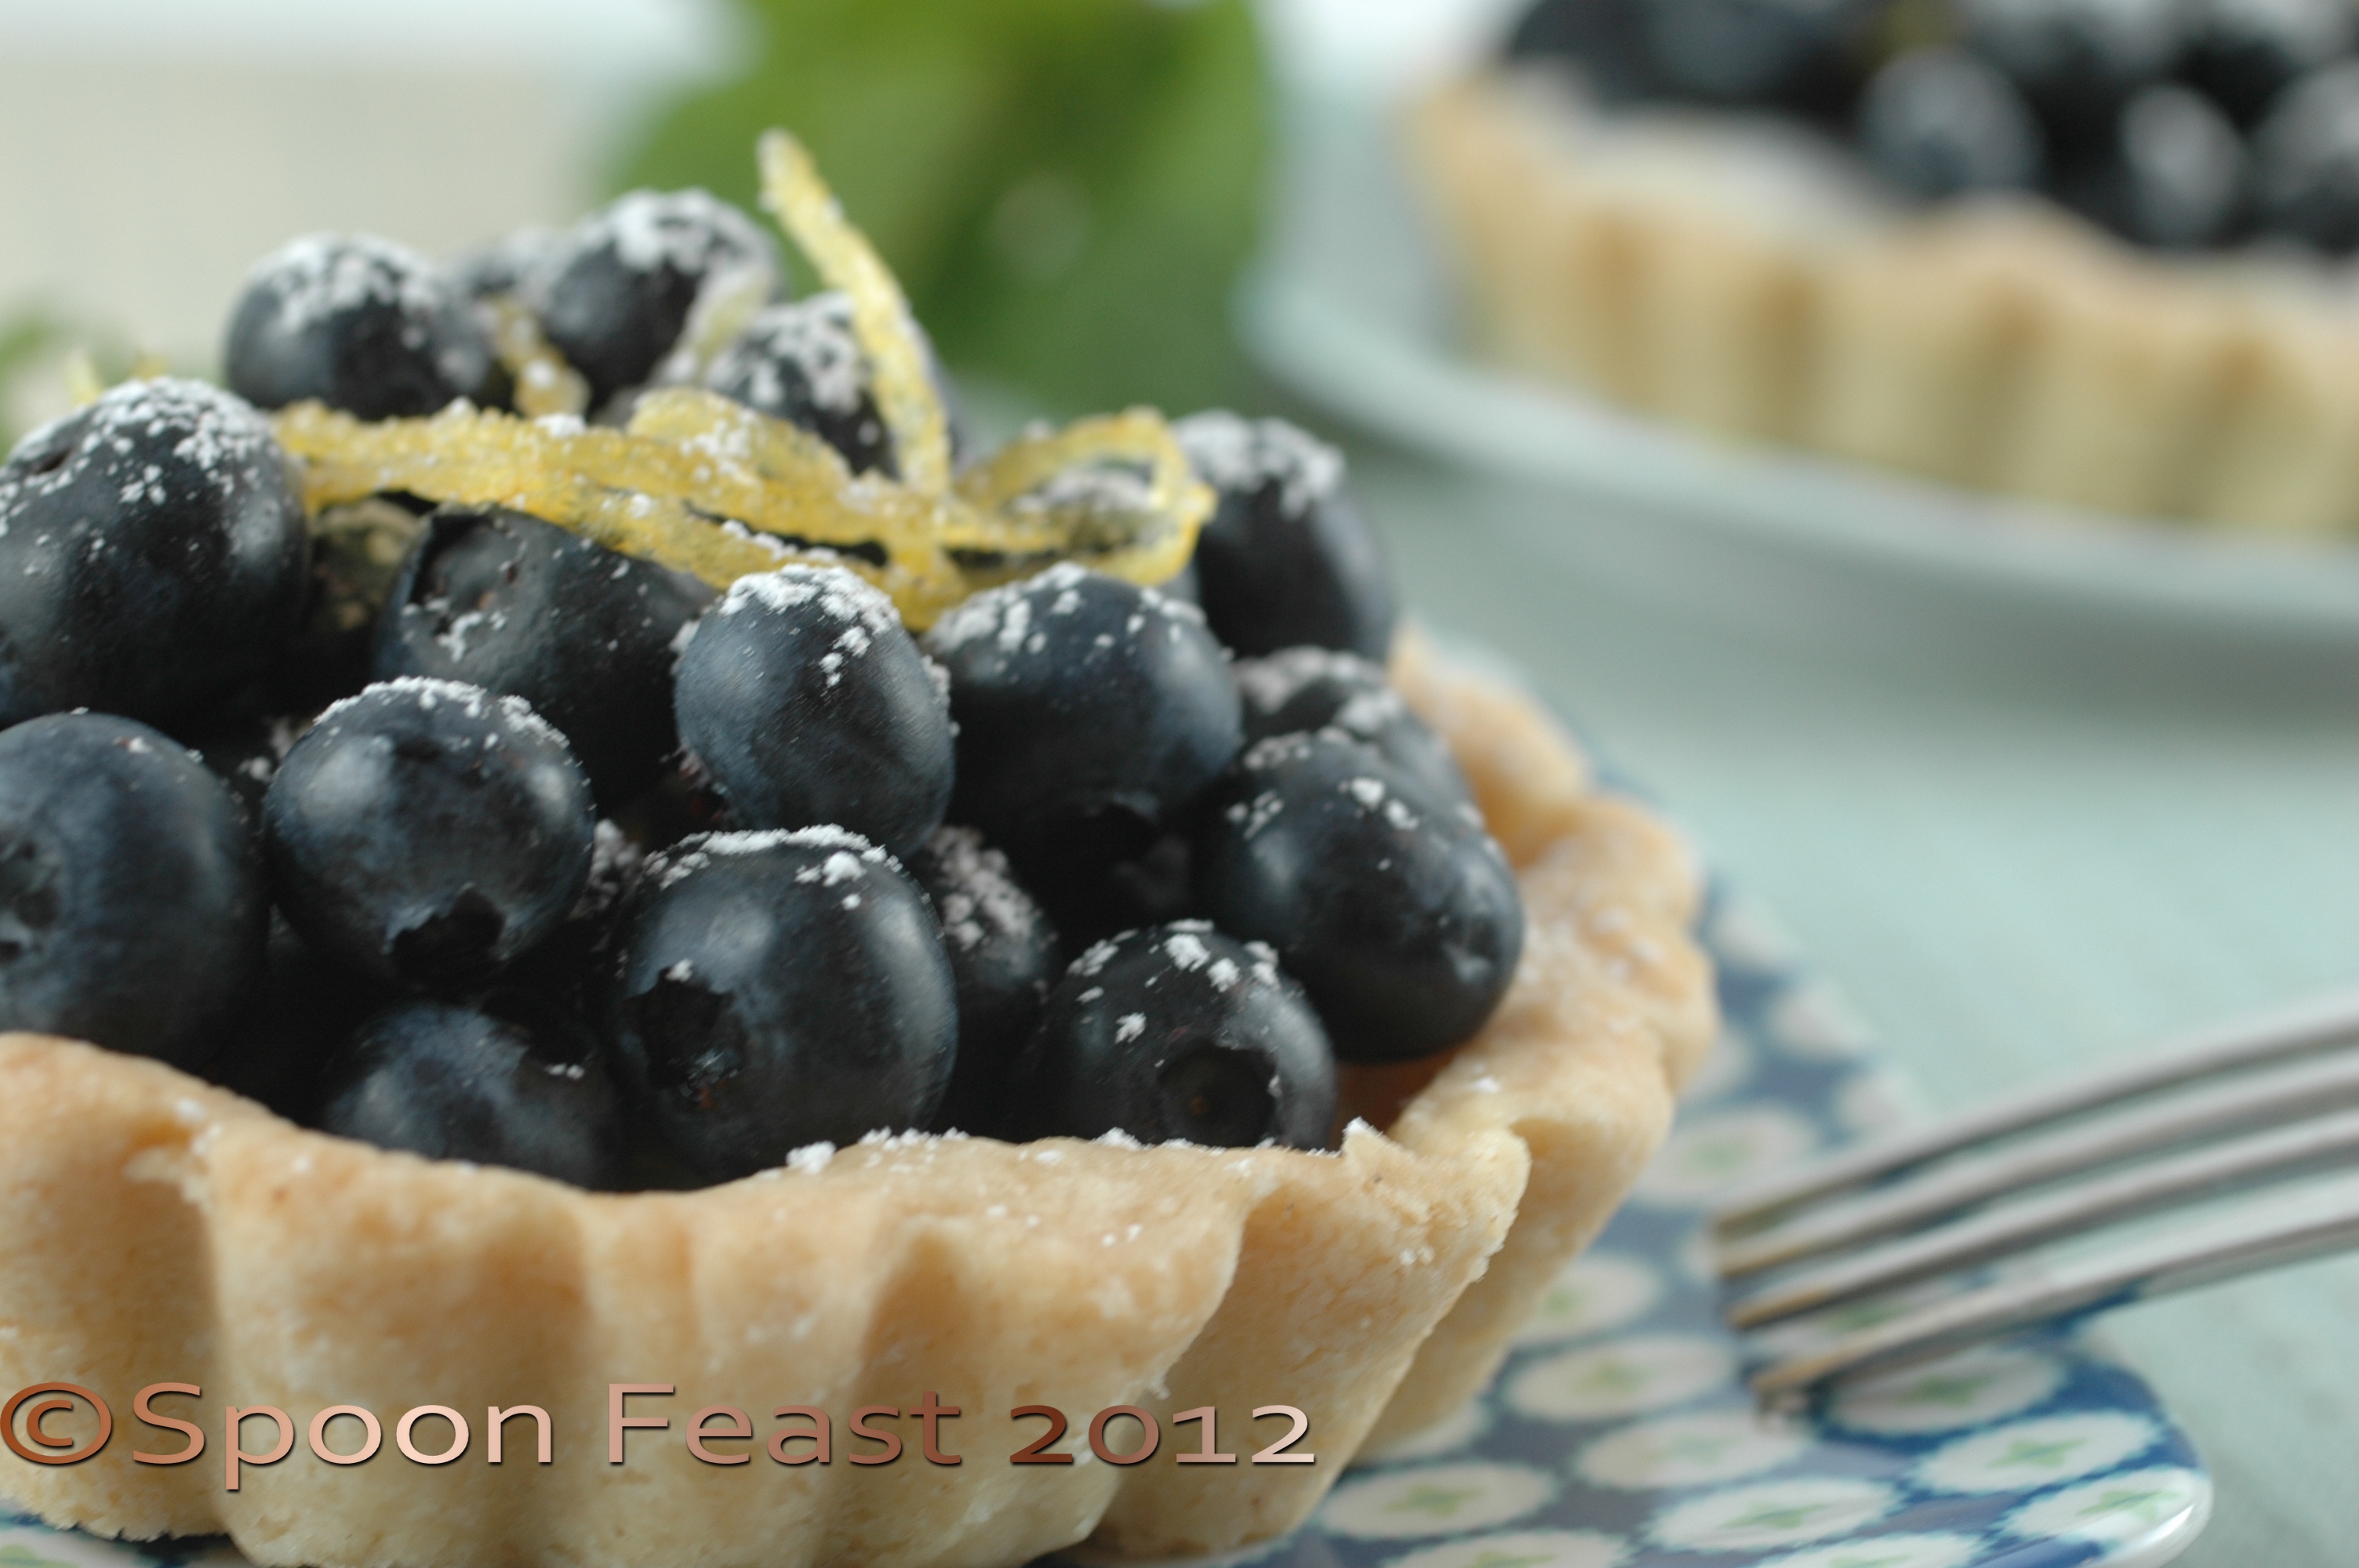
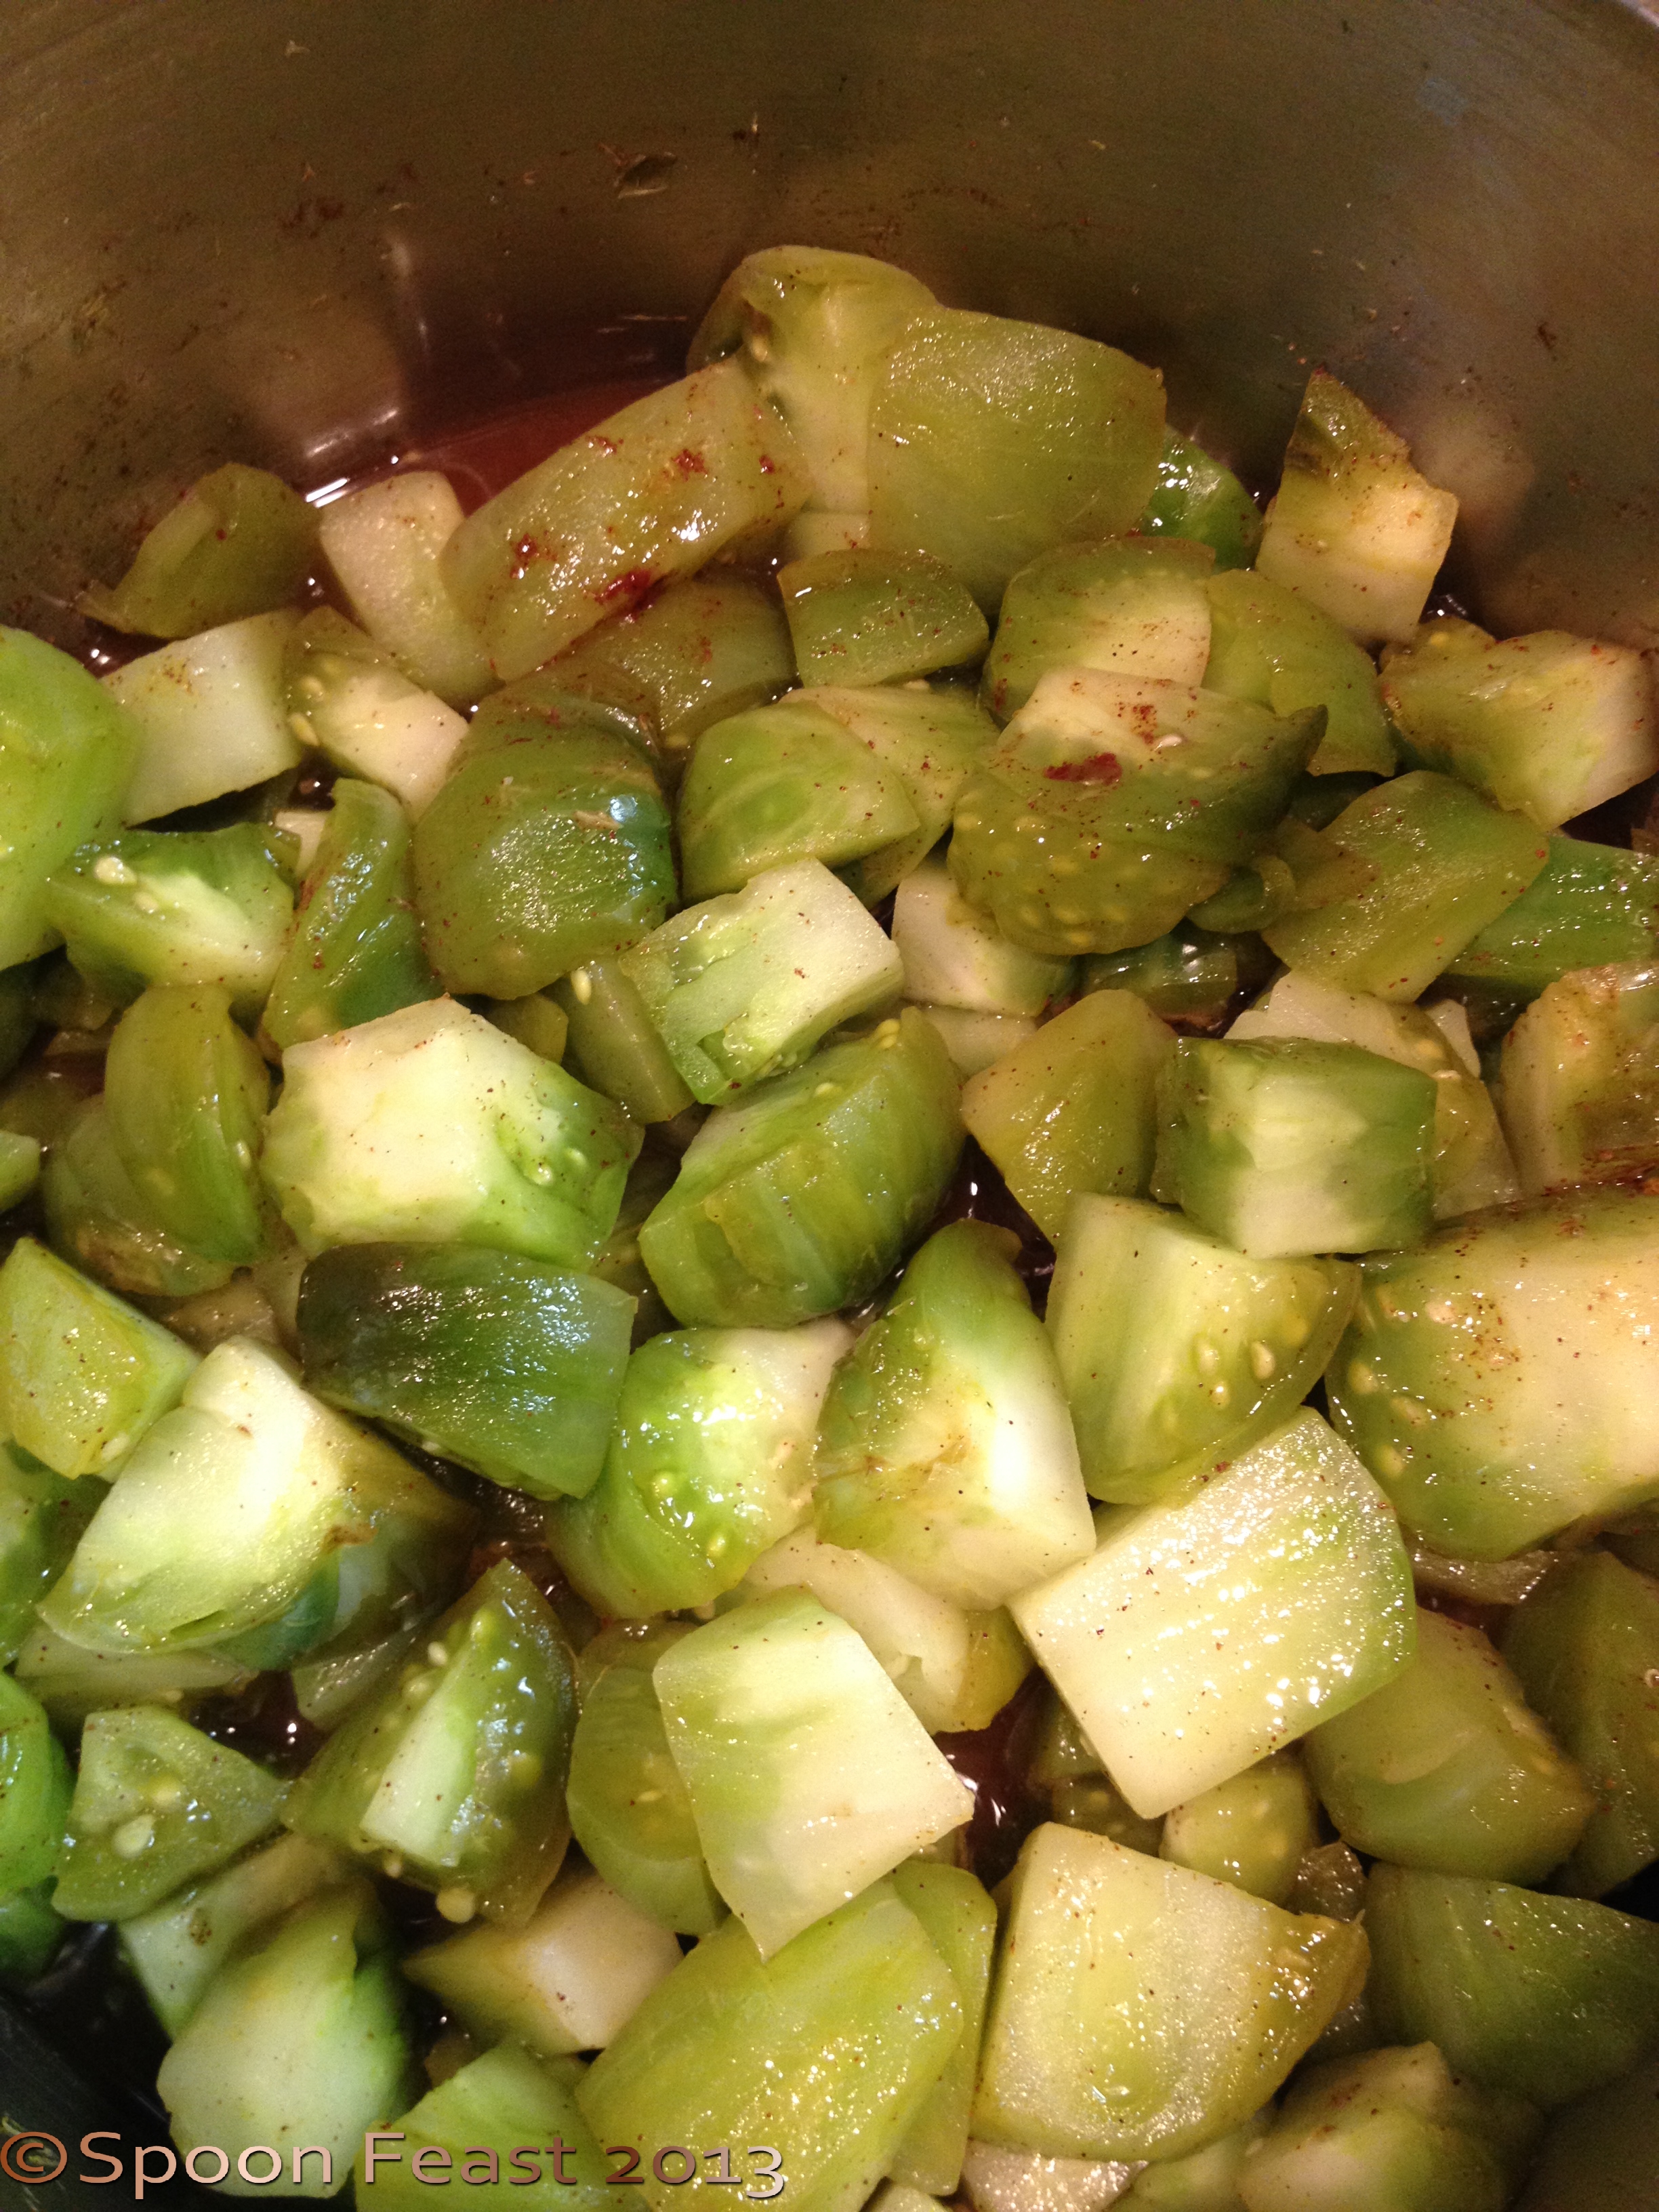
Ready to fill and bake. See the fat? That means you will have a flaky crust.

Fill them just as you would a pie.

If you use a top crust, decorate it with dough cut outs instead of just a pile of dough on top of the filling.

Or use a strusel topping or leave the fruit exposed and glaze with melted apple or seedless raspberry jelly when the tart is done. This puts a “sealing glaze” on the fruit and makes it shiny. The photo of the Plum and Blackberry Almond Tart at the beginning of this post is finished with melted red currant jelly.

Here are some of my thoughts about using other ingredients besides water and butter.

Butter: Fat is fat, at least the melting point of butter is lower than body temperature. Fat provides tenderness and flavor to the crust. I’d rather eat butter than Crisco or lard or hydrogenated oils like margarine. I have yet to try coconut oil.

Water: Some recipes will ask you to use vodka instead of water. It provides a flaky crust too. Alcohol evaporates faster than water therefore creating a flakier crust. Try it if you like. I don’t drink distilled spirits so it never occurs to me to use vodka.

Flour: Use a good quality organic flour. You can use gluten-free flours too. I’m just not too sure how strong the non-wheat flours will hold up in a fluted pan once the outer ring is removed. My experience is most gluten-free baked goods are crumbly due to the lack of gluten.  Not sure how to over come that but since I’m not gluten-free, I use King Arther’s unbleached AP flour and I get pretty crusts.

I do know if I had to go gluten-free, I would miss pie crust, tarts, and good chewy bread tremendously.

No matter what liquid you use, just be sure it is ice-cold. I use a large measuring cup with lots of ice and water and scoop what I need from there. When finished, I pour the cold water into a glass and make lemonade or tea. I suppose you could do the same with vodka. Use lots of ice.

Bake off empty shells by lining with parchment and filling with rice or beans and baking until done. Fill with fresh fillings.

Fill unbaked shells with fruits, custards, fillings and bake until golden and bubbly. Times vary but usually take 45-55 minutes in a 350°F oven.

There are so many finishing and fillings!

Use any left over scraps to make dough cut outs. Egg wash them and sprinkle with sugar. Bake on a cookie sheet until golden brown. Use these on the top of the tarts, place them when the tart is still hot from the oven or serve as a garnish with each serving.

Be creative.

Blueberry and Lemon Tart

Lemon Blueberry Tarts

A delicious blueberry and lemon tart for Fathers Day!

The tart uses a pie dough made with vodka, a filling with lemon curd and cream cheese crowned with a pile of fresh blueberries.

What could be better?

Pie dough first:

Using vodka in pie dough creates a very flaky crust. The alcohol prevents gluten from forming in the flour as the dough is processed. Gluten is what would make the dough tough. Wonderful for bread, but not so nice in a pie crust.

This dough rolls out beautifully. One secret is to chill the dough for at least 2 hours or overnight.

Use a food processor for speedy results. If you don’t have a processor, use the two knife technique or a pastry cutter to blend the fat and flour, then again to add the vodka and water.

Pie dough ready to roll

Pie Dough with Vodka

English: A dough blender; also called a pastry...

English: A dough blender; also called a pastry blender. (Photo credit: Wikipedia)

  • 2 -1/2 cups AP Flour or King Arthur’s white whole wheat flour
    • Measure it separately: 1 1/2 cups and then another 1 cup
  • 1 teaspoon kosher salt
  • 2 Tablespoons sugar (Optional)
  • 1- 1/2 sticks of butter cut into 1/4″ slices to ease combining
  • 1/2 cup Crisco or shortening (Or use all butter)
  • 1/4 cup vodka
  • 1/4 cup water

Method:

Add 1-1/2 cups flour to the bowl of a food processor. Add the salt, sugar (if using), butter and shortening to the bowl. Put the lid on and pulse until the mixture is about the size of peas.

Add the vodka and water, pulse to combine. Do not overwork which will make the dough tough.

Remove the dough from the bowl, separate into two pieces, flatten into discs. Wrap each disc in plastic wrap and chill either overnight or for at least 2 hours.

Roll the dough, line the pastry dish (pie tin, tart molds) with the pastry.

Dock the crusts before baking

Dock the surface of the dough; cover each tin or mold with parchment, fill with rice or beans and bake at 375°F until the crust is golden brown.

Fill with pie weights or dried beans and bake

Cool the shells before filling.

Cool shells before filling

You can always buy pie crust if you don’t want to make it. You can even pie totally pre-made and cooked shells if you prefer.

Lemon Cream Cheese Filling

8 ounces cream cheese

Homemade lemon curd

Homemade lemon curd (Photo credit: Wikipedia) You can also buy it already made.

4 ounces lemon curd

1/4 cup confectioners sugar (powdered sugar; 10x sugar)

2 ounces heavy cream

2 sheets or 1/4 ounce gelatin powder (Bloomed in the heavy cream)

Zest and juice of 1 lemon

Bloom the gelatin. Heat the cream and the gelatin in a double boiler to prevent scorching.  Set aside and keep warm.

Warm the cream cheese slightly in the microwave, it combines better with other ingredients when it isn’t cold. In the bowl of a mixer, add the cream cheese and lemon curd and confectioners sugar.

Mix cream cheese, lemon curd and sugar

Combine until smooth.

Add the warm cream and gelatin, zest and lemon juice to the mixture, mix until smooth.

Fill each of the baked pastry shells with lemon cream cheese mixture, Chill until firm.

To serve, top with fresh blueberries.

Fresh Blueberries

Garnish with a dusting of confectioners sugar and cinnamon.

Use a 5-hole zester to get long thin strips; sprinkle with granulated sugar

Top it all off with a curl of lemon zest and fresh mint leaves.

Dust the berries with confectioners sugar with a small bit of cinnamon over the berries just before serving.

Lemon Blueberry Tarts

Hand Pies

We don’t have birthday cakes around here, we have birthday pies because we like pies better than cake. What better way to have pie than to have a hand pie?

NOTE: No innuendo intended with “hand pies”. That’s what we call them. The guys often giggle and I won’t quote a recent comment. Although they did say the hand pie was better. . .

What is a hand pie?

Cherry Hand Pies

Hand pies are small individual pies you can eat in your hand without a knife or fork or even spoon for that matter. It is highly recommended you do have a napkin.

Hand pies are sweet or savory and  filled with anything your heart desires.

If you think of savory ones like mini calzones and sweet ones like small turnovers, you will have lots of ideas on how to fill your lovely hand pies.

I had these cherries left over from another project and thought hand pies would be perfect since there wasn’t enough to make a regular sized pie.

There were several apples in the refrigerator that needed to be used so I diced and sliced them up and created some apple hand pies too.

Warm apple hand pies are a real treat, eating bite by bite, while sipping a hot cup of coffee.

Here are some Savory ideas:

  • Chicken and cheese
  • Broccoli and cheese
  • Your favorite pizza toppings
  • Spicy pork (from BBQ to Cuban style)
  • Tomato and herb
  • Black bean and corn with salsa and cheddar
  • Scrambled eggs with herbs and cheese
  • Cheese steak and grilled onions

Sweet ideas:

Any fruit pie filling from apple, cherry, blueberry and anything you can dream up.

What ever style you make, make sure you have the fillings cold.

You can buy the ready-made pie dough or you can make it. Since it is so ridiculously easy, there is no reason not to make it yourself.

Basic Pie Dough

  • 1 cup plus 2 tablespoons all-purpose flour
  • 1/2 tsp kosher salt
  • 1 teaspoon sugar (optional for sweet pies)
  • 8 tablespoons or 1 stick or 4 ounces of butter cut into 8 pieces
  • up to 1/4 cup ice-cold water

Best method is to use a food processor. It is simple and super fast.

If you don’t have a food processor, you can use an old-fashioned pastry cutter or even two knives to cut the butter into the flour.

Add the flour, salt and sugar if using to the bowl, cut in the butter until the mixture resembles coarse corn meal.

Add the water a tablespoon at a time to bring the dough together. You may need all of the water, or just some of it and if the dough feels dry, you may need to add more.

Note: Some people like to sub half of the water with vodka or white vinegar claiming it makes a very flaky crust.

Try it and you be the judge.

As long as you do not overwork the dough by kneading it or over mixing, and you can still see bits of fat in the mix, your dough should turn out flaky. Just mix the ingredients until they come together, and keep the dough cold.

You are not making bread so don’t knead!

After mixing the dough, flatten the dough into a disk, wrap and chill for about 30 minutes.

To make the hand pies, roll the dough, cut desired shapes. I chose to use round cutters to make half-moon shapes. You can use whatever shape you want.

Here are a couple of filling recipes:

Cherry Hand Pie Filling

  • 1 15 oz can sweet canned Big cherries reserve juice
  • 1/2 cup dried tart cherries
  • 1/4 cup sugar
  • 2 Tablespoons instant tapioca
  • t teaspoon almond extract
  • pinch of salt

Re-hydrate the dried cherries in cherry juice from the canned cherries. Mix everything together in a bowl and allow to sit for 15-20 minutes for the tapioca to soften a little.

Roll out the dough, cut into shapes, egg wash, fill, fold and pinch the seams closed tightly.

Egg wash the outsides of the pies and sprinkle with sugar.

Bake in a 350°F oven for about 20 minutes or until the dough is golden brown.

Apple Hand Pie Filling

  • 1# Granny Smith Apples, peeled and diced into medium dice
  • 1/4 cup granulated sugar
  • 1 teaspoon ground cinnamon
  • 1/2 teaspoon ground ginger
  • 1/4 teaspoon kosher salt
  • 1/8 teaspoon ground cloves
  • 1/8 teaspoon ground nutmeg
  • 1 Tablespoon instant tapioca
  • 1 teaspoon vanilla extract

Mix all ingredients in a bowl and allow to sit for 15-20 minutes. Stir occasionally to mix the juices as they develop. Make and bake the hand pies as described above.

The hardest part is keeping them around until they cool; hands come from all directions and these lovely morsels disappear almost instantly!

Cut the shapes and place the filling in the middle

Fold pies in half and pinch to seal; egg wash and sprinkle with sugar

Apple hand pies