Caesar Salads have long been popular both in the restaurant scene and at home. I love a good Caesar Salad especially if you add some 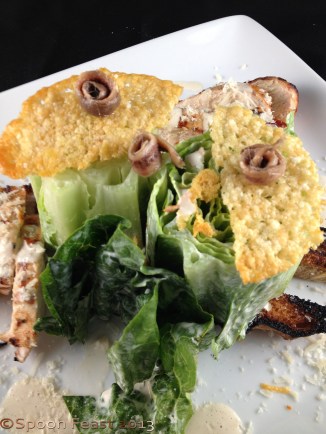 grilled chicken to it and lots of Parmesan cheese.
The dressing here is a low-fat version of a traditional Caesar. This maintains the flavor of the dressing the same as a traditional Caesar dressing, yet with far less fat. So you will find a stray from the traditional Caesar Dressing ingredients, but try this, you’d never know the difference!
Plating the salad becomes a real presentation. Take your time and you will be rewarded with not only a nice visual but also something that will satisfy your taste buds on many levels.
For the Salad:
- Romaine Hearts – each one makes 1-2 servings; 3 for an appetizer or side salad
- Keep the lettuce in tact!
- Good quality bread for the “croutons”
- Parmesan cheese, shredded or shaved off a block with a vegetable peeler
- Anchovy fillets – white anchovies are a gourmet treat, but everyday anchovies will do also
- Dressing (recipe follows)
- Add Grilled chicken or shrimp if desired.
To make the dressing:
- 1/2 cup low or non-fat mayonnaise
- 1/2 cup low or non-fat plain Greek yogurt
- 1/4 cup shredded Parmesan cheese (use the best quality you can buy!)
- juice from 1/2 lemon
- 1 tablespoon Worcestershire sauce
- 4 oil packed anchovy fillets (or more if you like)
- 2 cloves fresh garlic
- 1 -2 teaspoons fresh ground black pepper
Put it all in the blender and process until smooth. Taste it, you may want more anchovy or garlic or cheese. If you do, add it and process again until smooth. If it gets too thick, thin with water.
Wash the lettuce, carefully remove any dirt or debris while keeping the head in tact. Turn the romaine heart upside down to drip dry or pat it dry with a paper towel.
Holding the romaine heart upright in a clean bowl, drizzle the leaves with the dressing, use about 1-2 ounces per heart.

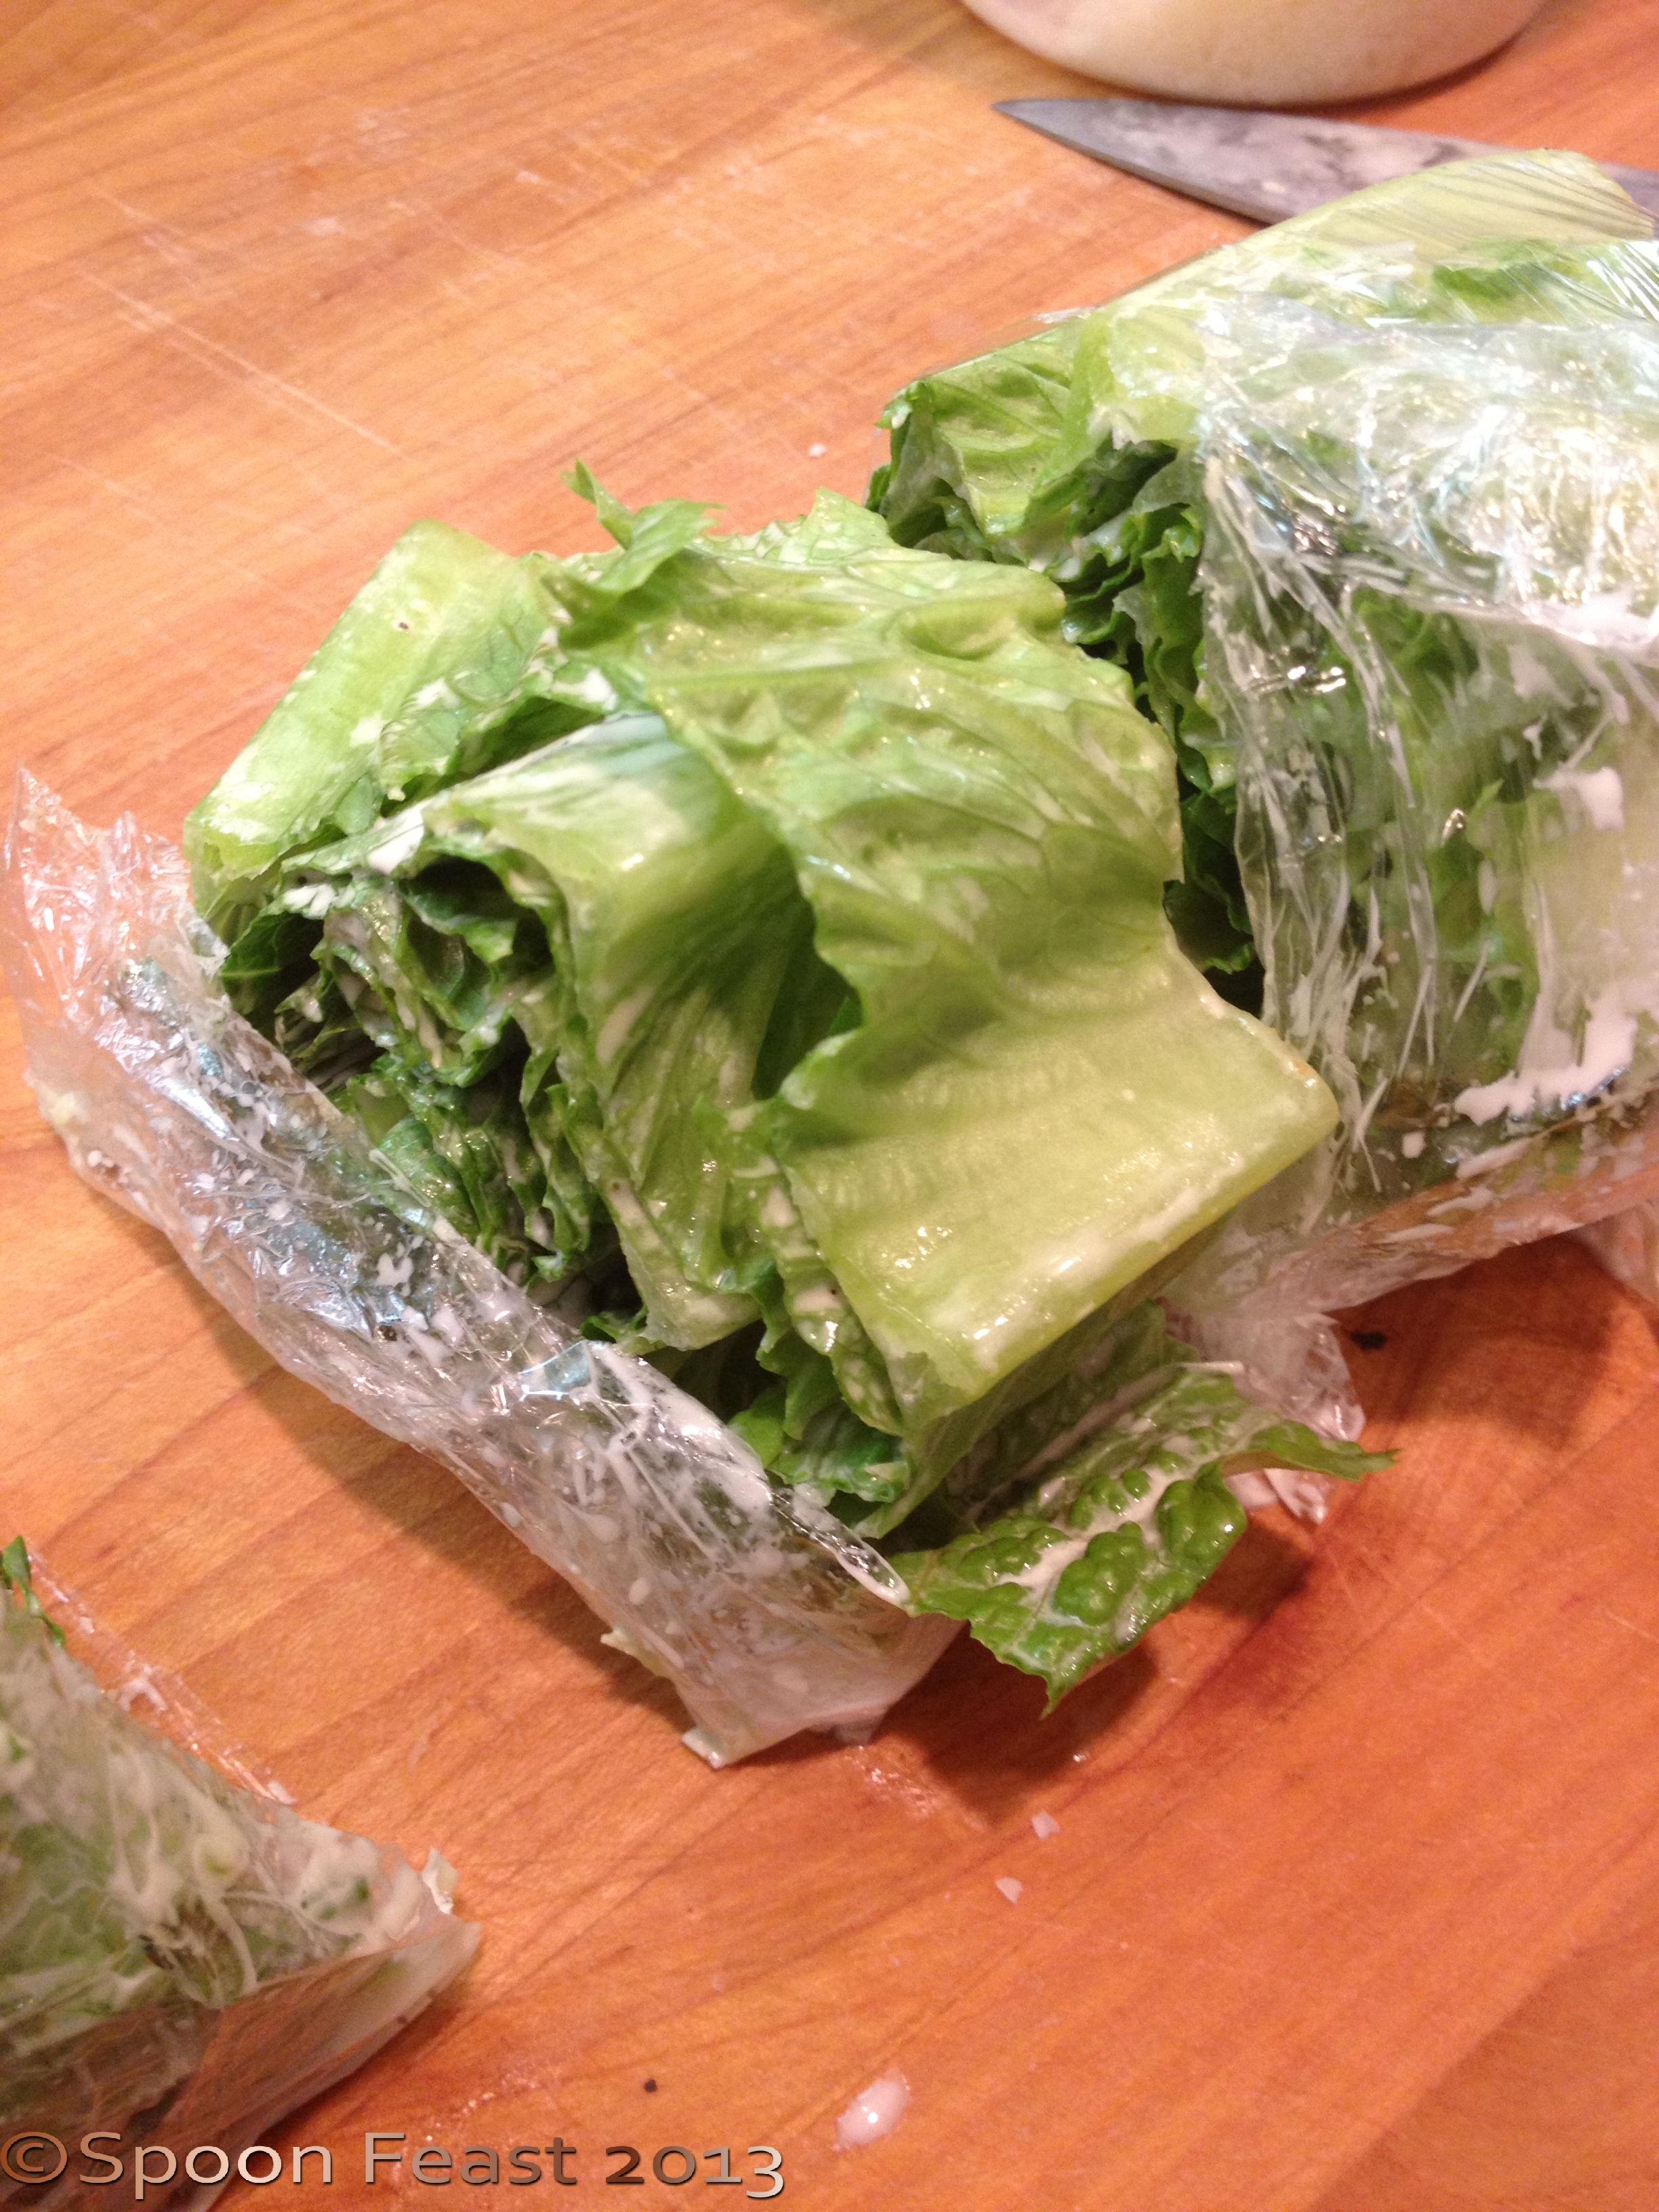
Wrap tightly into a log shape
Wrap the lettuce tightly in a log shape in plastic wrap. When you do this, arrange the leaves so they don’t break. You want to be able to wrap it together really tight.
Refrigerate for at least 30 minutes.
Brush the bread with olive oil, grill each side for 1-2 minutes.
Roll the anchovy fillets into ‘mini-flowers’.
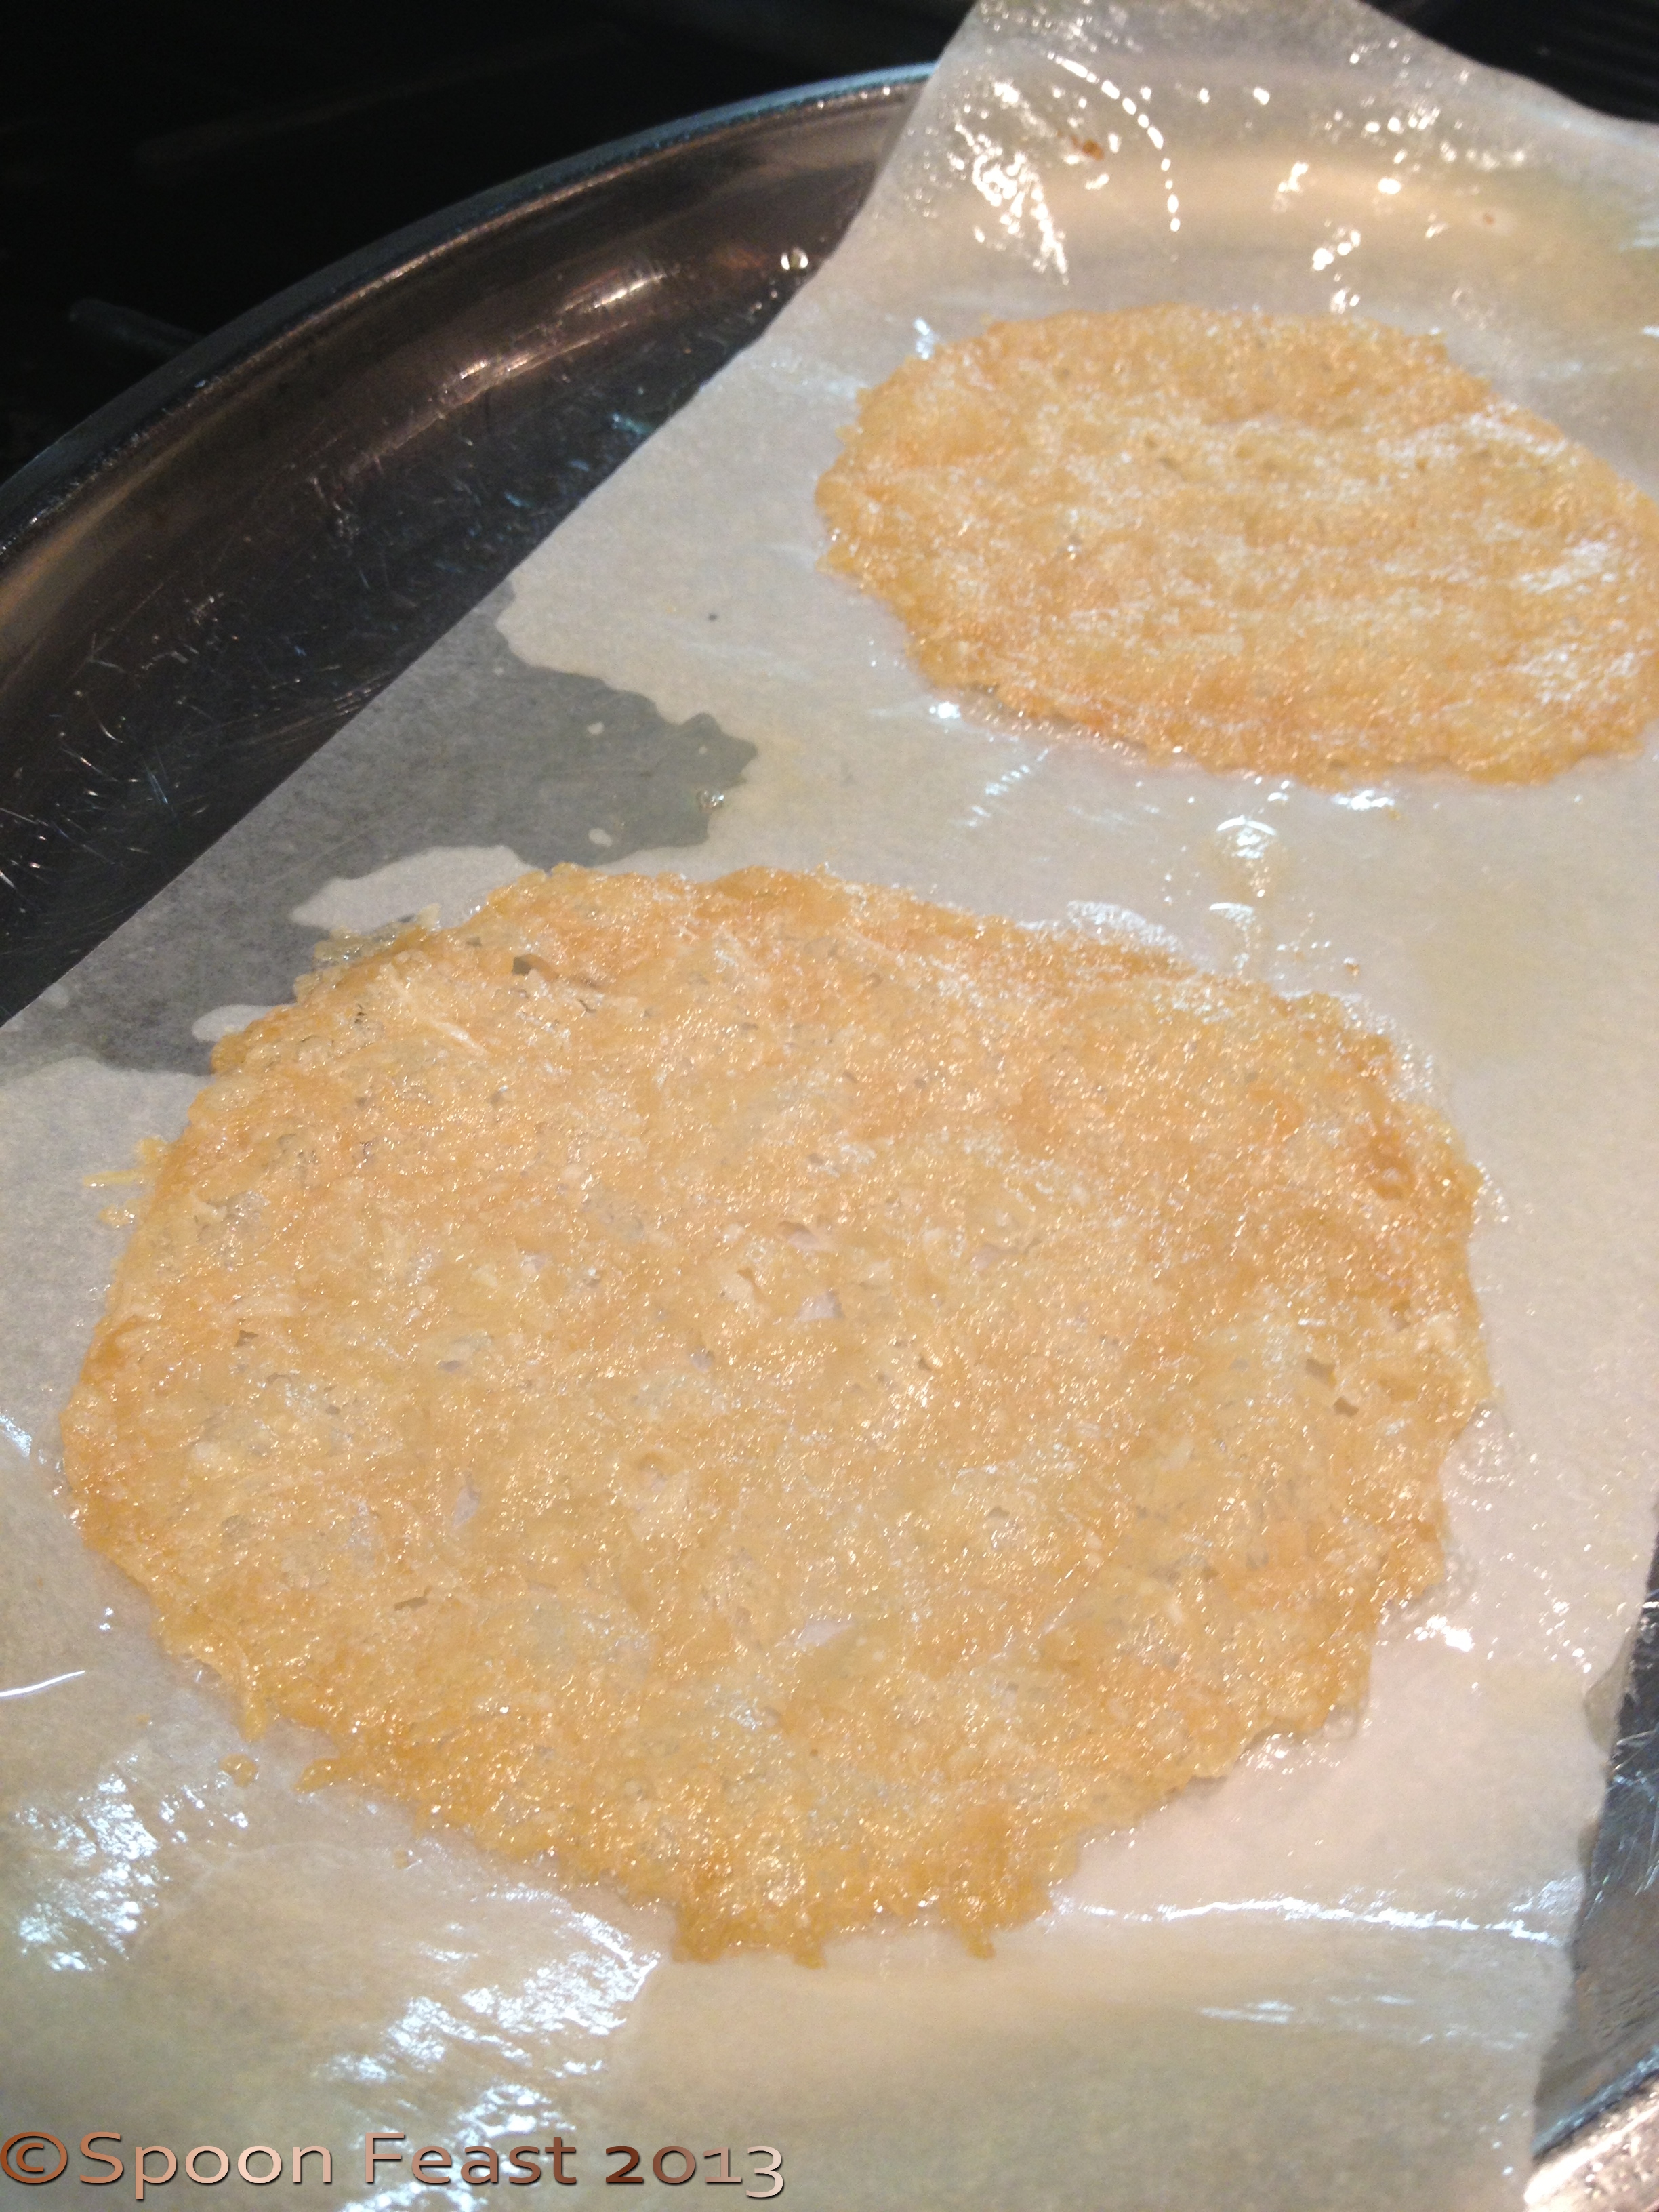
Make Crispy Parmesan Chips
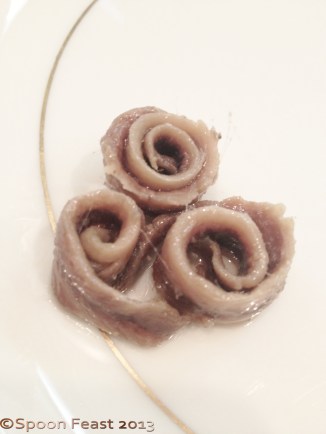
Rolled anchovy fillets
Make some crispy Parmesan chips by placing freshly shredded (grated cheese does not work) onto a piece of oiled parchment in a circle.

Use a ring mold for even shapes
Use a ring mold to make even sized circles. Bake them in a 350°F oven for 5-10 minutes or until they turn golden brown.

Remove when the cheese gets golden brown
Remove from the oven and using a spatula, remove them from the parchment immediately as the cheese cools rapidly. At this point, they will retain any shape you give them. but you have to move fast, once they cool they become crisp.
For this presentation, instead of making croutons, I cut the bread into a long rectangle, oiled it and then put it on the grill for a few minutes.
Plate Presentation:
Lay two lengths of bread on the base of the plate.
With the plastic wrap still on the lettuce, slice the lettuce into rounds about 2″ wide.

Slice the lettuce with the plastic wrap still on. Of course, remove it as you bring the lettuce to the plate.
Remove the plastic wrap and place them on the bread. Stand them up with the cut side down. Do this carefully and they will hold together.
Place a crispy cheese round on top of the cut lettuce, then add the rolled anchovies.

Place either the grilled chicken or shrimp along side of the bread, sprinkle with Parmesan. Drizzle some dressing onto the plate and serve.
The presentation is nice because when you want to eat the lettuce, it falls apart easily with your fork and does not require further cutting unless you cut them too wide. 2 inches is the perfect size for this presentation.
Enjoy this Caesar!

I was reading a recipe the other day on the Food Network website regarding a Massaged Kale Salad from the Aarti Party Show.
Kale is on the edge of being overdone but this is worth exploring. Give it a try before you get sick of eating so much kale!
 Previous thoughts had me thinking kale was too tough to eat raw. A quick saute, dip in hot oil, plunge into a hot oven or dropped into soup is how I prepared it before this recipe caught my eye.
So I tried it. Massage your kale, sounds kinky right?!
I had to come up with another way of massaging the kale as not everyone likes to have their food handled to this extent by someone else’s bare hands.

Use a dough hook instead of your hands
Bare hand contact can be a health issue if the person touching the food does not wash their hands correctly or is carrying some kind of germ.
While the recipe wasn’t followed, the massage technique was. The result is an addicting, tender kale salad that can be dressed in so many ways.
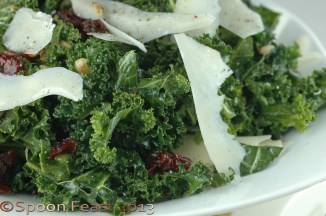
After massaging the kale, create your salad. All you need to add is other ingredients and the salad is already dressed.
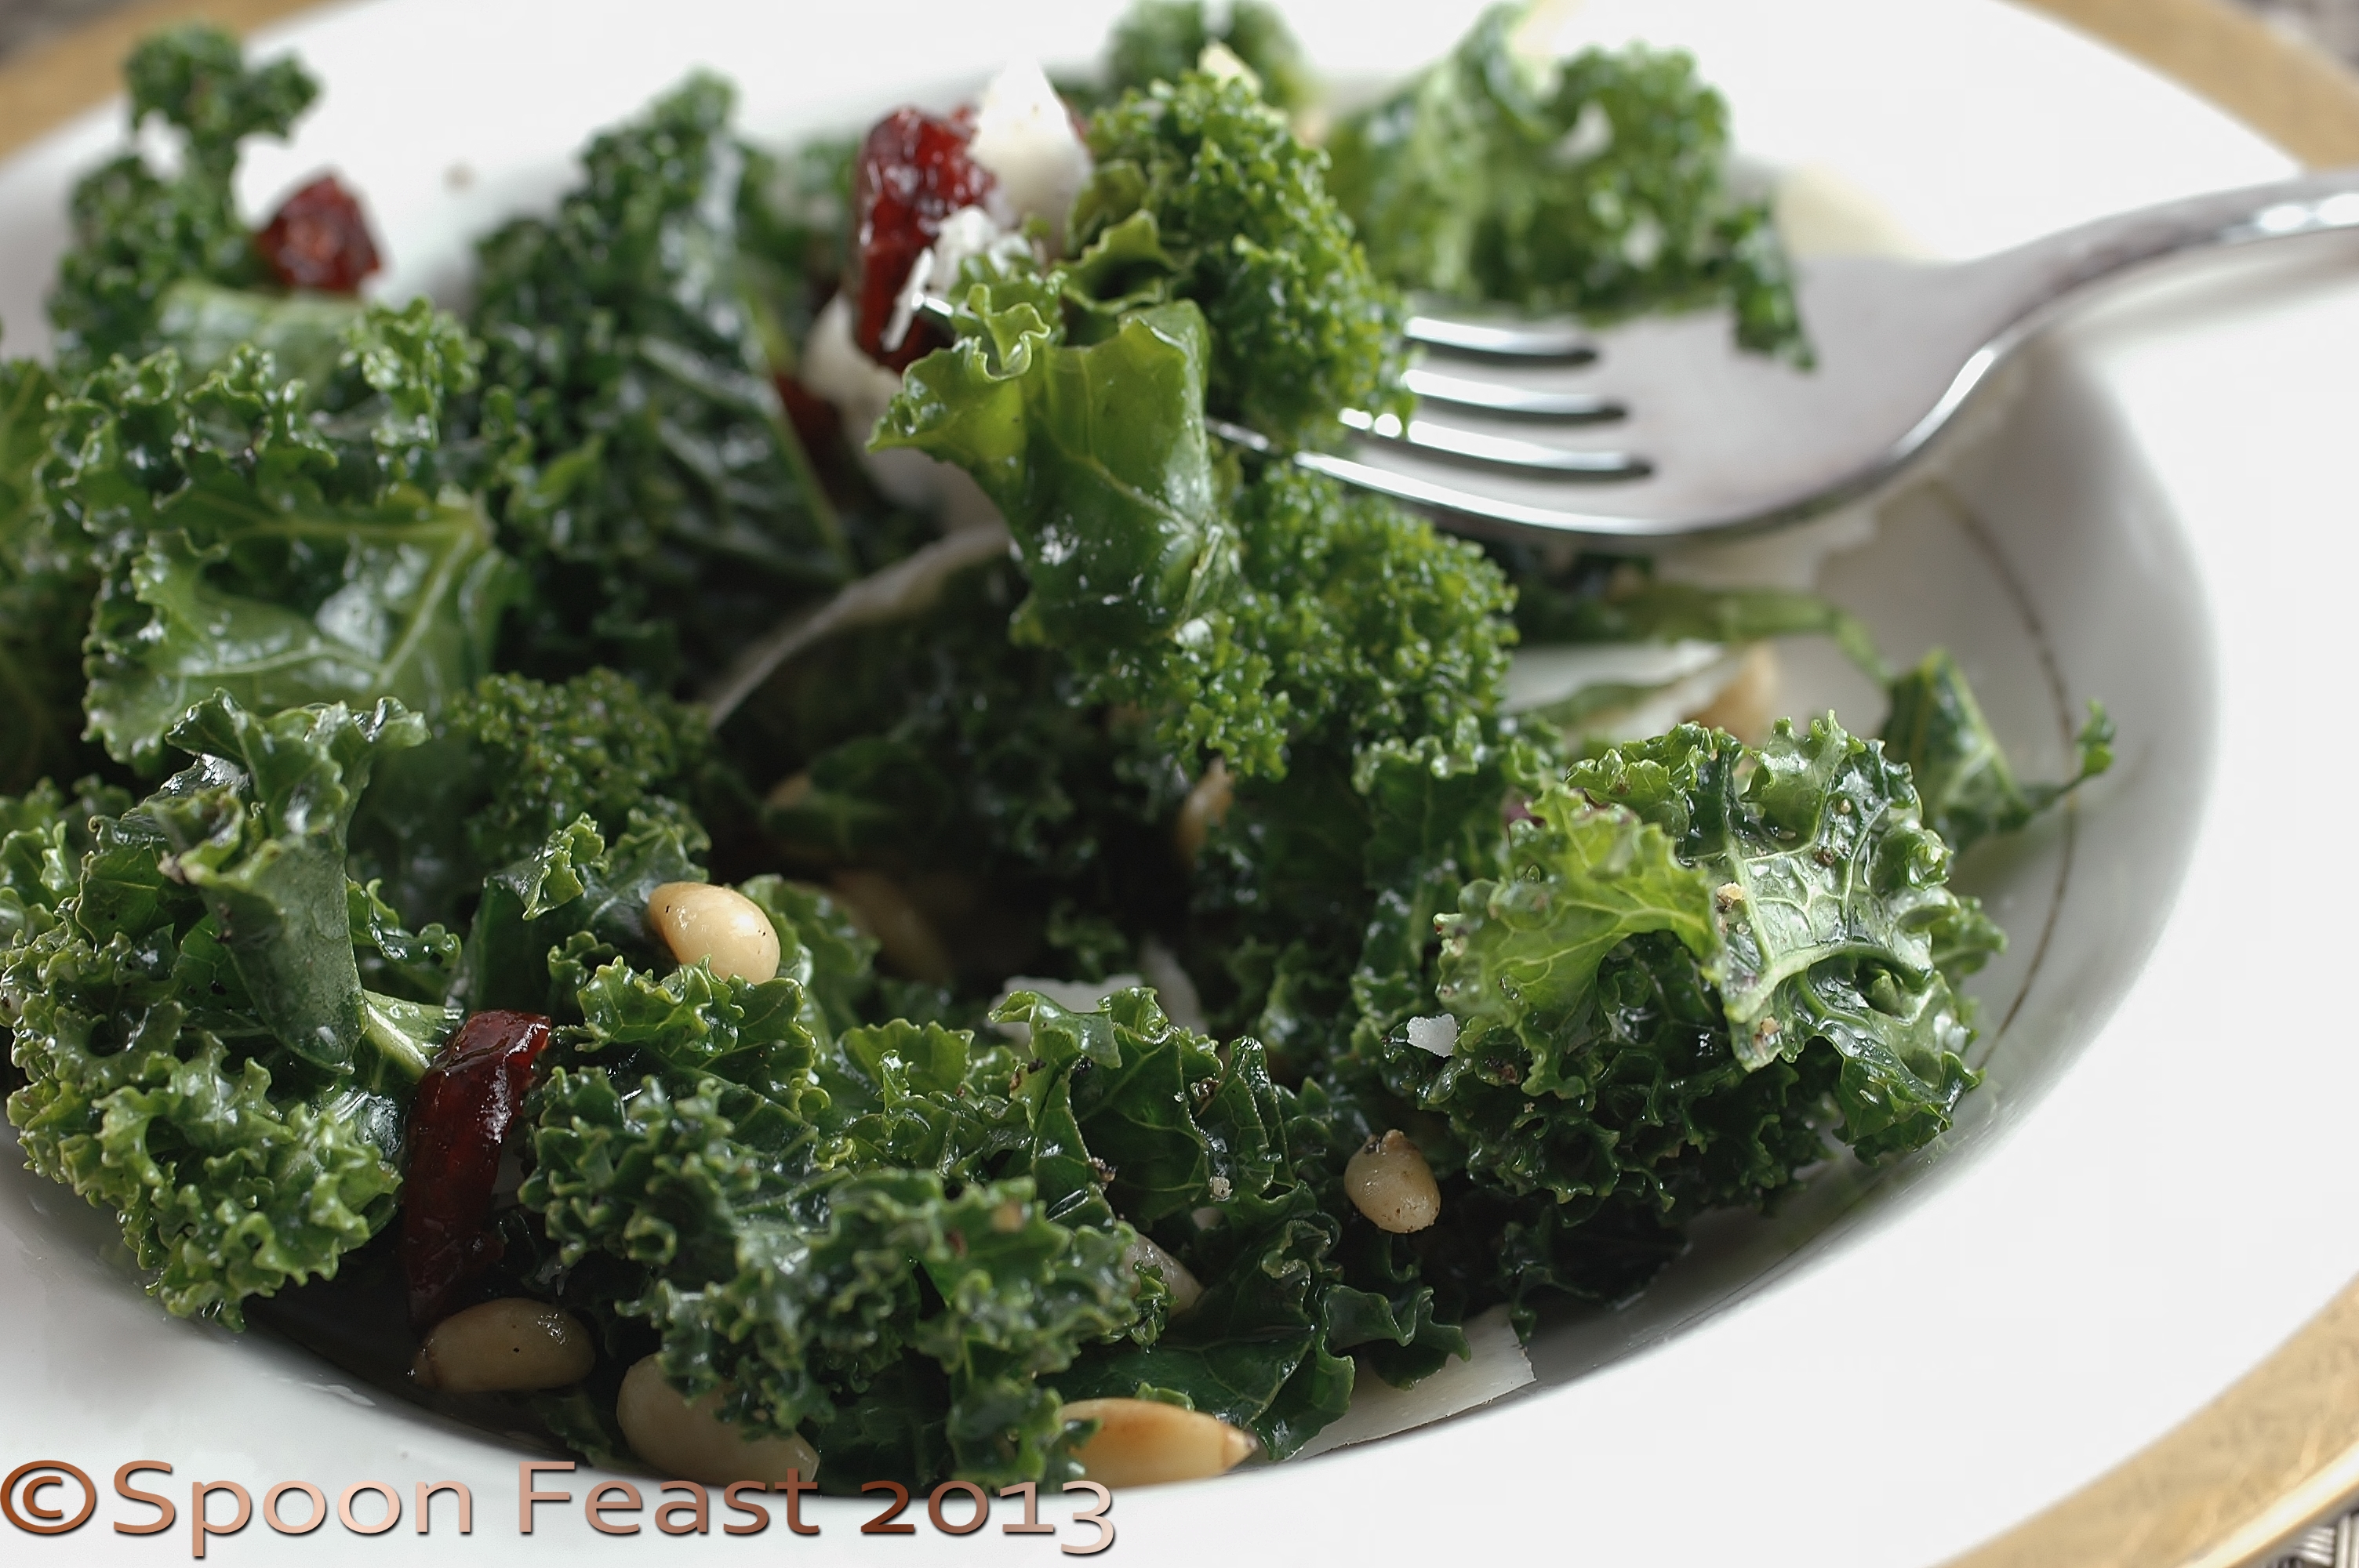
Choose a toasted nut and a favorite fruit, fresh or dried. Add some cheese and you can go forever with the combinations that can be created as additions for this most excellent salad.
This is what I did last night:
- 1 pound kale
- Juice from 1 fresh lemon
- 1 tablespoon extra virgin olive oil
- A light sprinkle of salt and fresh black pepper
- 1/2 cup dried cranberries
- 1/2 cup shredded Parmesan cheese
- 1/4 cup toasted pine nuts

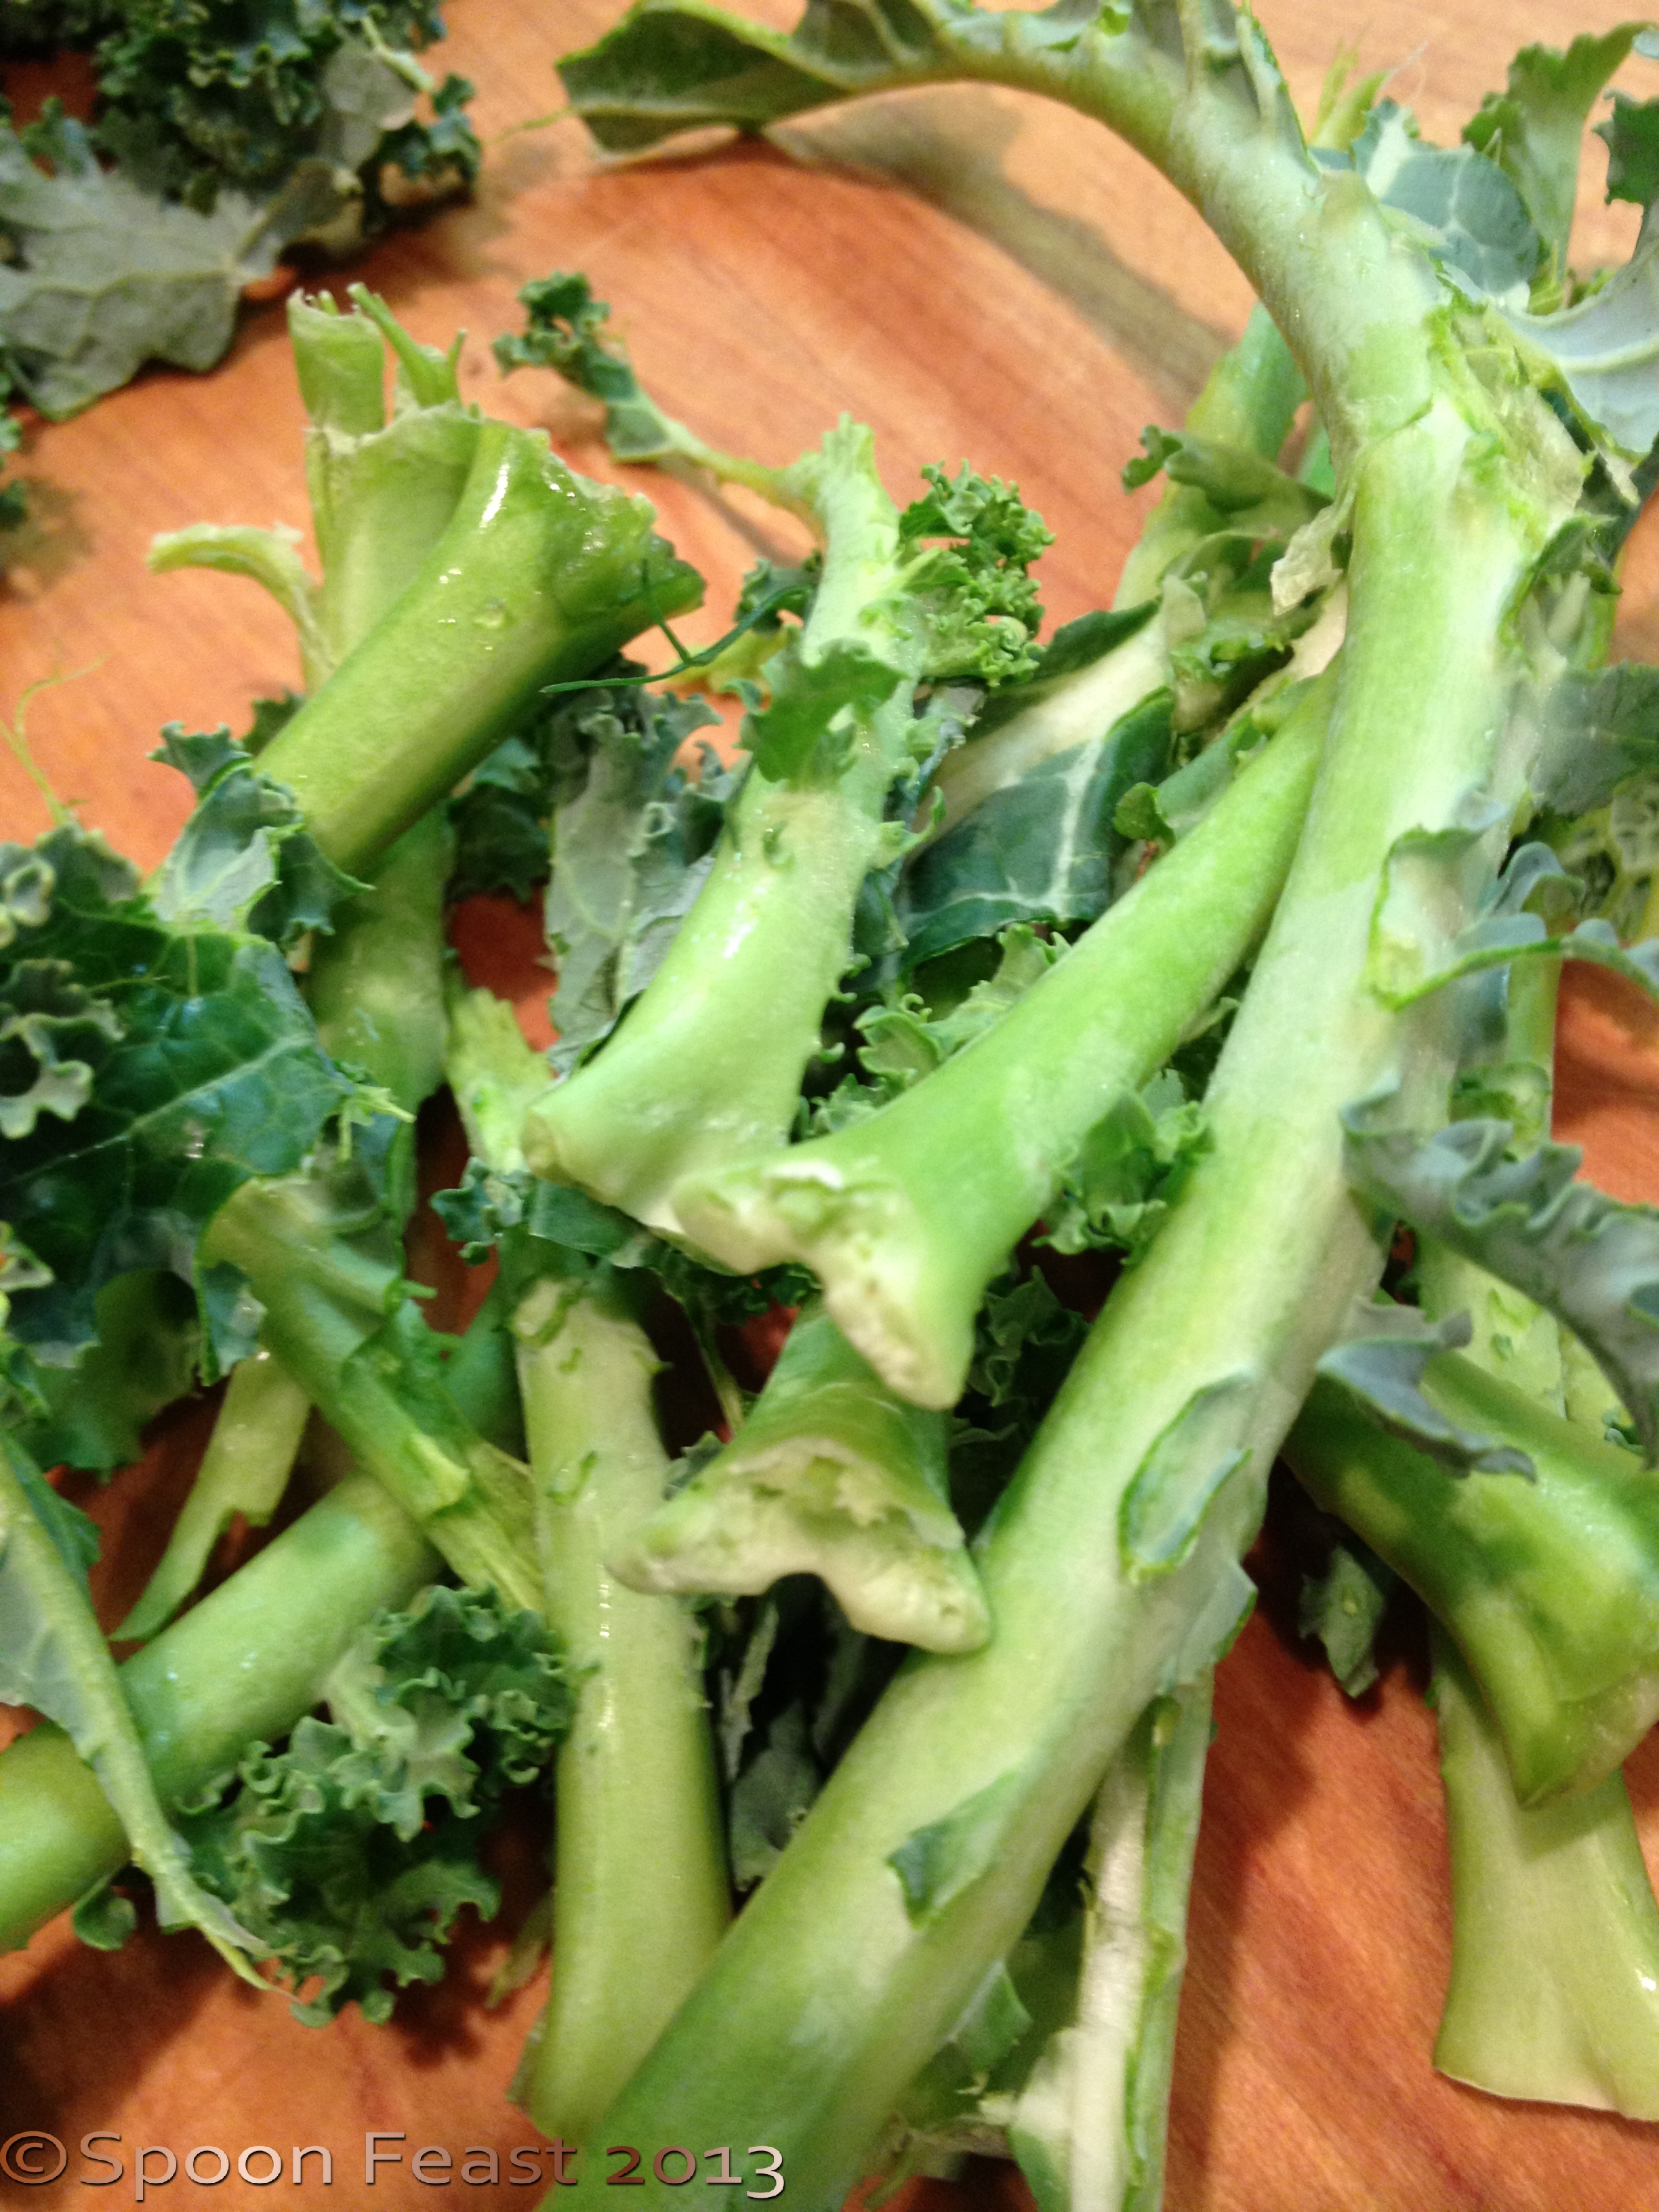
Trim the stems from the leaves
Trim leaves from the stems, wash thoroughly in cool water to remove any garden friends, sand and dirt.
If the kale is very sandy or has a lot of soil on it, soak it in a deep bath of salty water. Dip and lift the kale from the water so the soil is left behind in the bottom of the soaking bowl. You may need to do this several times to get rid of all the dirt.
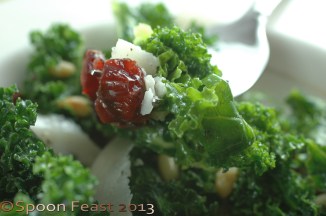
Chop the kale leaves small, but not too tiny; bite size is perfect.
Place the chopped kale into a bowl. Drizzle the kale with lemon juice, olive oil, salt and pepper. The amount you use depends on how much kale you use. Only use enough to lightly coat the leaves, you don’t want anything on the bottom of the bowl.
Using your hands (washed of course! and wear gloves) or in a stand mixer on low with the dough hook, massage the greens for 2-3 minutes.
You will notice the leaves changing texture, becoming more tender and turning a brighter green as well.

Peel Parmesan into the salad with a peeler.
After 2-3 minutes of massage, add toasted pine nuts, dried cranberries and use a peeler to shave Parmesan into the salad.
The above amounts can be adjusted to your liking.
Try other fruits, nuts and cheese in this salad, avocado is amazing too.
Top the salad with beef, grilled chicken, shrimp or fish to make it an entrée salad.
Serve and enjoy!
 This salad was so good, I came back down and scarfed another bowl in the middle of the night and another after breakfast.
Now I need to go buy more kale.
What a marvelous crisp and tasty fresh salad! Crisp pears, shaved thin, spicy arugula, earthy bleu cheese, crunchy hemp seeds and for dressing, simple drizzle with fresh lemon juice and extra virgin olive oil.

Grab a pear
Pear, Roquefort, Arugula Salad
1 small handful fresh arugula for each salad bowl
1/2 fresh ripe pear, any variety
1-2 tablespoons Roquefort or any bleu cheese for each serving
1 tablespoon toasted hemp seeds
1/2 lemon, please, not bottled juice!
1 tablespoon extra virgin olive oil
Place the arugula into a bowl. Slice the pear and place slices over arugula.
Crumble bleu cheese over, top with toasted hemp seeds (Optional)
Drizzle with lemon juice and olive oil as dressing.
Refreshing and delicious!

Pear and arugula salad

- The Gift of Pears (spoonfeast.com)
 My crazy friend Joanie gave us a remarkable gift of pears. I was immediately struck at their shapes and colors. Since they were a bit firm, the pears were placed into a bowl to ripen.
While they were still firm, I shaved on onto a salad, as they ripened, they became more sliced. One of our favorite salads now days is pear, Roquefort and arugula salad, which is a post soon to follow this one.
We have enjoyed the pears, both as a centerpiece and as tasty delights. I’ll even wager there is a pear tart in the near future.
This is how we enjoy the pears in the early evening while we sip our wine and watch the sun go down.
Sliced pears, Roquefort, walnuts, cashews, local honey, cut from the comb and berries or dried fruits like apricots or cranberries.
Enjoy!


This slideshow requires JavaScript.
- It’s a Pear-Palooza! (cynthia-david.com)
- Roasted Caramel Pears (carriefehr.com)
- Pears (themodernhomekitchen.wordpress.com)
- Weekly Winner: A Midweek Trip to Provence … on a plate (donnasquickqi.wordpress.com)
This weekend turn the grill on and have some tasty treats. Aside from the typical dogs and burgers, I am going to suggest a grilled vegetable salad perfect for a weekend.
- Zucchini
- Yellow Squash
- Eggplant – sliced and sprinkled with salt. Allow to sit and drain for 10-15 minutes. Rinse and marinade.
- Red Peppers
- Asparagus
- Onions
- Portobello Mushrooms
- Grape or cherry tomatoes
Slice all the vegetables; keep them separate in zip lock bags.
Add enough vinaigrette of your choice (my suggested recipe follows) to coat each slice evenly. They do not have to swim in the marinade.
Each vegetable has different cooking times so we want to place each kind of veg on the grill at the same time. This will help prevent you going bonkers while grilling if they were all mixed up.

Grill the vegetables, like items together.
Grill about 5 minutes or until each slice has a nice grill mark.
Remove from the grill and place into a large bowl. If the veg needs to be sliced after grilling, set those aside so you can cut them before combining the vegetables.
Portobello, red peppers and eggplant and asparagus will need to be cut into bite sized pieces after grilling.

Saute tomatoes; they are too small to grill
Cherry tomatoes are too small to grill so give them a quick saute in a hot saute pan with a bit of olive oil, salt and pepper. Blister them and they are good to go.
Toss all the grilled vegetables in a large bowl. Add additional dressing if necessary.
Garnish with fresh basil leaves.
This salad can be served either warm or cold or room temperature.
Just don’t let it sit out longer than 4 hours.
Basic Balsamic Vinaigrette
- * 1 clove garlic, minced fine
- 1 shallot or sweet onion, minced fine
- 1 Tbsp Dijon mustard
- 1 tbsp sugar
- ½ cup balsamic vinegar of good quality, can be white or dark
- 2/3-cup olive oil
- 1/3-cup vegetable oil
- Salt and pepper to taste
Mix all ingredients except oils. Slowly add oils while whisking to emulsify.
The dressing will separate and will need a whisk or two before serving.
If you blend the oil in with a food processor or blender, the dressing will be more stable and will not separate.
*Garlic is optional. Dried minced garlic is alright to use as long as you give it time to re-hydrate

Artichokes from the market
I found the most amazing artichokes in the farmers market this week. They were huge and hybrids. These artichokes did not have any of the thorns or much of a “choke’ inside either.
The woman at the market asked me “how do you cook them so they are tender?”
Steam them.

I had to find a domed lid to fit the steamer; the artichoke was so big!
All I did with this artichoke is cut the stem so it would fit in the pot with the lid on it and steam. It had to be steamed for about an hour and 15 minutes. Once the water came to a boil, the heat was turned down to low. You will need to check the water level to be sure you don’t burn up a good pot.
If you find the non-hybrid type that have the small thorn on each leaf, you will need to use the kitchen shears and clip them off. After your cut a few, wipe the edges with a cut lemon to prevent the artichoke from turning black.
Any cut you make on a raw artichoke, swipe it with a piece of cut lemon to preserve the color and keep it from oxidizing.
You can tell the artichoke is done cooking when the leaves pull off easily and a knife is easily inserted into the base of the artichoke with no resistance. Do this from the bottom so as not to ruin the presentation.
There are a lot of things you can do with an artichoke but today, I am just steaming it and serving it with a couple of sauces.
We will eat it as an hors d’ oeuvre with aperitif before dinner. Serving like this is also an interesting way to put out a snack when guests and friends come visit. We usually gather in the front yard about an hour or so before dinner and friends join us for great conversations, drinks and sometimes an hors d’ oeuvre or two.
A word of caution, artichokes make cheap red wine taste great and good red wine taste awful. So if you are serving artichokes, serve a decent inexpensive red wine.
Please don’t go down as low as Trader Joe’s Two Buck Chuck. That is truly awful stuff. The only thing that makes that better is pouring it down the drain.
The sauces:
Yogurt Sour Cream Sauce
- 1/4 cup plain Greek yogurt
- 1/4 cup sour cream
- 2 tablespoons mayonnaise
- 1 teaspoon smooth Dijon mustard
- 1 teaspoon fresh lemon juice
- 1/8 teaspoon garlic powder
- 1/8 teaspoon onion powder
- Salt to taste
- Sprinkle of sweet paprika for garnish
Mix it all together. Sprinkle sweet paprika lightly over the top.
Let is rest to allow the flavors to blend.
Dip artichoke leaves in sauce.
 Lemon Butter Sauce
- 1/2 cup butter
- 1 lemon, zested and juiced
Melt the butter, add the juice of the lemon and 1/2 of the zest. Warm through.
Place a couple of slices of lemon in the bowl to serve. Dip artichoke leaves into sauce.
How do you eat a whole artichoke?
Starting at the bottom base, carefully pull a leaf off. It should separate easily. Dip in sauce if desired.
Place the inside of the leaf against your bottom teeth, lightly bite down and scrape the artichoke flesh off the leaf with your bottom teeth and discard the remaining leaf. You have to pull the leaf to effectively scrape it against your teeth.
As you consume the leaves, the bottom will become visible. Once all the leaves have been consumed, you will find a “choke” in the very center. It is anchored by the bottom of the artichoke.

The "choke"
Notice how fuzzy it is; not leaf like at all

Scrape the choke away from the bottom; discard

The cleaned artichoke bottom

This is how it looks upside down

Cut artichoke bottom ready to use in salads, dips, etc.
You do not eat the choke because it is inedible and if you attempt to eat it, you will choke!
Scrape away the choke and eat the bottom. For this part, you will need a knife and fork.
You can always save it for slicing, mashing into Spinach Artichoke dip, salads or leave it whole and stuff it for a completely different dish.
If you have any leaves left over, scrape the flesh from the leaves with a spoon and make soup, salad dressings or use the artichoke scrapings in stuffing. There isn’t much shape to the scraping, use it like you would something mashed.
You can try making them the Roman way too. (Thanks, Barbara!)
How to boil an egg is a basic procedure that needs to have a couple of “rules” to follow in order to turn out right.
There are a few suggestions on what to do with your hard-boiled eggs after you master the technique at the end of this post.
So often the yolks have a dark green sulfur ring around them and the whites are rubbery rather than tender. This happens from the eggs being overcooked or being old after they are cooked. The reason they start to stink when they age is due to the sulfur content which is also what makes the green ring around the yolk form, a simple chemical reaction.
You can avoid this and have beautiful boiled eggs by following this method and eating them soon after.

The rules are simple:
- Start with cold water.
- Bring to a boil
- Add salt (only after the water boils)
- Boil for 10 minutes

Set timer for 10 minutes
- Cool quickly in cold water
Cool by running cold water over the cooked eggs until they cool

Cool under cold water
down. You will need to change the water as it warms up from the hot eggs. Keep the water cool and in about 15 minutes you will have perfectly cooked hard-boiled eggs.
A perfectly cooked hard-boiled egg is yellow throughout the yolk

Perfectly cooked hard-boiled eggs
and the whites are tender.
Using this method, they

Gently tap to crack the shell all over
should be easy to peel. Gently tap the shell on the counter until it cracks. Gently roll the egg so the shell gets cracked all over; then peel the shell off.
Starting with cold water and adding salt after the boil all contribute to successful peeling.
A lot of Europeans will leave their eggs out on the counter, in the US we keep them in the refrigerator. Either way, it is best to start with cold water. Place the eggs in the pot, fill with cold water to cover the eggs by at least an inch or more. This helps keep the eggs from cracking due to temperature change.
Use a pot that can comfortably hold all the eggs you are boiling neatly on the bottom of the pot. There should be enough room for them to roll a little, but not too much. (See the photo of the eggs in the pot earlier in this post) Some people put a small towel in the bottom to cushion the eggs. This is totally unnecessary, but you can do it if you like.
Add salt after the water comes to a boil. This saves the bottom of your cookware from getting pitted from years of salting cold water. Save your cookware, salt only after water boils.
Some people will save the egg cooking water for plants, I don’t due to the salt.

Carefully peel, rinse and dry
The eggs will absorb some of the salt while boiling.
Here is a traditional Southern dish named “Deviled Eggs“. I have always been around Deviled Eggs so I am not sure how well-known they are in other parts of the world.
Here in the South, we have dishes known as “egg plates” made specifically for holding Deviled Eggs. I used to have several in different styles but alas, I no longer own an egg plate. Not even an egg plate shaped like a holiday wreath, not a glass one nor a china one. Where did they go? It’s not like I swore off ever making deviled eggs again. Puzzling how things come and go. Maybe one day I decided I would rather have the space than the egg plates. I don’t recall making that decision.
Be careful when adding the pickle relish. Don’t add too much liquid or else your egg filling will be runny. If that happens add some cheese or bread crumbs or go commercial and add xanthan gum to thicken it back up. You could always boil some more eggs too.
Here is the recipe:
Deviled Eggs
- 6 eggs, hard-boiled, split in half.
- 2 Tablespoons Mayonnaise
- 1 Tablespoon Sweet Pickle Relish
- 1/8 Teaspoon Onion Powder
- 1/8 Teaspoon Garlic powder
- 1/2 Teaspoon Kosher salt
- 1/2 teaspoon Capers
- Chives or scallion for garnish
Remove the yolks from the whites, place the yolks in a bowl. Add the remaining ingredients and mash

Tray of Deviled Eggs garnished with scallion green, caper and chive flower
together with a fork until smooth.
Adjust the quantities of the ingredients to match the yolks and your personal taste.

Perfectly cooked hard-boiled eggs
Remove yolks to make filling for Deviled Eggs
Spoon the yolk mixture back in to the whites. Top each with a bias cut chive or scallion green.

Deviled Eggs
Sprinkle lightly with sweet paprika and finely ground black pepper.
What else can you do with hard-boiled eggs?
Add them to tuna salad, make egg salad for sandwiches, slice and serve with spinach salad, make Pad Thai and sprinkle chopped hard boiled eggs, peanuts and cilantro over the noodles.
Personally, I can eat them sprinkled with a touch of Fleur de sel.

Spinach Salad
Main thing to remember, start with cold water and boil only for 10 minutes.
Cooking Note: A “BOIL” is 212°F or when the bubbles roll rapidly and break the surface of the water.

Use hard-boiled eggs in Salad Nicoise

 grilled chicken to it and lots of Parmesan cheese.