
I was reading a recipe the other day on the Food Network website regarding a Massaged Kale Salad from the Aarti Party Show.
Kale is on the edge of being overdone but this is worth exploring. Give it a try before you get sick of eating so much kale!
 Previous thoughts had me thinking kale was too tough to eat raw. A quick saute, dip in hot oil, plunge into a hot oven or dropped into soup is how I prepared it before this recipe caught my eye.
So I tried it. Massage your kale, sounds kinky right?!
I had to come up with another way of massaging the kale as not everyone likes to have their food handled to this extent by someone else’s bare hands.

Use a dough hook instead of your hands
Bare hand contact can be a health issue if the person touching the food does not wash their hands correctly or is carrying some kind of germ.
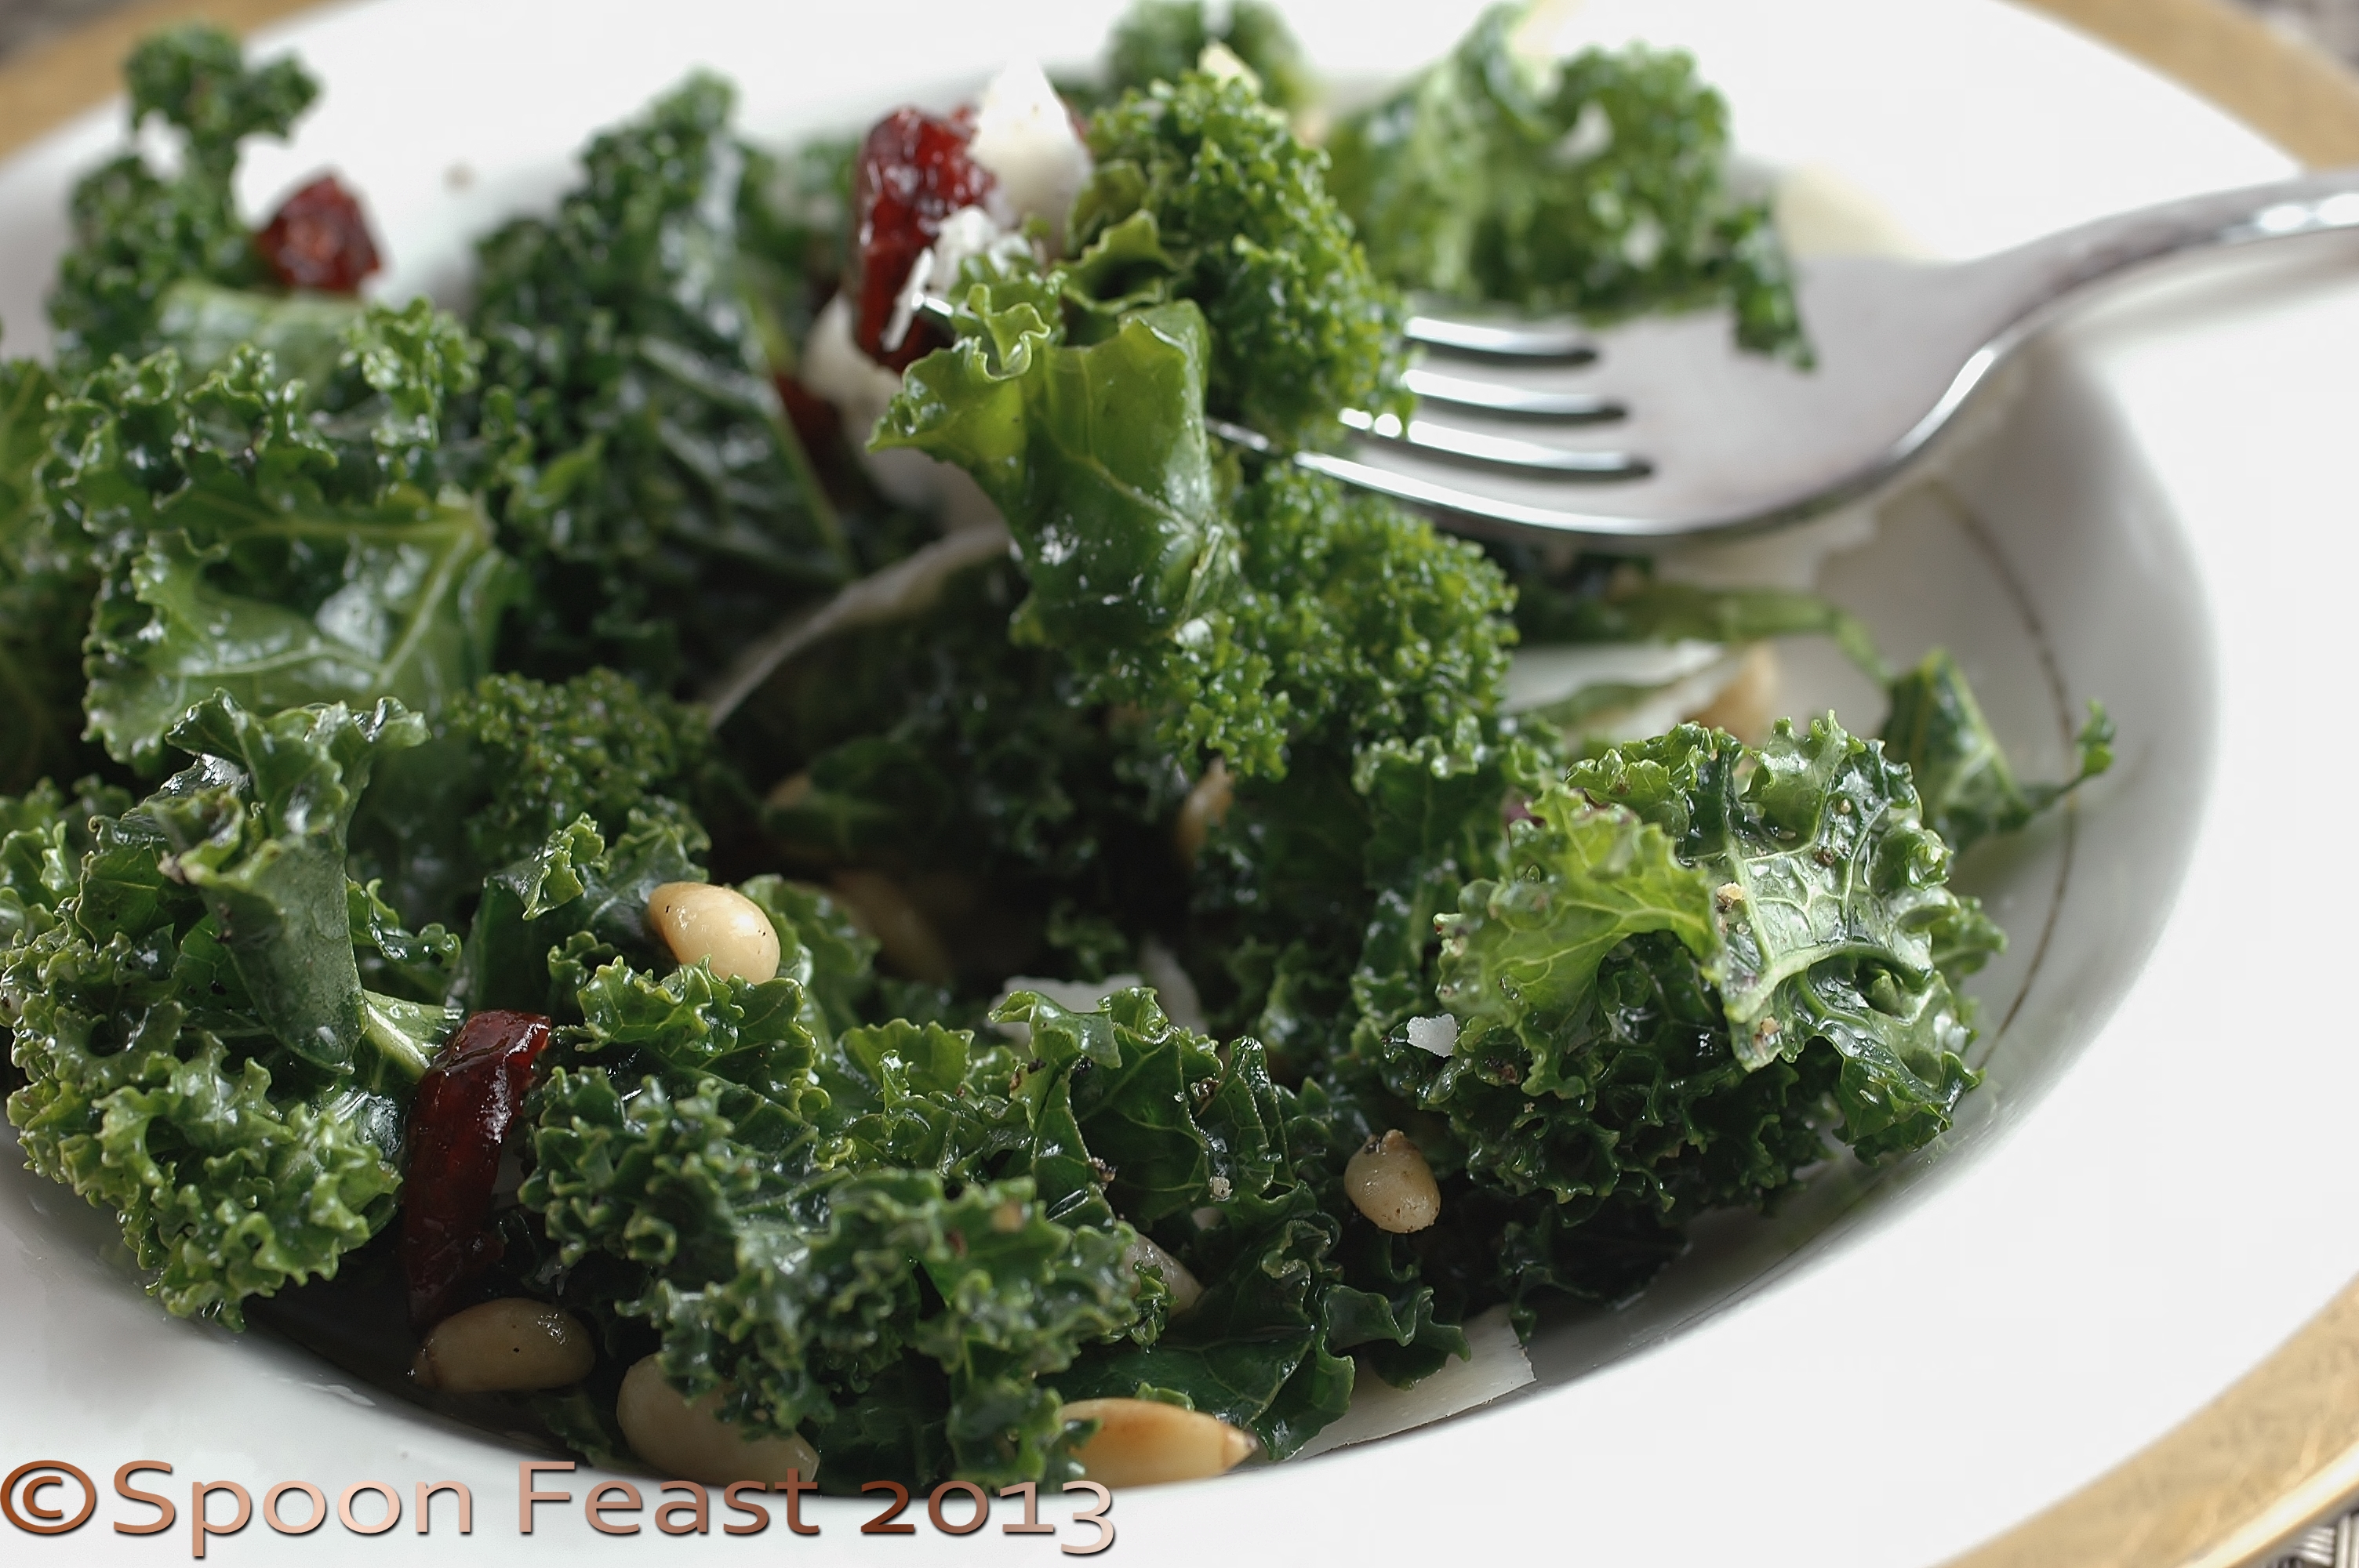
While the recipe wasn’t followed, the massage technique was. The result is an addicting, tender kale salad that can be dressed in so many ways.
After massaging the kale, create your salad. All you need to add is other ingredients and the salad is already dressed.
Choose a toasted nut and a favorite fruit, fresh or dried. Add some cheese and you can go forever with the combinations that can be created as additions for this most excellent salad.
This is what I did last night:
Kale Salad with Toasted Pine Nuts, Dried Cranberries and Shaved Parmesan
- 1 pound kale
- Juice from 1 fresh lemon
- 1 tablespoon extra virgin olive oil
- A light sprinkle of salt and fresh black pepper
- 1/2 cup dried cranberries
- 1/2 cup shredded Parmesan cheese
- 1/4 cup toasted pine nuts
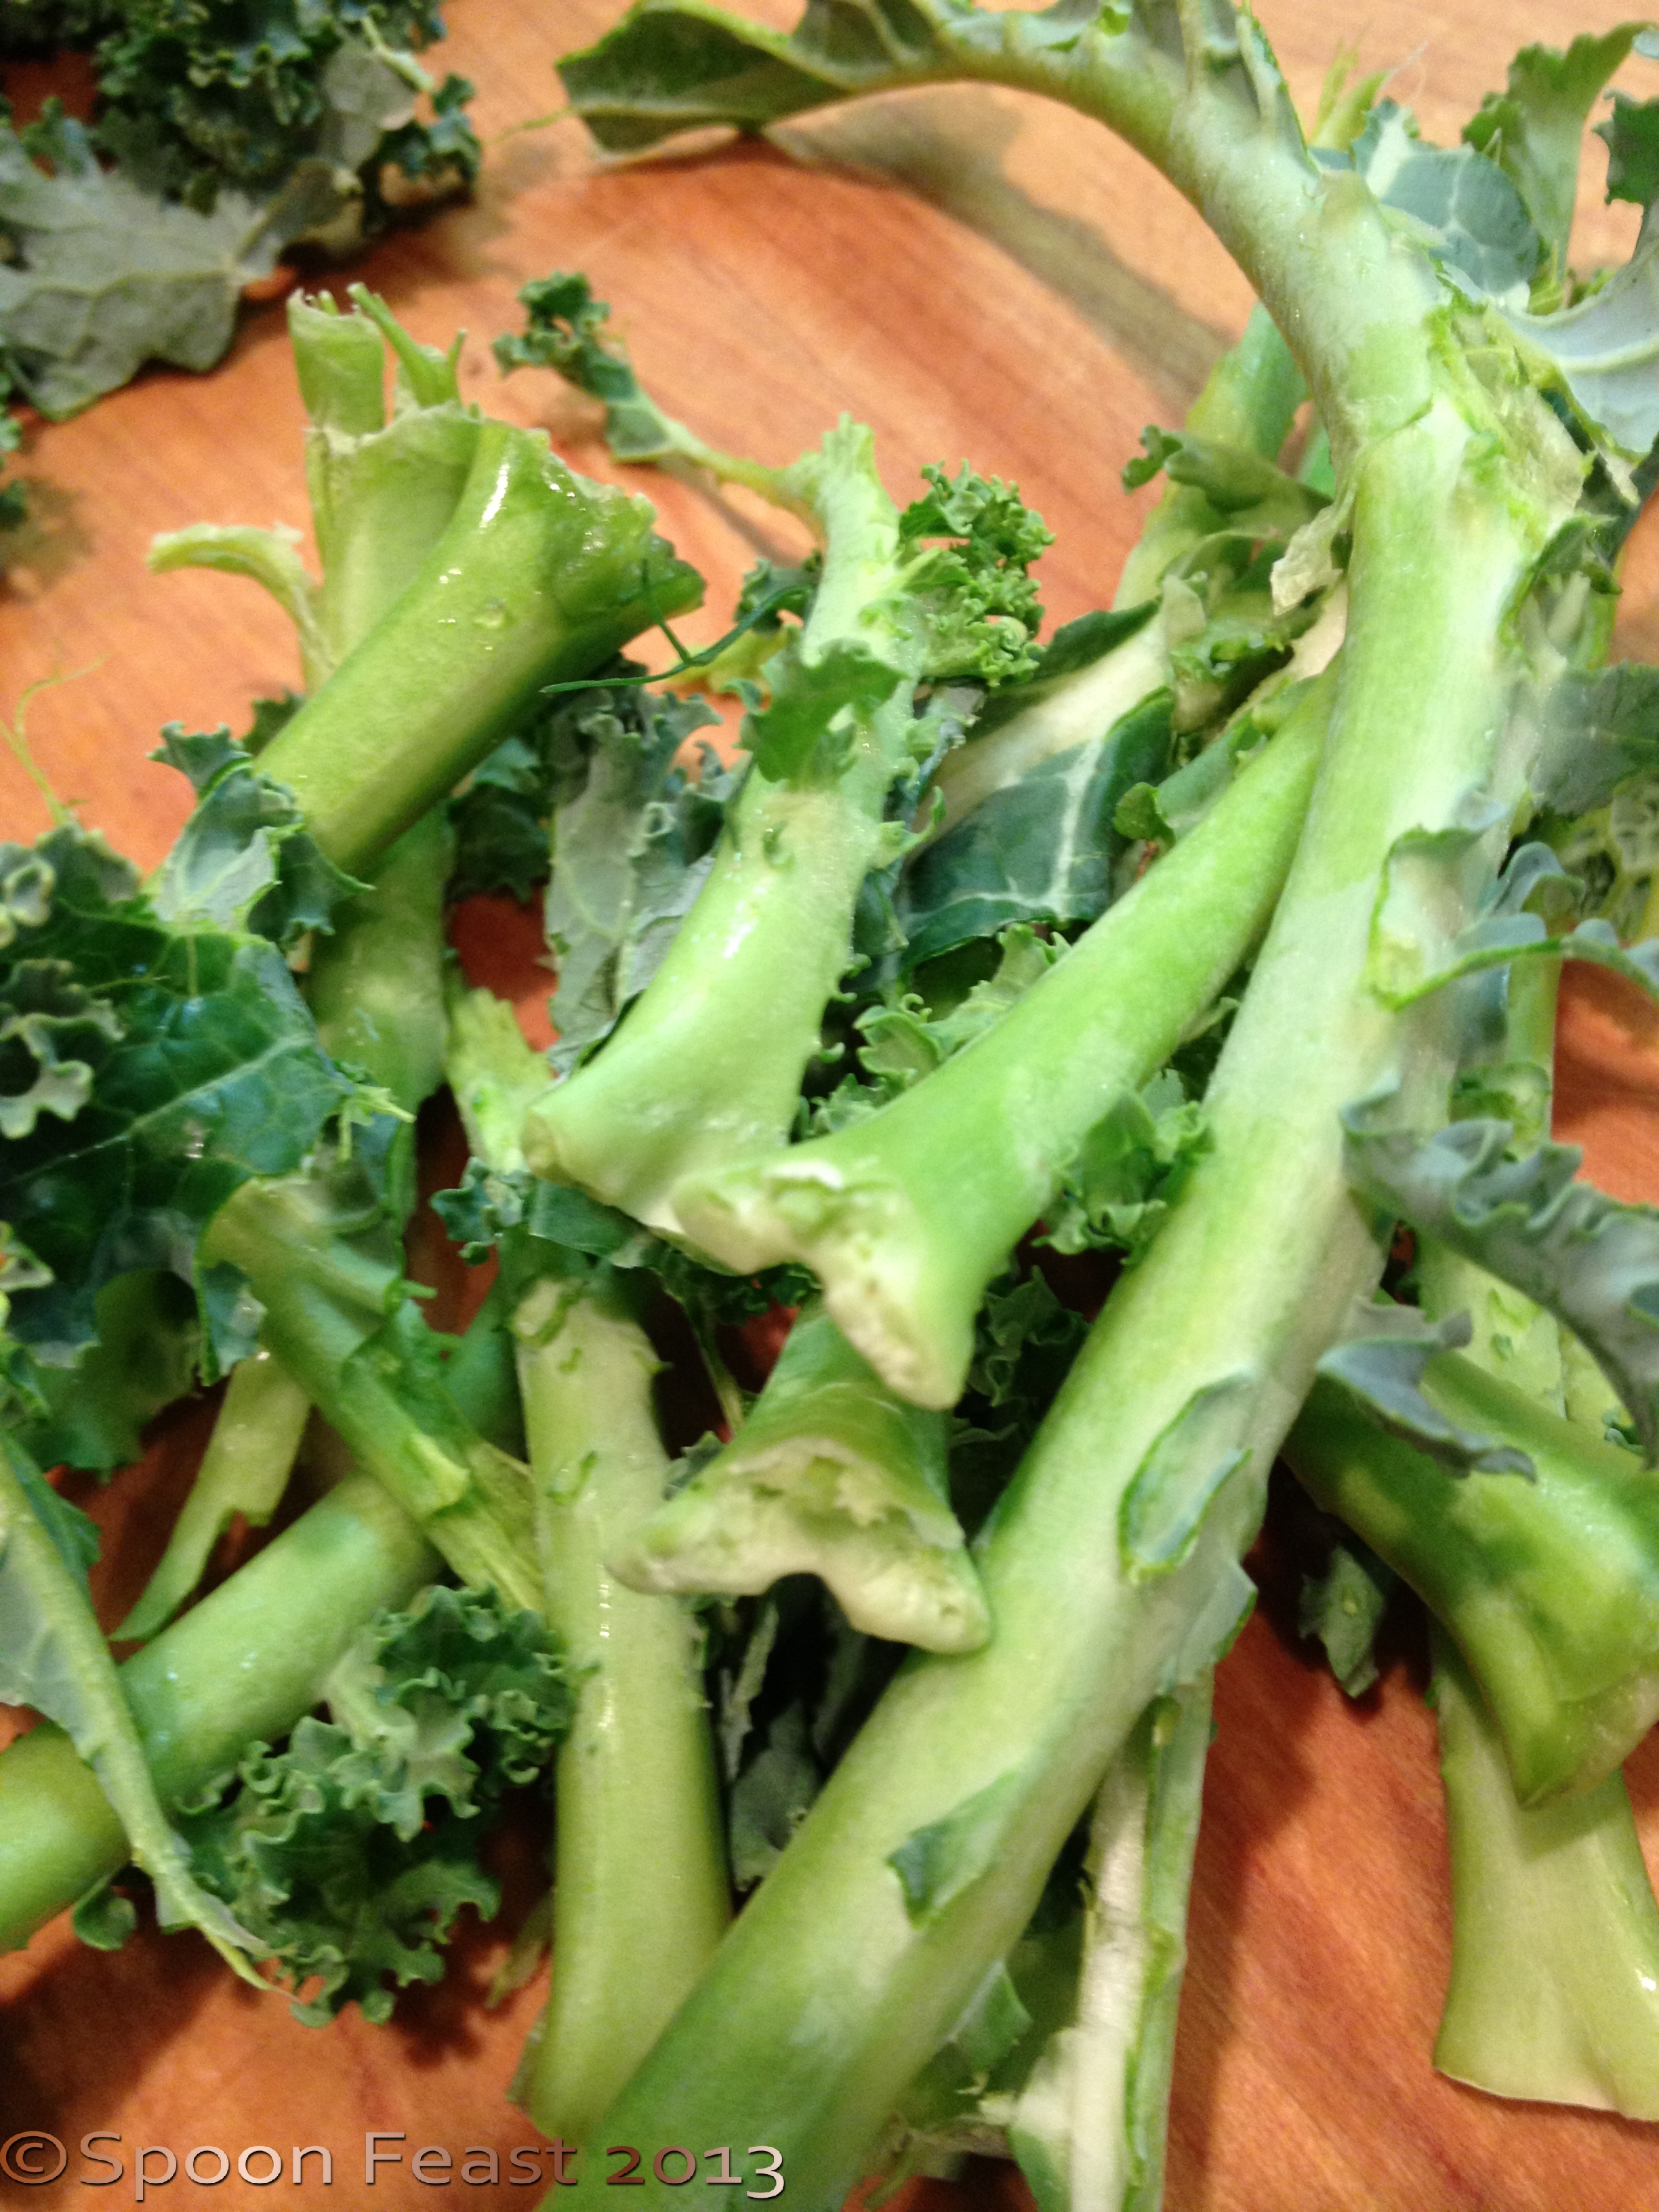
Trim the stems from the leaves
Trim leaves from the stems, wash thoroughly in cool water to remove any garden friends, sand and dirt.
If the kale is very sandy or has a lot of soil on it, soak it in a deep bath of salty water. Dip and lift the kale from the water so the soil is left behind in the bottom of the soaking bowl. You may need to do this several times to get rid of all the dirt.
Chop the kale leaves small, but not too tiny; bite size is perfect.
Place the chopped kale into a bowl. Drizzle the kale with lemon juice, olive oil, salt and pepper. The amount you use depends on how much kale you use. Only use enough to lightly coat the leaves, you don’t want anything on the bottom of the bowl.
Using your hands (washed of course! and wear gloves) or in a stand mixer on low with the dough hook, massage the greens for 2-3 minutes.
You will notice the leaves changing texture, becoming more tender and turning a brighter green as well.

Peel Parmesan into the salad with a peeler.
After 2-3 minutes of massage, add toasted pine nuts, dried cranberries and use a peeler to shave Parmesan into the salad.
The above amounts can be adjusted to your liking.
Try other fruits, nuts and cheese in this salad, avocado is amazing too.
Top the salad with beef, grilled chicken, shrimp or fish to make it an entrée salad.
Serve and enjoy!
 This salad was so good, I came back down and scarfed another bowl in the middle of the night and another after breakfast.
Now I need to go buy more kale.

Related articles
- Day #5 Super Greens Wellness Challenge – Citrus Sesame Kale Salad (sharonkoski.com)
- Avocado Rubbed Kale Salad (freshfoodperspectives.typepad.com)
- The Best Raw Kale Salad You Will Ever Eat (empowernetwork.com)
- 2 Fabulous Kale Salads (fitsofhealth.com)
- Gifts From Nature: Kale (thejuicypineappleblog.com)


 1# fresh wild-caught shrimp, any size (I used 26-30’s for this recipe)


 o...")


 Perfect for a gift from your kitchen.


