
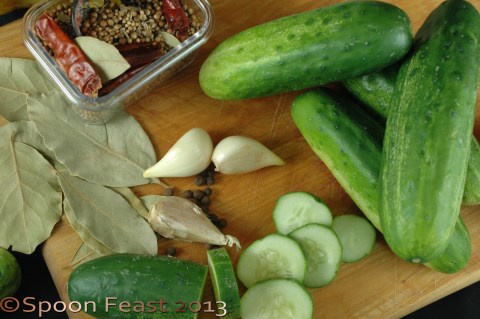

A basket of goodies to pickle!
Here is a pickling primer that will provide some basic guidelines on making your very own homemade pickles.
There are no recipes but here are some basic steps to follow to ensure your pickles turn out amazing.
I really want to encourage you to try making your own pickles!
Sterilize everything you use. Use the Sanitize button on your dishwasher or boil jars, utensils, and lids to ensure no bacteria will interfere with the pickles fermentation process.
While this step sounds intimidating, please be assured, it isn’t.
Wash towels you use in a bleach cycle, then heat dried.
If you don’t have a dishwasher, simply bring a very large pot of water to boil in the stove and then, using tongs, dip the jars, lids and seals, spoons etc. into the boiling water and let them sit until ready to use. (Turn the heat down to a low simmer once it boils). It is not necessary to cover the pot but you can if you like, to control the amount of humidity in the room.
Pickling Hints and Tips
- Select perfect produce. No blemishes or scars, cracks, avoid bruised food.
- Gently scrub produce to remove garden debris and lurking insects. Soak for 30 minutes in water that has 1/2 cup salt per gallon.
- Do not trim or cut produce for the soaking step, soak them whole. Remember, produce can float so move it around some while it is soaking.
- Placing a plate on top will help hold the items under the water.
- For cucumbers, trim 1/4 inch from the blossom end only. It contains an enzyme that can make pickles mushy.

Pickled beets
- Use plain white or apple cider vinegar. You need 5-7% acidity.
- Sugar is used to counteract the bitterness of the vinegar and salt. If you must substitute, experiment to ensure you like the flavor of the brine. Personally, I don’t care for artificial sweetener.
- Be sure to wipe the rim of the jars after filling to ensure a good seal.

Pickling Jars with wire bales and silicone or rubber seals
- If canning, follow directions exactly. Take a class to learn the safety features.
- Always use a water bath canner, NEVER a pressure canner! A pressure canner will turn all of your pickles to complete mush. Ew, who likes mush?
- Pickles will keep for up to 12 months in the refrigerator. I don’t bother to process my jars, just refrigerate them.
- Use a non iodized salt. Using table salt with iodine will make the brine cloudy and leave an off bitter taste. Pickling salt or Kosher salt works well.
- If your pickles become slimy or have pink floaties and bubbles, don’t taste them, just throw them away. These are signs the pickles have become contaminated with something. It could be yeast or bacteria but either way, don’t eat it. This is why it is so important to have very clean equipment, jars and hands when pickling.
- All the pickles recipes found on Spoon Feast are for small batches and are ready to eat typically within a day or two. But, they continue to improve with age.

About Recipes:
- Find recipes you like and can manage. If the recipe starts out with 50# of cucumbers, find another recipe.
- Here are links to the pickle recipes on Spoon Feast.
Try pickling something this summer! Please let me know how it goes.
If you have any questions, I’m here to help, just ask in the comments below.
If you have a Perfect Pickle Tip please share below!

Pickled Turnips
Related articles
- Pickled Cauliflower (spoonfeast.com)
- Sweet Pickle Chips (spoonfeast.com)
- The World’s Best (and Easiest) Dill Pickles (spoonful.com)


