Caesar Salads have long been popular both in the restaurant scene and at home. I love a good Caesar Salad especially if you add some 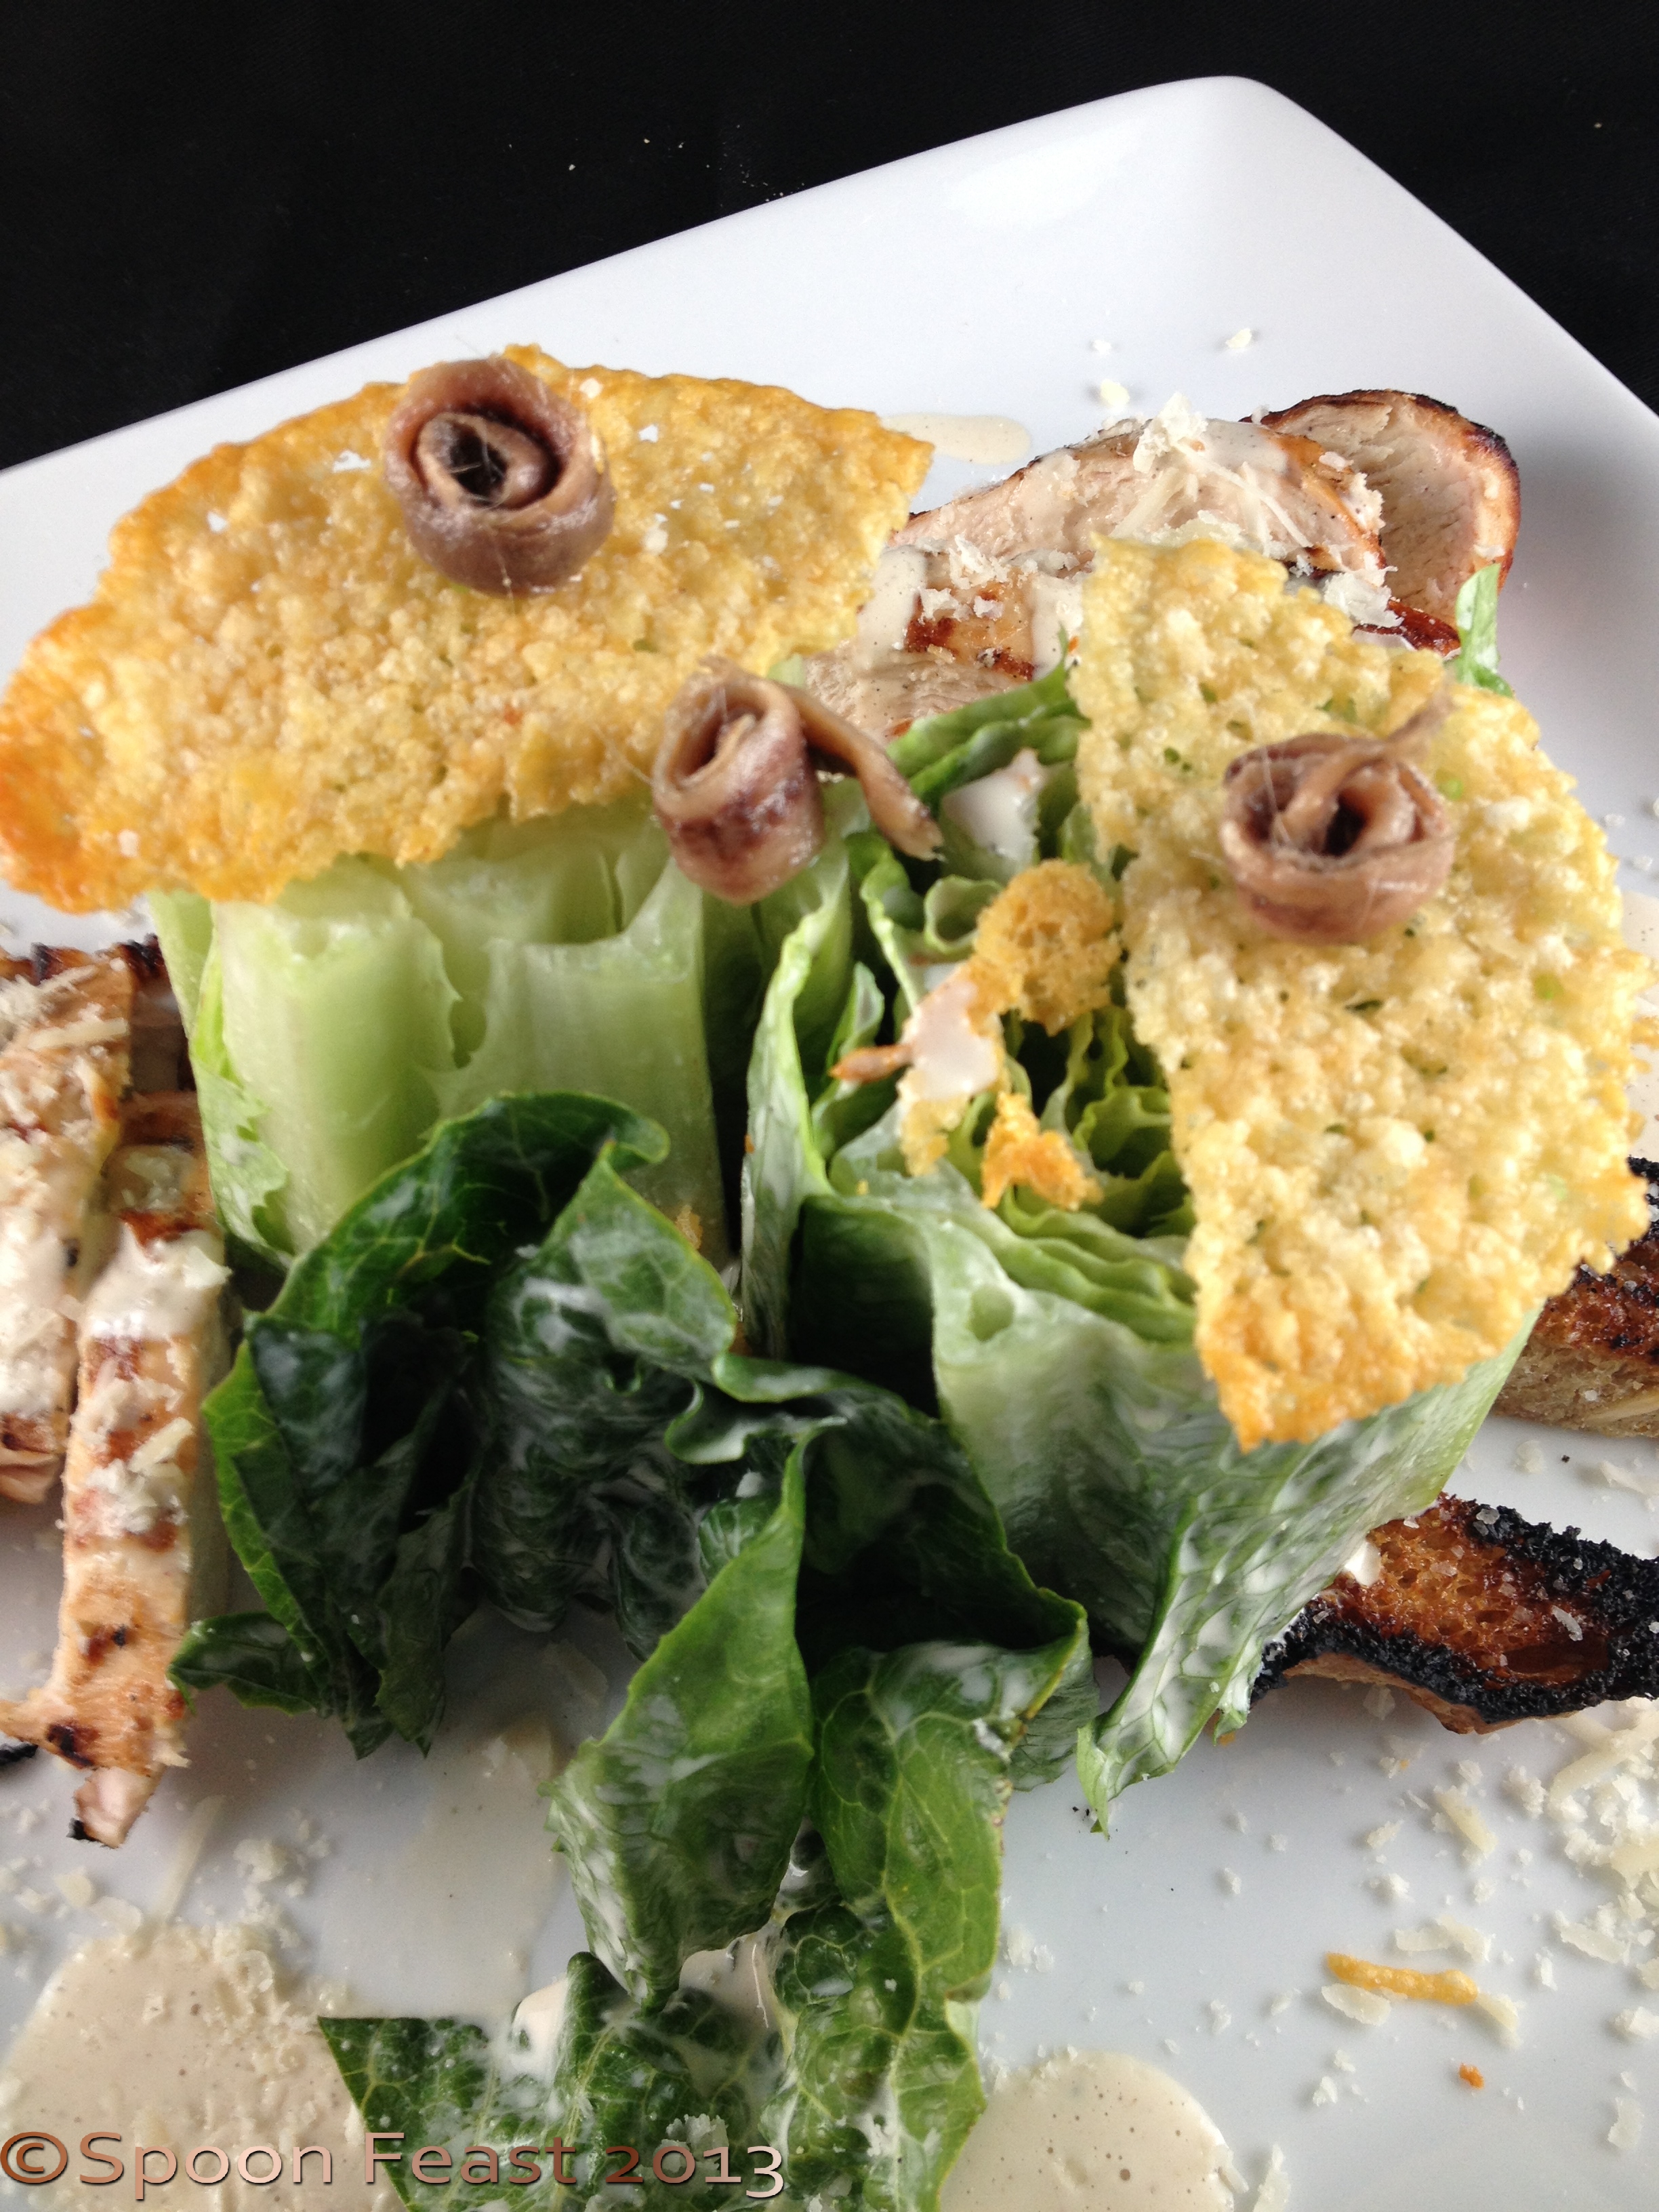 grilled chicken to it and lots of Parmesan cheese.
The dressing here is a low-fat version of a traditional Caesar. This maintains the flavor of the dressing the same as a traditional Caesar dressing, yet with far less fat. So you will find a stray from the traditional Caesar Dressing ingredients, but try this, you’d never know the difference!
Plating the salad becomes a real presentation. Take your time and you will be rewarded with not only a nice visual but also something that will satisfy your taste buds on many levels.
For the Salad:
- Romaine Hearts – each one makes 1-2 servings; 3 for an appetizer or side salad
- Keep the lettuce in tact!
- Good quality bread for the “croutons”
- Parmesan cheese, shredded or shaved off a block with a vegetable peeler
- Anchovy fillets – white anchovies are a gourmet treat, but everyday anchovies will do also
- Dressing (recipe follows)
- Add Grilled chicken or shrimp if desired.
To make the dressing:
- 1/2 cup low or non-fat mayonnaise
- 1/2 cup low or non-fat plain Greek yogurt
- 1/4 cup shredded Parmesan cheese (use the best quality you can buy!)
- juice from 1/2 lemon
- 1 tablespoon Worcestershire sauce
- 4 oil packed anchovy fillets (or more if you like)
- 2 cloves fresh garlic
- 1 -2 teaspoons fresh ground black pepper
Put it all in the blender and process until smooth. Taste it, you may want more anchovy or garlic or cheese. If you do, add it and process again until smooth. If it gets too thick, thin with water.
Wash the lettuce, carefully remove any dirt or debris while keeping the head in tact. Turn the romaine heart upside down to drip dry or pat it dry with a paper towel.
Holding the romaine heart upright in a clean bowl, drizzle the leaves with the dressing, use about 1-2 ounces per heart.

Wrap tightly into a log shape
Wrap the lettuce tightly in a log shape in plastic wrap. When you do this, arrange the leaves so they don’t break. You want to be able to wrap it together really tight.
Refrigerate for at least 30 minutes.
Brush the bread with olive oil, grill each side for 1-2 minutes.
Roll the anchovy fillets into ‘mini-flowers’.
Make Crispy Parmesan Chips

Rolled anchovy fillets
Make some crispy Parmesan chips by placing freshly shredded (grated cheese does not work) onto a piece of oiled parchment in a circle.

Use a ring mold for even shapes
Use a ring mold to make even sized circles. Bake them in a 350°F oven for 5-10 minutes or until they turn golden brown.
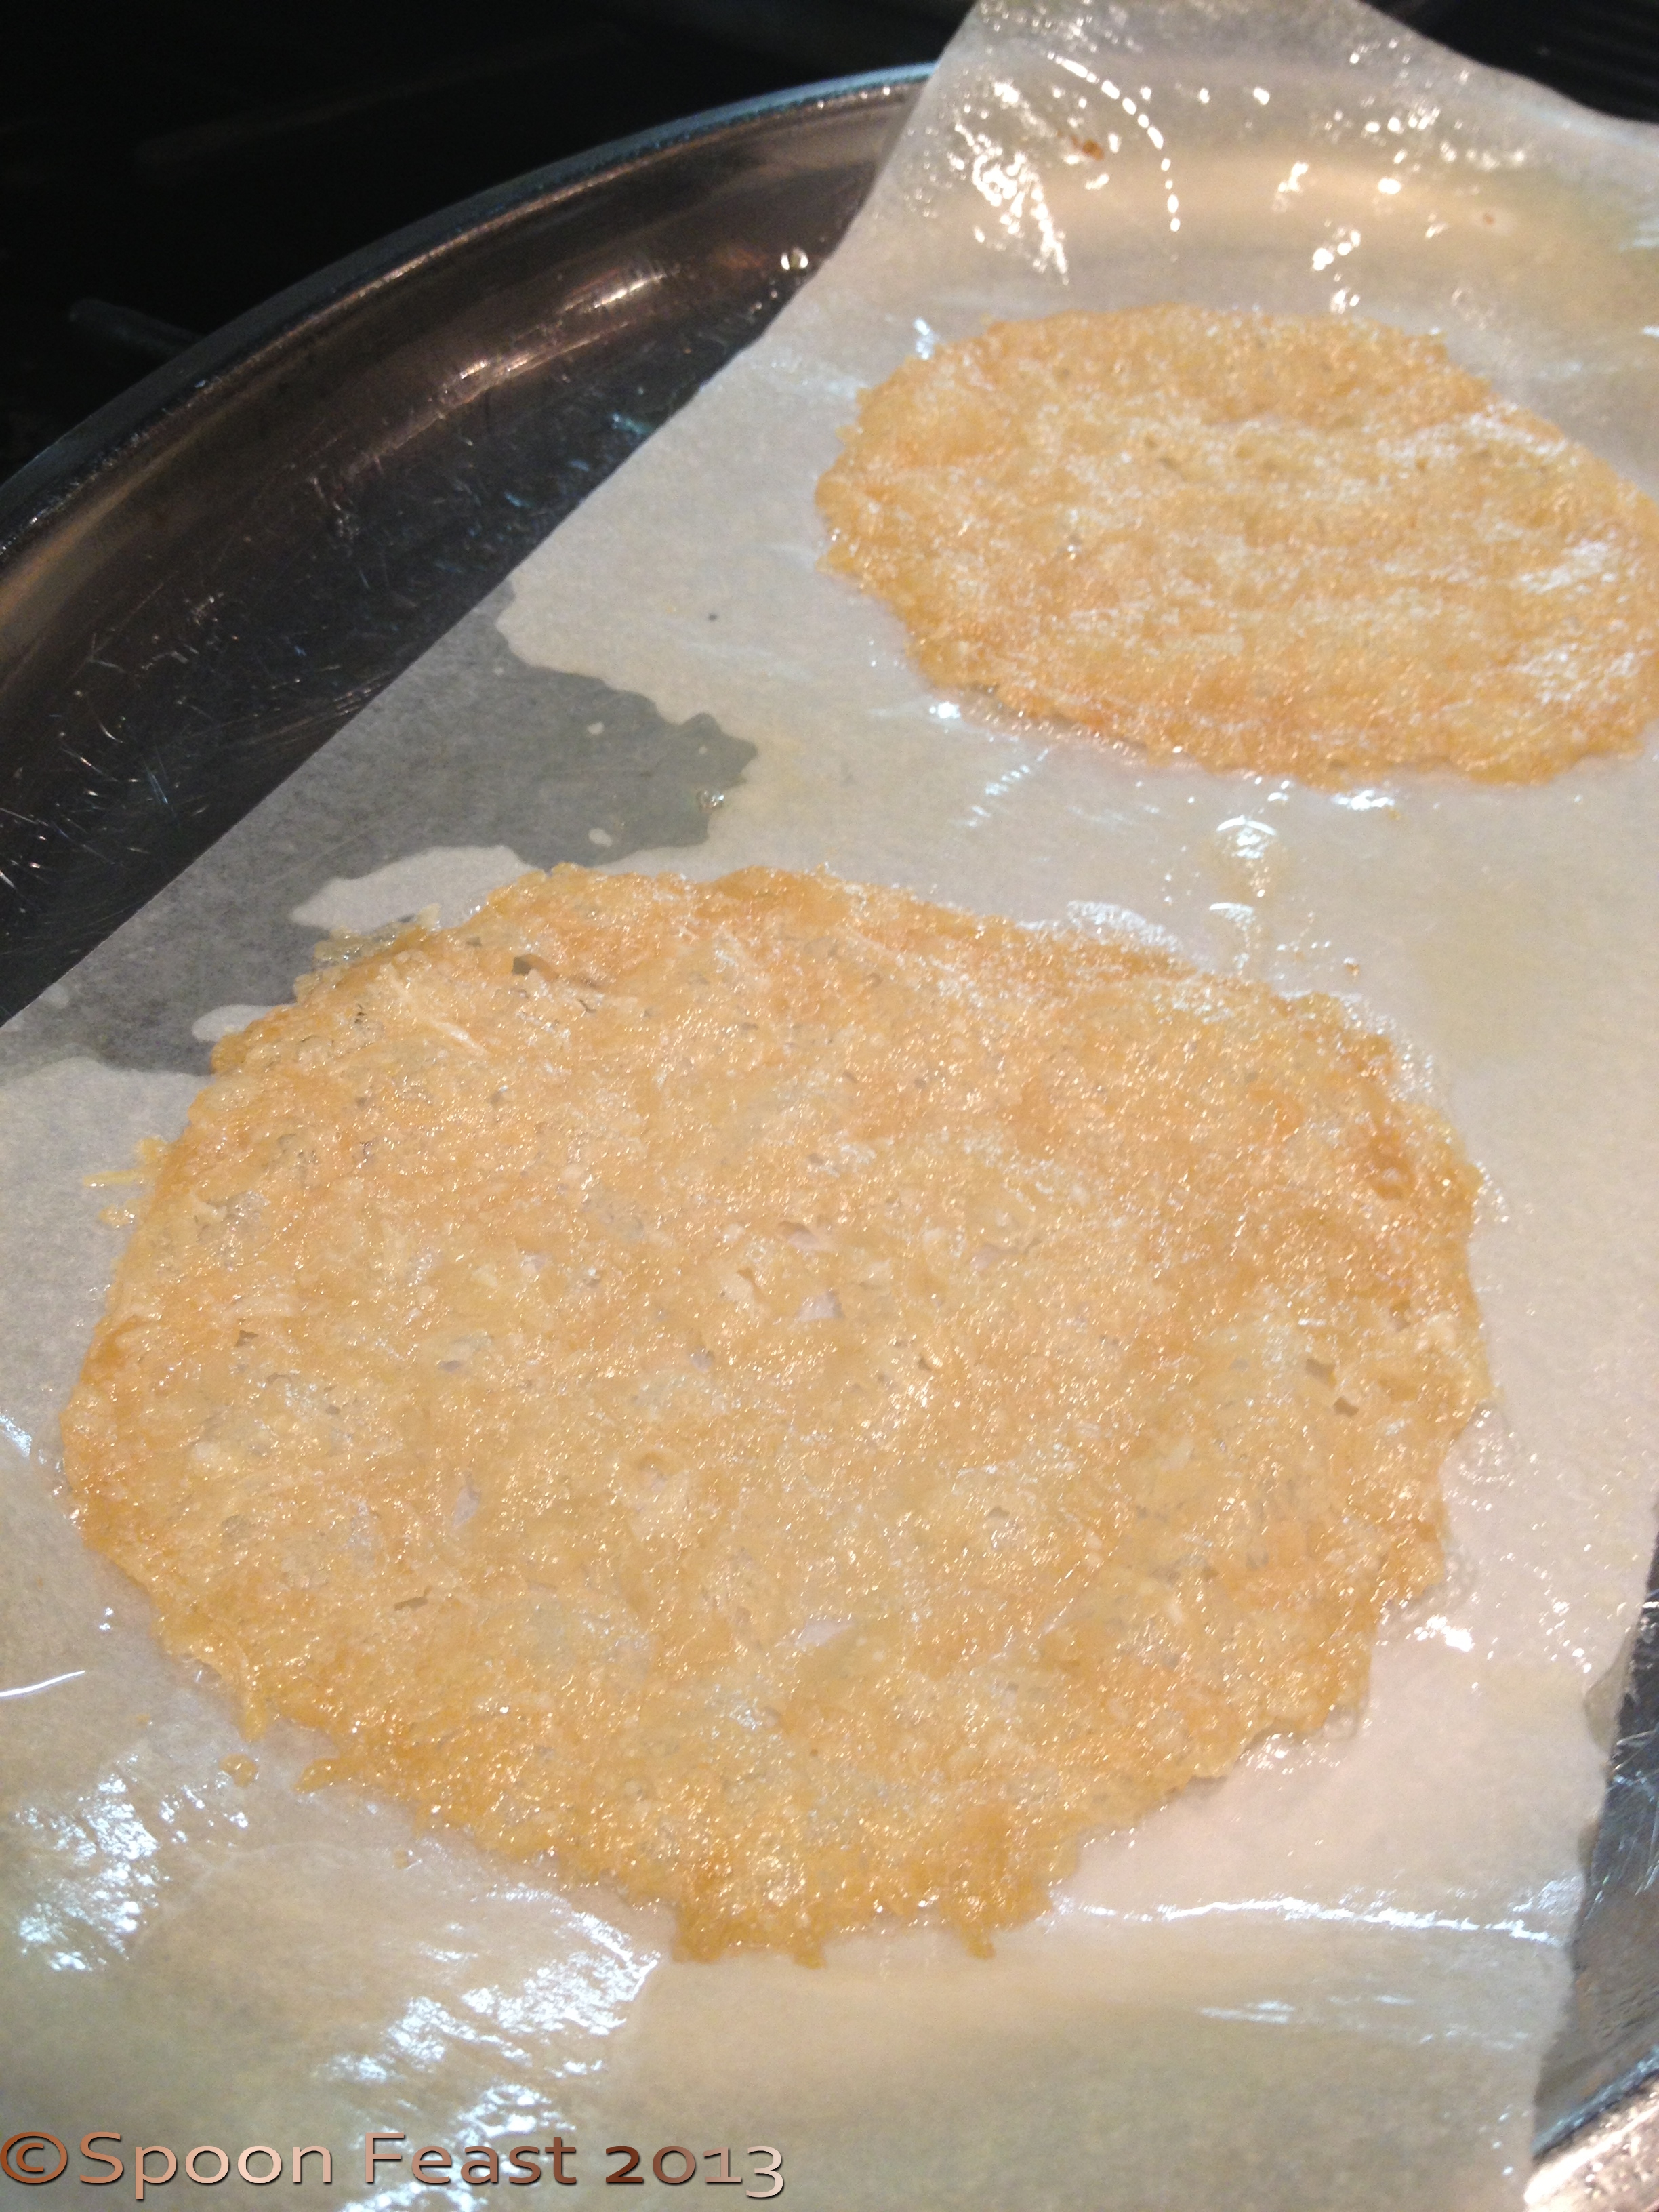
Remove when the cheese gets golden brown
Remove from the oven and using a spatula, remove them from the parchment immediately as the cheese cools rapidly. At this point, they will retain any shape you give them. but you have to move fast, once they cool they become crisp.
For this presentation, instead of making croutons, I cut the bread into a long rectangle, oiled it and then put it on the grill for a few minutes.
Plate Presentation:
Lay two lengths of bread on the base of the plate.
With the plastic wrap still on the lettuce, slice the lettuce into rounds about 2″ wide.
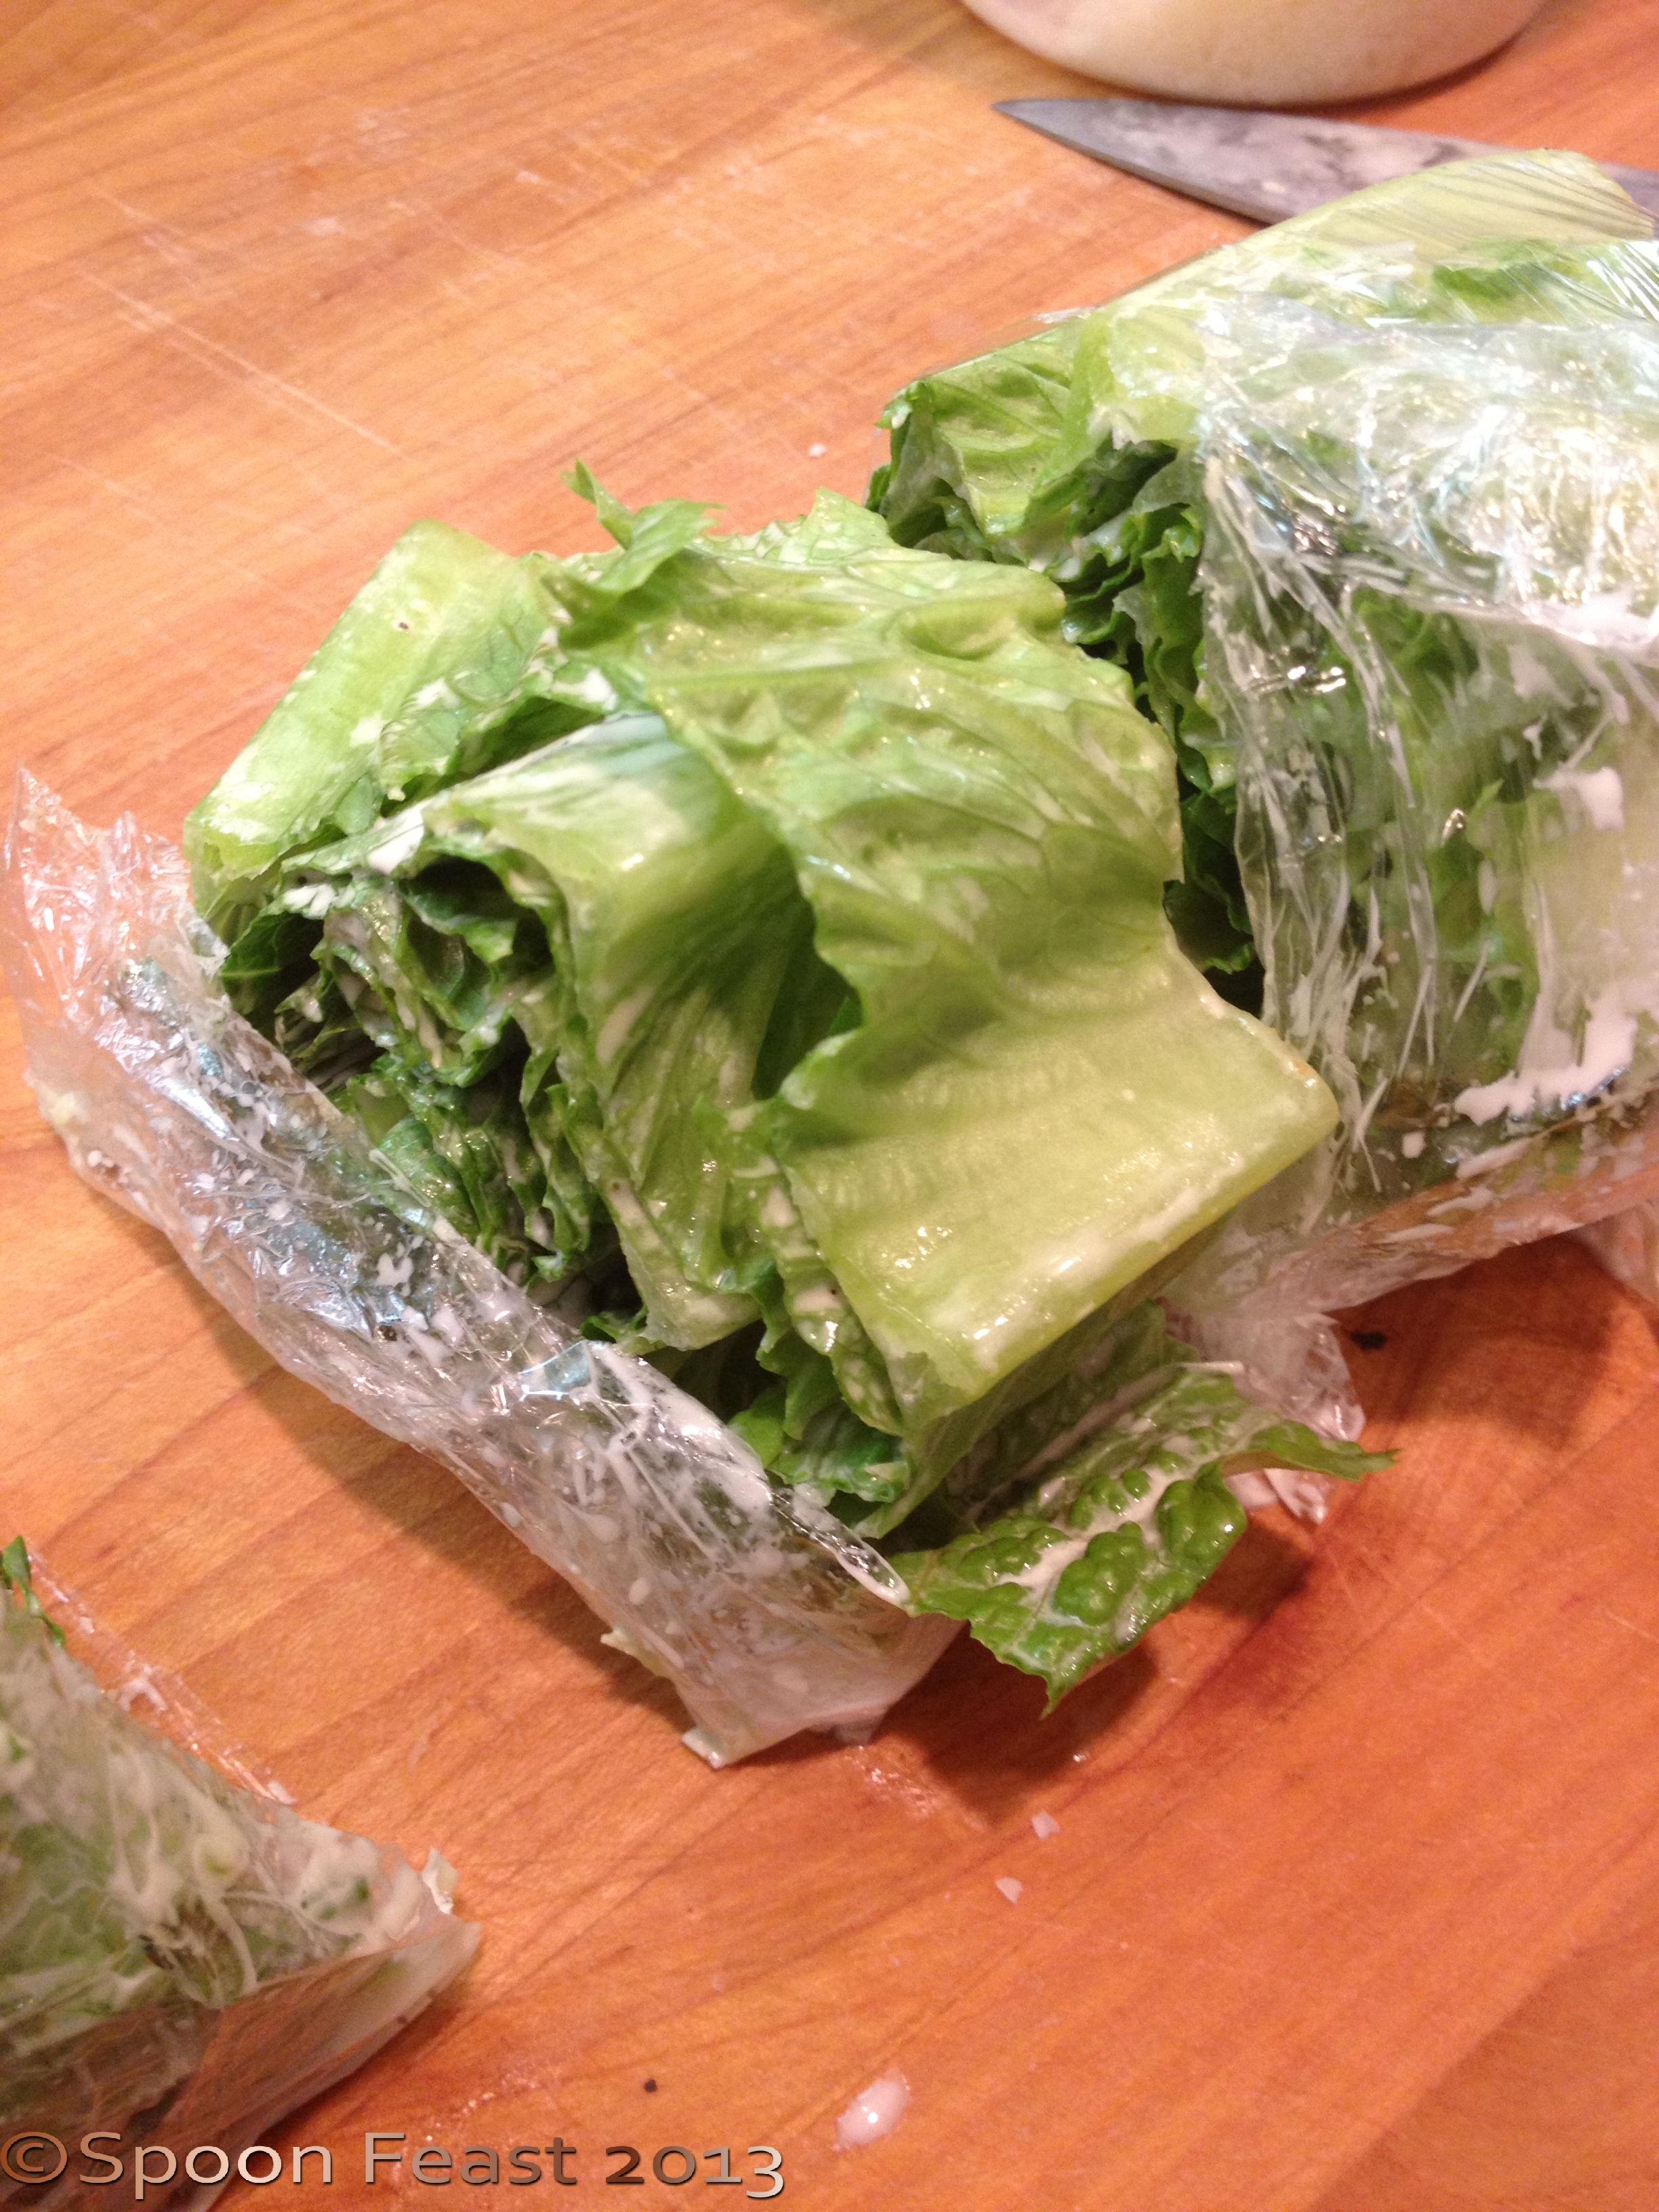
Slice the lettuce with the plastic wrap still on. Of course, remove it as you bring the lettuce to the plate.
Remove the plastic wrap and place them on the bread. Stand them up with the cut side down. Do this carefully and they will hold together.
Place a crispy cheese round on top of the cut lettuce, then add the rolled anchovies.

Place either the grilled chicken or shrimp along side of the bread, sprinkle with Parmesan. Drizzle some dressing onto the plate and serve.
The presentation is nice because when you want to eat the lettuce, it falls apart easily with your fork and does not require further cutting unless you cut them too wide. 2 inches is the perfect size for this presentation.
Enjoy this Caesar!

Related articles
- 8 Healthy Home-Made Salad Dressings (leanonlife.com)