

Paper cones ready to use
Knowing how to make a paper cone for decorating can save you a lot of headaches if you have some decorating of pastries to do.
The paper cones can be filled with melted chocolate, various glazes and thinned icing for writing on cakes or drizzling pastries or creating piped designs.
Best of all, no tip is needed and when you are done, simply throw the cone away.
It takes a few practice units to get it right, but after you do, it’s like learning to ride a bicycle, you don’t really forget how.
Here’s how:

Lay out a piece of parchment paper.

Fold it so it forms a square. There may be an extra piece to cut off at one end.

Remove the piece you don’t need. I find cutting with a sharp knife works best.

Fold the square into a triangle and cut to make two triangles.

With the triangle, you have the top tip and two points along the long edge. Bring one of the bottom points up to meet the top tip as shown.

Close up, bring both points on the long edge up to this top tip.

With all three points together, adjust the cone so the pointy tip is closed. You can adjust the opening by moving the points. Play with this to see how it works. You will need to know how this works later when piping.

Using the tips, you can move them to adjust the size of the opening.
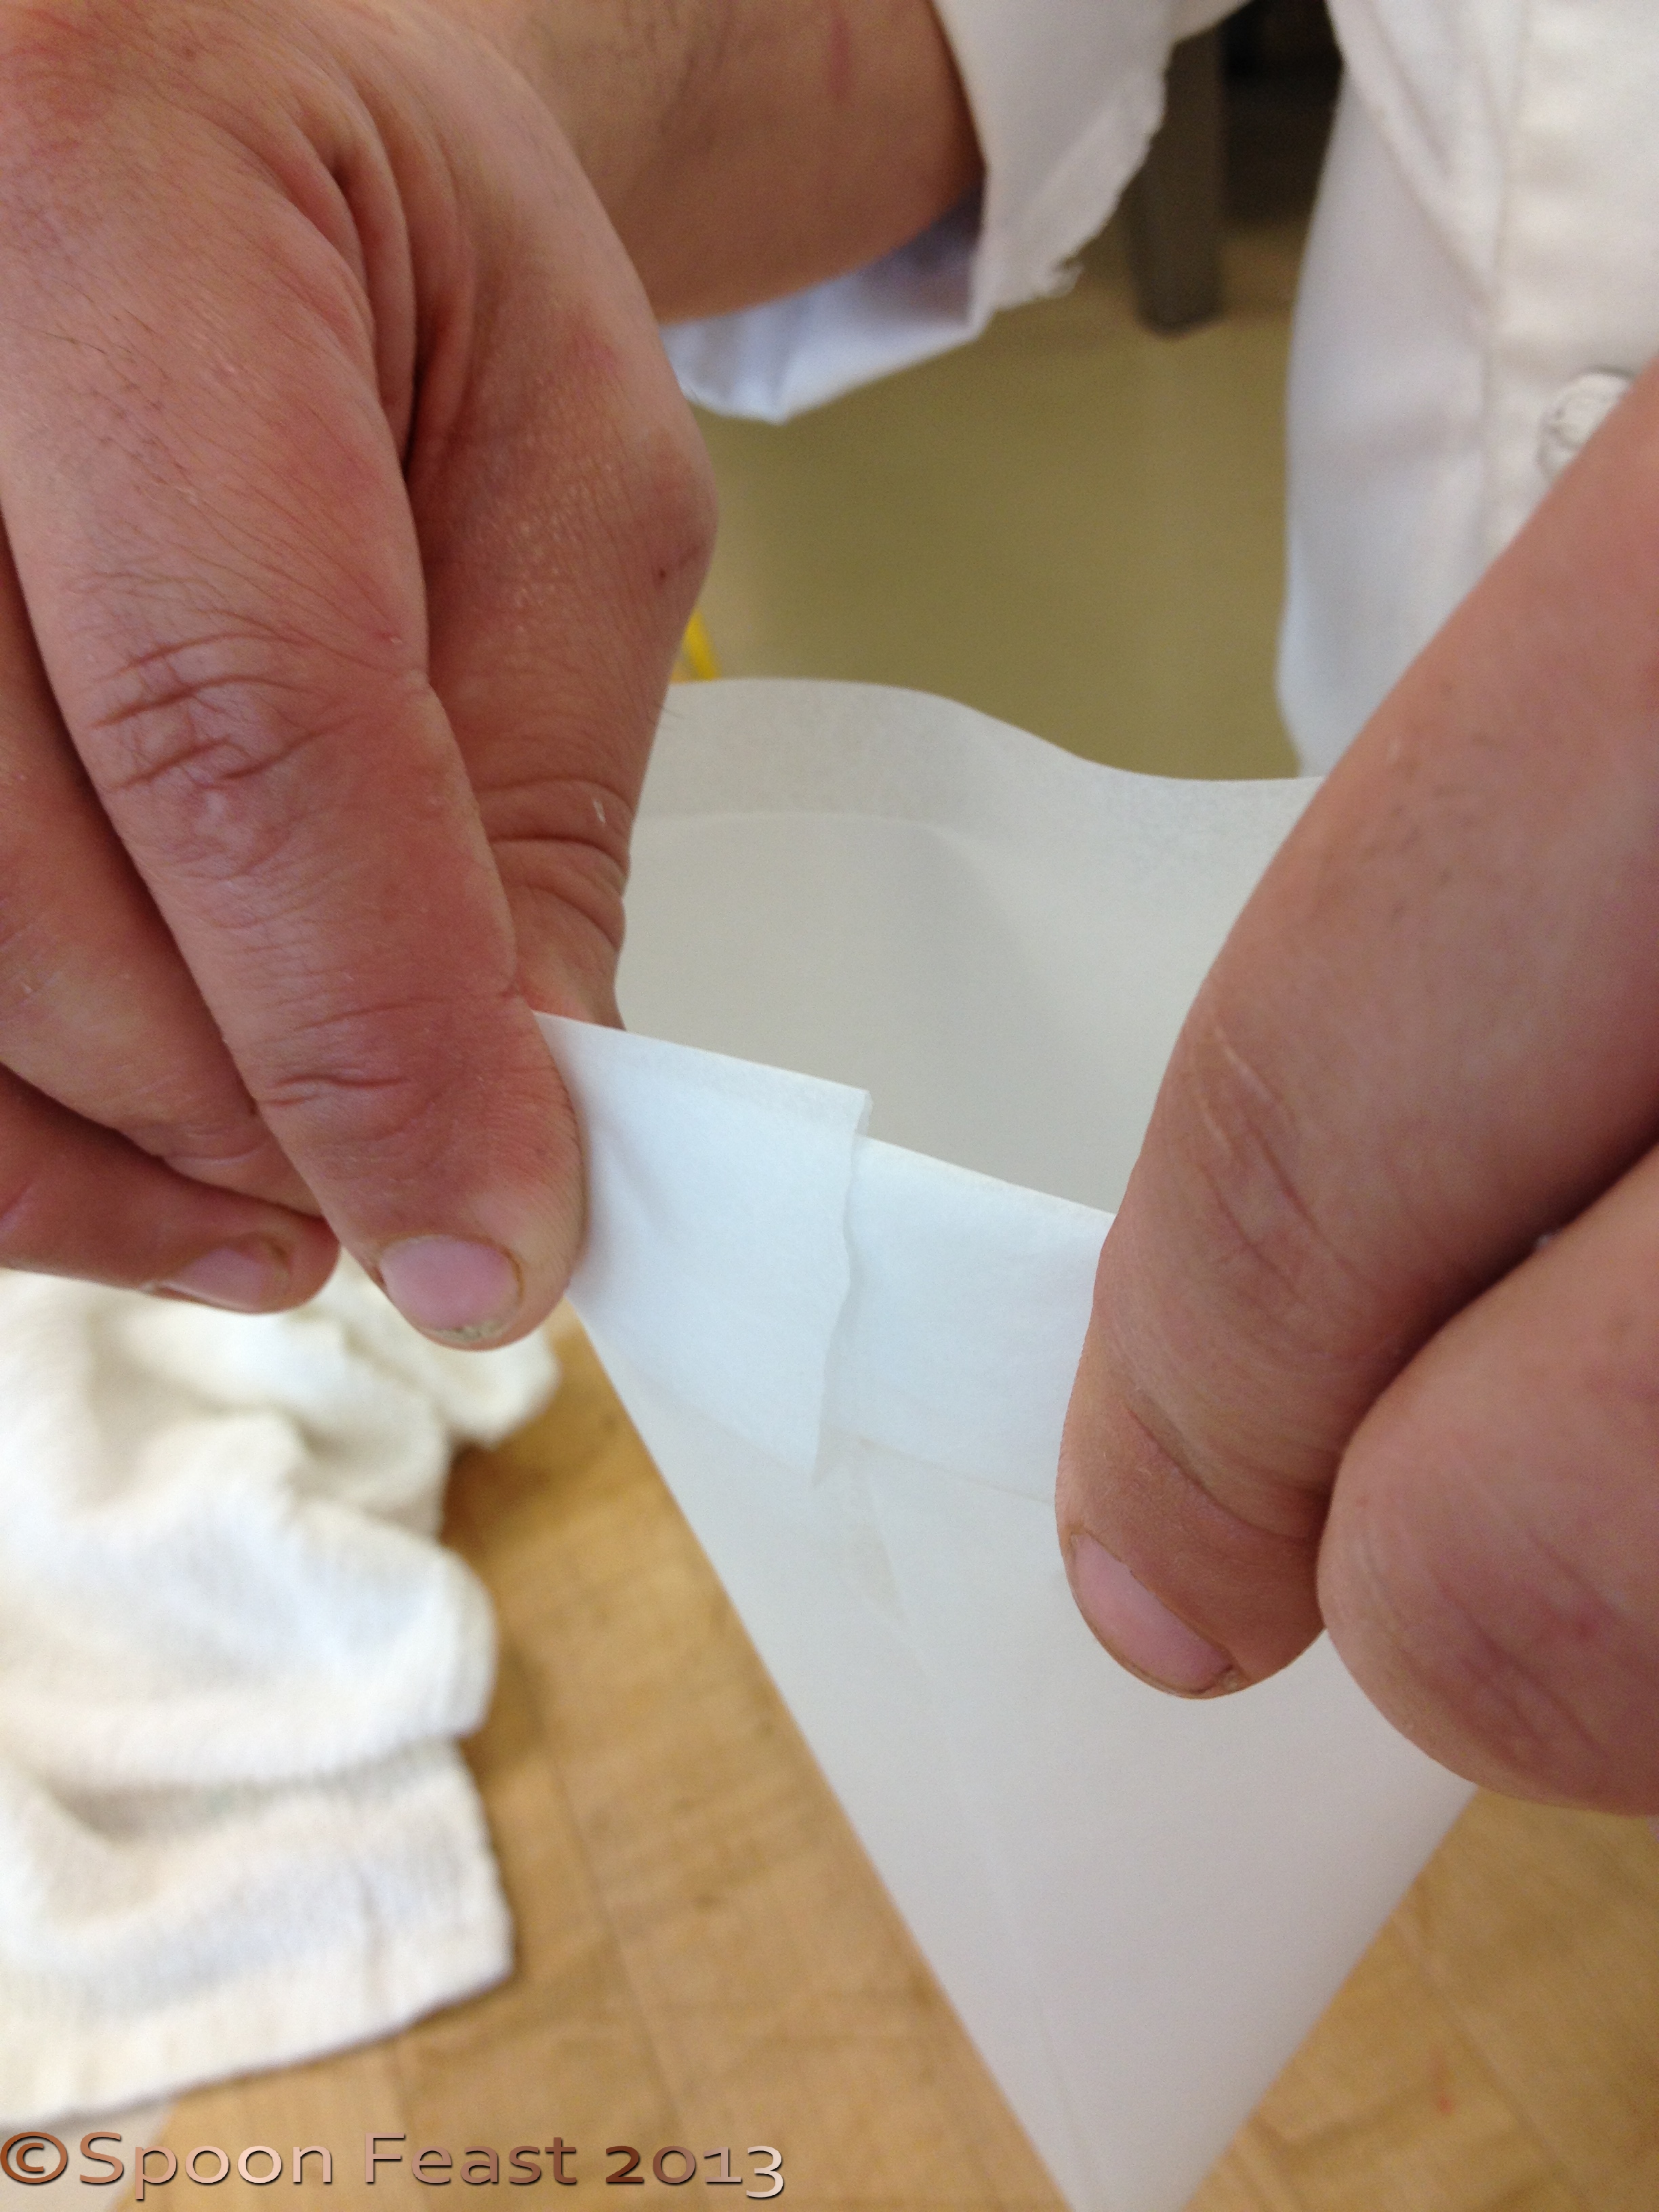
Fold the edges to secure. (NO TAPE!) Folding, if done correctly, is all you need to hold these together. Practice!

A finished paper cone

Moving the points on the long edge up to the tip on the top of the triangle allows you to control the size of the opening.

Paper cones ready to use!
