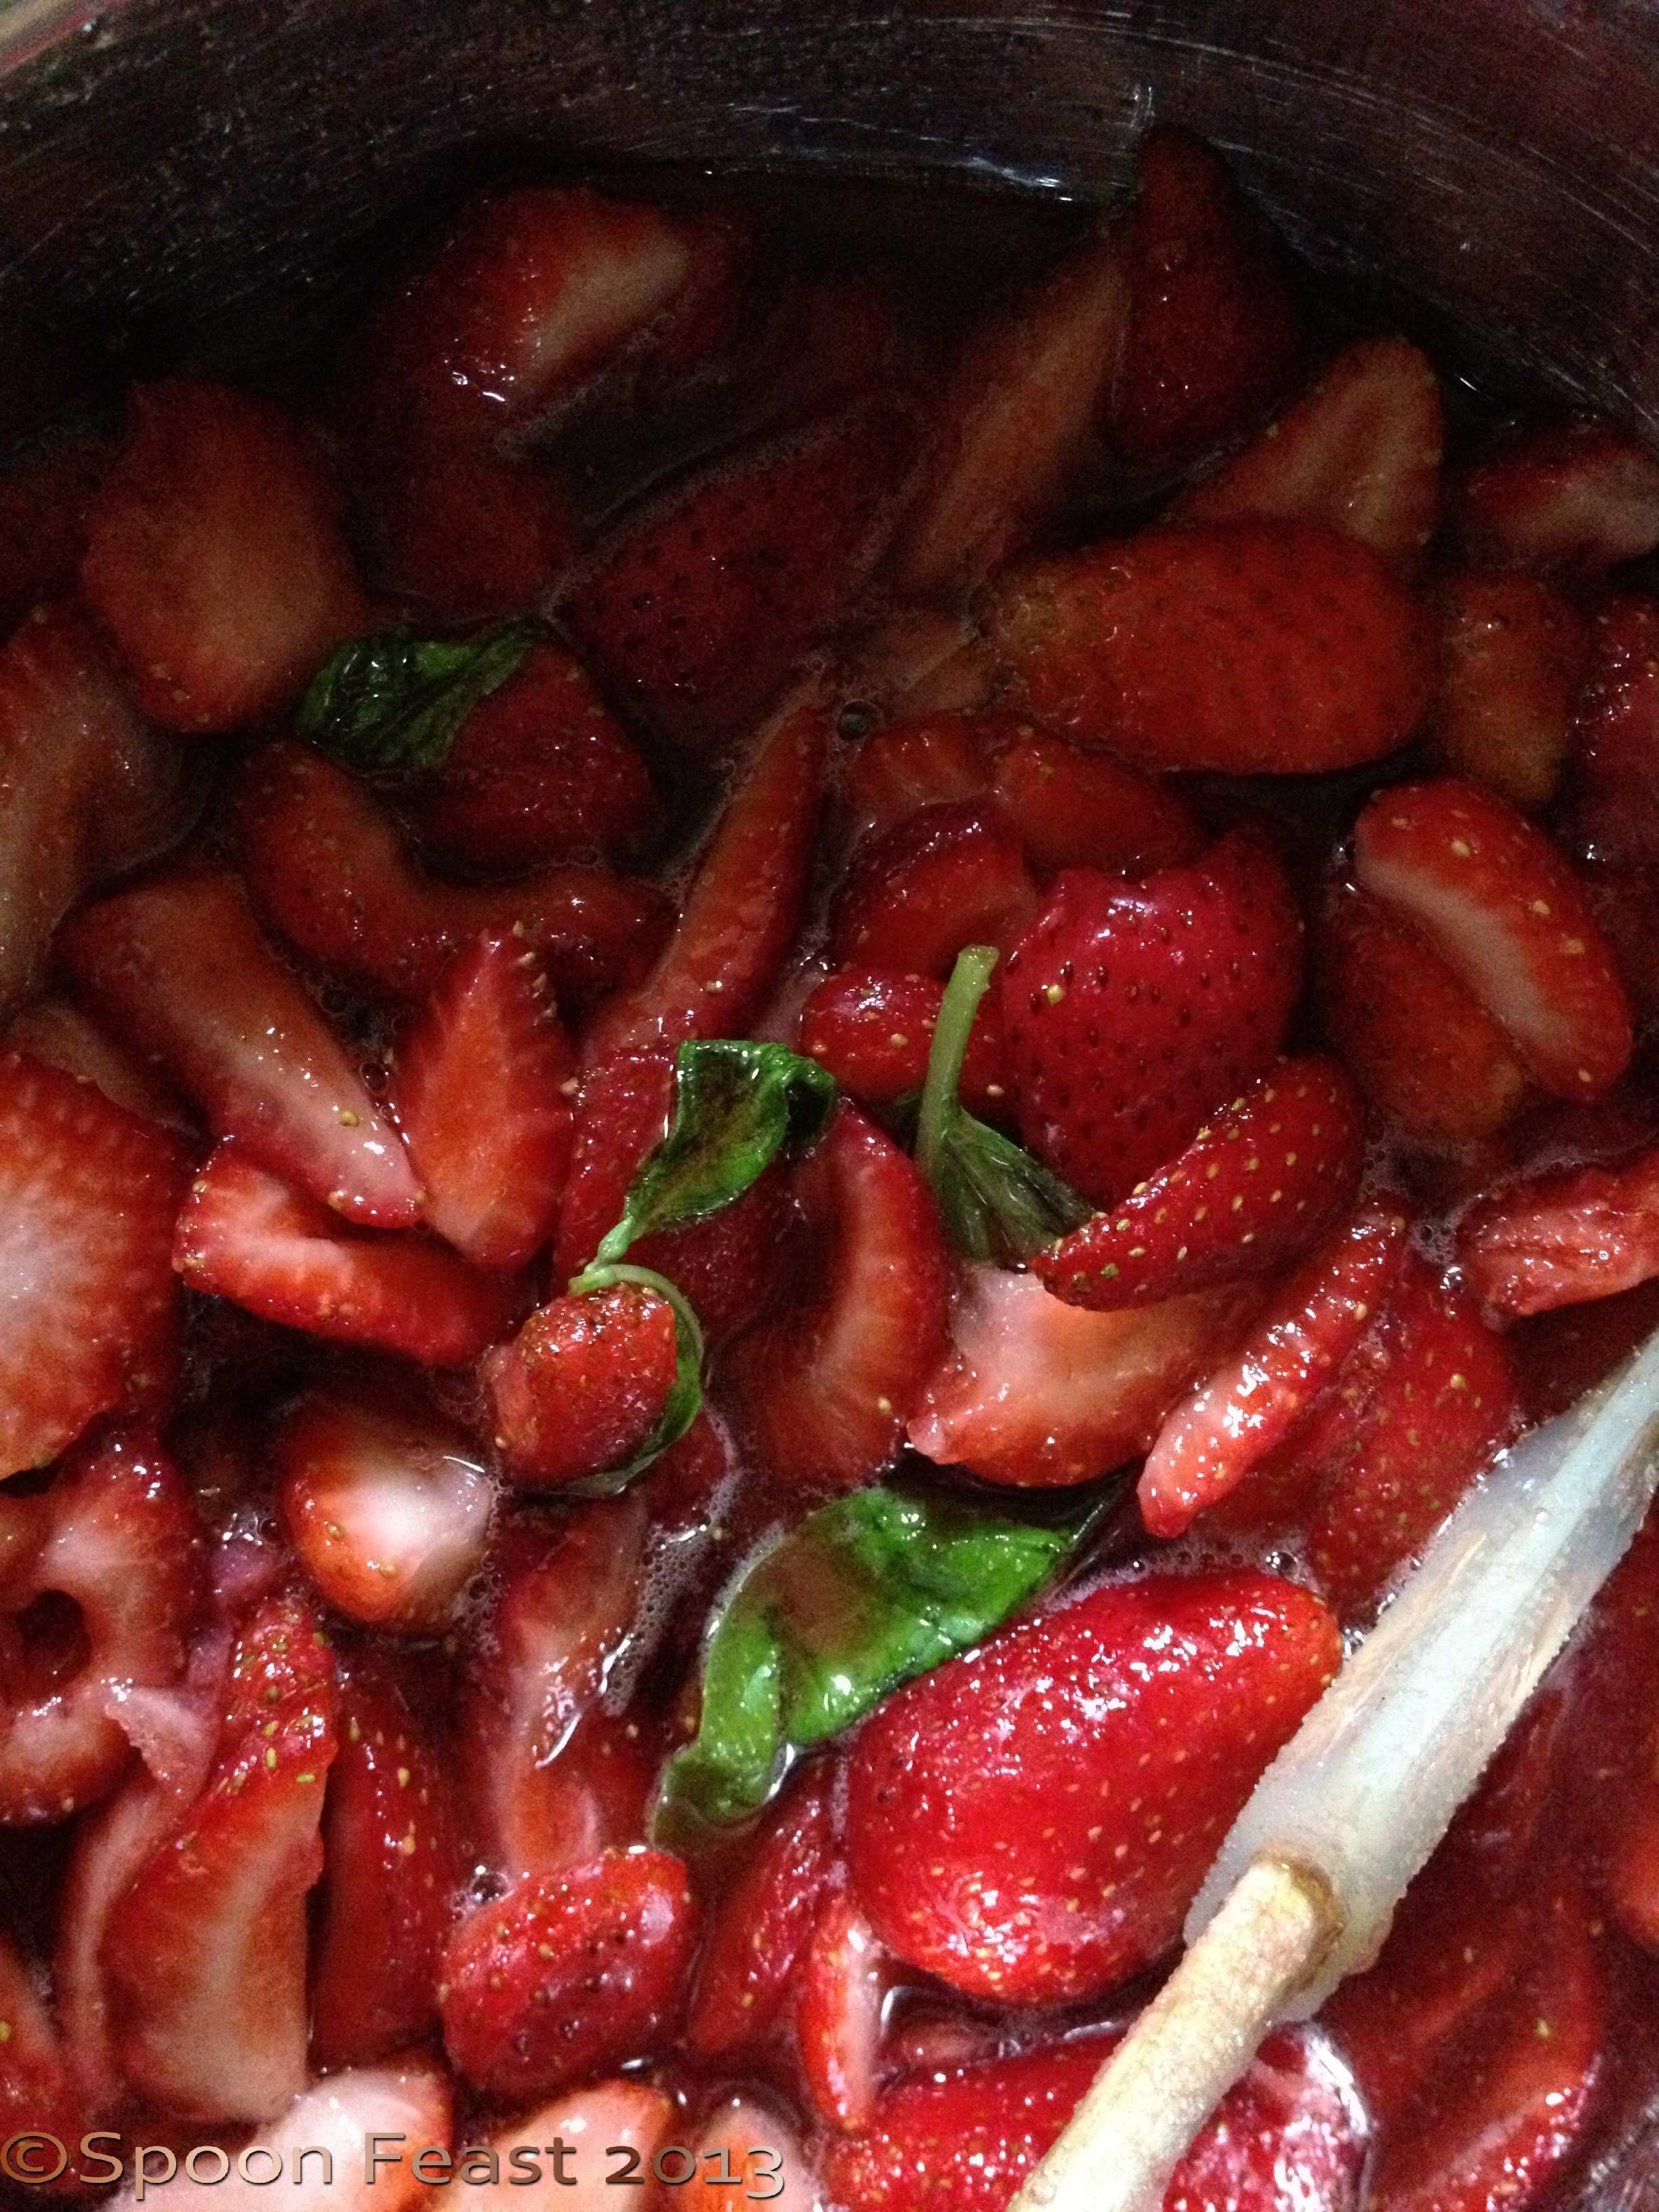
Strawberries and basil
This Strawberry Basil Balsamic Jam captures the essence of fresh summer fruit. It is easy to make, it just takes some time.
You can store this jam in the refrigerator or you can process it using a safe water-bath canning method to store it in the pantry for up to 1 year.
Try to hide a jar in the back of the cabinet for a cold winter night in January or February or if you get snowed in. Pour it over some goat cheese, toast up some great bread, slice an apple and summer will come alive again in your mouth.
if you are one of those who think strawberry jam is far too sweet, try this one. The herbal element as well as the complex acid from the balsamic really takes a plain strawberry jam and turns it into an amazing treat.
Leaving the strawberries whole, this creates a delicious strawberry compote perfect for desserts, ice cream and goat or cream cheese. Puree the berries for a more jam like consistency.
Strawberry Basil Balsamic Jam
- 1# fresh strawberries, stemmed and cleaned; cut as desired
- 3 cups sugar
- 2 large sprigs of fresh basil
- 2 Tablespoons balsamic vinegar
- 1/4 cup chopped basil leaves
- pinch of kosher salt
Combine the berries with the sugar and large sprigs of basil. Stir well. Allow to marinade for 2 hours, stir often. You will notice the sugar will melt and there will be considerable syrup in the bowl.
Place this into a heavy bottomed stainless pot, add the balsamic vinegar, turn the heat to high and bring the mixture to a boil. Stir frequently to prevent scorching. Then the mixture boils, skim any foam that forms on the surface.
Reduce the heat and simmer actively until the mixture thickens to the desired consistency, about 20 minutes.
Place a plate in the freezer. Once cold, pour a spoonful of hot jam onto the plate and replace it in the freezer until the jam cools.
Run your finger through the cooled jam. If it remains separated and does not run or run back together, it will maintain a jam like consistency. If not, keep cooking longer. Chill some down to really evaluate the consistency. Even if it remains a bit runny, it makes great syrup and dessert sauce. The flavor is so delicious!
Ladle the hot jam into hot sterilized jars, cap and either process in a water-bath canner to store at room temperature or refrigerate once the jars cool.
I am not an expert canner so I would advise following expert advice on how to process your jars in a water-bath canner. I do know that if you use a pressure canner, you will have mushy fruit, so be sure to only use a water bath canner or a “granny bath” – I love that term!
This jam has a lovely complex flavor. We find it delightful on toast, over oatmeal or French toast, we even enjoy it on cheese platters with a glass of wine in the evening.
I packed some in small 4 ounce jars so they would be easy to take just a few servings on picnics, tailgating or on the go meals.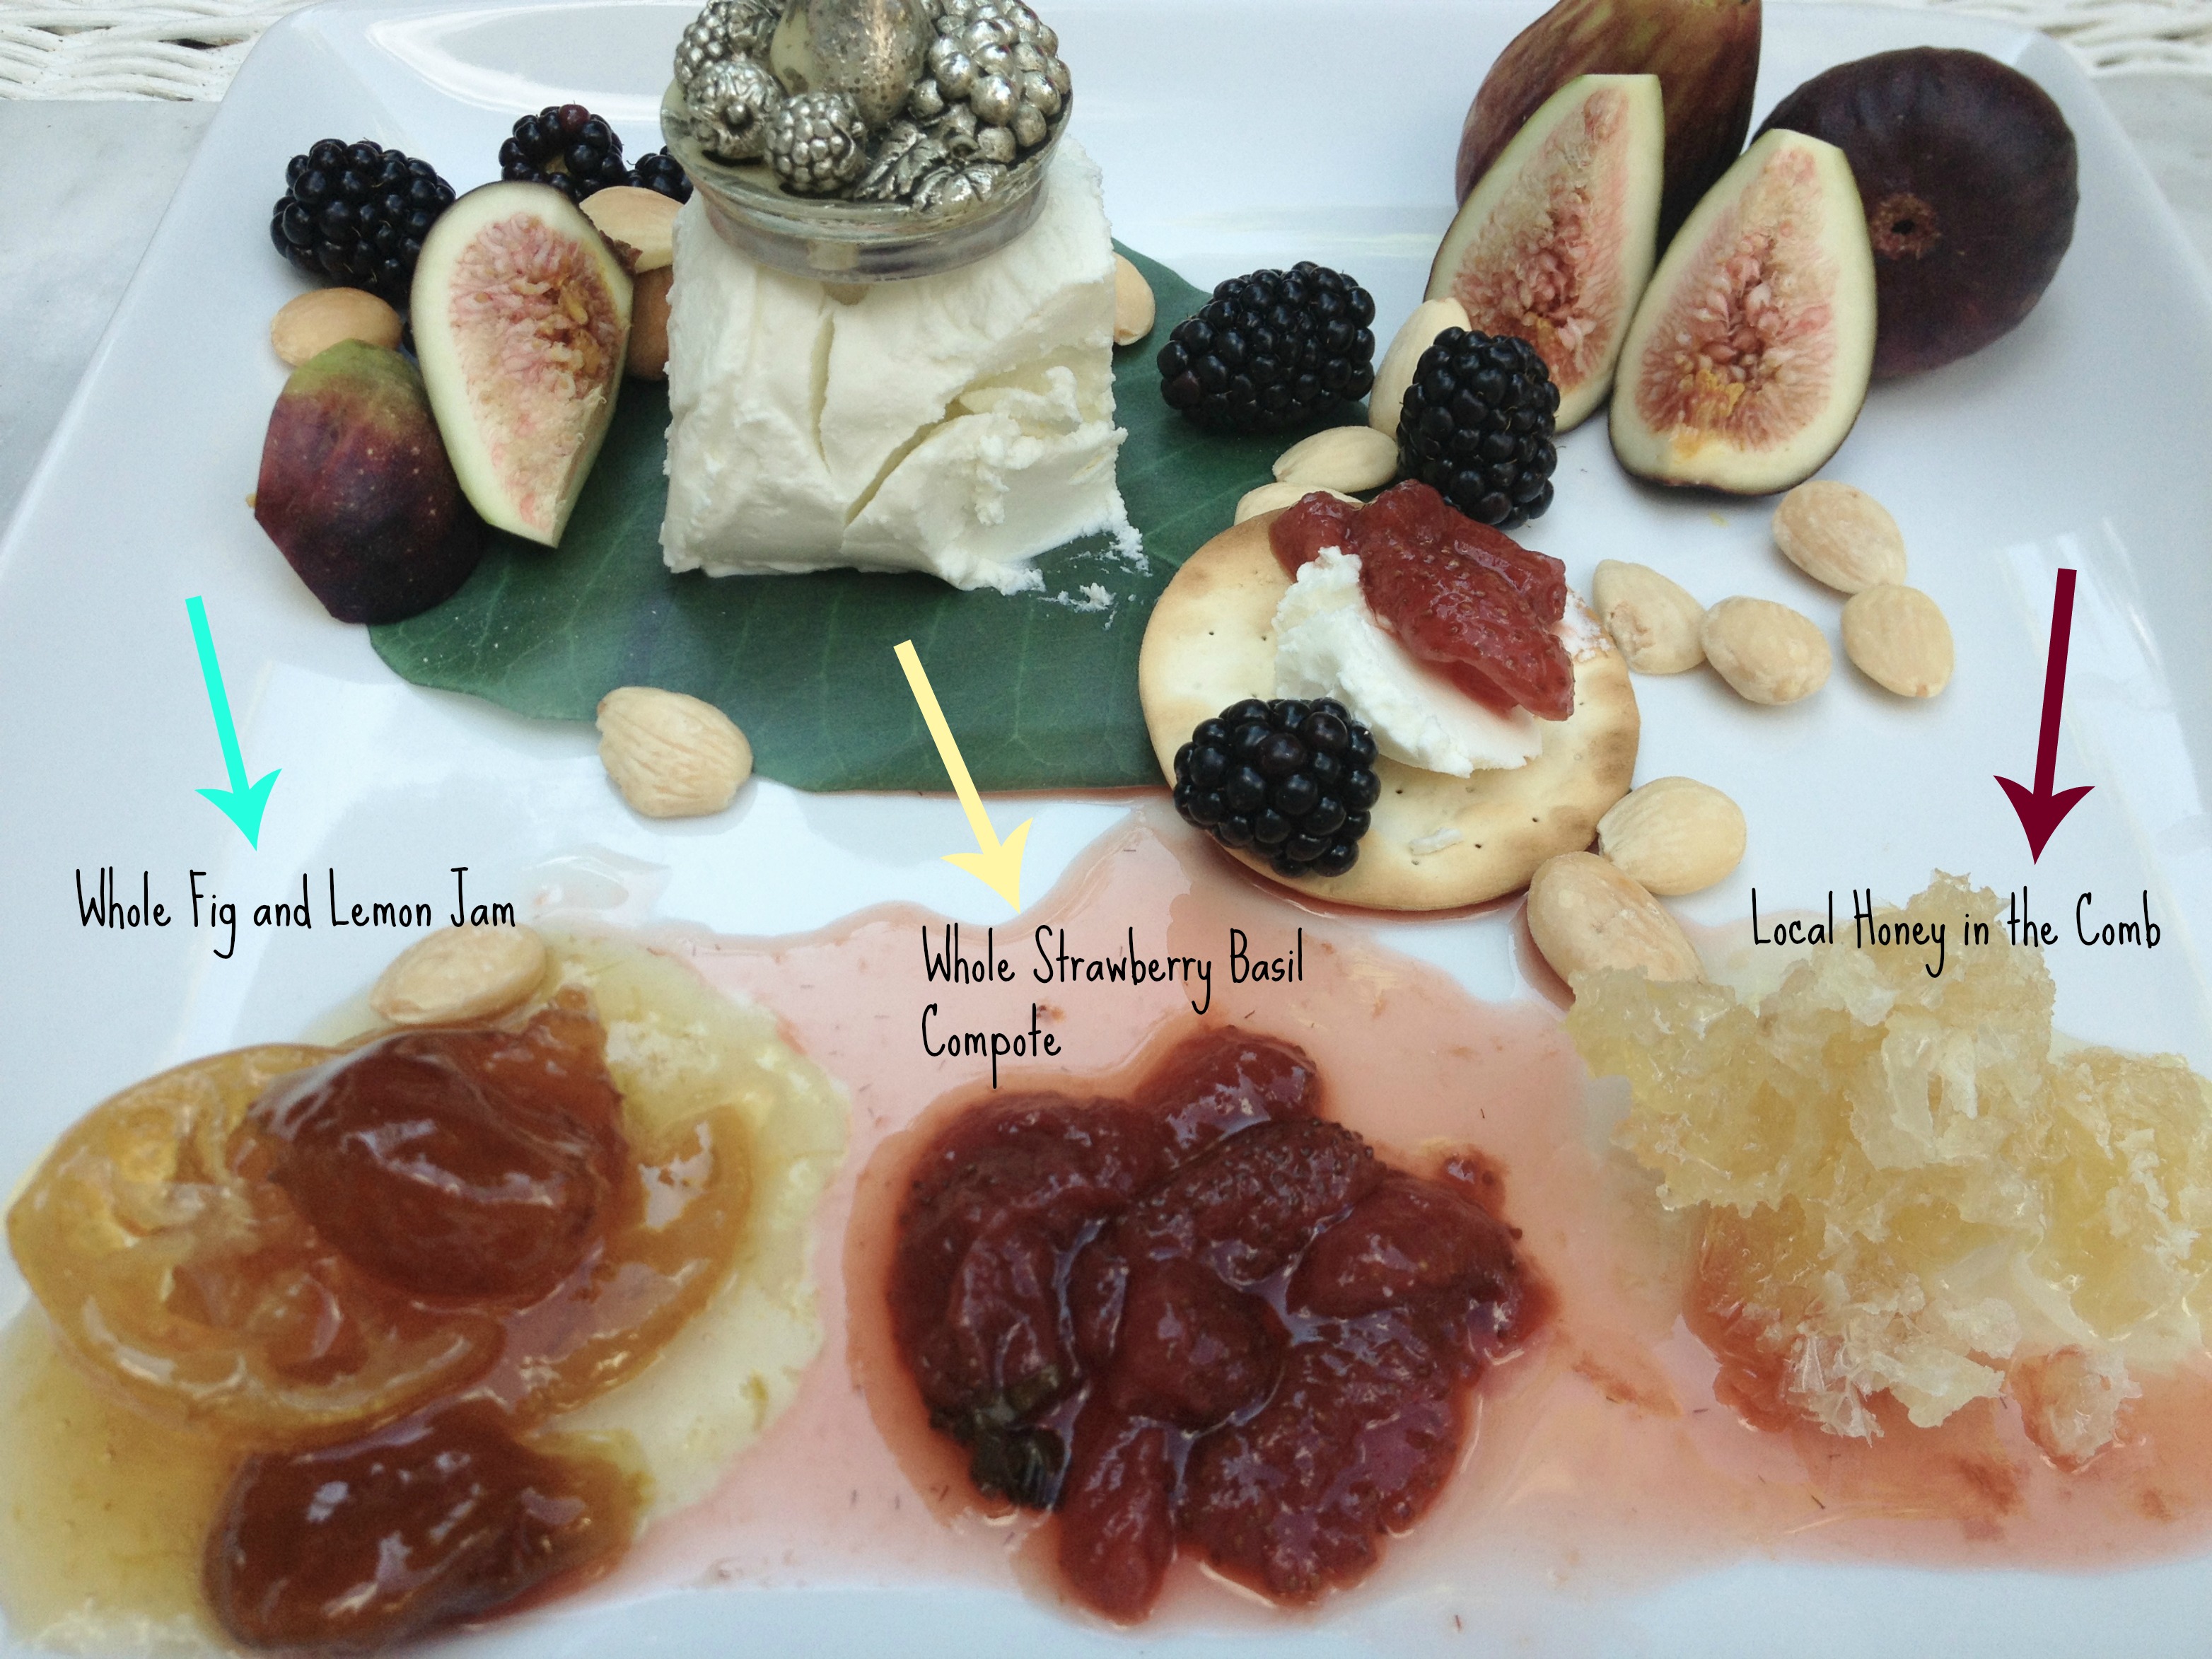
Make some before all the summer berries are gone! Those of you in climates just warming into your Summer, make this with the fresh berries, you’ll be glad you did!
Related articles
- Strawberry Balsamic Black Pepper Jam (korenainthekitchen.com)
- Strawberry Bruschetta with Balsamic Vinegar and Basil (cakebuttermilk.wordpress.com)
- Strawberry Balsamic Sauce (onceinabluemoon17.wordpress.com)
- Easy & Delicious Strawberry Jam Recipe (thelovelyphotog.com)
- Balsamic Tomato Jam with Fresh Basil (bklynlocavore.com)


 We won a