Pumpkin Snicker-doodles

Pumpkin Snicker-doodles are delightful. Full of rich Autumnal flavors, they are sure to please your sweet tooth craving.

Yum! Cookies!

I made last year and sent some down to Tyler. I had my culinary students make them to share with the local Ronald McDonald House, and now my son wants the recipe again. He had several friends last year who were going to another friends home for Thanksgiving and they wanted to take these pumpkin cookies.

So somehow they found a kitchen to bake in. We had an afternoon of “cooking by text” with successful results. Hopefully they had enough to take to their hostess.

This year he and his girlfriend are in apartments and have their own kitchens. They are going to cook for each other this year. I am publishing the recipe for Pumpkin Snicker-doodles, along with the method and photos so one of them can make the cookies again.

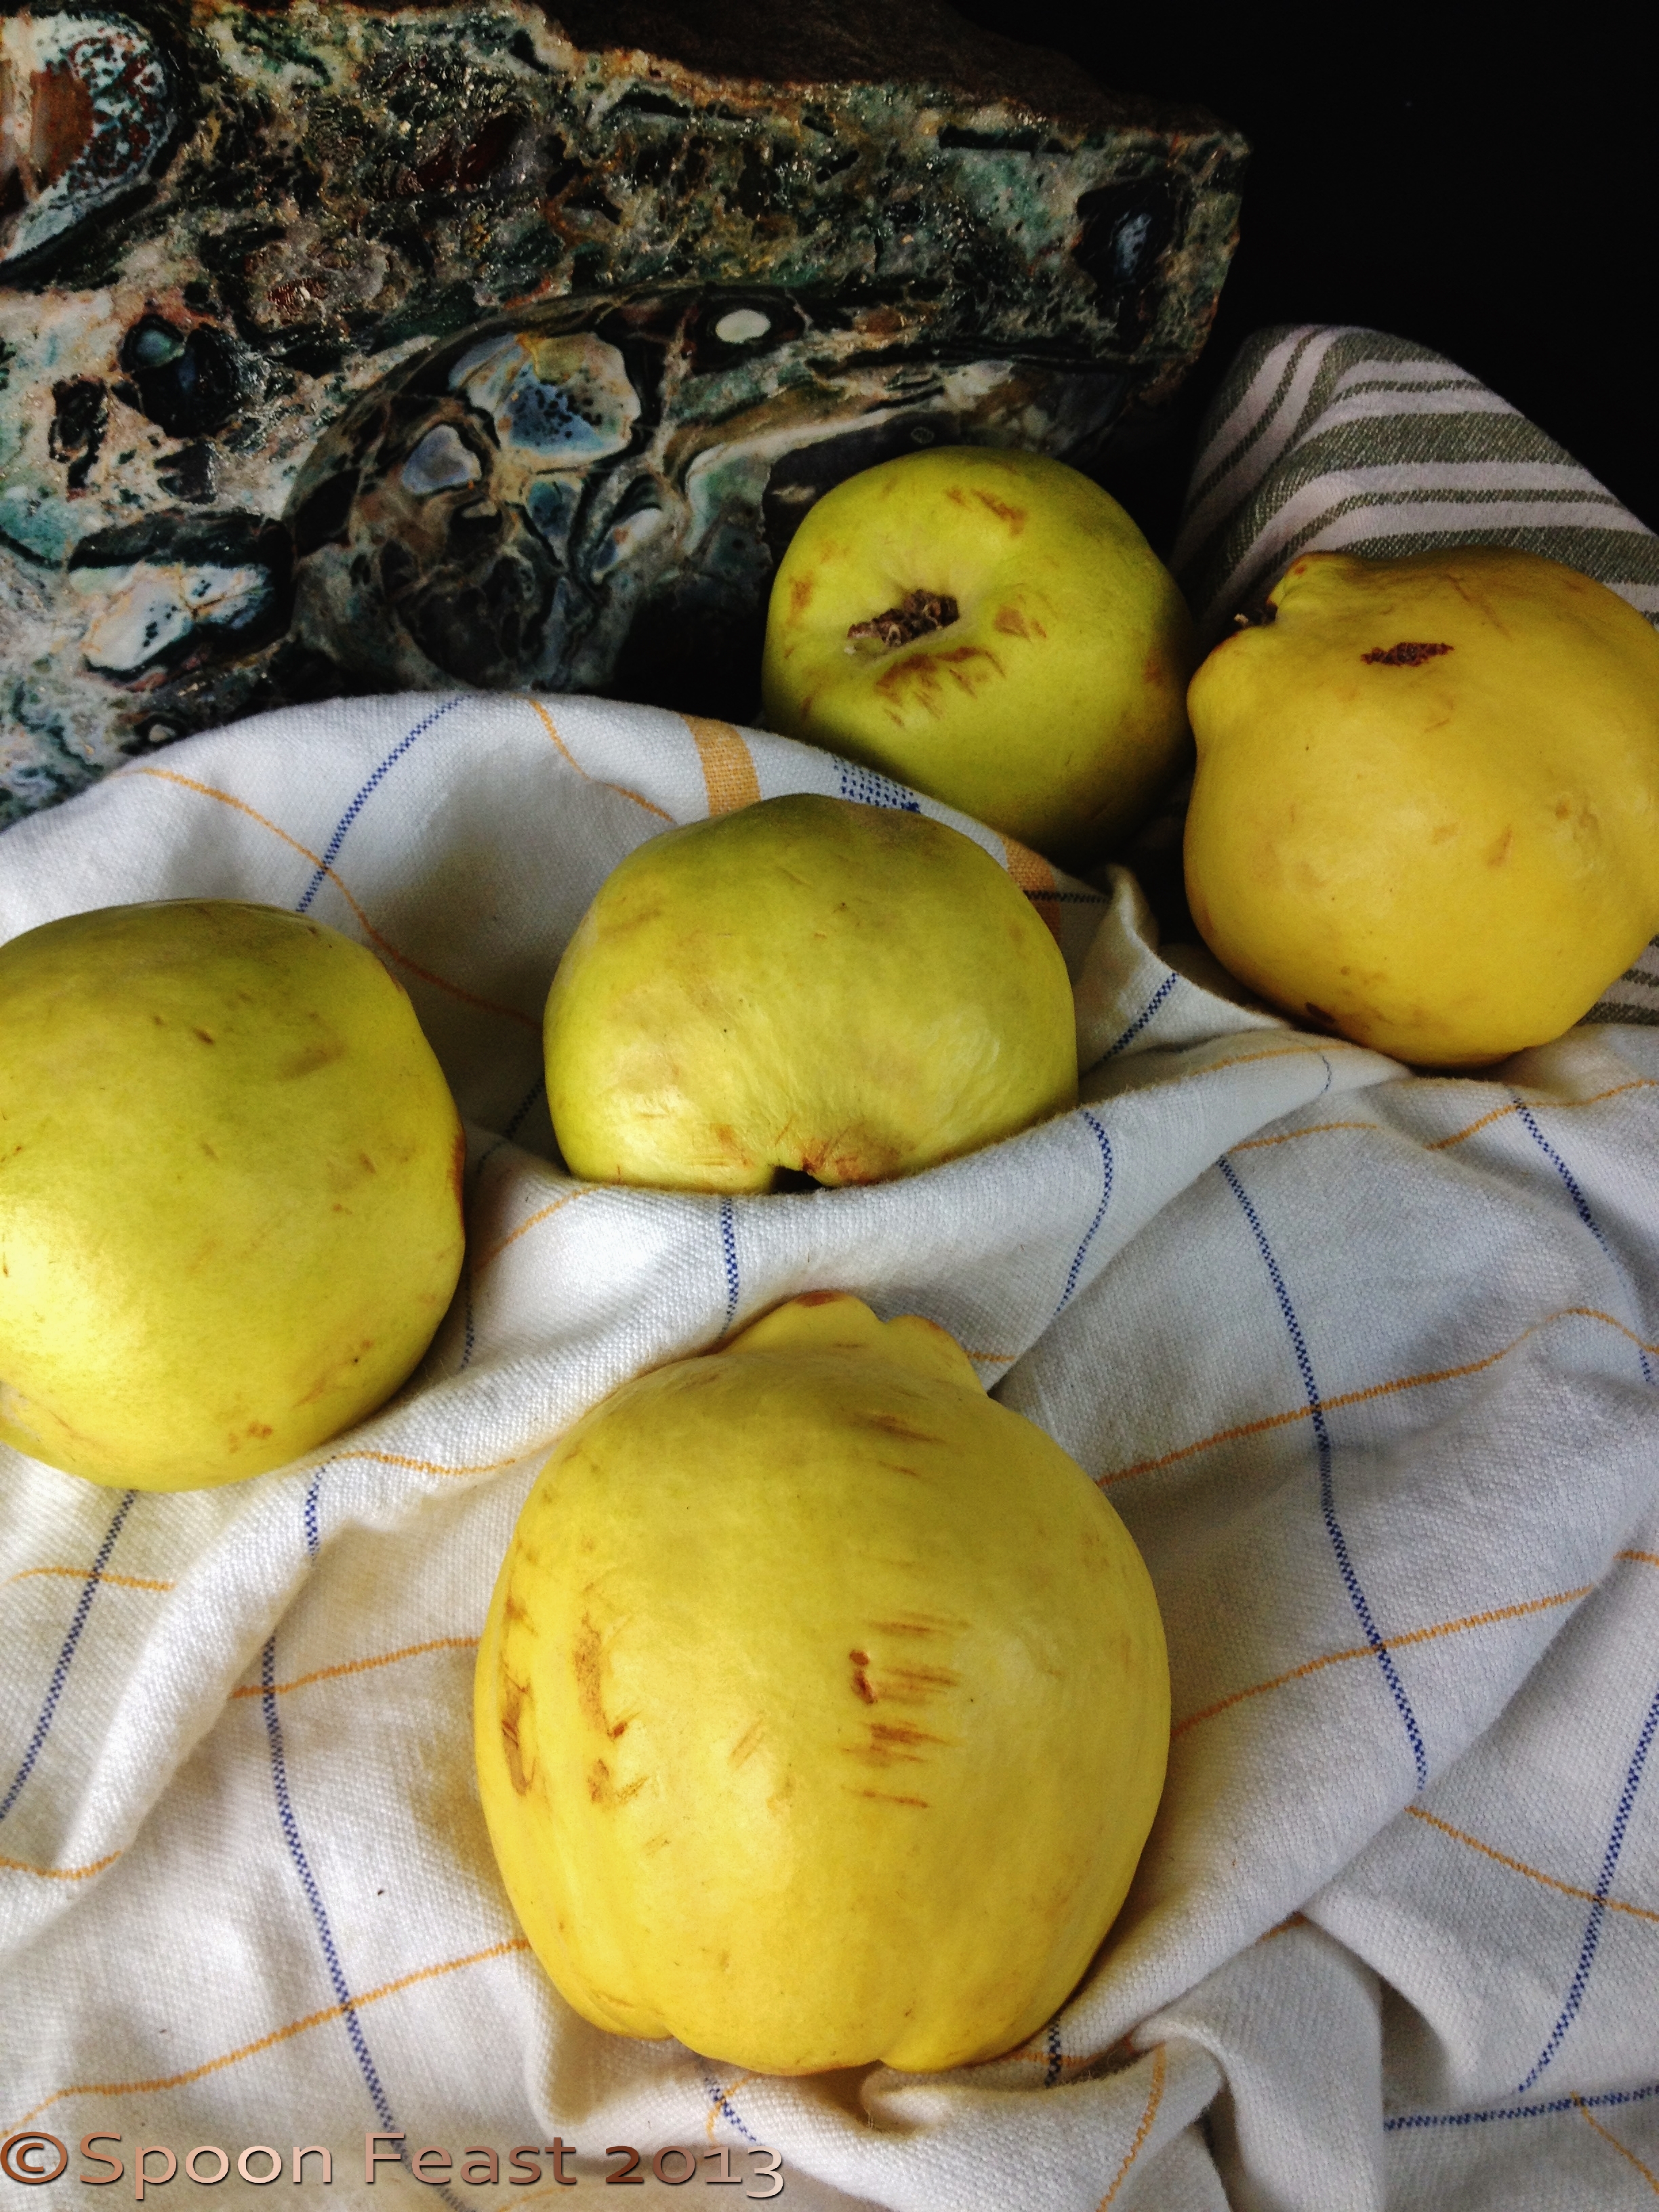
So, you don’t like pumpkin? Substitute mashed banana instead of pumpkin.

This recipe makes a lot of cookies so you may want to cut the recipe in half or just share!

Here are some reasons you should make these this afternoon:

  • They are easy
  • They taste great
  • They look impressive
  • The recipe makes a lot of cookies so there is plenty to share
  • Your house will smell wonderful all afternoon
  • You can freeze some dough to bake later
  • It’s another Pumpkin thing!
  • Fall is in the air

Pumpkin Snickerdoodles

  • Servings: A lot of small cookies! About 6 dozen
  • Difficulty: moderate to easy
  • Print

  • 1 cup softened butter (2 sticks)
  • 2 cup white sugar
  • ½ cup brown sugar
  • 3  large eggs
  • 1 cup pumpkin puree
  • 2 teaspoons vanilla
  • 6 cups AP flour
  • 2 teaspoons baking soda
  • 1 Tablespoon + 1 teaspoon cream of tartar
  • 1 tablespoon ground ginger
  • 2 tsp. cinnamon
  • 1 tsp. cloves
  • 1 tsp. salt

For rolling dough balls in before baking:

  • 1 cup white sugar mixed
  • 1 ½  tsp. cinnamon

In a large mixing bowl beat butter, both sugars, eggs, pumpkin puree, and vanilla on medium until butter is evenly incorporated into pumpkin.

In another bowl combine flour, baking soda, cream of tartar, salt and spices.

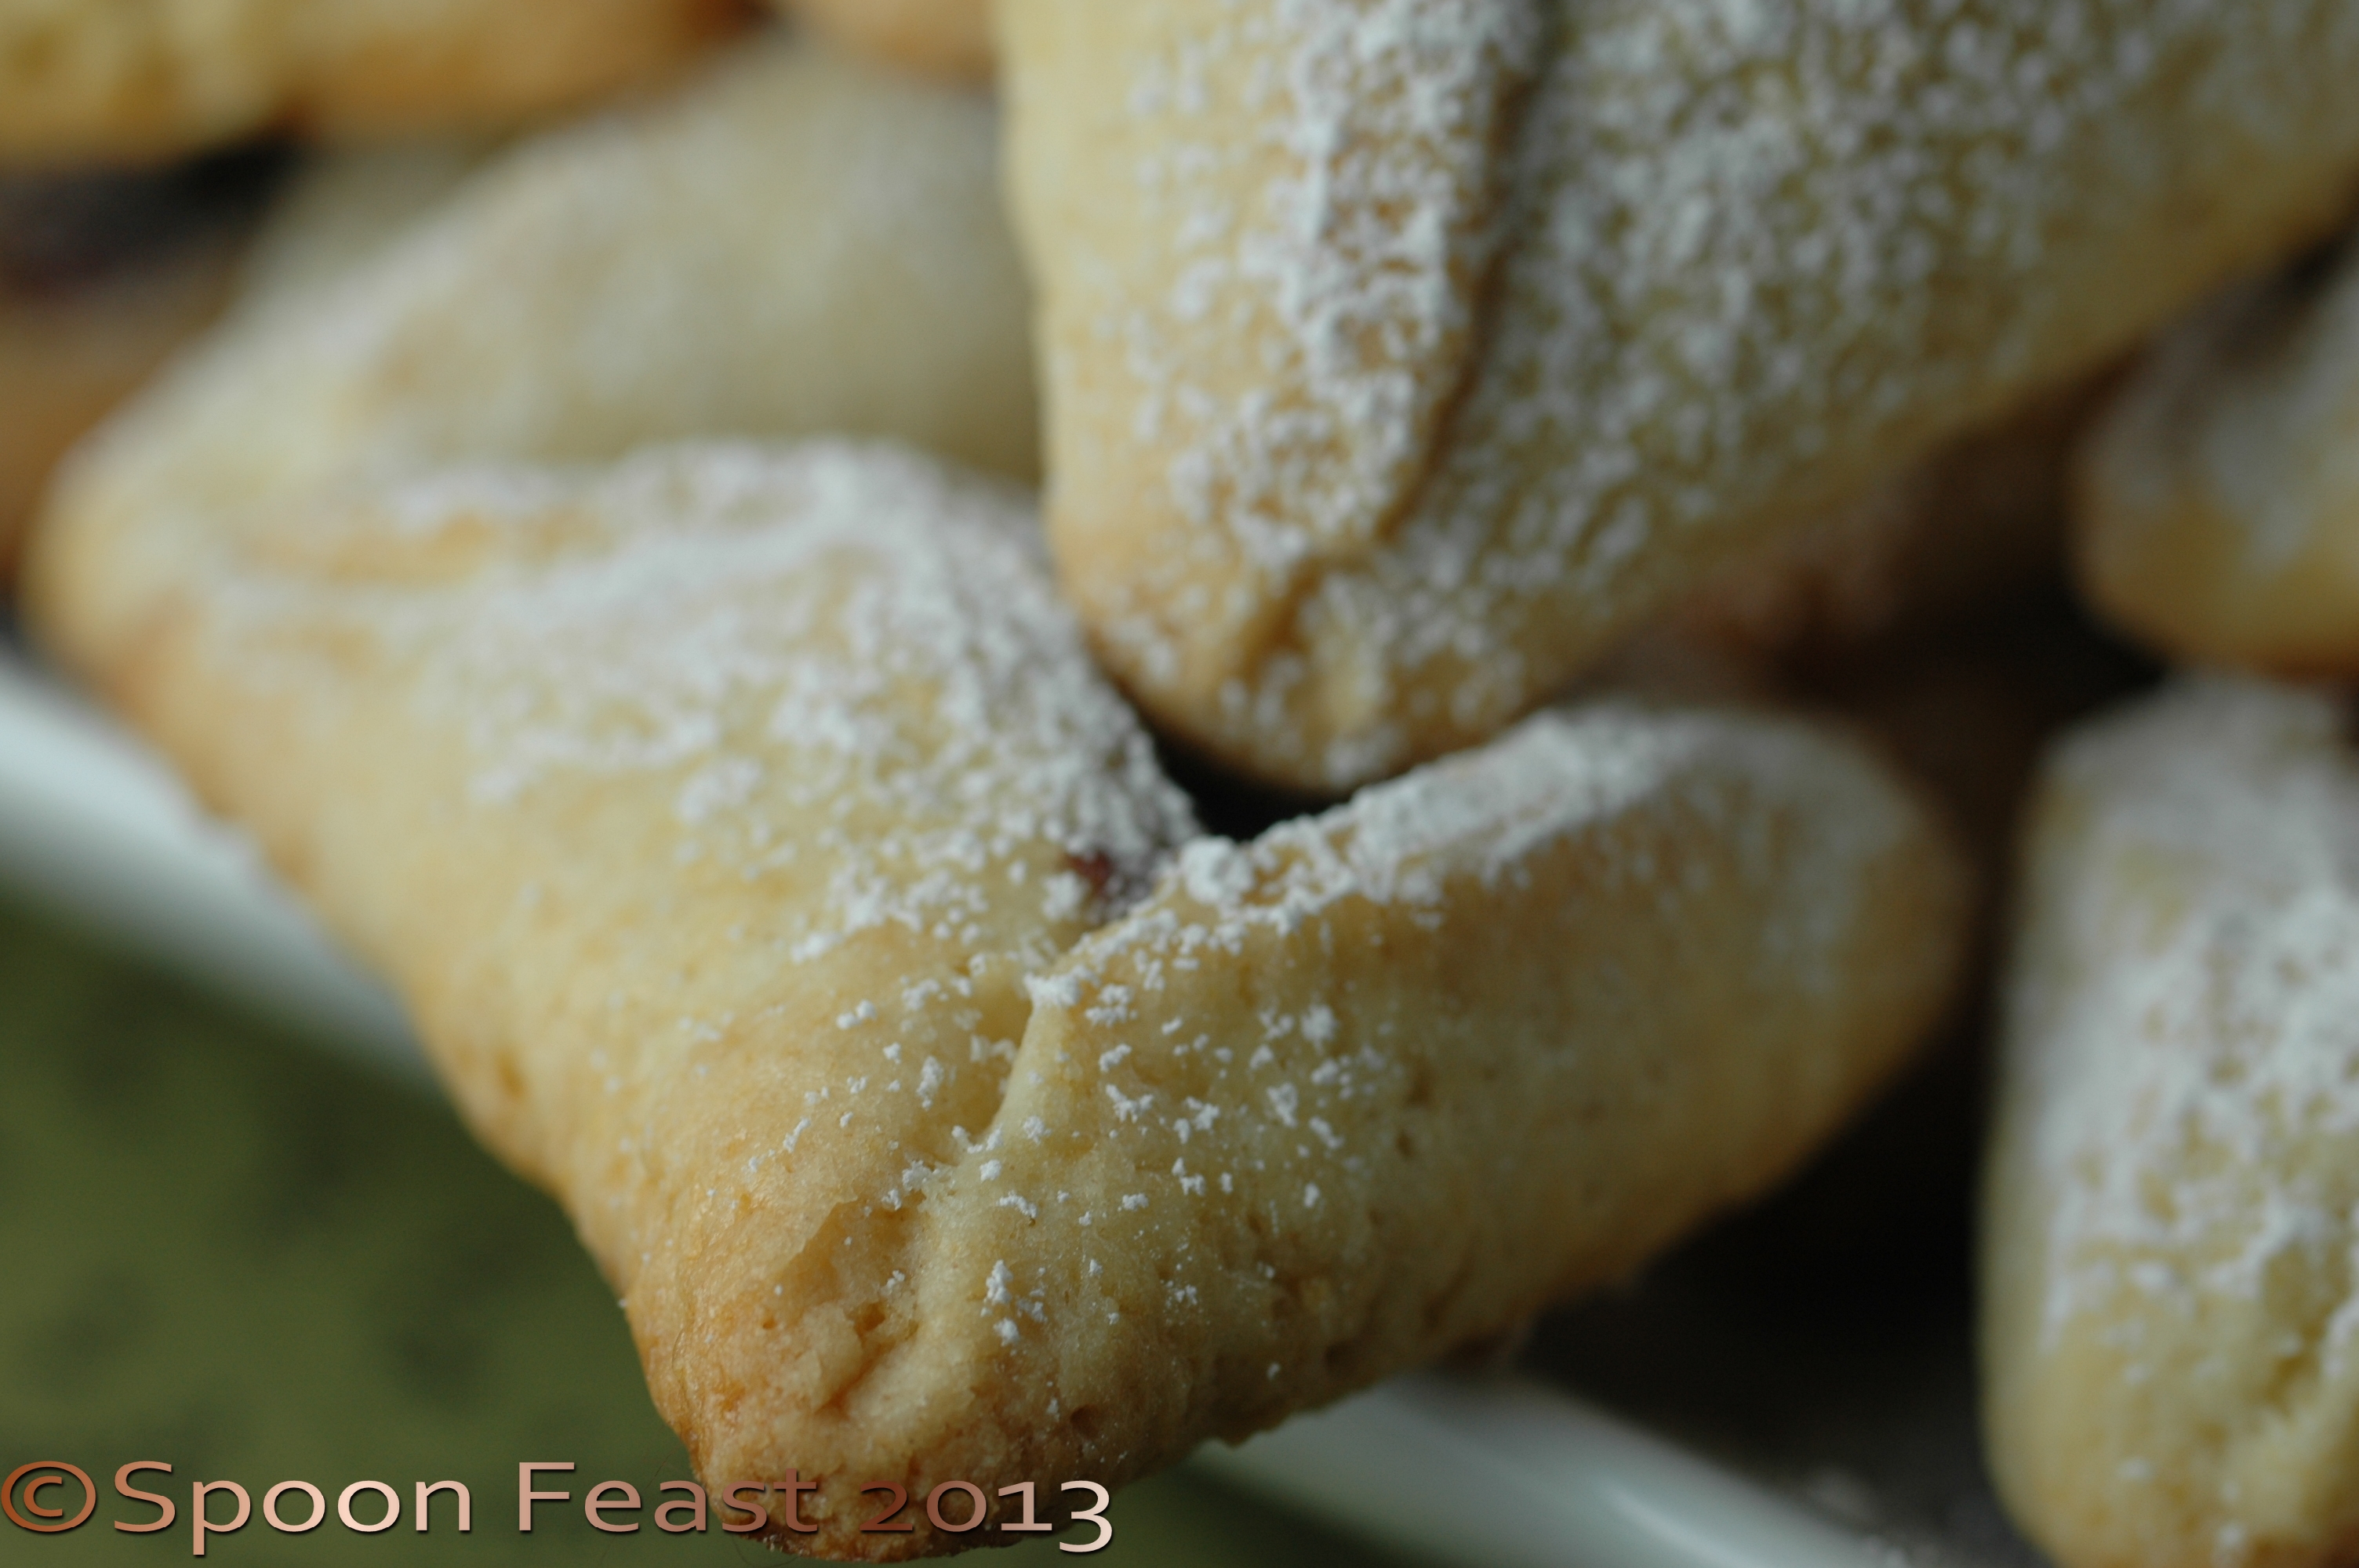
Fully Mixed Dough, Chill for at least 1 hour

Roll balls of the chilled dough in cinnamon sugar

Space the cookies 2″ apart on a lined sheet pan. Use parchment paper if you don’t have a silpat sheet. Flatten slightly with your fingers.

Beat dry ingredients into wet until it is all mixed in.  The dough will be fluffy but very sticky.

Cover and chill for at least an hour.

Pre-heat oven to 375°.

Using a cookie scoop or two spoons  form golf-ball sized balls with the chilled dough.

Roll balls in cinnamon sugar.

Place 2” apart on a baking sheet lined with parchment paper.

Flatten slightly with fingers, but not too much.

Bake for 15 minutes, or until the tops are crackled and the edges are light golden brown.

Let cool for a couple of minutes on the baking sheet before removing to cooling sheets.

Cool cookies on a wire rack before drizzling with icing sugar.

To make icing sugar, combine 10x powdered sugar with a small bit of milk and a few drops of vanilla. Add the liquid a few drops at a time as the sugar will reach drizzling consistency quickly. Us a fork to drizzle, allow to dry before stacking cookies.

Eat and be happy!

Pumpkin Snicker doodles


Quince and Gingerbread

Quince and Gingerbread make such a nice treat! This is like an upside down cake and it tastes so delicious.

In the fall, I like to keep a bowl of fall fruit on the table for not only display, but for nibbling as well. I like to have some quince in the bowl as they give off a lovely fruity aroma when ripe.

Ripening Quince

Ripening Quince

Quince are similar to a cross between an apple and a pear. They look like fat flat-bottomed pears. Quince are green when unripe and soften to a creamy yellow when ripe. The aroma is also a clue to ripeness. The aroma is captivating and inspires poems  – The Owl and the Pussy Cat by Sir Edward Lear has the two dining on “mince and slices of quince”, cooked slices of course.

Inedible raw, unlike apples or pears, quince take on a lovely mellow flavor and maintain the sweet grainy pear-like texture when cooked. Unlike most apples, quince hold on to their shape when cooked. They don’t turn brown when sliced as apples do.

If you can’t find Quince, you can substitute apples and or pears if you like.

Quince and Gingerbread Cake

Prepare the Quince:

  • 2 pounds peeled, seeded and sliced quince
  • 3/4 cup sugar
  • 1/2 cup water
  • 4 tablespoons whole  butter

Place the water and sugar into a large saute pan, bring to a boil, stir and let boil until the sugar begins to become a light golden brown. Add the butter and the quince, stir to coat then simmer for 8-10 minutes, until the quince are tender and cooked through.

Set aside to cool slightly.

Butter the inside of a, 8″ cake pan or what ever cake pan you want to use. I baked some in large (really large) ramekins and another in a square pan. Whatever pan you use, be sure you have a plate large enough to invert the finished cake onto after baking. (More on this later)

You can choose to use pan spray rather than butter for the pan. This ensures the cake will turn out easily when done.

Pour and place the quince mixture into the bottom of the prepared pan. If you like, arrange the fruit in a decorative manner as this will be the top of the cake when done.

Once the quince are cooling in the prepared pan, make the gingerbread.

Quince and Gingerbread

Quince and Gingerbread

For the Gingerbread:

  • 3/4 cup boiling water
  • 1/2 cup molasses
  • 1 teaspoon baking soda

Add the molasses to the boiling water and stir in the baking soda. Allow this to cool while putting the rest of the cake together.

In a mixing bowl, mix then set aside:

  • 1 1/4 cup all-purpose flour
  • 1 teaspoon baking powder
  • 1 1/2 teaspoons ground ginger
  • 1/2 teaspoon ground cinnamon
  • 1/4 teaspoon non-iodized salt

In the bowl of an electric mixer, cream:

  • 1/4 cup (4 Tablespoons) soft butter
  • 1/2 cup brown sugar
  • 1 large egg yolk
  • 1 Tablespoon vanilla extract

Cream the sugar and butter for about 3 minutes, add 1 large egg yolk and vanilla; process until smooth.

On low-speed, add the flour mixture alternating with the water and molasses mixture. Scrape down the sides of the bowl several times. Mix the batter until smooth.

Pour the batter over the quince in the pan. Bake in a 350°F oven for 30-40 minutes, until a toothpick inserted into the cake comes out clean.

Remove the cake from the oven, allow to cool for 15 minutes. Place a plate on top of the pan and then invert the two so the cake comes out of the pan onto the plate.

To do this maneuver easily, place a kitchen towel, folded long way, on the counter top. Place the warm cake pan on the towel, put the plate you want to invert the cake onto upside down on top of the cake pan. Fold the ends of the towel over the cake pan and the plate. hold tightly, pick it up and flip it over and set it down. slide the towel out from under the plate, then lift off the cake pan and voila! The upside down cake should be correctly displayed.

Serve with whipped cream or vanilla yogurt while still slightly warm.

Ginger has the ability to warm from the inside, the baked sweet and tart quince provide a comforting fall dessert, just perfect when the air gets nippy. I love this with a nice cup of tea.

Quince and Gingerbread

Quince and Gingerbread

Hamantashen! Shortbread and Jam Filled Cookies

Hammentashen

Hamentashen

Hamantashen are lovely cookies that can be a bit of a challenge to get the hang of making. These tasty morsels are made for the Jewish celebration of Purim. Since I’m not Jewish, I’ll not attempt to tell you the story, I’ll show how to make the cookies instead.

I have several Jewish friends so making these was fun and a nice surprise to give away.

Some basic notes, the cookies are cut out of circles that are folded into triangles to resemble hats. Who wore the hats, I’m not sure but they are part of the celebration.

Notice the direction say “folded” not pinched! For some odd reason if you pinch them, they open while baking; folded, they turn out perfect.

Here is what you need:

Hamantashen

  • 3 cups AP flour
  • 1 Tablespoon baking powder
  • 1/4  teaspoon kosher salt
  • 6 ounces butter at room temperature
  • (6 ounces or 1-1/2 sticks or 3/4 cup of butter)
  • 1/2 cup granulated sugar
  • 3 eggs
  • 1 Tablespoon Vanilla extract

Method:

Pre-heat the oven to 400°F.

Mix the flour, baking powder and salt together in a bowl. Set aside.

In the bowl of a mixer, combine the soft butter and sugar with a paddle until incorporated, add the eggs, one at a time, mixing until the mixture is smooth, add the vanilla.

Add the flour mixture a third at a time to the butter, sugar and egg mixture, process just until the mixture is combined. Don’t mix it a long time as gluten will develop resulting in a tough cookie rather than a tender one.

IMG_5201Divide the dough in half and roll it out on a lightly floured surface.

Cut 3-4 inch circle, brush with egg wash, add your filling and fold the circles into triangles.

Roll out the dough and cut circles (3 or 4 inches)

Roll out the dough and cut circles (3 or 4 inches)

Lay the disks on a parchment lined baking sheet and add the filling of your choice: Any fruit jam, peanut butter, chcolate chips, poppy filling, prune filling, raisin filling etc.

Lay the disks on a parchment lined baking sheet and add the filling of your choice: Any fruit jam, peanut butter, chocolate chips, poppy filling, prune filling, raisin filling etc.

 Egg wash the edges, Fold the circles into a triangle;  bake in a 400 F degree oven for 15-20 minutes, until golden brown.

Egg wash the edges, Fold the circles into a triangle; bake in a 400 F degree oven for 15-20 minutes, until golden brown.

It is important to note do not pinch the corners, FOLD them!

Egg wash the outsides of the triangles and bake for 15-20 minutes, until the edges are golden brown.

Cool and sprinkle with confectioners sugar.

Purim cookies

Folded edges

Folded edges

DSC_0051 DSC_0043

In My Kitchen February 2013

I missed out on last months post, mainly because I ran out of time and the other was due to being “suspended “ on WordPress. (Yeah, I’m such a bad girl!)

This In My Kitchen posting neatly summarizes what has been happening in my kitchen over the last month.

At Soup in Sunday I bought another bowl, for condiments this time.

The new bowl

The new bowl

There has been lots of information going around on how to grow things from kitchen scraps. I love scallions and have a hard time getting them to grow. My dad on the other hand gets things to grow for him just by thinking about it.

"Hydroponic" Scallions; They will need dirt soon!

“Hydroponic” Scallions; They will need dirt soon!

So scallions are now growing in vases for easy clipping and almost instant regrowth. They will need soil soon, I’m sure

In my kitchen this month are these lovely measuring cups.

Hedge Hog measuring cups

Hedge Hog measuring cups

You can use them as scoops too

You can use them as scoops too

How cute are these? They were a Christmas gift from Robert’s daughter Kim. Aren’t they adorable!

I started taking a class (just because) on Nutritional Concepts and Medical Nutritional Therapy so the awareness of what we eat has been in the spotlight. Eating/using  a lot of butter (I love butter!) is one thing that has changed. I used to keep at least 5# of butter on hand for baking but now, I hardly have any. If I want to bake, a to run to the store would be required. This step alone has really put a damper on the treats available in my kitchen.

So now baking sweet treats involves some actual thinking about it rather than just jumping in and baking my heart out.

I am teaching a baking class this semester so the advantage of this is I get to play with tons of dough and make all kinds of things all day long. When I come home, the treats aren’t staring me in the face demanding “eat me!”

However, Celia’s Chocolate Nutella frogs had me locating the jar of Nutella and slathering it on to  a Trisket and topping that with a few pistachios. Thankfully there are no incriminating photographs!

In my kitchen this month is a  new (to me) book, The Bread Baker’s Apprentice  authored by Peter Reinhardt.

I find it fascinating. Additionally, I bought a couche for when I make bread. the need has been there for a while, I’m just getting around to buying one.

Bread Baker's Apprentice and floured couche

Bread Baker’s Apprentice and floured couche

One of our friends is a friend of Peters. I am hoping to get the book signed one day.

In my kitchen are some great new lenses for the i phone!

i Phone lenses

i Phone lenses

There are three of them, wide-angle, fish eye and macro lenses. I am really looking forward to having the time to really learn how to use them effectively.

I’ll do a post on the shots the camera makes with the different lenses.

Here is a shot using the macro lens

Using the i phone macro lens

Using the i phone macro lens

So, now it is time to go make bread for the week. Celia’s pain-viennois and Richard Bertinet’s method of kneading the sticky dough mass until smooth and elastic seems just like the therapy I need today.

I’ll make some with chocolate!

Gratitude goes out to Celia of Fig Jam and Lime Cordial for hosting this fun series of peeking into one another’s kitchens each month.

Promise, I’ll get back on track and not be so late  submitting next month.

Pain Chocolate

Pain Chocolate

An Easy Crust for Pies and Tarts

Here is a super simple dough to use for pies and tarts. One key to working with any tart dough is to keep it cold. This allows the fat to melt while baking which creates light, flaky crusts.

Plum Blackberry Almond Tart

With lots of holiday events approaching, here is a simple basic approach to a nice pie or tart dough.

If you want a double crust, double the recipe. This only makes 1 crust.

Easily done by hand, you can also use a food processor, just pulse the ingredients without the water, add water, bit by bit to make the dough mass. You may use all the water, only some or you may need more. It depends on how much moisture your flour holds.

Easy Pie or Tart Crust

  • 1 cup all-purpose flour
  • 1 tablespoon sugar
  • 1 teaspoon salt
  • 3 ounces cold butter, cut into small cubes
  • 3 – 5 tablespoons ice-cold water

If creating the crust by hand, combine the salt and sugar with the flour. Cut the cubed butter into the flour using a pastry cutter, two knives or a fork.

English: A dough blender; also called a pastry...

English: A dough blender; also called a pastry blender. (Photo credit: Wikipedia)

Cut the fat into the flour

When the mix resembles a coarse mixture (you still want to see some globs of butter, don’t make it smooth) add the ice-cold water tablespoon by tablespoon.

The mass should come together. Only use as much water as you need to bring the ball together. You may need more water or less water. This is why you add it bit by bit.

Add enough water to just bring the dough ball together when you squeeze it.
You want to see blobs of fat in the dough, not smooth.

Press the dough into a ball and place it between 2 pieces of plastic wrap. Press it into a disk.

Refrigerate until cold.

Roll the dough between sheets of plastic wrap

Roll the chilled dough out to the size you need while it is still in between the wrap. This makes it easier to handle and is much easier to clean up too.

Remove one side of the plastic wrap. Position the dough over the pie or tart pan and press it into place.

Alternatively, you can press the dough into the pan and then chill while you prepare the filling.

Much easier is to use the fluted tart pans with the removable bottoms. Press the dough into the tart pan. Make sure you have at least 1/4 inch at the sides and at the curve of the pan so it is strong enough to stand on its own when the pan is removed.

Small fluted tart shells ready for filling

The fluted edge pans give all your tarts such a professional finished look, they are so worth the investment. Since they come in many sizes, you can make large tarts or small individual ones and any size in between.

Ready to fill and bake. See the fat? That means you will have a flaky crust.

Fill them just as you would a pie.

If you use a top crust, decorate it with dough cut outs instead of just a pile of dough on top of the filling.

Or use a strusel topping or leave the fruit exposed and glaze with melted apple or seedless raspberry jelly when the tart is done. This puts a “sealing glaze” on the fruit and makes it shiny. The photo of the Plum and Blackberry Almond Tart at the beginning of this post is finished with melted red currant jelly.

Here are some of my thoughts about using other ingredients besides water and butter.

Butter: Fat is fat, at least the melting point of butter is lower than body temperature. Fat provides tenderness and flavor to the crust. I’d rather eat butter than Crisco or lard or hydrogenated oils like margarine. I have yet to try coconut oil.

Water: Some recipes will ask you to use vodka instead of water. It provides a flaky crust too. Alcohol evaporates faster than water therefore creating a flakier crust. Try it if you like. I don’t drink distilled spirits so it never occurs to me to use vodka.

Flour: Use a good quality organic flour. You can use gluten-free flours too. I’m just not too sure how strong the non-wheat flours will hold up in a fluted pan once the outer ring is removed. My experience is most gluten-free baked goods are crumbly due to the lack of gluten.  Not sure how to over come that but since I’m not gluten-free, I use King Arther’s unbleached AP flour and I get pretty crusts.

I do know if I had to go gluten-free, I would miss pie crust, tarts, and good chewy bread tremendously.

No matter what liquid you use, just be sure it is ice-cold. I use a large measuring cup with lots of ice and water and scoop what I need from there. When finished, I pour the cold water into a glass and make lemonade or tea. I suppose you could do the same with vodka. Use lots of ice.

Bake off empty shells by lining with parchment and filling with rice or beans and baking until done. Fill with fresh fillings.

Fill unbaked shells with fruits, custards, fillings and bake until golden and bubbly. Times vary but usually take 45-55 minutes in a 350°F oven.

There are so many finishing and fillings!

Use any left over scraps to make dough cut outs. Egg wash them and sprinkle with sugar. Bake on a cookie sheet until golden brown. Use these on the top of the tarts, place them when the tart is still hot from the oven or serve as a garnish with each serving.

Be creative.

Pineapple, Chestnut and Caramel Upside Down Cake

Going crazy with using chestnuts these past few days lead me into dessert realm. If I could keep my hand out of the jar and stop snacking on these tasty morsels, they would actually make it into more things.

Alas, what to do?

Pineapple Upside Down Cake is one thing you can do. Please, forget about those horrible neon glaring cherries Betty Crocker used. This is a cake for adults because it has rum in it. Of course you could leave it out or use rum flavoring, but there isn’t anything quite like Pyrat Rum.

Upside down baking is a rather nice idea actually and can be adapted to may other fruits as well. One you may have heard of is the French famous Tarte Tatin. Flip the baked cake or tart over onto a plate and the bottom of the pan becomes the most wonderful caramelized fruity topping.

What a novel idea, upside down baking.

I found a can of baby pineapple rings at a gourmet store that were screaming to be made into a cake. With waning warm weather, this cake brings you smack dab into a nice tropical get-away.

Pineapple, Chestnut and Caramel Upside Down Cake

Ingredients:

For the caramel and pineapple topping:

1 can mini pineapple rings

You can use regular pineapple rings too. You may want to cut them to make an overlapping pattern.

3 ounces butter

3/4 cup brown sugar

1 cup chestnuts cut in half

You want enough so every hole has a chestnut. Or sprinkle chopped chestnuts over pineapple.

Method:

Pre-heat oven to 350°F.

Drain the pineapple, reserving juice for the cake batter.

Using a 9″ heavy bottomed saute pan, melt the butter and the brown sugar. Once melted, allow to simmer for 4 minutes, do not stir once simmering begins.

After 4 minutes, remove from heat and carefully place the pineapple all over the surface of the caramel.

Be careful about touching the caramel as it is very hot.

Arrange pineapple over caramel, place a chestnut over each hole or sprinkle them on.

Overlapping the pineapple, cover the entire surface of  the pan. Fill each hole with a chestnut half. If chopping, sprinkle the surface of the pineapple with the chopped chestnuts.

For the cake batter:

  • 1 1/2 cups AP flour
  • 2 teaspoons baking powder
  • 1/4 teaspoon salt

Sift these together and set aside.

  • 3 ounces soft butter
  • 3/4 cup granulated sugar
  • 2 eggs
  • 1 teaspoon vanilla
  • 1 tablespoons good quality rum (Or 1 teaspoon rum extract)
  • 1/2 cup unsweetened pineapple juice ( left from straining the pineapple)

Using an electric mixer, whip the soft butter until it is light and fluffy. Gradually add the sugar and then the eggs, one at a time.

Add the vanilla and rum then add the pineapple juice.

The mixture will separate and look like a mess, but move on.

Add the flour in two stages. Once the flour is added, the mixture looks just fine.

Pour the batter over the fruit and caramel. Bake.

Pour the batter over the pineapple and chestnuts.

Place the pan into a 350°F oven for 45-50 minutes. Test for doneness with a toothpick. When it comes out clean, the cake is done.

Remove the pan from the oven. Keep a cloth on the handle so no one burns their hands on a hot handle while the cake cools.

Cool for 10 minutes.

Lay a folded towel on the counter. Place the cake pan on the towel. Place the serving plate over the pan.

Fold the towel over the plate and holding it all tightly together, flip it so the cake turns out onto the plate.

Hopefully, all the pineapple will also follow. If not, just replace them.

If you like, sprinkle a bit of rum over the top of the cake. Totally optional.

Exploring Upside Down Baking is on the agenda for this winter.

What about an Upside Down Banana’s Foster Cake?


Oatmeal Cranberry Bars or What To Do With Leftover Cranberry Sauce

Oatmeal Cranberry Bars

This recipe is a great way to use up any leftover cranberry sauce you may have from holiday meals. I find whole berry works best but if you like the jelly kind, use it too. Store bought, in a can or fresh, any cranberry sauce will work out quite well.

For the best, make your own cranberry sauce.

Oatmeal Cranberry Bars

  • Servings: 12
  • Difficulty: moderate
  • Print

Cranberry Sauce 003

Cranberry Sauce 003 (Photo credit: MGF/Lady Disdain)

Pre-heat the oven to 350°F. Prepare a 9 x 13 inch baking pan. Spray the bottom and sides with baking spray, line the pan with a sheet of parchment, allowing the sides of the paper to overhang on the long edge of the pan. This makes for easy removal from the pan after the bars are baked. Simply lift the paper and the whole thing can be moved to a cutting board or platter.

Spray the parchment with baking spray. Set aside until ready to use.

Make the dough:

  • 8 ounces soft  unsalted butter
  • 1 1/4 cups packed light or dark brown sugar
  • 1 large egg
  • 2 teaspoons vanilla extract
  • 2 cups all-purpose flour
  • 1 teaspoon baking soda
  • 1 teaspoon kosher salt
  • 1/2 teaspoon ground cinnamon
  • 2 1/2 cups old-fashioned rolled oats
  • 1 cup chopped pecans
  • 4 ounces cream cheese
  • 1 cup semi sweet chocolate chips

Using a mixer with a paddle attachment, add the butter and sugar, mix just until it comes together.

Add the eggs and vanilla.

Mix together: flour, baking soda, salt, cinnamon and pecans in a separate bowl. Add the mixture to the butter and eggs, stirring slowly to combine, slowly add all of the oats and mix only until combined.

Press 1/2 of the dough into the bottom of the baking pan.

Top with cranberry sauce. Make sure to cover the entire surface, all the way to the edges. I added some seedless raspberry jam in dollops all over the dough too.

Dot the cream cheese over the surface of the dough.

Using the remaining half of the dough, dollop it over the top of the cranberries and cream cheese.

Bake in the pre-heated 350°F for 45 minutes or until the top is lightly golden brown.

When the bars come out, drop 1 cup of semi-sweet chocolate chips on top. The heat from the baked bars will melt the chips, then spread the melted chocolate in swirled patterns over the top. You could drizzle some fondant icing over them too but that might be overkill.

Remove from the oven and cool on a wire rack for about 1 hour.

Carefully lifting the sides of the overhanging paper, lift the baked bars onto a cutting board and cut them into the desired size with a sharp knife. Sprinkle any crumbles over yogurt.

Store covered at room temperature for up to 7 days. (If they last that long!)

Plated Oatmeal Cranberry Bar

Baking from a Box


My friend Joanie asked me if I would make up a batch of cupcakes from a box mix. She was curious about whether they would live up to the name associated with the high-priced mix.

“Would it be the same if I made it vs. a professional chef?” she asked.

Presenting me with the challenge of using a boxed mix I told her I would give it a whirl.

She wants to know:

Would I make any changes to the directions?

Is it easy like baking from a box promises?

Are the results as promising as the names on the box: in this case, Ina Garten, the Barefoot Contessa and the German Chocolate Cupcake and Frosting Mix.

The mix is distributed by Stonewall Kitchens although nowhere on the box does it say where the mix was put together.

So, here goes.

First, the mix costs $13.95 for 12 cupcakes.

My first thought is “expensive”. Is it worth the money?

I notice the frosting mix contains cornstarch which is something I wouldn’t use as in my opinion, it is a cheap way out of proper thickening techniques. But we will see.

Inside the box are three bags: one contains the chocolate cake mix, another granular frosting mix and lastly, a small bag of sweetened shredded coconut.

I need to supply:

  • 1-1/2 sticks of butter
  • 2  whole eggs
  • 2 egg yolks (I see macarons in the near future!)
  • 1/2 cup heavy cream

The directions seem to be simple enough, so I pull the eggs and butter from the fridge and go for a run while they come to room temperature.

Instead of using plain cups for the cupcakes, I am going to use the fun flower ones I found out shopping one day.

Fast forward to finished baking these. All I can say it they are definitely NOT worth the price, let alone the extra cost of a fancy paper cup. Not only did they not turn out, they were also hard as rocks one they cooled.

They also had a funny smell as they were baking. Usually when you bake chocolate, the aroma is thick in the air. The aroma from these had you checking the bottom of your shoes.

Nice expensive cupcake mix
Don’t waste your money!

Now after that fiasco, my curiosity was up, how would the normal cake mixes found in the grocery store work out?

So I hauled up to the grocery and bought one of each kind of German Chocolate Cake Mix; there were three.

All three had me supply eggs, oil and water. That’s it. Frosting was extra, but was that tiny bag of coconut in the expensive mix worth the $13? (No)

So I made each of these mixes, each mix made 24, the expensive mix made 12.

I made a quick coconut caramel frosting from scratch to frost the cupcakes with, and I used the frosting mix from Barefoot Contessa’s box. It was OK, nothing great and it looked rather dull. I’m wondering if they ever passed this box mix by Ina to see if she approved. I can’t imagine they did.

So at the end of the day, we had so many cupcakes and bowls of coconut frosting lying around, Robert was afraid of us eating them all.

I wrapped plated of the cupcakes up in cellophane and sent Robert around the neighborhood giving them to all our neighbors.

One little boy was asking his mom why they didn’t have anything good around the house to eat, like cupcakes, the night before.

When he answered the door and Robert was standing there with an entire plate of cupcakes, all he could say was “Really! Thank you! Thank you so much!” Grinning ear to ear, he disappeared into the house with a plate of cupcakes. I could imagine him hiding them in his room so his older brothers wouldn’t get any.

I love sharing the sweets I make because if I didn’t, #1, we would weigh as much as a horse, #2 I wouldn’t make them just because of #1.

And I do love to make pastries, bread and lots of great food. Sharing it is the only way to keep from wearing it.

As a side note, I did make macarons from the egg whites, I should have given away more of them. I need to add a few more miles to my running schedule.

I did figure out that if you are going to bake cupcakes, forget the boxes and make the batter from scratch. It will be cheaper by far and you will know exactly what you are eating.

My advice? Joanie, get your money back.

If you want to use a mix Duncan Hines or Pillsbury or any of the organic mixes work just fine.

My opinion is Contessa needs to go back to the kitchen to re-work her box mix.

I never would have done this if Joanie didn’t ask.


Bread Insanity: Baking Bread on the Grill

I have Bread Insanity. I hope it isn’t contagious.

Ever since last August  I have made all of our bread. Today, we are completely out so I need to make some.

This is the hottest record-breaking heat wave this area has seen since the 1800’s. Today it is 105°F outside with at least 80% humidity or more. I decided not to run today because of the heat, why do I decide to bake bread?

I need to make bread but certainly don’t want to crank my kitchen ovens up to 450°F for an afternoon on the hottest day of the year and the hottest day of June ever recorded here.

So I decided to bake the bread on the grill. Brilliant!

We have a wonderful workhorse of a grill that is over 10 years old. It is stainless steel and cranks 60,000 BTU‘s. Sweet.

I have learned to control the heat chamber like an oven so , bread gets to be baked outside today.

I have never done this before so it will be interesting how it turns out.

Up goes the umbrella to provide the courtyard with shade.

Tea and Thermometer while watching the grill waiting for the bread to bake.
105 F outside; hottest June ever recorded here. The grill set at 450 F raises the temp in the courtyard just a wee bit.

A clean table-cloth is placed on the table, fresh big glass of iced tea is poured and ready to sip with a straw. (Sip with a straw and you get the coldest part of the drink)

Bread is rising; grill is heating.

I have two loaves: one a traditional artisan loaf baked free form and the other in a cast iron pot.

Dough rising in a cast iron pot

I wonder if the heat retention of the cast iron will have any influence on how the loaf bakes.

Since it is so warm out, I leave the loaves on the table, covered, to rise in the warmth. Which happened quite quickly today.

After the grill had warmed for about 10 minutes, the first loaf goes in. The sheet pan fits.

No window to peek in like the oven has.

Timers start. 30 minute countdown begins, then temp to see if it has reached 190°F internally.

I realize I can’t go inside for very long because I need to monitor the temperature and keep it steady at 450°.

Grill temperature nearly there

Sweat. Drink tea, sweat more drink more. I am drinking un- sweet tea with lemon and mint to keep hydrated. Ugh, it sure is hot.

The only running I have done today is to the ladies room.

Damn it gets hot out there quick!

The courtyard is maintaining an ambient temperature between 118°F and 125°F with no air movement. Ek.

Outside temperature in the courtyard

Drink more and wonder about this idea of baking bread on the grill on the hottest day of June ever recorded here.

It must be Bread Insanity. There is no other explanation.

I wonder if I could grill a pie?

First loaf done!

Second loaf done! This is the one in the cast iron.

Finished loaves cooling

Cooling loaves

Ready to eat

Baked Crispy Kale Chips

If you love potato chips, you will probably love baked crispy kale chips too.

They are so simple to make, quick and nutritious, and you can’t stop eating them!

The shared bounty this week was baby kale.

ImageHere is how you make the baked crispy kale chips.

Preheat the oven to 350 degrees F. Line a baking sheet pan with parchment. Do not use an insulated baking sheet pan.

You will need:

  • 1 bunch fresh kale
  • olive oil
  • sea or kosher salt (do not used iodized table salt)

Prepare the kale.

To make the chips, remove the leaves from the kale stems. Do this by holding the leaf and pulling the stem off from the back side of the leaf. This removes the stringy stem all the way down the leaf.

ImageImage

Tear the leaves into bite size pieces, but not too small. Wash and spin dry in a salad spinner. Place the kale in a bowl, season with a light drizzle of olive oil and a light sprinkle of salt.Image

Image

Spread the kale on the baking sheet and place in the pre-heated oven for 10-15 minutes. The younger and more tender the kale, the less time it takes to crisp.

When the chips are crispy and slightly brown on the edges, remove from the oven and serve.

If you live in a humid area, the chips may need re-crisping by simply placing them in a warm oven for a few minutes.

They have a lovely earthy flavor that complements many dishes. The chips make a great snack and are something different to put out at your next party.

Image

Spread the kale on a baking sheet and bake for 10-15 minutes

When taking a chefs certification once, I used the kale chip to compliment a dish of Lobster and Israeli Couscous with Grapefruit Emulsion. It was the perfect compliment as it brought  warm earthy “umami” flavors which really made the dish pop.