Lavash – An Easy Cracker to Make

Lavash

Lavash

Lavash is such an easy cracker to make I think if more people knew how, more people would make them.

So here goes my attempt to teach everyone how to make Lavash.

Here is another added bonus, this recipe also makes great pita bread! Just weigh the dough balls to 4 ounces and roll it to 1/4 inch think.

Bake them on a baking stone in a 500°F oven. (Yeah, that’s HOT!) Place the dough disks onto the baking stone, wait for them to poof and begin to brown. Remove them to a cooling rack to cool. Lovely pita!

Sometimes I’ll make two 4-ounce pita and roll the rest out into lavash. Sometimes it’s all lavash others, all pita. Either way , this is a great formula and it comes to you by way of Peter Reinhart’s book, The Bread Bakers Apprentice, which if you don’t have it, I highly recommend it. But only if you like to bake bread.

OK!

Back to Lavash!

  • 1 1/2 cups bread flour
  • 1/2 teaspoon kosher salt
  • 1/2 teaspoon instant yeast
  • 1 tablespoon vegetable oil
  • 1 tablespoon honey
  • 1/3 to 1/2 cup room temperature water
  • Spray bottle with water (hopefully you have one dedicated to baking!)

DSC_0021
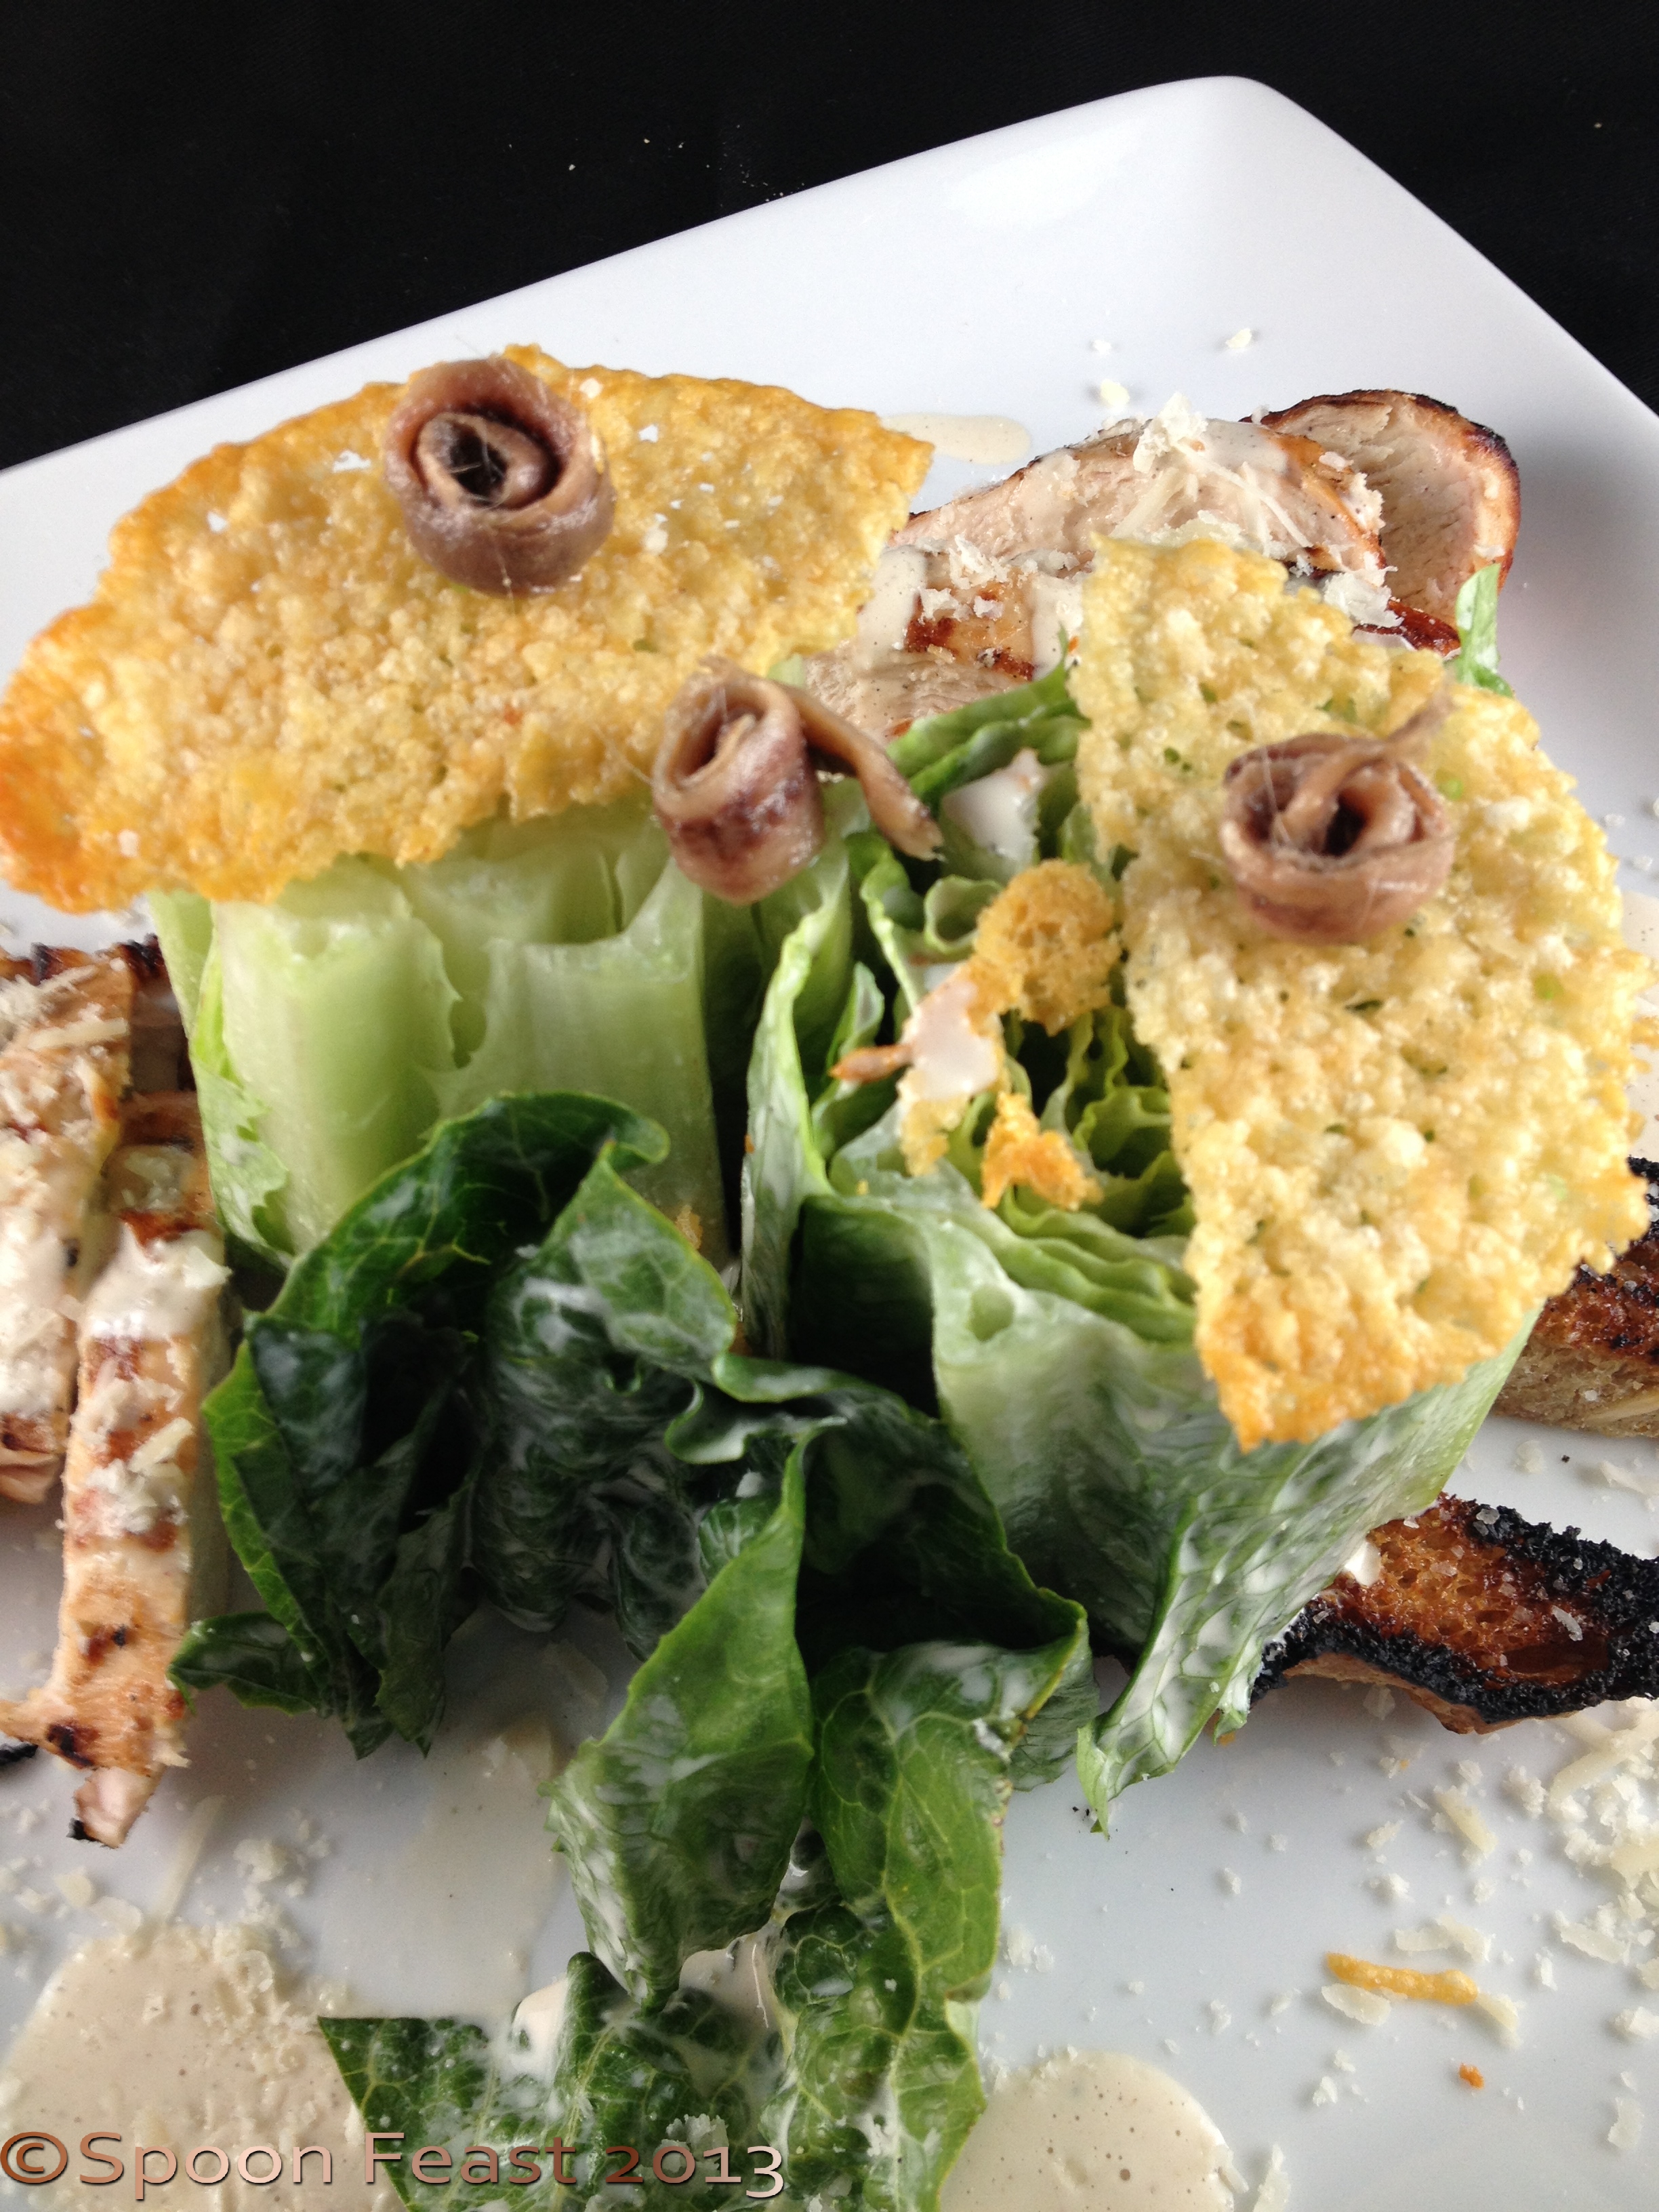
Some topping suggestions:

  • Sesame seeds, both white and black
  • Poppy seeds
  • Cumin and caraway seeds
  • Sweet and/or hot Paprika
  • Kosher salt
  • Montreal Steak Seasoning
  • 7 seed mixtures

To make crackers:

Put all ingredients into a bowl of an electric mixer, add enough water to bring everything into a ball. You may only need 1/3 of a cup or you may need all the way up to 1/2 cup. If you need more than that, add it only 1 Tablespoon at a time.

Inf using an electric mixer to knead, knead the dough 6 minutes on medium speed. If kneading by hand, do it for 10 minutes.

The dough should be firm to the touch, satiny and not sticky.

Oil a bowl, roll the dough ball in the oil so it gets a light coating. Place the dough in the bowl and allow to rise for about 1 and 1/2 hours or until it has doubled in size.

If you don’t feel like finishing the crackers now, you can store the dough in the refrigerator overnight at this point.

If you want to make a couple of pita, weight out 2 4-ounce balls, give them an initial roll and set aside to rest.

Line the back side of a sheet pan with parchment paper. (The crackers get baked on the backside of the sheet pan.)

On a lightly oiled or floured surface, roll the dough into a paper-thin sheet. You may need to lift the dough to ensure it isn’t sticking to anything during this rolling process.

If, while rolling, the dough ‘fights’ you by shrinking back, cover it with a clean towel or piece of plastic wrap and allow the dough to rest for 5-10 minutes.

Place the thin dough onto the parchment lined sheet pan. Spray with water and sprinkle on the topping of your choice.

You can cut the dough into crackers or long strips using a pizza cutter before baking. Don’t worry about separating the crackers now, they will snap apart once cooled.DSC_0006

Bake the crackers in a preheated 350°F oven for 15-20 minutes or until they are golden brown.

Freshly baked crackers are a real treat to share with anyone dropping by for a glass of wine and a few nibbles. Don’t be surprised if your Lavash crackers become a topic of interest!

Caesar Salad – A Fresh Look

Caesar Salads have long been popular both in the restaurant scene and at home. I love a good Caesar Salad especially if you add some Caesar Saladgrilled chicken to it and lots of Parmesan cheese.

The dressing here is a low-fat version of a traditional Caesar. This maintains the flavor of the dressing the same as a traditional Caesar dressing, yet with far less fat. So you will find a stray from the traditional Caesar Dressing ingredients, but try this, you’d never know the difference!

Plating the salad becomes a real presentation. Take your time and you will be rewarded with not only a nice visual but also something that will satisfy your taste buds on many levels.

For the Salad:

      • Romaine Hearts – each one makes 1-2 servings; 3 for an appetizer or side salad
          • Keep the lettuce in tact!
  • Good quality bread for the “croutons”
  • Parmesan cheese, shredded or shaved off a block with a vegetable peeler
  • Anchovy fillets – white anchovies are a gourmet treat, but everyday anchovies will do also
  • Dressing (recipe follows)
  • Add Grilled chicken or shrimp if desired.

To make the dressing:

  • 1/2 cup low or non-fat mayonnaise
  • 1/2 cup low or non-fat plain Greek yogurt
  • 1/4 cup shredded Parmesan cheese (use the best quality you can buy!)
  • juice from 1/2 lemon
  • 1 tablespoon Worcestershire sauce
  • 4 oil packed anchovy fillets (or more if you like)
  • 2 cloves fresh garlic
  • 1 -2 teaspoons fresh ground black pepper

Put it all in the blender and process until smooth. Taste it, you may want more anchovy or garlic or cheese. If you do, add it and process again until smooth. If it gets too thick, thin with water.

Wash the lettuce, carefully remove any dirt or debris while keeping the head in tact. Turn the romaine heart upside down to drip dry or pat it dry with a paper towel.

Holding the romaine heart upright in a clean bowl, drizzle the leaves with the dressing, use about 1-2 ounces per heart.

Wrap tightly into a log shape

Wrap tightly into a log shape

Wrap the lettuce tightly in a log shape in plastic wrap. When you do this, arrange the leaves so they don’t break. You want to be able to wrap it together really tight.

Refrigerate for at least 30 minutes.

Brush the bread with olive oil, grill each side for 1-2 minutes.

Roll the anchovy fillets into ‘mini-flowers’.

Make Crispy Parmesan Chips

Rolled anchovy fillets

Rolled anchovy fillets

Make some crispy Parmesan chips by placing freshly shredded (grated cheese does not work) onto a piece of oiled parchment in a circle.

Use a ring mold for even shapes

Use a ring mold for even shapes

Use a ring mold to make even sized circles. Bake them in a 350°F oven for 5-10 minutes or until they turn golden brown.

Remove when the cheese gets golden brown

Remove when the cheese gets golden brown

Remove from the oven and using a spatula, remove them from the parchment immediately as the cheese cools rapidly. At this point, they will retain any shape you give them. but you have to move fast, once they cool they become crisp.

For this presentation, instead of making croutons, I cut the bread into a long rectangle, oiled it and then put it on the grill for a few minutes.

Plate Presentation:

Lay two lengths of bread on the base of the plate.

With the plastic wrap still on the lettuce, slice the lettuce into rounds about 2″ wide.

Slice the lettuce with the plastic wrap still on. Of course, remove it as you bring the lettuce to the plate.

Slice the lettuce with the plastic wrap still on. Of course, remove it as you bring the lettuce to the plate.

Remove the plastic wrap and place them on the bread. Stand them up with the cut side down. Do this carefully and they will hold together.

Place a crispy cheese round on top of the cut lettuce, then add the rolled anchovies.

IMG_5419

Place either the grilled chicken or shrimp along side of the bread, sprinkle with Parmesan. Drizzle some dressing onto the plate and serve.

The presentation is nice because when you want to eat the lettuce, it falls apart easily with your fork and does not require further cutting unless you cut them too wide. 2 inches is the perfect size for this presentation.

Enjoy this Caesar!

IMG_5422

How to Make a Paper Cone for Piping

Paper cones ready to use

Paper cones ready to use

Knowing how to make a paper cone for decorating can save you a lot of headaches if you have some decorating of pastries to do.

The paper cones can be filled with melted chocolate, various glazes and thinned icing for writing on cakes or drizzling pastries or creating piped designs.

Best of all, no tip is needed and when you are done, simply throw the cone away.

It takes a few practice units to get it right, but after you do, it’s like learning to ride a bicycle, you don’t really forget how.

Here’s how:

IMG_5353

Lay out a piece of parchment paper.

IMG_5354

Fold it so it forms a square. There may be an extra piece to cut off at one end.

IMG_5355

Remove the piece you don’t need. I find cutting with a sharp knife works best.

IMG_5357

Fold the square into a triangle and cut to make two triangles.

IMG_5359

With the triangle, you have the top tip and two points along the long edge. Bring one of the bottom points up to meet the top tip as shown.

IMG_5360

Close up, bring both points on the long edge up to this top tip.

IMG_5364

With all three points together, adjust the cone so the pointy tip is closed. You can adjust the opening by moving the points. Play with this to see how it works. You will need to know how this works later when piping.

IMG_5365

Using the tips, you can move them to adjust the size of the opening.

IMG_5367

Fold the edges to secure. (NO TAPE!) Folding, if done correctly, is all you need to hold these together. Practice!

IMG_5368

A finished paper cone

IMG_5362

Moving the points on the long edge up to the tip on the top of the triangle allows you to control the size of the opening.

IMG_5352

Paper cones ready to use!


Awareness of Eating

“Never trust a skinny chef!” is how the old saying goes. But let’s examine that adage and explore the rearrangement of a common cliché.

As we become more aware of our diets, the effects food has on our bodies and how it makes us feel, there needs to be a basis of trust between the cook and the consumer.

English: White House chefs, directed by Execut...

English: White House chefs, directed by Executive Chef Henry Haller, prepare for a state dinner honoring Australian Prime Minister Malcolm Fraser. The chefs are working in the White House kitchen; the dinner occured in 1981, during the administration of Ronald Reagan. (Photo credit: Wikipedia)

Take a look at the chef, the person responsible for creating the menu and training the kitchen staff on how to prepare the various dishes.

Since I have worked in kitchens, I know a lot more about how restaurant kitchens run than most. If the person creating my meal is on the heavy side, typically sauces and flavorings  would be full of butter, fats, salts and sugars.

“A heavy chef means they enjoy their food, so it must be good!”

Really? How many people who are overweight have a hard time identifying a proper portion size? Someone who struggles with weight will eat for the sake of eating.

Someone who has emotions (hopefully all of us) will eat sometimes for comfort. Think of chicken soup when you’re ill; but when you can’t stop eating weight becomes an issue.

Sometimes the food choices we make are simply because the food we choose is familiar, it is what we know. But what if that food is bad for us? What if people really don’t understand the processed food they are eating is bad?

Evidence the obesity crisis in the USA.

Jamie Oliver is doing an eating awareness program in West Virginia to address the problem of obesity. He goes into an elementary school and the children cannot identify fresh tomatoes on the vine, cauliflower or even potatoes.

The pile of pizza, corn dogs, hot dogs, hamburgers, cakes and ice cream all over the table that represented what the family ate for a week was disturbing. Most disturbing of all is that the mom didn’t know the food was bad for them. They weren’t hungry and she thought that was good.

But she is killing her family. Her 10-year old son is already 350 pounds. Really, “Well we’re not hungry”?!

Shocking. How did it get so far?

I want a chef who is inventive but not at the expense of my health. I want someone preparing my food with the same attitude I have for health.

Obesity is a rampant problem in the USA. Identifying proper nutrients is a major issue. Processed foods, fast foods, restaurant foods loaded with fats, salts and sugars invade the diets of every day eating all around us.

The basic food environment in the USA is severely lacking in good solid nutritious fresh food.

Drive through any town, fast foods for everything from donuts, burgers, sandwiches, Mexican, Chinese, and Italian; fried and fast is what lines the streets. It isn’t easy to choose not to eat fast food, especially when you are hungry, the temptation is great to give in.

There are many of us who are aware of what we eat. Those on gluten-free diets are aware of nearly every product they eat. Thankfully, gluten-free is easier to find these days, but there is still the issue of all that fat, sugar and sodium.

When we eat out, we are at the mercy of the kitchen to actually know how to make food taste good without the added fat, salts and sugar.

Slapping butter, sugar and salt onto food is an easy way to make anything taste good. Cooking like that takes no skill at all.

Using salt is an important seasoning but so many far overdo the salt thing. Adding some salt to cooking water when boiling pasta, rice or potatoes is usually all you need.

I love salt! I adore all the different kinds of salt there are, yet I don’t overdo it either.

I am not looking for a chef who serves me a plate full of sauces and vegetables full of butter. I am looking for foods that are cooked correctly and seasoned to bring out the full of flavors.

People need to learn what a proper portion size looks like. Restaurants serve enough to 1 person to feed three and yet that one person still tries to eat as much as they can because that is what they are served.

Case in point: The Cheesecake Factory (Hint right there) offers a “Crispy Chicken Costoletta” which serve up a whopping 2610 calories, 89 grams of fat and 2720 milligrams of salt. Costolotta alright, cost a lotta health if you eat all that.  If you really have to eat that, then break it down into three meals at least. (Nutrition Action Healthletter, January/February 2012) Best of all, choose another place to eat.

Watch buffets; people load up their plates as if they only have one visit. All manner of foods get glopped together on a plate so it becomes a huge pile of goop melange. Why not go get some salad, talk, visit with your dining companions, eat, and return for entrée, then again for dessert. It seems more civil. Why are we rushing? Trying to beat the mental signal you are full?

But instead they try to slip that cherry cobbler right next to the fried chicken and coleslaw that sits on top of the ranch dressing salad with “Country Crocked” yeast rolls underneath.

Then they stuff it all in, make a second trip and wonder why they have bellies the size of VW Bug cars.

Burp.

Talking to Tyler the other day, he mentioned he was having his girlfriend over for dinner and he had to go set the table. I felt good knowing he was carrying on a family value: Setting a table and sitting there to eat dinner and talk to each other about the day.

An attractive dinner setting

An attractive dinner setting (Photo credit: Wikipedia)

Something so small, yet it is so important. Our social and family bonds grow stronger with each meal gathering. Shouldn’t the food put in front of us be nourishing as well?

The movement to better health through eating well begins with each one of us making a choice.

If you don’t know how to cook or how to choose better nutrition, take a class and learn. Get your children involved with preparing meals; they are more likely to try new foods if they have a hand in making the dish.

Step away from the sugar bowl! Put down those sodas and juice boxes. Drink water, teas, non-fat milk. There are even flavored waters with bubbles if you simply must have a fizzy drink.

Try extra-virgin coconut and olive oils instead of butter. Your heart will thank you.

I started taking a Therapeutic Nutrition class a few weeks ago. My eyes have really been opened to how severe the obesity epidemic is and that we CAN do something about it.

That something is education and choice.

I hope you can join me in starting something is your neighborhood. The future depends on our kids, how can they carry on if they aren’t healthy?

First step ANYONE can take:

Don’t eat any food advertised on TV

Except eggs and milk, of course!

Sorry Jared, Subway needs a better way.

Make a sandwich from home. Learn to cook fresh foods and eliminate processed foods. It may take a while to actually accomplish this, but you will be rewarded with better health and more money in your pocket.

If each of us took one small step towards better eating and nutritious health, we could change a nation. We can start in our own homes.

The power of one can inspire another.

Apples are an all-American success story-each ...

Coconut Oil – Myth and Reality

Coconut oil has become the latest buzzword in healthy diets these days.

Healthy coconut oil? This goes against everything we have been told for the last 65 years.

English: This is a photo of one of my painting...

I must admit I held a lot of misconceptions about coconut oil until I started doing research and talking to people about using the oil.

If you want to know a very simple analysis of what I found read below.

How to use coconut oil in the kitchen is after the research. If you get bored by the technical stuff, drop down to the kitchen section.

“Coconut oil is high in fat and therefore bad for you.”

The fat found in coconut oil is a medium-chain fatty acid or triglyceride. Most vegetable and seed oils are composed of long-chain fatty acids. The medium-chain fatty acids are easily processed in the liver without insulin spikes. They are easy to break down therefore are used by the liver as energy rather than stored as fat cells like the long-chain fatty acids.

Coconut oil is a rich source of lauric acid, rarely found in nature, lauric acid is known as a ‘miracle’ element due to its ability to

Chemical structure of Lauric acid created with...

Chemical structure of Lauric acid created with ChemDraw. (Photo credit: Wikipedia)

promote health in the body. The body converts lauric acid into an anti-viral and anti-bacterial and anti-protozoa substance.

(Bacteria, viruses and parasites such as some protozoa, like Giardia and Cryptosporidium, are major sources of food borne illnesses.)

“Coconut oil is a saturated fat. It can build up in your system and cause clogged arteries, obesity and heart disease.”

Actually the opposite is what is true.

We have been told for the last 65 or so years, all saturated fats are bad for you. Consuming saturated fats can lead to health issues.

The health issue list includes obesity, heart disease, clogged arteries, high cholesterol, just to name a few.

Some saturated fats occur naturally and some are created, like margarine.

Bombarding  molecules with hydrogen to produce a thick sticky substance has no health benefits whatsoever. Yet this is what has been sold to us in the form of margarine and preached to us by the ad agencies as being “beneficial, healthy, and a better choice than butter. Witness the popularity of things like Country Crock, Parkay and I can’t believe it’s not Butter kind of products.

The created products are full of trans-fats, which we should avoid completely.

The marketing industry convinced us that because coconut oil was solid at room temperature, it should never be consumed. It was used in cosmetics to benefit the skin, but it was shunned as an ingredient in our diets.

Research has discovered these negative myths about coconut oil are not true. Studies have been done on cultures that thrive on coconut oil in their diets to show lower rates of obesity, no cardiovascular disease, and over all better general health than we have in the USA.

Coconut oil helps equalize cholesterol levels by promoting HDL in the blood which helps improve the HDL/LDL ratio. Additionally coconut oil helps promote healthy thyroid function thereby also assisting cholesterol and boosting energy and endurance. A boost to the thyroid can also pump up your metabolism, which is a great benefit!

Consumption of coconut oil helps the body absorb fat-soluble vitamins. It helps blood sugar stabilize, it can help resist fungus and yeast and can improve how the body uses insulin.

Consuming 2 tablespoons of coconut oil daily, in this 2009 study, demonstrated benefits. In this 12-week study, the women did not gain weight but actually lost stomach fat during the study. Reading this study made me decide to give coconut oil a try.

English: Coconut oil in solid state

Coconut Oil in the Kitchen

Selecting Coconut Oil:

You want extra-virgin, organic coconut oil. Read the labels!

Not all coconut oil is the same. Some is hydrogenated which is what you want to avoid.

Storing Coconut Oil:

Coconut oil has a low melting point (76°F) and a high smoke point (350°F). Store the oil in a cool dry place like a cabinet.

Do not store the coconut oil in the refrigerator.

Do not store it near the stove because it could cause it to melt.

Store it in a cool cabinet away from the stove. It should last about 2 years without going rancid.

But if you are using it, it shouldn’t last that long.

Using Coconut Oil:

Use Coconut Oil to saute or pan-fry your meals and snacks. Popcorn is wonderful popped in a bit of coconut oil.

Saute kale for an incredible flavor! The sweetness of the coconut oil really enhances and tames the bitterness of kale.

Use it to saute any vegetable, chicken, fish, or meat.

Use it just as you would any cooking oil. However because it is solid below 76°F, it is best not used in dressings or marinades. Use a quality grade of olive oil for these items instead.

Here is another use for coconut oil: replace butter or solid shortening (Crisco or margarine)with equal amounts of coconut oil in baking recipes. Your baked goods will be amazing and much healthier.

Does it make everything taste like coconut?

While the oil has the very mild scent of coconut, so far I cannot detect the flavor of coconut when I cook with it. Sometimes things may taste a bit “sweeter” but not like sweet as if you added sugar.

Just an enhancement of the natural sweetness that is already there.

Last night I marinated some chicken breasts in a spicy “Cockalacky” sauce which is made with sweet potatoes. After the marinade, the breasts were breaded in panko and pan-fried in coconut oil until done.

The oil really brought the flavor of the sweet potato used in the marinade, such a nice flavor surprise!

While I have added coconut oil to our diets, we still use other oils as well. I enjoy the flavors of various seed and nut oils in salad dressings. Additionally the various oils also have other health benefits.

This is not about giving up other oils but about making smarter choices, more informed choices.

The key thing to remember fat is fat.

Just because it is coconut oil does not mean you can consume mass quantities of it. As with all fats, use it in moderation.

For the next 12 weeks, I am going to get 2 tablespoons a day of coconut oil into my diet. I am looking forward to seeing the results. Hopefully my skin and hair will not suffer winter dryness, my tummy fat will start to disappear and I will feel great. I have a physical in soon so it will be interesting to compare the numbers from last year to this.

Summer 2013 Update

This summer I heard of using coconut oil instead of sunscreen. Personally, I think that’s taking it a bit too far. I love using coconut oil on my skin, it feels so good but instead of sunscreen? “They” may say that coconut is naturally SPF 30 but I think I’ll back it up with some SPF 50 just to be sure.

Before foregoing coconut oil for sunscreen, ask your dermatologist their professional opinion!

Skin cancer is no laughing matter and not worth a risk.

Use all fats in moderation, including coconut oil.

While I have lost 13 pounds so far, my goal is 10 more, it isn’t all because of coconut oil. It’s more about making better choices.

Do you use coconut oil? Why or why not?

Please share your thoughts and experiences so we can all learn something from each other.

Coconuts

An Easy Crust for Pies and Tarts

Here is a super simple dough to use for pies and tarts. One key to working with any tart dough is to keep it cold. This allows the fat to melt while baking which creates light, flaky crusts.

Plum Blackberry Almond Tart

With lots of holiday events approaching, here is a simple basic approach to a nice pie or tart dough.

If you want a double crust, double the recipe. This only makes 1 crust.

Easily done by hand, you can also use a food processor, just pulse the ingredients without the water, add water, bit by bit to make the dough mass. You may use all the water, only some or you may need more. It depends on how much moisture your flour holds.

Easy Pie or Tart Crust

  • 1 cup all-purpose flour
  • 1 tablespoon sugar
  • 1 teaspoon salt
  • 3 ounces cold butter, cut into small cubes
  • 3 – 5 tablespoons ice-cold water

If creating the crust by hand, combine the salt and sugar with the flour. Cut the cubed butter into the flour using a pastry cutter, two knives or a fork.

English: A dough blender; also called a pastry...

English: A dough blender; also called a pastry blender. (Photo credit: Wikipedia)

Cut the fat into the flour

When the mix resembles a coarse mixture (you still want to see some globs of butter, don’t make it smooth) add the ice-cold water tablespoon by tablespoon.

The mass should come together. Only use as much water as you need to bring the ball together. You may need more water or less water. This is why you add it bit by bit.

Add enough water to just bring the dough ball together when you squeeze it.
You want to see blobs of fat in the dough, not smooth.

Press the dough into a ball and place it between 2 pieces of plastic wrap. Press it into a disk.

Refrigerate until cold.

Roll the dough between sheets of plastic wrap

Roll the chilled dough out to the size you need while it is still in between the wrap. This makes it easier to handle and is much easier to clean up too.

Remove one side of the plastic wrap. Position the dough over the pie or tart pan and press it into place.

Alternatively, you can press the dough into the pan and then chill while you prepare the filling.

Much easier is to use the fluted tart pans with the removable bottoms. Press the dough into the tart pan. Make sure you have at least 1/4 inch at the sides and at the curve of the pan so it is strong enough to stand on its own when the pan is removed.

Small fluted tart shells ready for filling

The fluted edge pans give all your tarts such a professional finished look, they are so worth the investment. Since they come in many sizes, you can make large tarts or small individual ones and any size in between.

Ready to fill and bake. See the fat? That means you will have a flaky crust.

Fill them just as you would a pie.

If you use a top crust, decorate it with dough cut outs instead of just a pile of dough on top of the filling.

Or use a strusel topping or leave the fruit exposed and glaze with melted apple or seedless raspberry jelly when the tart is done. This puts a “sealing glaze” on the fruit and makes it shiny. The photo of the Plum and Blackberry Almond Tart at the beginning of this post is finished with melted red currant jelly.

Here are some of my thoughts about using other ingredients besides water and butter.

Butter: Fat is fat, at least the melting point of butter is lower than body temperature. Fat provides tenderness and flavor to the crust. I’d rather eat butter than Crisco or lard or hydrogenated oils like margarine. I have yet to try coconut oil.

Water: Some recipes will ask you to use vodka instead of water. It provides a flaky crust too. Alcohol evaporates faster than water therefore creating a flakier crust. Try it if you like. I don’t drink distilled spirits so it never occurs to me to use vodka.

Flour: Use a good quality organic flour. You can use gluten-free flours too. I’m just not too sure how strong the non-wheat flours will hold up in a fluted pan once the outer ring is removed. My experience is most gluten-free baked goods are crumbly due to the lack of gluten.  Not sure how to over come that but since I’m not gluten-free, I use King Arther’s unbleached AP flour and I get pretty crusts.

I do know if I had to go gluten-free, I would miss pie crust, tarts, and good chewy bread tremendously.

No matter what liquid you use, just be sure it is ice-cold. I use a large measuring cup with lots of ice and water and scoop what I need from there. When finished, I pour the cold water into a glass and make lemonade or tea. I suppose you could do the same with vodka. Use lots of ice.

Bake off empty shells by lining with parchment and filling with rice or beans and baking until done. Fill with fresh fillings.

Fill unbaked shells with fruits, custards, fillings and bake until golden and bubbly. Times vary but usually take 45-55 minutes in a 350°F oven.

There are so many finishing and fillings!

Use any left over scraps to make dough cut outs. Egg wash them and sprinkle with sugar. Bake on a cookie sheet until golden brown. Use these on the top of the tarts, place them when the tart is still hot from the oven or serve as a garnish with each serving.

Be creative.

4 Safe Methods for Thawing Food

Color-enhanced scanning electron micrograph sh...

Color-enhanced scanning electron micrograph showing Salmonella typhimurium (red) invading cultured human cells (Photo credit: Wikipedia)

Food safety is a serious subject. I am passionate about preventing food borne illness. I have been teaching the subject to restaurants, hospitals, schools, dietary managers, nursing homes and at the college level since 1991. I am a Food Safety expert.

This is the launch of a series of food safety articles.

The first subject is on 4 Safe Methods of Thawing Foods.

There are 4 safe methods for thawing food. Following one of these methods can help prevent making your family and friends sick with a food borne illness.

1. Thaw under refrigeration.

This takes some planning. Sort out  your refrigerator so you have a designated drawer on the bottom of your fridge to hold raw meats.

If you want to defrost a whole 3 pound chicken, it will take about 4 days to thaw. You need to plan a place where it can do so safely. All thawing meats should be positioned so they are not dripping onto any foods below them. Place them in containers to catch thawing juices.

In My Fridge

In A Fridge (Photo credit: Nikita Kashner)

Store food according to:”Swim, Walk, Fly”

  • Ready to eat foods on top
  • Things that swim (Including oysters, clams etc. If it comes from the water, it is considered a “swimming thing.”
  • Things that walk around (On hooves and feet and have fur or hair like pork, lamb, beef, or Ostrich.)
  • Things that walk around but are ground up, like ground pork or ground veal or hamburger. These get cooked to a higher temperature than steaks, chops or roasts.
  • Things that fly ( Chickens, ducks, squab, quail, and even though turkeys don’t fly, they also fall into this category)
  • This is based upon internal cooking temperatures which will be explained in another post. For now remember and practice
  • “Swim, Walk, (Ground-up Walk),Fly”

So what happens when you don’t have the time?

2. Thaw under clean drinkable water that is 70°F or less, and either running or changed frequently.

A bowl in the sink with cold water, but not hot, is fine for thawing a package of chicken for dinner. As long as you change the water about every half hour. If water logging is a concern, place the item in a zip lock bag and place that in the water.

The water should be changed every 30 minutes.

This is not a method to use while you are at work. Why? Because the water needs to be changed every 30 minutes or lightly running so the water is exchanged as thawing occurs.

Never thaw in the sink for longer than 4 hours! That is the amount of time it takes any bacterial colonies to grow to dangerous levels.

Never, ever thaw on the counter or just left in the sink. This is a very bad and risky practice.

Keep you eye on the product, it will thaw faster than you think it will.

3. In a microwave as long as the item will be cooked immediately after thawing.

My concern here would be the quality of the item. I can’t think of anything that benefits from a run in the microwave.

But, as long as you cook the item as soon as you finish nuking it to thaw, this is considered a safe method.

Be sure to clean and sanitize the inside of the microwave after you finish thawing.

4. You can thaw food as part of the cooking process.

day fifty three | a piece of meat

(Photo credit: I Are Rowell)

The best examples here are frozen vegetables into soup stock, frozen french fries into the oven or fryer oil and frozen burgers going directly onto the grill.

Again, your call on the quality issue of cooking meats from frozen. I find the texture isn’t as nice than if you thawed it under refrigeration which is my thawing method of choice.

So there you have it. 4 Safe methods to thaw foods.

This information is from ServSafe® an educational division of The National Restaurant Association (NRA). These are the best practices that are used to train food handlers in  all restaurants, hospitals, nursing homes, schools and dietitians.

I have a dual role with the NRA to both teach and administer the exam for ServSafe®. Food safety is a passion of mine. No one should ever suffer an illness from food you eat.

Learn how to prevent such things from happening.  Become advocates for your own food safety. If you see a bad practice, speak up!

Implement good food handling practices every time you touch food.

It really is that important.

Please let me know if you have any questions!

None - This image is in the public domain and ...

How To Section Citrus Fruit

Cutting citrus fruit into sections, also called a supreme, is a basic skill.

Culinary students should learn this skill in the first class they take.

However, with that said, I find it odd that in class some students don’t know how to section citrus fruit, even in an advanced class.

I also observed this student who once shown how to do it, passed it on to another team-mate to complete. They in turn, did something else. Not being my class, all I could do is observe and makes notes to myself.

Note to self: Knife Skill Test; Measurement Test for class. If you are a student, consider this heads up!

The process is quite simple and the technique applies to all citrus fruits.

If you are going to want the zest for anything, remove the zest before removing the peel. Personally, I like to dry the zest and keep it handy for quick flavor blasts in a bland dish.

Cut the top and bottom from the fruit.

Cut the peel down the side, removing the pith and exposing the inner fruit.

Cut the peel away all around the fruit.

Work over a bowl to catch all the juices that drip while you cut the fruit sections out.

Remove the sections

Using a sharp knife, cut between the membranes and slide the cut section into a bowl.

Continue all around the fruit until all sections are removed. Squeeze the juice into the bowl with fruit sections.

Discard remaining peel, any seeds and membrane.

All used up.
For total mileage, roll it in salt and give your copper pots a polish.

The sections should be free of seeds, pith and peel.

Use them in salads, salsa, on grilled or fried meats or poultry or seafood.

A bowl of citrus segments is really nice with vanilla ice cream or to accent fruit desserts.

Orange and lemon segments

Refreshing!

How to Boil Pasta

Cooking spaghetti. Photo by Eloquence.

See how the oil sits on top? Do not put oil in pasta water, it just goes down the drain. Oil pasta after cooking.

Dear Tyler,

Here is another assumption I made. Since your father is Italian, and you grew up eating pasta, I assumed you knew how to cook it.

Boiling pasta is really quite simple.

You need to use a pot big enough to hold enough water to cook the amount of pasta you need. Err on too much water rather than not enough water.

English: Boling water in colour

Bring the water to a boil. A boil is when the bubbles actively break the surface. A boil measures 212°F (100°C) on a thermometer. A lid on the pot will help water boil faster. If you live in a high altitude (like the mountain house) water won’t boil without a lid, and the boiling point decreases 1° every 500 feet in elevation (or 1° C every 285 meters). it has everything to do with atmospheric pressure. Actually, boiling point is quite a science subject.

Always salt the water AFTER it reaches an active boil. In the science community, adding a solute to the water creates a solution that raises the temperature of the boiling point. Scientists will argue that it is not necessary to add salt because the amount of increased temperature isn’t worth it to ‘cook faster’. This is not why we add salt.

We add salt for flavor.

We add salt after a boil is reached so the salt does not pit our pots over a lifetime of poor cooking habits.

Most of all, we add salt to things we boil for flavor. Boiled potatoes are ever so bland when salt is left out. The amount required isn’t much, just enough to lightly flavor the water.

Be aware, when you add salt to boiling water, the water will flare up momentarily. Be ready for it to avoid getting burned.

Choose your favorite pasta and read the package it comes in. Look for cooking directions for the time it takes to cook the pasta to “Al-dente“. Each pasta will have different cooking times.

Place the pasta in the pot, stir it up so it does not stick together. If using a long pasta, don’t break it so it fits in the pot! Short strands are hard to twirl onto the fork.

Lean the noodles up against the side of the pot and using tongs, as the pasta under the water softens, fold the rest of the pasta under the water. Be sure to stir it all around so nothing gets stuck either to other pasta strands or the bottom or sides of the pot.

This is especially true of fettuccine or linguine and other flat pasta.

Comparison between different types of long Ita...

Comparison between different types of long Italian pasta (Photo credit: Wikipedia)

Set a timer fort the required time.

If cooking fresh pasta, the time will be very short, dried pasta takes longer.

Drain the pasta in a colander and try to save about a cup of the pasta water.

Boiling pasta

Boiling pasta. Fold the ends under the water as the pasta softens. (Photo credit: Wikipedia)

Did you notice there was never a mention to put oil in the water while boiling?

Ha! That is because the oil sits on the top of the water while the pasta is below the water. It does nothing to keep the pasta from sticking together.

Stirring the pasta after you first put it in the water does.

After draining, put the pasta into a serving bowl and drizzle with a great olive oil.

Serve as you like.

If you are going to use the pasta in a salad or need it cold, rinse the pasta in cold water after draining to stop the cooking process. Drizzle with olive oil to prevent sticking.

If the pasta gets dry or you need more moisture in your sauce, add a small bit of the pasta water. This is why you do not want to over salt the water. Only salt it enough to make it taste good.

If you want to re-heat pasta that has been refrigerated, simple bring water to a boil and dip the pasta in for a minute or so, just to warm it, not cook it. This can be done in a small amount of water.

Drain and serve as desired.

This works for all kinds of pasta, semolina, whole wheat, rice, artichoke, quinoa etc. Read the package for length of cooking time.

Short pasta

Short pasta (Photo credit: Wikipedia)

Short pasta

Short pasta (Photo credit: Wikipedia)

Pasta is a great budget stretcher so learn to cook it correctly.

The basic technique:

Boil the water – use lots of water!

Salt after water boils

Stir the pasta after adding to boiling water to prevent sticking

Drain

Drizzle with olive oil and serve

OR

Drain, rinse  in cold water to cool and drizzle with oil.

Enjoy!

Love, Mom

Pasta again!

Pasta again! (Photo credit: HatM)

How To: Standard Breading Procedure

Dear Tyler,

You asked how to bread something to make Tonkatsu or Parmesan style dishes. So here it is!

If you want to bread something so the breading actually stays on the product, you need to follow a standard breading procedure,

It is a 5 station set-up. Breading your food using this method ensures a great finished dish.

Flour, Egg wash and Bread crumbs
(To remember the order, think of the abbreviation for the month of February: FEB)

1) Ready to go product – seasoned

2) Flour – just plain flour

3) Egg wash – make it liquid

4) Bread crumbs – You can use any bread crumbs, Panko are amazing in my opinion. Instead of bread crumbs, you can also use any kind of ground nut, crushed potato chips, corn flakes, or plantain chips, Trisket crumbs, coconut, etc.

5) Final breaded product

In this post I am using catfish, but the same method works for everything you want to bread.

Prepare the product, trim it, skin it, pound it thin, what ever you want to do, do it before it gets breaded.

Season with salt and pepper and other seasonings if desired.

Here, catfish is getting seasoned with lemon ginger seasonings before breading

Dip each piece into the flour

Then into the egg wash

Then into the bread crumbs

Place the breaded items onto a baking sheet; drizzle with oil.
Bake at 375 F for 20-30 minutes to ‘oven fry’ or pan fry in a saute pan with a small amount of oil.

The family favorite for this is to make “Katsudon”  with thin sliced pork loin or a chicken breast sliced and pounded thin. We serve it over Basmati rice with Bull Dog Brand Tonkatsu Sauce. (I usually buy this in an Asian grocery store.)

Bull Dog Sauce

When using chicken breasts, you can cut them into fingers or slice a large breast into thirds, place each slice into a zip bag (don’t zip it!) and pound gently it so it gets evenly flattened. Season and proceed with the breading procedure.

To pan fry instead of cooking the cutlets in the oven, heat a saute pan to high, add a thin-film of oil to the pan and saute until each side is golden brown.

Pan fry in a thin-film of oil until golden on each side

Add steamed broccoli to round out your meal.

You can take the plain breaded cutlets and serve them with different sauces and sides to create very different meals from breaded cutlets.

Boil some rice, add some frozen green peas when the rice is done. The peas only need to warm through.

Place the fried cutlet on top of the rice and drizzle with Bulldog sauce.

To make a “true” katsudon, place caramelized onions over the hot steamed rice, top with the cutlet and then top it all with an egg. Cover and the steam from the cutlet and the rice will gently cook the egg. Break the egg yolk and stir it in to create a wonderful sauce. Drizzle with Bull Dog Sauce .

Tonkatsu with Bull Dog Sauce

You can create Chicken Parmesan by topping the golden brown cutlet with marinara sauce and cheese – I am partial to Asiago – but Parmesan, or mozzarella are just fine too.

Melt and brown the cheese, serve over pasta and more sauce on the side. Top it all with more cheese and serve with a salad on the side.

Chicken Parmesan

Breaded Cutlet with Lemon

Be careful when pan frying, place the cutlets into the pan so it splashes away from you, not towards you. Once the cutlets are golden brown, you can finish cooking them in the oven that has been pre-heated to 350°F.

Enjoy making these and think of other ways to serve them too. Change the sauce ( try Thai Green sauce!) and starch. Put a cutlet on a bun, add coleslaw and BBQ sauce to make it into a sandwich.Or make Chicken Piccata with lemon and capers.

Let me know if you come up with other ideas!

If you want to freeze the breaded cutlets, freeze them raw as soon as you finish breading them. You can cook from frozen over medium heat.

Love ya!

Mom