Charlotte Cooks Wins a Telly Award!

We won a Telly Award for our Shrimp Creole show!

https://i0.wp.com/www.wtvi.org/wp-content/uploads/2013/02/Cooks_Orange_Chicken.jpg

While I can’t post the video yet, here is the recipe for the dish. I hope they release the video soon on You Tube. I think it is circulating now on the channel so I’m guessing when they air a new show this one will become available. When it does, I’ll update this post to include the video.

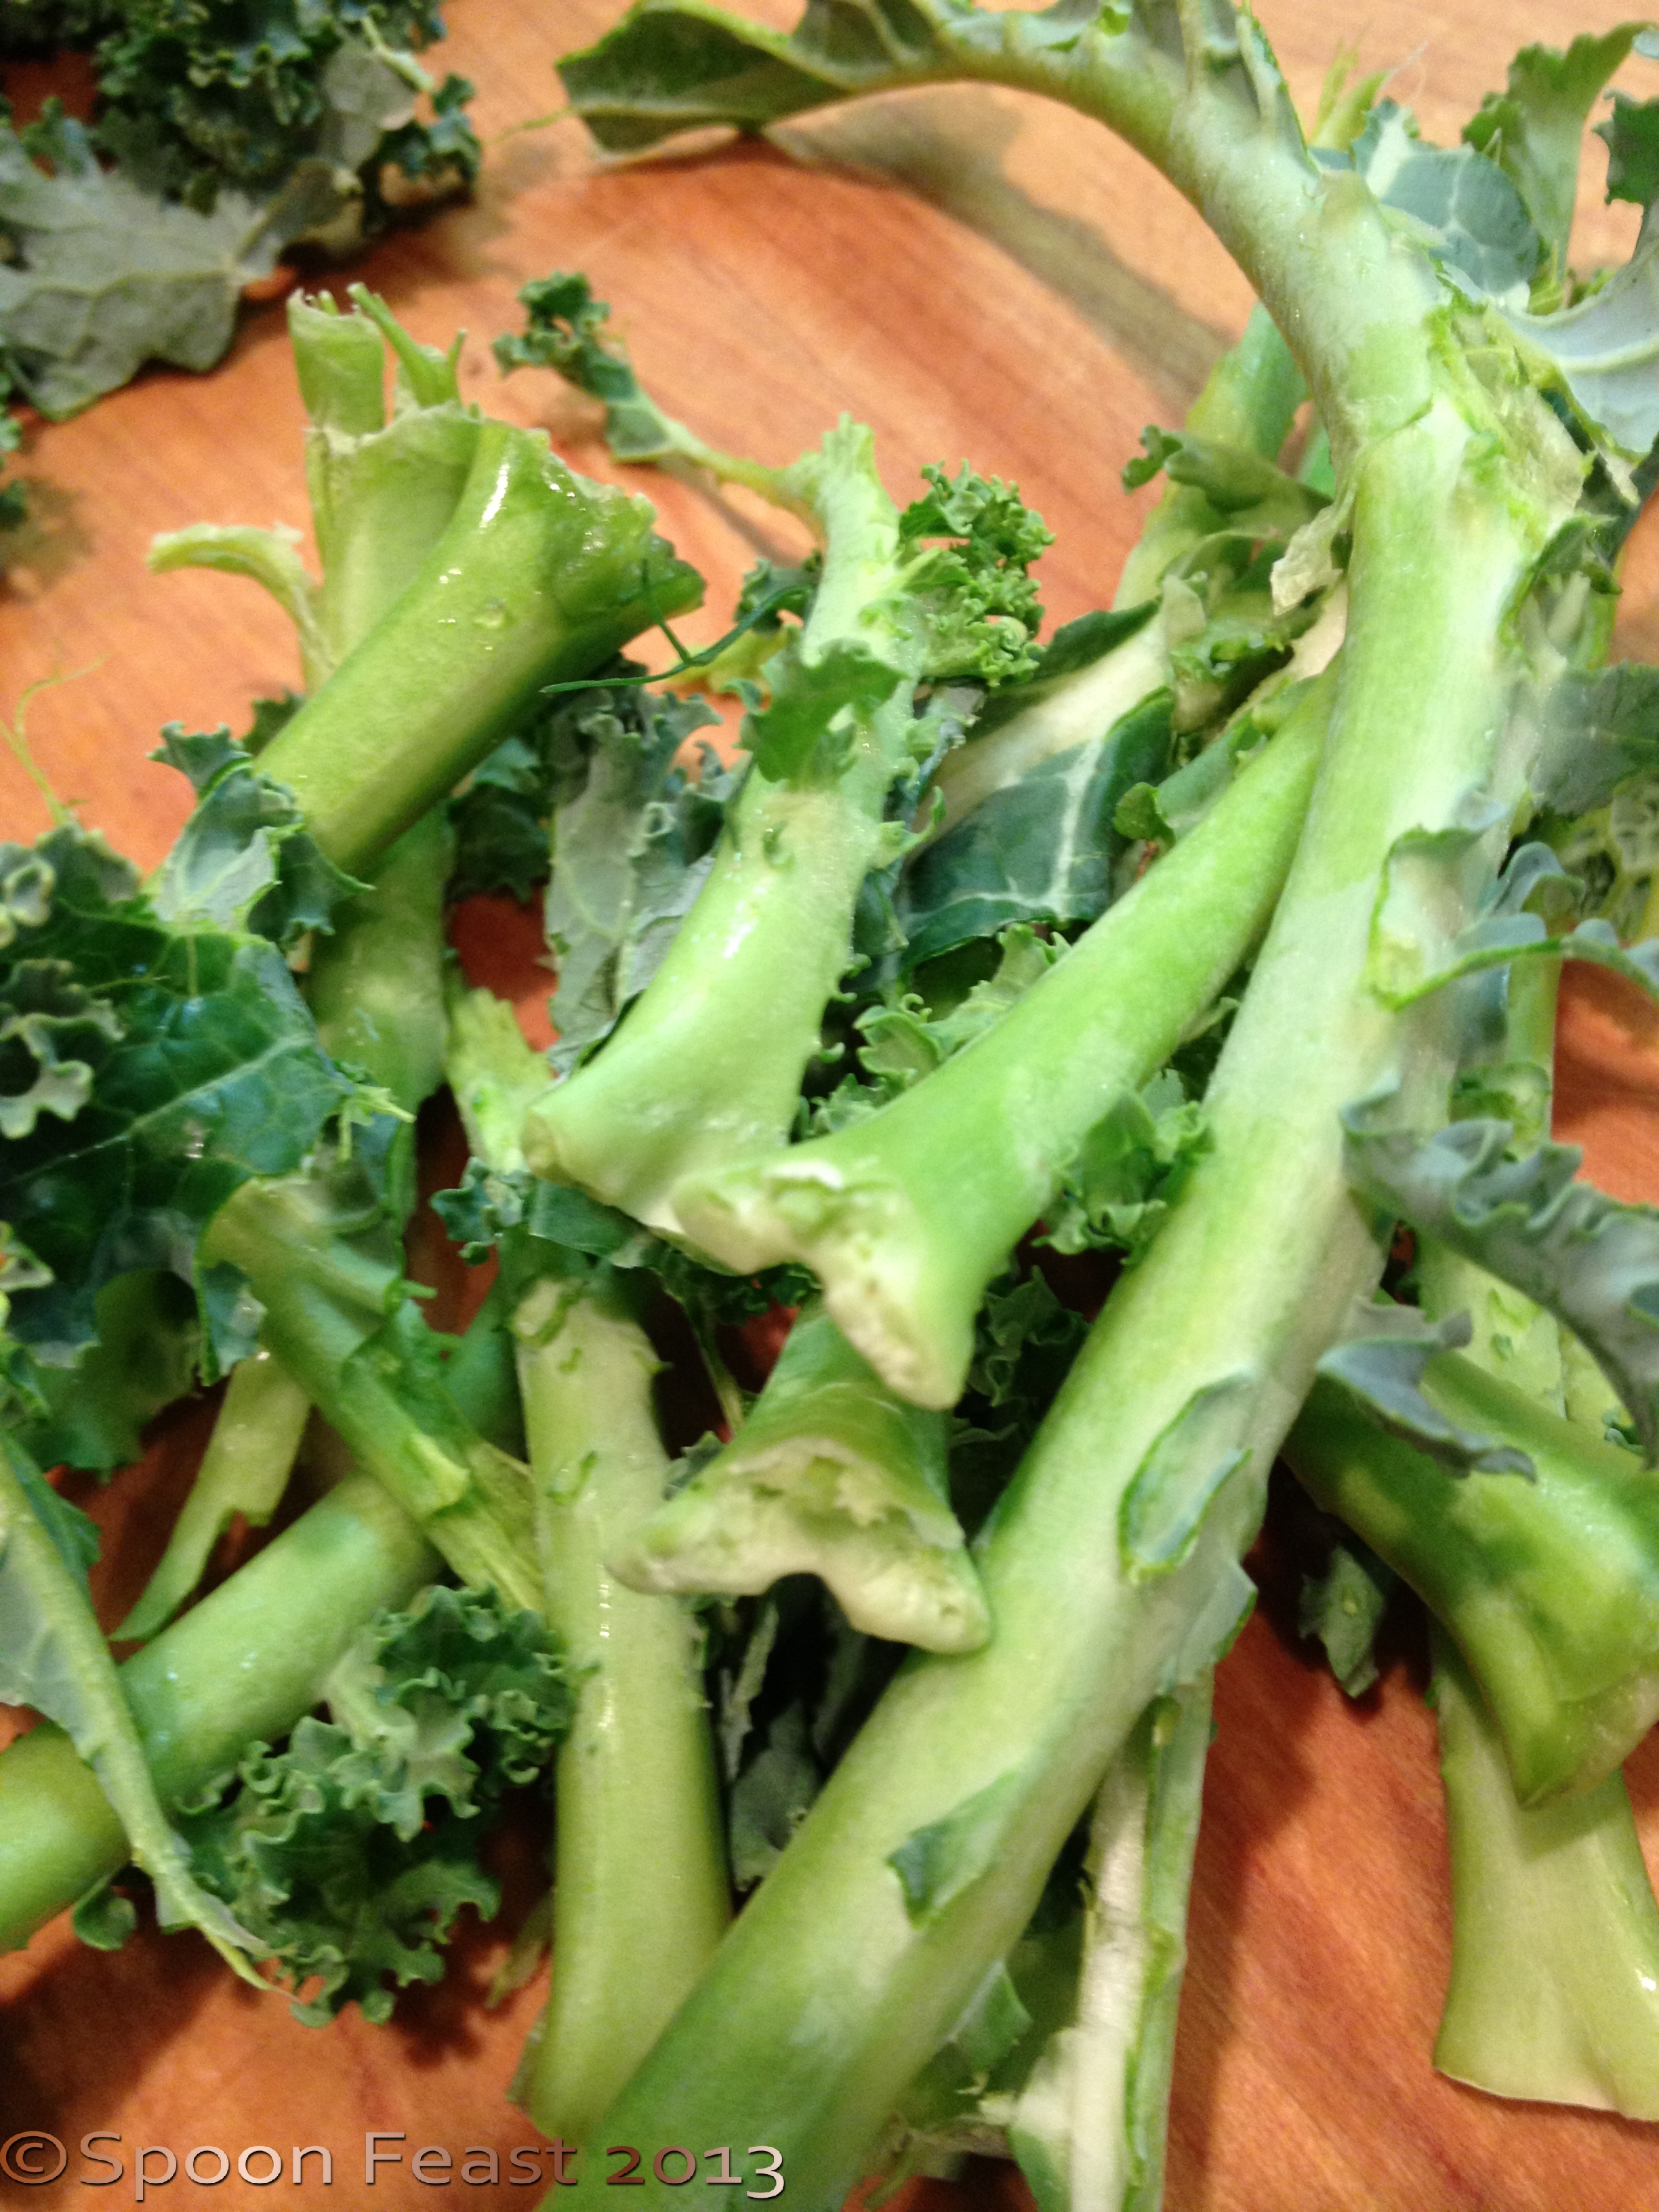
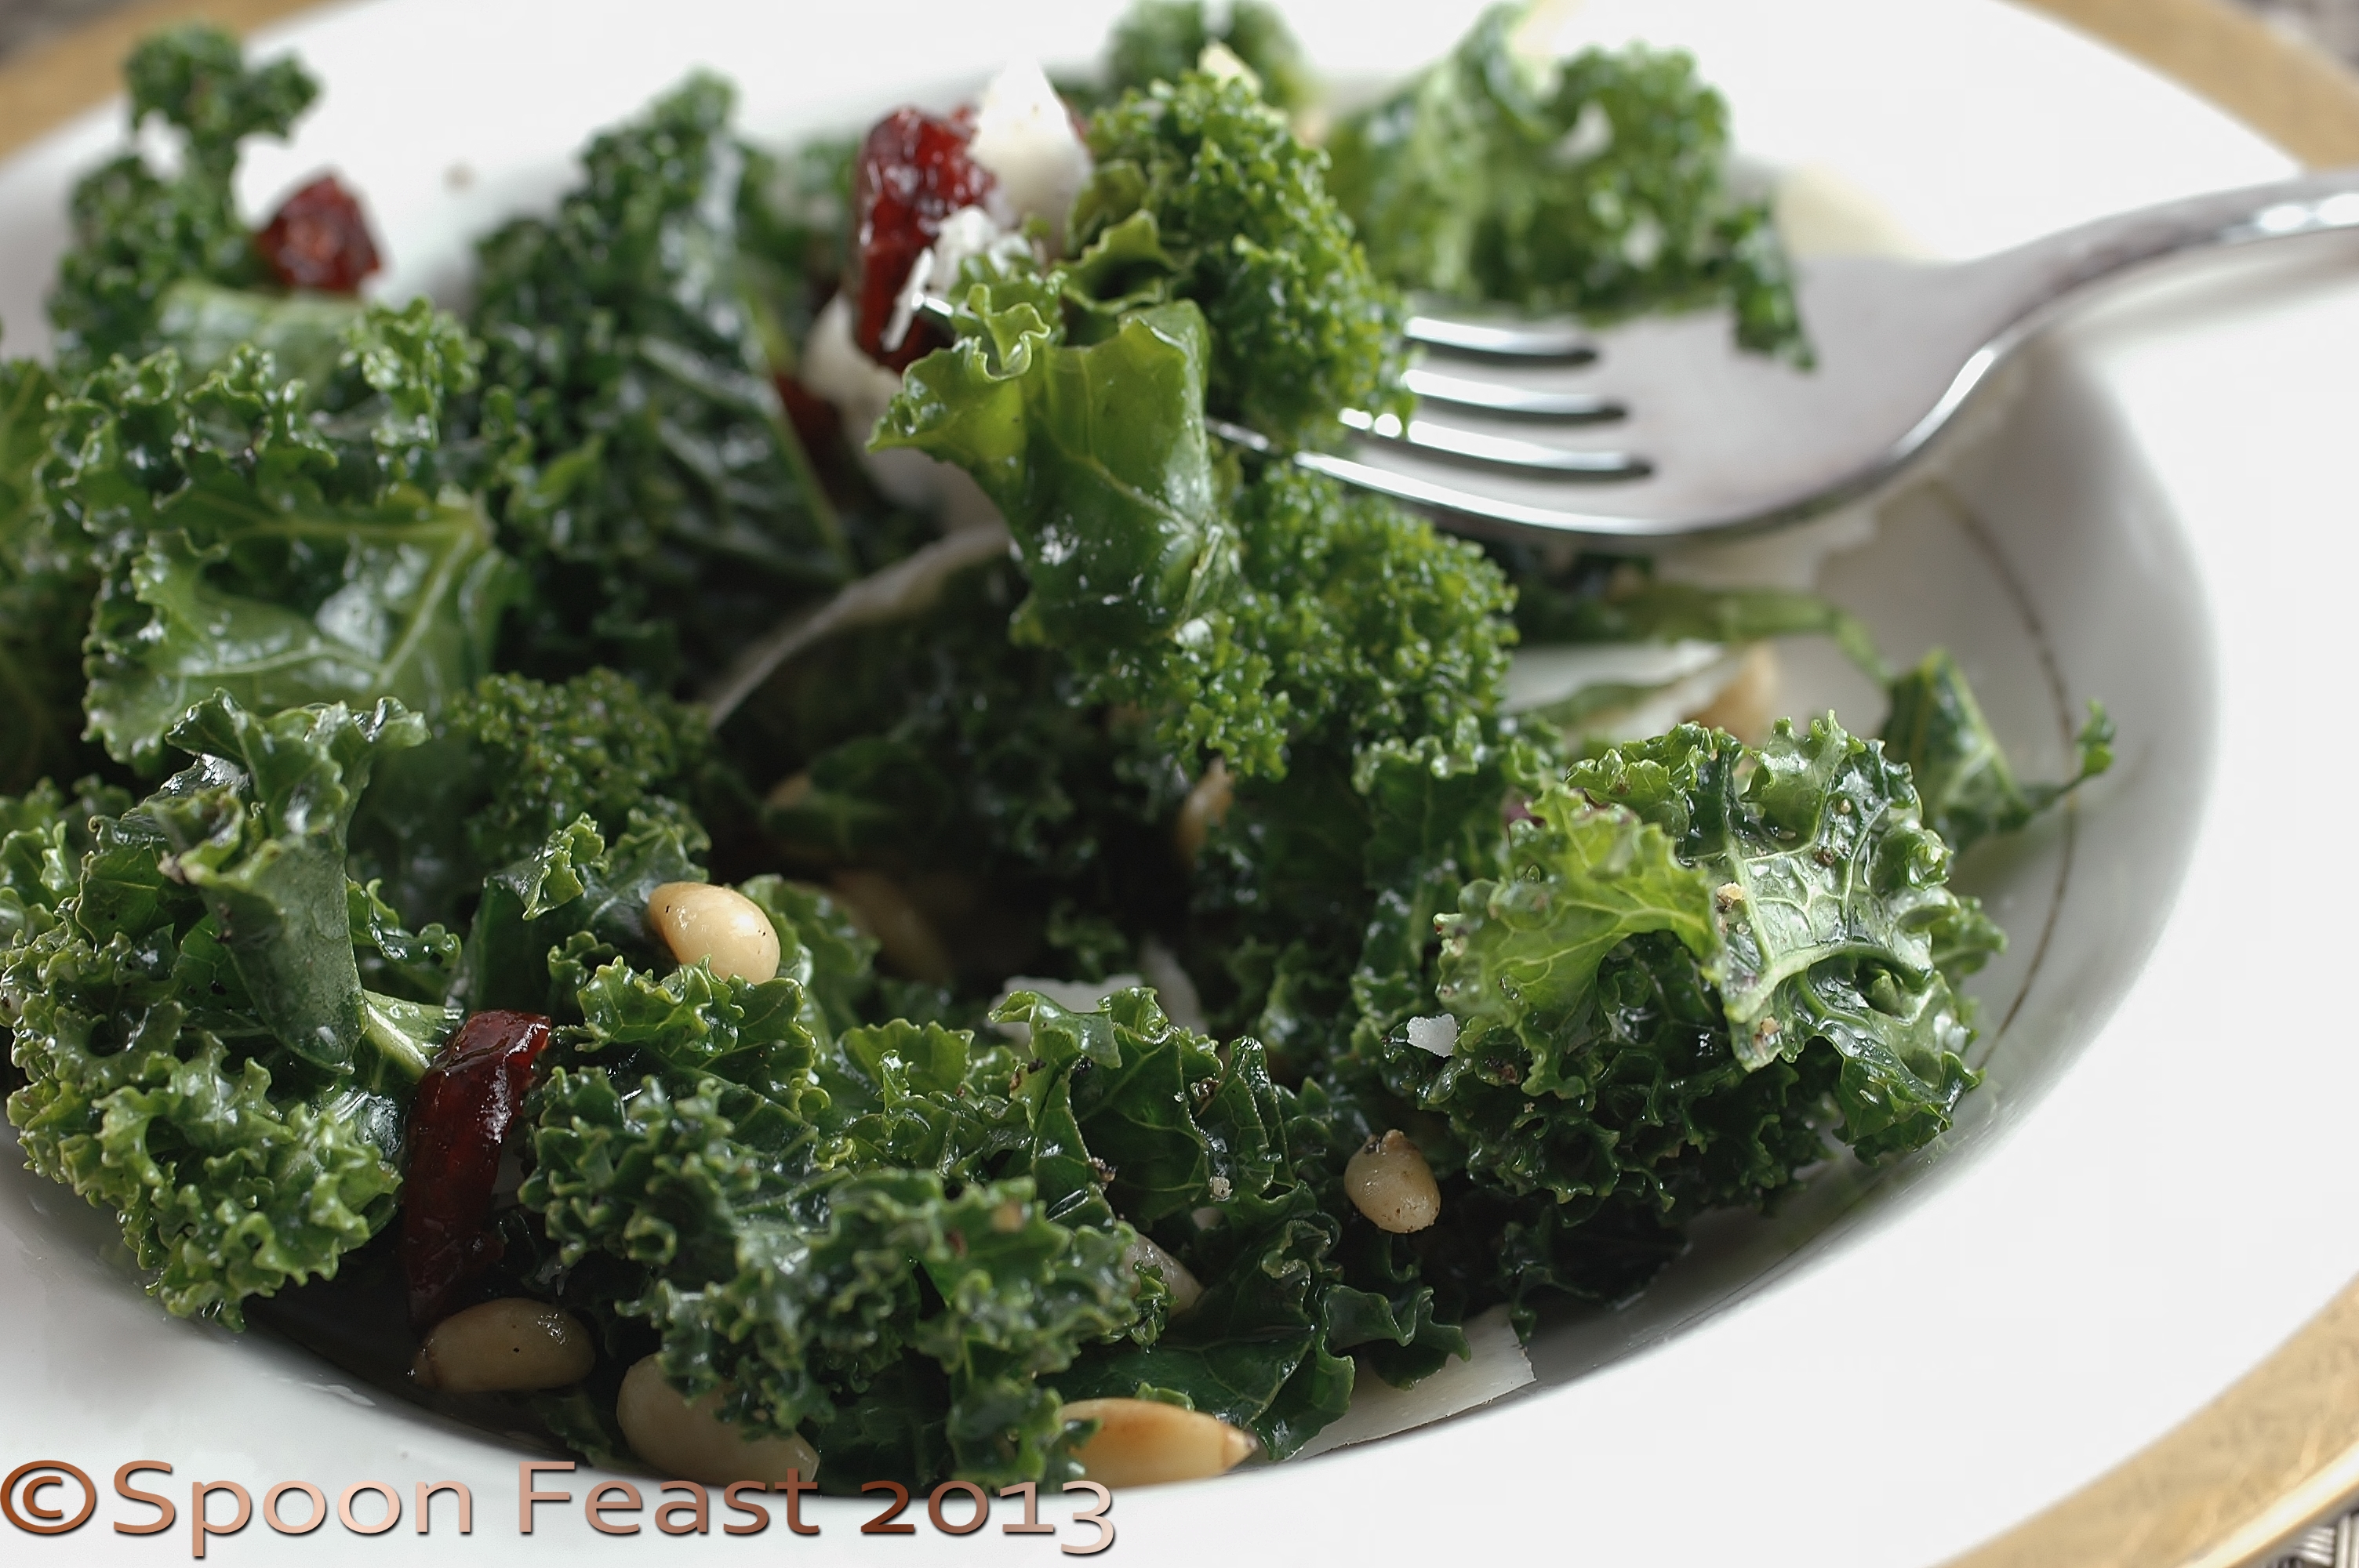
Until then, enjoy making this recipe which also features Raw Kale Salad.

Creole inspired by NOLA cuisine.

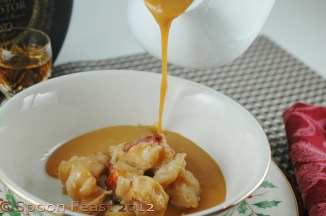
NOLA Style Shrimp Creole

  • 2 pounds Peeled and De-veined Shrimp, save shells to make Shrimp Stock
  • 2 Tablespoons Butter
  • 1 Tablespoon Vegetable Oil
  • 3 Tablespoons All- purpose flour
  • 1 Large Onion, finely chopped
  • 2 Ribs Celery, finely chopped
  • 1 small Green Pepper, finely chopped
  • 2 Tablespoon Creole Seasoning
  • 2 Tablespoon Tomato Paste
  • 2-1/2 Cups Very Ripe Fresh Tomatoes, Diced
  • 1/2 Cup Dry White Wine
  • 2 Cups Shrimp Stock
  • 2 Tablespoon Garlic, minced
  • 2 Bay leaves
  • Cayenne to taste
  • Kosher Salt to taste
  • 1 teaspoon Black Pepper
  • 1 teaspoon White Pepper
  • 1 bunch Fresh Thyme
  • 2 Tablespoon Tabasco or to taste
  • 1 Tablespoon Worcestershire Sauce
  • 1/2 Cup Green Onions, green tops thinly sliced, white part sliced into 1/4″ thickness
  • 2 Tablespoons Flat Leaf Parsley, minced

Melt the butter in a large sauce pan with the vegetable oil over medium high heat.

Add the flour and stir so it looks like wet sand on the beach.

When the butter begins to froth add 1/2 cup of the onions. Cook until the onions are golden brown.

Add the remaining onions, celery, and bell pepper.

Reduce the heat to medium and season with 1 Tablespoon Creole Seasoning and a healthy pinch of salt.

Sweat the vegetables until soft.

Add the tomato paste mixing well, and cook, stirring constantly, until the paste begins to brown, add the fresh tomatoes. Stir well.

When the tomatoes start to break down into liquid add the white wine, bring to a boil and boil for 1-2 minutes.

Add the Shrimp Stock, remaining Creole seasoning, garlic, bay leaves, black pepper, white pepper, cayenne (to taste), and thyme.

Bring to a boil then reduce to a low simmer.

Simmer for 30-45 minutes.

Add the hot sauce, Worcestershire, and adjust seasonings.

Bring the sauce to a boil, reduce the heat to low and add the shrimp.

The key is to not  to over cook your shrimp. Let them slowly simmer in the sauce until just cooked through.

If you boil them, they get tough so just simmer gently. They cook quickly!

Serve with boiled rice and garnish with the remaining green onions and parsley.

Serve immediately.

Serves 4.

I hope you join us in WTVI-PBS Charlotte Thursday evenings at 8:30 to see our new shows.

As always, thanks for watching Charlotte Cooks!

Things to Make with Mint

Mint Leaves

Mint Leaves (Photo credit: Wikipedia)

Mint leaves.

Mint leaves. (Photo credit: Wikipedia)

Oh my! The mint in my garden has taken off! If you have an overgrowth of mint here are a few ideas on how to put the mint to good use.

  • Mint Pesto
  • Mint Mojitos
  • Mint Ice Cream

    A scoop of Mint Chocolate Chip, Baskin-Robbin'...

    A scoop of Mint Chocolate Chip, Baskin-Robbin’s most popular flavor. (Photo credit: Wikipedia)

  • Mint Simple Syrup
  • Mint Liquor
  • Add mint to agua fresca
  • Make chocolate mint leaves by painting clean mint leaves with melted chocolate, let dry and peel the leaf away leaving a chocolate mint leaf!

These take more patience than I have, surely you have more than I do and therefore are able to make en entire tree of chocolate mint leaves.

Personally I don’t care for working with chocolate. I find it far more messy than  worth it. I’ll gladly pay for fine chocolates which are also far better than I would have the patience to make. Temper chocolate? Meh, I’d rather not.

  • English: Too young for mint sauce A very young...

    English: Too young for mint sauce A very young lamb in the wildflower meadow beside the church of St George. (Photo credit: Wikipedia)

    Make mint sauce for lamb! Not mint jelly. Although that would be good too, but the vinegar, sweet mint sauce like Crosse and Blackwell make. I love this sauce on so many things – lamb, shrimp, pork . . .

  • Mint jelly

    Mint jelly (Photo credit: Wikipedia)

    Make Apple Mint Jelly. Put that on a biscuit with some butter. Slap on a bit of salty ham, maybe some brie and chow down!

  • Make Moroccan Mint Tea – Make a large jar full because this will disappear on you so fast!
  • Mint Ice cream with chocolate shavings, or frozen mint chocolate yogurt
  • Rub your temples with mint leaves to help relieve headache and general stress. Breathe deep.
  • If you have large mint plants, cut long thick branches, tie them together and hang them in your shower. The scent will be released from the essential oils in the leaves by the warm water of the shower and be exhilarating. Best first thing in the morning as it can be quite stimulating.
  • Make Tabbouleh
  • At the end of the day make Mint Juleps!

Ah, an over growth of Mint can be heavenly!

Raw Kale Salad – Give it a Massage!

I was reading a recipe the other day on the Food Network website regarding a Massaged Kale Salad from the Aarti Party Show.

Kale is on the edge of being overdone but this is worth exploring. Give it a try before you get sick of eating so much kale!

Kale saladPrevious thoughts had me thinking kale was too tough to eat raw. A quick saute, dip in hot oil, plunge into a hot oven or dropped into soup is how I prepared it before this recipe caught my eye.

So I tried it. Massage your kale, sounds kinky right?!

I had to come up with another way of massaging the kale as not everyone likes to have their food handled to this extent by someone else’s bare hands.

Use a dough hook instead of your hands

Use a dough hook instead of your hands

Bare hand contact can be a health issue if the person touching the food does not wash their hands correctly or is carrying some kind of germ.

While the recipe wasn’t followed, the massage technique was. The result is an addicting, tender kale salad that can be dressed in so many ways.

After massaging the kale, create your salad. All you need to add is other ingredients and the salad is already dressed.

Choose a toasted nut and a favorite fruit, fresh or dried. Add some cheese and you can go forever with the combinations that can be created as additions for this most excellent salad.

This is what I did last night:

Kale Salad with Toasted Pine Nuts, Dried Cranberries and Shaved Parmesan

  • 1 pound kale
  • Juice from 1 fresh lemon
  • 1 tablespoon extra virgin olive oil
  • A light sprinkle of salt and fresh black pepper
  • 1/2 cup dried cranberries
  • 1/2 cup shredded Parmesan cheese
  • 1/4 cup toasted pine nuts
Trim the stems from the leaves

Trim the stems from the leaves

Trim leaves from the stems, wash thoroughly in cool water to remove any garden friends, sand and dirt.

If the kale is very sandy or has a lot of soil on it, soak it in a deep bath of salty water. Dip and lift the kale from the water so the soil is left behind in the bottom of the soaking bowl. You may need to do this several times to get rid of all the dirt.

Chop the kale leaves small, but not too tiny; bite size is perfect.

Place the chopped kale into a bowl. Drizzle the kale with lemon juice, olive oil, salt and pepper. The amount you use depends on how much kale you use. Only use enough to lightly coat the leaves, you don’t want anything on the bottom of the bowl.

Using your hands (washed of course! and wear gloves) or in a stand mixer on low with the dough hook, massage the greens for 2-3 minutes.

You will notice the leaves changing texture, becoming more tender and turning a brighter green as well.

Peel Parmesan into the salad with a peeler.

Peel Parmesan into the salad with a peeler.

After 2-3 minutes of massage, add toasted pine nuts, dried cranberries and use a peeler to shave Parmesan into the salad.

The above amounts can be adjusted to your liking.

Try other fruits, nuts and cheese in this salad, avocado is amazing too.

Top the salad with beef, grilled chicken, shrimp or fish to make it an entrée salad.

Serve and enjoy!

eating kale saladThis salad was so good, I came back down and scarfed another bowl in the middle of the night and another after breakfast.

Now I need to go buy more kale.

DSC_0051

Shrimp and Lobster Bisque

Christmas Eve dinner somehow has become a seafood feast that features ravioli. This year Tyler asked me to make the Shrimp and Lobster Bisque like we used to make in the restaurant. It takes a bit of effort but it sure is an indulgent soup!

Perfect for a special dinner.

So here goes.

Make Shrimp and Lobster Stock

Shrimp and lobster1# fresh wild-caught shrimp, any size (I used 26-30’s for this recipe)

1- 2 ounce lobster tail per person + 1

You can use a whole lobster and use the claws for decoration or you can use frozen lobster meat. Tails were on sale at the grocery so I bought some. Perfect!

1#  thickly sliced carrots

1/2 pound chopped celery

1/2 pound chopped onions

1/4 cup  tomato paste

Sprig of fresh thyme

3 cloves fresh garlic, smashed

1/4 cup brandy, flambeed to remove alcohol

1 gallon water

1 pint heavy cream (later, to finish)

Remove the shells and tails from the shrimp, reserve the shells and tails for making the stock.

Set shrimp aside, keep it cold.

Remove the tail meat from the lobster, run a skewer down the underside of the tail to keep it from curling while cooking. Keep the tails cold.Insert a skewer to prevent curling

Roughly chop the shells with your knife. put the chopped shells and shrimp shells into a 2 gallon stock pot.

Over high heat, saute the shells until they turn red and pink.

Add the chopped carrots, onions, celery, thyme and garlic to the pot and saute the vegetables until they soften a bit.

Saute the shells and vegetables

Saute the shells and vegetables until they turn pink.

Add the tomato paste and stir to coat everything as much as you can with the paste.

Do not allow this to burn. Once you see a bit of color forming on the bottom of the pan, add the 1/4 cup brandy. Since you are working in a stock pot, you will have to ignite the brandy fumes with an extension lighter. Just place the flame over the edge of the pot to ignite the brandy. Let the fire burn until it extinguishes. This burns out the raw alcohol.

Flambe with Brandy

Flambe with Brandy

When the flames go out, stir and then add 1 gallon cold water.

Bring to a boil, then reduce the heat and allow this to simmer for at least 1 hour, 2-3 hours is best.

Do not cover the pot, do not boil the pot and do not stir. Doing any of these things will make your stock cloudy.

Strain, reserving the liquid, throw away all of the vegetables and shells. Use a fine screen strainer to ensure all shell fragments are removed from the finished stock.

Cool and reserve for making the bisque.

To Make the Bisque:

Reserve a few shrimp whole for garnish. Roughly chop the remaining shrimp. Season with salt and white pepper.

Season the skewered lobster tails. Trim the bamboo skewers used to keep the lobster straight so they fit into the saute pan.

Saute the tails and shrimp in a small bit of olive oil. Deglaze the pan with the brandy, allow to flambe to cook out the alcohol.

Saute and deglaze the lobster  and shrimp with brandy before adding to the bisque.

Saute and deglaze the lobster and shrimp with brandy before adding to the bisque.

Perfect consistency is when the soup coats the back of a spoon and it stays separated when you draw a line through it with your finger.

Perfect consistency is when the soup coats the back of a spoon and it stays separated when you draw a line through it with your finger.

Mound a bit of the cooked seafood in the bottom of the serving bowl; pour the hot soup over the shrimp and lobster.

Mound a bit of the cooked seafood in the bottom of the serving bowl; pour the hot soup over the shrimp and lobster.

Garnish with sour cream and chives or scallions.

Garnish with sour cream and chives or scallions.

Bring the stock to a boil and add the heavy cream simmer until the consistency coats the back of a spoon. This may take 30-40 minutes, depending on how fast you simmer.

Alternatively, you could use 4-6 ounces of roux to thicken and simmer the stock and cream for 15-20 minutes to cook out the flour taste. I prefer to use the reduction method for better flavor and less fat and flour in the final dish. Using roux is the classic method.

When the stock and cream are at the consistency you desire, add the flambeed shrimp to the soup.

Remove the skewer from the tails and slice each tail into nice neat disks.

Place 3-5 disks of lobster  in the center of the soup bowl and ladle the hot broth over the lobster.

Garnish with a small dollop of sour cream, whipped cream or creme fraiche.

Saute the

An Easy Crust for Pies and Tarts

Here is a super simple dough to use for pies and tarts. One key to working with any tart dough is to keep it cold. This allows the fat to melt while baking which creates light, flaky crusts.

Plum Blackberry Almond Tart

With lots of holiday events approaching, here is a simple basic approach to a nice pie or tart dough.

If you want a double crust, double the recipe. This only makes 1 crust.

Easily done by hand, you can also use a food processor, just pulse the ingredients without the water, add water, bit by bit to make the dough mass. You may use all the water, only some or you may need more. It depends on how much moisture your flour holds.

Easy Pie or Tart Crust

  • 1 cup all-purpose flour
  • 1 tablespoon sugar
  • 1 teaspoon salt
  • 3 ounces cold butter, cut into small cubes
  • 3 – 5 tablespoons ice-cold water

If creating the crust by hand, combine the salt and sugar with the flour. Cut the cubed butter into the flour using a pastry cutter, two knives or a fork.

English: A dough blender; also called a pastry...

English: A dough blender; also called a pastry blender. (Photo credit: Wikipedia)

Cut the fat into the flour

When the mix resembles a coarse mixture (you still want to see some globs of butter, don’t make it smooth) add the ice-cold water tablespoon by tablespoon.

The mass should come together. Only use as much water as you need to bring the ball together. You may need more water or less water. This is why you add it bit by bit.

Add enough water to just bring the dough ball together when you squeeze it.
You want to see blobs of fat in the dough, not smooth.

Press the dough into a ball and place it between 2 pieces of plastic wrap. Press it into a disk.

Refrigerate until cold.

Roll the dough between sheets of plastic wrap

Roll the chilled dough out to the size you need while it is still in between the wrap. This makes it easier to handle and is much easier to clean up too.

Remove one side of the plastic wrap. Position the dough over the pie or tart pan and press it into place.

Alternatively, you can press the dough into the pan and then chill while you prepare the filling.

Much easier is to use the fluted tart pans with the removable bottoms. Press the dough into the tart pan. Make sure you have at least 1/4 inch at the sides and at the curve of the pan so it is strong enough to stand on its own when the pan is removed.

Small fluted tart shells ready for filling

The fluted edge pans give all your tarts such a professional finished look, they are so worth the investment. Since they come in many sizes, you can make large tarts or small individual ones and any size in between.

Ready to fill and bake. See the fat? That means you will have a flaky crust.

Fill them just as you would a pie.

If you use a top crust, decorate it with dough cut outs instead of just a pile of dough on top of the filling.

Or use a strusel topping or leave the fruit exposed and glaze with melted apple or seedless raspberry jelly when the tart is done. This puts a “sealing glaze” on the fruit and makes it shiny. The photo of the Plum and Blackberry Almond Tart at the beginning of this post is finished with melted red currant jelly.

Here are some of my thoughts about using other ingredients besides water and butter.

Butter: Fat is fat, at least the melting point of butter is lower than body temperature. Fat provides tenderness and flavor to the crust. I’d rather eat butter than Crisco or lard or hydrogenated oils like margarine. I have yet to try coconut oil.

Water: Some recipes will ask you to use vodka instead of water. It provides a flaky crust too. Alcohol evaporates faster than water therefore creating a flakier crust. Try it if you like. I don’t drink distilled spirits so it never occurs to me to use vodka.

Flour: Use a good quality organic flour. You can use gluten-free flours too. I’m just not too sure how strong the non-wheat flours will hold up in a fluted pan once the outer ring is removed. My experience is most gluten-free baked goods are crumbly due to the lack of gluten.  Not sure how to over come that but since I’m not gluten-free, I use King Arther’s unbleached AP flour and I get pretty crusts.

I do know if I had to go gluten-free, I would miss pie crust, tarts, and good chewy bread tremendously.

No matter what liquid you use, just be sure it is ice-cold. I use a large measuring cup with lots of ice and water and scoop what I need from there. When finished, I pour the cold water into a glass and make lemonade or tea. I suppose you could do the same with vodka. Use lots of ice.

Bake off empty shells by lining with parchment and filling with rice or beans and baking until done. Fill with fresh fillings.

Fill unbaked shells with fruits, custards, fillings and bake until golden and bubbly. Times vary but usually take 45-55 minutes in a 350°F oven.

There are so many finishing and fillings!

Use any left over scraps to make dough cut outs. Egg wash them and sprinkle with sugar. Bake on a cookie sheet until golden brown. Use these on the top of the tarts, place them when the tart is still hot from the oven or serve as a garnish with each serving.

Be creative.

Pineapple, Chestnut and Caramel Upside Down Cake

Going crazy with using chestnuts these past few days lead me into dessert realm. If I could keep my hand out of the jar and stop snacking on these tasty morsels, they would actually make it into more things.

Alas, what to do?

Pineapple Upside Down Cake is one thing you can do. Please, forget about those horrible neon glaring cherries Betty Crocker used. This is a cake for adults because it has rum in it. Of course you could leave it out or use rum flavoring, but there isn’t anything quite like Pyrat Rum.

Upside down baking is a rather nice idea actually and can be adapted to may other fruits as well. One you may have heard of is the French famous Tarte Tatin. Flip the baked cake or tart over onto a plate and the bottom of the pan becomes the most wonderful caramelized fruity topping.

What a novel idea, upside down baking.

I found a can of baby pineapple rings at a gourmet store that were screaming to be made into a cake. With waning warm weather, this cake brings you smack dab into a nice tropical get-away.

Pineapple, Chestnut and Caramel Upside Down Cake

Ingredients:

For the caramel and pineapple topping:

1 can mini pineapple rings

You can use regular pineapple rings too. You may want to cut them to make an overlapping pattern.

3 ounces butter

3/4 cup brown sugar

1 cup chestnuts cut in half

You want enough so every hole has a chestnut. Or sprinkle chopped chestnuts over pineapple.

Method:

Pre-heat oven to 350°F.

Drain the pineapple, reserving juice for the cake batter.

Using a 9″ heavy bottomed saute pan, melt the butter and the brown sugar. Once melted, allow to simmer for 4 minutes, do not stir once simmering begins.

After 4 minutes, remove from heat and carefully place the pineapple all over the surface of the caramel.

Be careful about touching the caramel as it is very hot.

Arrange pineapple over caramel, place a chestnut over each hole or sprinkle them on.

Overlapping the pineapple, cover the entire surface of  the pan. Fill each hole with a chestnut half. If chopping, sprinkle the surface of the pineapple with the chopped chestnuts.

For the cake batter:

  • 1 1/2 cups AP flour
  • 2 teaspoons baking powder
  • 1/4 teaspoon salt

Sift these together and set aside.

  • 3 ounces soft butter
  • 3/4 cup granulated sugar
  • 2 eggs
  • 1 teaspoon vanilla
  • 1 tablespoons good quality rum (Or 1 teaspoon rum extract)
  • 1/2 cup unsweetened pineapple juice ( left from straining the pineapple)

Using an electric mixer, whip the soft butter until it is light and fluffy. Gradually add the sugar and then the eggs, one at a time.

Add the vanilla and rum then add the pineapple juice.

The mixture will separate and look like a mess, but move on.

Add the flour in two stages. Once the flour is added, the mixture looks just fine.

Pour the batter over the fruit and caramel. Bake.

Pour the batter over the pineapple and chestnuts.

Place the pan into a 350°F oven for 45-50 minutes. Test for doneness with a toothpick. When it comes out clean, the cake is done.

Remove the pan from the oven. Keep a cloth on the handle so no one burns their hands on a hot handle while the cake cools.

Cool for 10 minutes.

Lay a folded towel on the counter. Place the cake pan on the towel. Place the serving plate over the pan.

Fold the towel over the plate and holding it all tightly together, flip it so the cake turns out onto the plate.

Hopefully, all the pineapple will also follow. If not, just replace them.

If you like, sprinkle a bit of rum over the top of the cake. Totally optional.

Exploring Upside Down Baking is on the agenda for this winter.

What about an Upside Down Banana’s Foster Cake?


Pepper Jelly, Another Southern Staple

Chances are, if you live in the southern USA, you have seen and tasted pepper jelly. Pepper jelly is one of those staples that can be used in many things.

Hostess Saver

It saves a hostess when guests show up; pour some pepper jelly over cream cheese and some crackers and you have a marvelous snack with wine, beer or even iced tea.

It adds a special something to pan-fried pork chops and makes scrambled eggs amazing. Slathering some onto a biscuit or over some ham will leave you in taste bud heaven.

While pepper jelly is a bit on the pricy side ($4.99 USD for a small 6 oz jar) it can be made rather quickly and you can adjust the heat to make it hot or just make it sweet.

When you make this, set aside time to give it your full attention because it needs to be stirred constantly to prevent lumping and scorching.

As always, when working with hot sugar, be careful. Keep a bowl of ice water near your working space so if you get splashed, you can plunge it into ice water to prevent a bad burn.

There are many recipes for pepper jelly. This one does not use a large amount of pectin so it sets on a medium gel which makes it perfect for pouring over cream cheese, making a sauce or slathering onto a nice hot buttermilk biscuit.

Pepper Jelly Biscuit with herb and cheese scrambled eggs

Southern Pepper Jelly

1 1/4 cup of finely diced red and orange peppers (one large pepper of each color)

3/4 cup finely diced green pepper

2 tablespoons finely diced jalapeno pepper OR 1 small Habanero

Wear gloves when handling hot peppers. If you get the hot peppers on your skin, soak the skin in milk, 1/2 & 1/2 or cream.

Do not rub your eyes or touch small children or babies with hands that have just handled hot peppers.

1/2 cup apple cider vinegar

1 1.75 ounce package of powdered pectin

1/2 teaspoon kosher salt

2 1/2 cups granulated sugar

Take your time cutting the peppers. The best jelly has lovely evenly diced cubes of multicolored peppers floating the jelly. If you just hack and chop, you see uneven strands and bits and pieces of peppers which isn’t so nice to look at through the jar or when you are eating the jelly.

Here is how to cut a nice looking pepper:

Wash the peppers and remove any sticky labels.

Trim the top and bottom off, remove the stem and save the trimmed ends for kebab or in a salad or stir-fry.

Remove the ribs and seeds, open the pepper so it lays flat, skin side down.

Carefully remove the membrane

See how much prettier the pepper is with the membrane removed?

Slice into julienne, cut even slices all the way down the pepper strip.

Turn the julienne and cut into dice. The cubes should be of even size.

Pepper Jelly, a southern staple and hostess saver.

Slice the pepper so it becomes one long strip. Lay the pepper out with the skin side down. Remove the seeds and ribs from inside the pepper.

Using a sharp knife, remove the membrane from the inside of the pepper, leaving the plump pepper flesh. Just take a very thin slice from the surface to remove the membrane.

Make long thin slices from the pepper (Julienne cut), then turn the strips and cut them into cubes. Do this carefully so you create a bowl full of nicely diced peppers.

Trust me, it really makes a difference to take the time to do it right.

Place the diced peppers, vinegar and pectin into a saucepan. Bring to a boil over high heat, stirring constantly.

Be careful of vinegar fumes, turn your exhaust fan on so you don’t get all choked up.

When the mixture comes to a full rolling boil, add the sugar.

Return the mixture to another rolling boil, then boil it for 1 full minute while stirring constantly.

Remove from heat and skim off any foam that may have formed on the top.

You can process the jelly in canning jars, hot water bath etc to seal and make them shelf stable. (Great idea for gifts)

Or using clean, sterile jars, fill and invert them on the counter to cool. Once cool, turn them over and they seal will set, but you will need to refrigerate the jars.

This makes slightly over a pint.

Soften cream cheese, to fancy it up a bit, put it in a piping bag and pipe the cream cheese out in a decorative pattern rather than just plopping a chunk of cream cheese on a plate.

But if you want to, you can do it that way. Lots of southern folks do.

Pecan Crusted Fried Okra

Southern Cooking has to include okra of some kind so I thought Pecan Crusted Fried Okra would be interesting.

Okra

How many of you like okra?

The most common perception of okra is that is disgustingly slimy. I have to give you that it is slimy like a world of snails would love.

I’ll never forget the first time I had stewed okra and tomatoes and all I could think was “what is wrong with you people?” It didn’t help that the person who made the dish was a terrible cook. (Bless her heart!)

Then I discovered pickled okra and fell instantly in love.

Quickly I learned there are ways of preparing okra that avoid the slimy aspects of this misunderstood vegetable.

Used in vegetable soup, okra will give the broth a nice thickness, not too thick but not watery either. I love the little balls of seed that float into the soup, yummy.

Okra

Okra (Photo credit: NatalieMaynor)

Okra is found all over the world and is used in many cultures and cooked in just about as many different ways as you can find recipes.

I am working on developing content for Charlotte Cooks which begins filming the new PBS season in August.

We are filming a segment on Southern Cooking and that must include some kind of okra dish.

Robert thought it should be fried okra. So as I researched and thought, the idea of combining the southern love of cornbread, buttermilk and pecans with okra.

This is the result of my study.

Pecan Crusted Fried Okra

1 pound fresh okra – choose young tender ones over older more sturdy okra

1 cup Martha White Self Rising Buttermilk Cornbread Mix

(Use more as needed)

1 cup buttermilk

(Use more as needed)

1 cup coarsely chopped pecans

1/2 cup panko bread crumbs

Mix pecans and panko together, use more as needed

Vegetable oil as needed to fry

Fine ground sea salt

Method:

Set up a standard breading procedure with trimmed okra, cornbread mix, buttermilk, mix the pecans and panko together in the third pan.

Standard breading procedure set up:
Use cornbread mix, buttermilk, pecans and panko

Wash and dry the whole okra pods.

Trim the tops off the okra, leave the pods whole other than the top.

Bread the okra by coating in flour, then buttermilk, then pecan mix.

Have a pan with enough oil to come half way up the okra in the pan.

Only enough oil to come half way up the okra. Don’t move them around too much.
See, even mine had some drop the breading. Keep those as “cooks treats”.

Cook on medium high heat about 3 minutes on each side. The breading will be golden brown.

Using a slotted spoon or slotted spatula remove the golden brown okra from the hot oil and drain on a fresh paper towel.

Season with a light sprinkle of fine salt.

Serve with Texas Pete Hot Sauce.

Be careful, not only are these lovely morsels tasty and addicting but they will disappear before you know it!

When calculating how much to make, always make more because you will need it.

OK, now here’s the thing. Many of you will experience the breading does not really want to stay on the okra. It is hard to bread an okra and have it stay on like it should.

Following the standard breading procedure making sure to get each pod coated in flour first then coat totally in the buttermilk then pecans you will have the best chance of keeping the breading intact.

Once they hit the pan, let them cook. Don’t move them around too much or you WILL see the breading all fall off. This is why they don’t get deep-fried too. Just enough oil to come about half way up the okra while in the pan.

Make sure the oil is hot so the okra start cooking as soon as they hit the pan.

Putting them in a cold pan and cold oil will result in soggy oil filled  okra. That is disgusting. Oil and slime. Avoid it.

When they are done, pile them up on a plate and serve.

Jump back quick because they will disappear before you set the plate down.

A Heaping Plate of Pecan Crusted Fried Okra

Ya’ll come and don’t be late for dinner!

Grilled Watermelon

Uh huh, you heard that, Grilled watermelon.

Get your grill hot, really hot.

Slice watermelon about finger width or thicker slices.

Ingredients for Grilled Watermelon

Drizzle the melon with a high quality Greek olive oil such as Theros unfiltered extra virgin.

Sprinkle Herbs de Provence. Fleur de Sel (or kosher or sea salt) and grind some fresh black pepper over the oiled slices.

Place the watermelon on the hot grill for 3-4 minutes. Once grill marks appear, flip and grill the other side.

5 minutes is all it takes once you have a really hot grill. You want the melon to have some chars on it.

The flavor and texture totally changes and is a refreshing, wonderful treat!

Try it.

Smack your lips and say “Hallelujah!”

Your friends and neighbors will think you crazy at first, but they will soon be grilling their own watermelon and smacking their lips too.

Do you think Grilled Watermelon will be as popular as deep-fried turkey?

{Try it before you answer!}

Stay tuned! Find out how YOU can win a bottle of Theros Unfiltered Greek Olive Oil.

Details coming soon

Grilled Watermelon

All About Potatoes – What is the difference?

In this post, I will attempt to explain all about potatoes, explain the varieties available and when to choose one over another.

What is the difference between potatoes?

Red skin and Russet Potatoes

Next time you go shopping for potatoes, you will have a lot more knowledge about them after reading this post.

Have you ever:

  • Tried to make french fries from scratch only to have them turn out limp and soggy?

  • Tried to make potato salad or put nicely diced potatoes in a soup only to have the potatoes all fall apart?

  • Ever had your mashed potatoes turn out like glue?

  •         Had a baked potato explode on you in the oven? (Technique rather than variety is the secret)

It all has more to do with the potato you chose to make the dish with than your culinary skills, which I am sure are impeccable.

There are few categories in the potato world. Basically there are low-moisture, high-starch varieties and high-moisture, low-starch varieties.

The high starch varieties will fall apart if cooked in liquid but create light and fluffy mashed potatoes, crisp french fries and crispy chips.

Russet Potatoes – notice the dark, thick skin. Compare this to a new potato which has a thin tender skin.

The russet is the king of the low moisture-high starch category. These potatoes have thick dark skins as opposed to the thin tender skin of new potatoes.

Yukon Gold: thin skin, shallow eyes and golden flesh

The low starch – high moisture category belongs to red potatoes, Yukon gold, new potatoes. All potatoes with a tender thin skin will be high moisture, low starch potatoes.

These potatoes hold their shape in soups, casseroles and salads. Their tender skins are often deep-fried and used a receptacles for dips, spreads, chili and salsa.

Go to the store and buy some of each variety and compare them. Cut them, notice the textures. Cook some of both using a variety of cooking methods and compare results. Make notes so you can remember what you discover during this experiment.

Then we have sweet potatoes and yams.

Yams are not as high is sugar as sweet potatoes are but they taste just a good. Be careful with large varieties of these potatoes as they can get very stringy. Choose smaller, even sized, good color and smooth skins when selecting these potatoes for purchase.

Typically, sweet potatoes and yams can be used interchangeably and can be applied to a many cooking methods. The skins are not edible. Colors vary from pale yellow to deep orange and now there are garnet and purple varieties too.

Tiny new potatoes, fingerling potatoes, “potato gems” are all varieties that belong in the low starch, high moisture variety. their size and shape make them special in that you can cook them without peeling or cutting them if you wanted.

Fingerling potatoes

Some of this variety are so moist and tasty, you never miss the butter.

Have you ever seen a blue or purple potato? They really are blue or purple throughout. And they stay that way when cooked.

When you have purple asparagus or purple carrots, they lose the purple color when cooked.

Purple potatoes do not! For the most part, you can use them as a high moisture low starch potato, but they do mash well without turning into glue or paste.

Additional varieties from the potato world include Malanga, Boniato which take to any cooking method potatoes do.

Boniato, inside flesh is white. Use these as you would sweet potatoes.

Malanga

Here in the US, Melissa’s Brands offer several unusual varieties not only of potatoes but of all unusual, hard to find produce items.

Be adventurous and try a different kind of potato next time you go shopping.

When choosing what potato you want, if you want a potato to hold its shape as in soup, choose a high moisture low starch.

For fluffy mashed potatoes, select russets and run cooked potatoes through a ricer, not a mixer. perfect mashed potatoes is another post soon.

For great french fries you need a low moisture potato with high starch. Again russets are your best choice but you can also use “All-purpose potatoes” or “chef’s potatoes”. These labels indicate a moderate amount of starch and moisture and can be used in any potato recipe.

This is why sweet potato fries are mostly limp, they have too much moisture to get fluffy like russets do. Sweet potatoes also break down your frying oil faster due to the amount of natural sugar in the potato.

Quick run down:

Fluffy baked potatoes, mashed potatoes and french fries use russet potatoes

To hold the shape as in soup, potato salads, use red or white skin potatoes, you can also find blue ones in this category.

Never store potatoes in the refrigerator. The cold converts the starch to sugar.

Always store potatoes in the dark, in a dry place. I keep mine in a cabinet that isn’t used much.

If potatoes area stored in light, they will develop a green skin which is a toxic substance known as “solanin”

It would take a boatload of solanin consumption to have an effect, but it is an intestinal irritant. You choose.

There will be doing a series of posts of cooking potatoes and selecting the right one for the recipe in the next few weeks.

In the meantime, choose something different and play!

Inside of a purple potato; notice the color of the skin in the background.

Inside a baked garnet sweet potato; isn’t that a great color?!