#allnaturalbodycare #softskin #helpmyfeet #homespa #pampering


#allnaturalbodycare #softskin #helpmyfeet #homespa #pampering

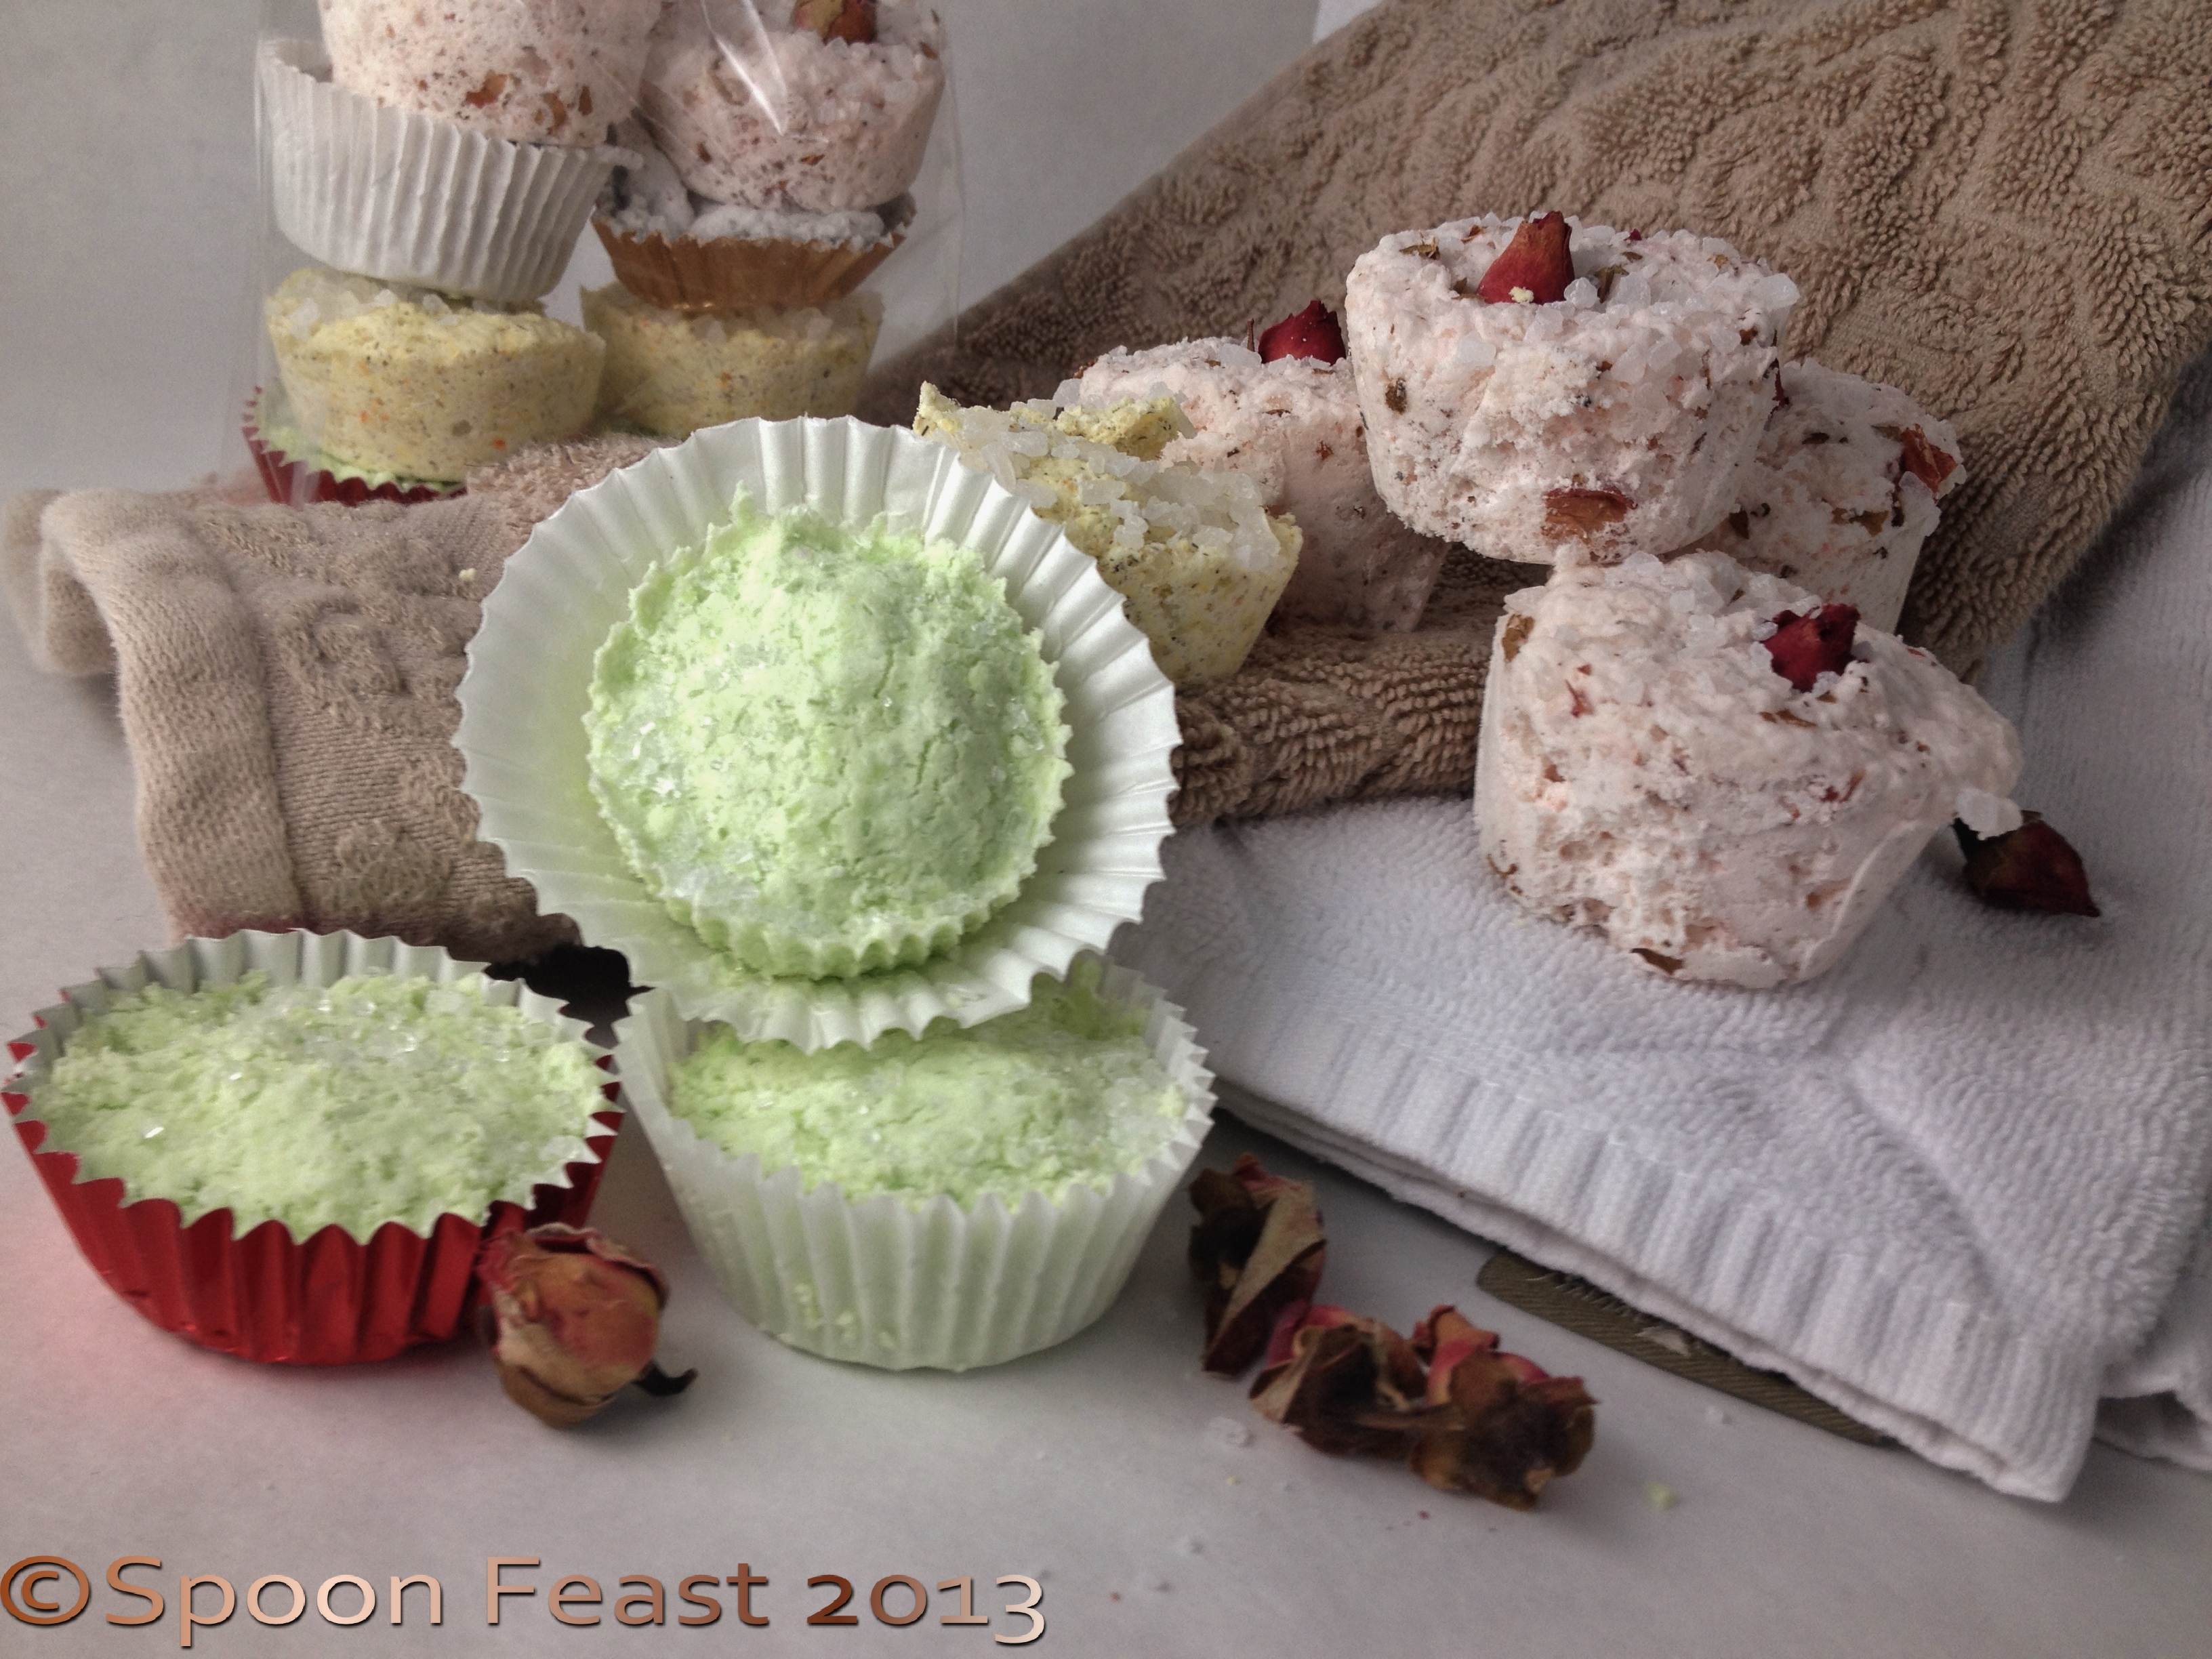
Herbal Bath Fizzes
Nothing relaxes as well as a nice soak in a warm bath especially when that warm bath has an herbal bath fizzy in it.
These are another great gift idea from my kitchen. They are fragrant, pretty and very easy to make. The hardest part is waiting for them to dry. That and not using too much liquid.
This batch recipe makes 8 fizzes the size of mini cup cakes, in fact I use a mini cup cake pan to set them up in. You can use paper liners if you like. If not, be sure to lightly oil the pan so the dried fizzes come out without too much trouble. You can always use any crumbles by the handful in the bath too.

Chai Rose Herbal Bath Fizzy
Powdered green tea, chamomile tea, fine-cut herbs and citrus zest, rose petals, flower petals. Leave flower petals large so they don’t fit down the drain.
Just remember, you don’t want to clog a drain.
In order to be successful making these, you need to understand the science behind what makes them work. When the Herbal Bath Fizzes work, they float around the tub fizzing away like a big Alka-Selser until dissolved. Once dissolved, they leave behind a rich bath full of minerals, skin softeners and stress relieving aromatherapy.
Remember making the volcano lava as a child? You know, mixing the baking soda with the vinegar that produces a huge fizz that rises and flows spending the fizzy energy quickly, depending on how much baking soda you had.
Well basically that’s the same principle here: add the baking soda to an acid, (citric acid), add liquid and watch the fizz begin. So there lies the trick.
The fizz is supposed to happen in the tub. If you add too much liquid to mix the bath fizzes together, they will rise like cupcakes, from a flat batter to a full-blown overflowing, catch-it! mess. Whats the secret? Add only the smallest amount of liquid, only enough to hold the mixture together when it is squeezed together with your hands.
Why? Because it is the liquid that activates the citric acid by liquefying the citric acid and thereby providing an acid base for the baking soda’s reaction of mass expansion. Only use the bare minimum liquid. Measure as directed but only use a tablespoon. I find the liquid is enough for two batches.
Mix the dry ingredients together, making sure there are no lumps.

Mix all dry ingredients, no lumps
Mix the oil and liquid in a separate bowl. Add 20-30 drops of your favorite fragrance, 1-2 drops of food coloring in a small bowl.

Measure liquids in a separate bowl
Use a plastic pipette to measure the drops. Stir it then measure out exactly 1 tablespoon and drop it into the bowl of salts and minerals (the dry stuff) you just mixed without lumps.
The first thing you will notice it how it poofs as the liquid hits the powders. Stir quickly with a spoon to incorporate the wet with the dry, use your hands to mix the final stage and give it a squeeze test.

Watch it puff! Stir quickly to incorporate. Don’t use too much liquid!
If the mixture even holds together a little bit, its good to go.
If it is a bit dry and won’t hold together, sprinkle just a few drops over the surface and mix again with your hands. Give it a squeeze test, then mold it up.
Use silicone molds or cupcake pans with liners, (or spray the cupcake tin with pan spray to prevent sticking. These can really get stuck in hard once they dry out; you have to chisel them out. I found out the hard way.)

Press mixture firmly into molds. Notice how much the batch in the back has puffed! They kept going and going. . .
When filling, only fill 2/3-3/4 full and press the mixture in very firmly. Always allow room for some puffing. Hopefully it will be a minimum.
If you added too much liquid, you will notice they will start rising, and keep rising. I’ve taken half the mix out of risen cups before and doubled the number I was trying to make, then pressed everything back down into the cups again. Only to find they rose wildly again! After wrestling them back into the cups again, I learned to keep an eye.
The problem with them puffing while trying to dry, is that all the puffy gas gets spent so when it hits the water in the tub, instead of getting all fizzy-like, it just melts leaving all the goodness behind. It still has all the great benefits, just not much of a show.
Any broken bits or crumbs can be collected and put in a jar to sprinkle into the bath by the handful.

Green Tea and Rosemary Bath Fizzy
I like to take deep hot water baths so I use two, sometimes three of these.
I love them and so will anyone you give them to, including yourself!
Packaging: Wide mouth canning jars, tins with see through covers, see-through ‘paint cans’, baskets, cellophane bags with ribbons, single acetate bags with adhesive sealing, boxes, Chinese take-out boxes. There are so many ways to package these fizzy gems!
Just another gift idea from my kitchen this year.
Robert says he wants to get a cup of tea and eat one. I told him he would be in for quite a surprise!
Herbal Bath Fizzes

Next Monday marks the start of our FREE Holiday Event! We will transform our holiday season together and start the New Year out right!
We can all do it our own way. All you have to do is set goals and be accountable for your actions and progress at least once a week.
Goals should include:
Nutrition
Don’t be hard on yourself this holiday season. Our goal is to simply add in one healthy whole food each week. Enjoy your holiday traditions and don’t eat beyond what feels good to you.
Exercise
Resolve to get at least 30 minutes of good healthy exercise in each day (with one day of rest). You will feel better through the holidays. Exercise is good for depression, weight maintenance and your general health.
Gratitude
List 3 things that you are grateful for each day. By focusing on gratitude, we see our lives from a different perspective. Instead of seeing what is going wrong, we see the more important picture of what is right in our lives.
Giving
You don’t have to brag about your giving, but if someone gives and it turns out to be really special, share it with us. You may also want to include it as a part of your goal. In prior years, my goal was to give without cost; it does not have to be an expensive gift, just thoughtful and meaningful.
Do you know anyone who is struggling through the holidays? Invite them along!
This weekend I will work on my own goals and post them here.
Please click on the “Secret Facebook Group” page that you can be invited to if you would like to be involved!
Comment below or Follow this link to the Face Book Group to join in, this will be fun!
The group will close on Monday, 11/24, 2014 so be sure to request to join by then. See you there!
 #happyhealthyholidays #holidayfun #holidaysupport #holidayweightgain #avoidweightgain #healthyyou
#stayontrack
 I’d like to invite you all to a simple challenge.
Here’s what you do:
Each morning, before you have anything to eat or drink, squeeze 1/2 or a fresh lemon into a glass, add 8 ounces of room temperature water and drink it down.
Then go about your day as normal.
Make any notes about anything you may feel or how drinking the lemon water effects your body.
People report having more energy, clearer skin, calmer gut, less gas, regular bowel movements, anti aging effects (you’d have to do it a lot longer than 21 days, like, forever. . .) and easier weight control.
I’ve done this before and I really do like how I feel when I do this. My mother used to tell me when I was a little girl to drink a glass of lemon water every morning for your health. Good thing I like lemon.
I’ll be doing a brief post each day about my experience on my Health Coaching Website’s blog www.chefpamela.com in hopes of supporting you in successfully completing your challenge.
Natural Beauty-21 Day Detox Routine http://ourlittlegreendot.com/natural-beauty-morning-detox-routine/

Lips All Natural Soothing Balm, my lip balm!
Soothing lip balm is a must have, simply must have it available all the time.
Addicted? To lip balm? Really? Personally, I don’t think that using lip balm can be addicting. The behavior can be compulsive, but lip balm is not a substance you get addicted to. I talking about the natural products, not the Carmex, Blistex and other chemical crap storms whipped up into a lip balm like substance. In my opinion, since the balm is going onto the lips, the ingredients shouldn’t be petroleum or chemical based.
Since I use it all the time, I am very aware of what the ingredients of my lip balms are. Additionally I also realize the premium lip balms also cost a pretty penny. But now, I make them at home and have a huge supply of soothing lip balm for the cost of what one of the other tubes used to cost.
Some balms have things that make your lips tingle. These can be more drying than they are hydrating. Lips have a thin skin, and they do not have sweat glands. This means lips need to be moisturized. Licking your lips, as everyone knows, is commonly reserved for drooling over food. It is one action that can chap your lips quicker than anything. Stop licking your lips!
Supposedly, using peppermint and other mints in balm, attracts more blood to the area thus causing a “plumping” effect. Not quite as much as jabbing a needle full of plumping materials into your lips. But you certainly won’t end up looking like a platypus or have duck-bill lips. Just nice fresh, kissable lips that would taste good too.
Who doesn’t want that?
A note about tubes: buy the ones that have the “elevator screw” in them so the balm is easy to use.

Buy the tubes with the elevator screw inside them.
Over a double boiler, melt the beeswax. Once melted, add the remaining oils and butters, not the essential oils.

Melt the beeswax. Add the remaining ingredients. The wax will firm up again. Just keep warming everything until it all melts together. Add essential oils after removing from heat.

Fill lip balm tubes to the top. Allow the tubes to cool, then cap, label and enjoy!
Stir until everything is melted. Remove from the heat, stir in the essential oils; mix well.
Pour into tubes or tins, allow to cool before moving it around too much.

Steady lip balm tubes in something to keep them all standing upright
This will make about 10-16 tubes of balm that will keep for about a year in a cool dry place.
When you melt the beeswax, use a dedicated stainless or glass bowl or mason jar. The reason is, it is very difficult to remove all the beeswax from the melting vessel.
If you dedicate tools and utensils for making balms and salves, you won’t have to worry so much about ruining things you use for food.
I bought a small hand mixer to use for lotions and body butters so I don’t have to use my stand mixer.
Line your filling area with parchment or a paper towel to catch any spills or drips. It makes clean up so easy!

Getting ready to make lip balm
Add the essential oils after melting everything. This is so the oils aren’t released by the heat and are retained instead.
Use a glass measuring cup with a pour spout to fill tubes and tins easily.
This balm with Eucalyptus and Lemon Balm is a soothing, healing formula. Perfect for those dry winter days ahead. If you want to change-up the properties a bit, use peppermint essential oil, vanilla extract or any other flavor or scent you would like.
Keep in mind these go on your lips so you be tasting it too. I find adding honey makes the lip balm sticky and while I love honey, I’m not so fond of it, either flavor or feeling wise, on my lips.
Go here; Bulk Apothecary and search for your favorite tube or tin. They also sell supplies so stock up while you’re browsing!
Please let me know how you like the balm. It is my new favorite!
