#allnaturalbodycare #softskin #helpmyfeet #homespa #pampering


#allnaturalbodycare #softskin #helpmyfeet #homespa #pampering

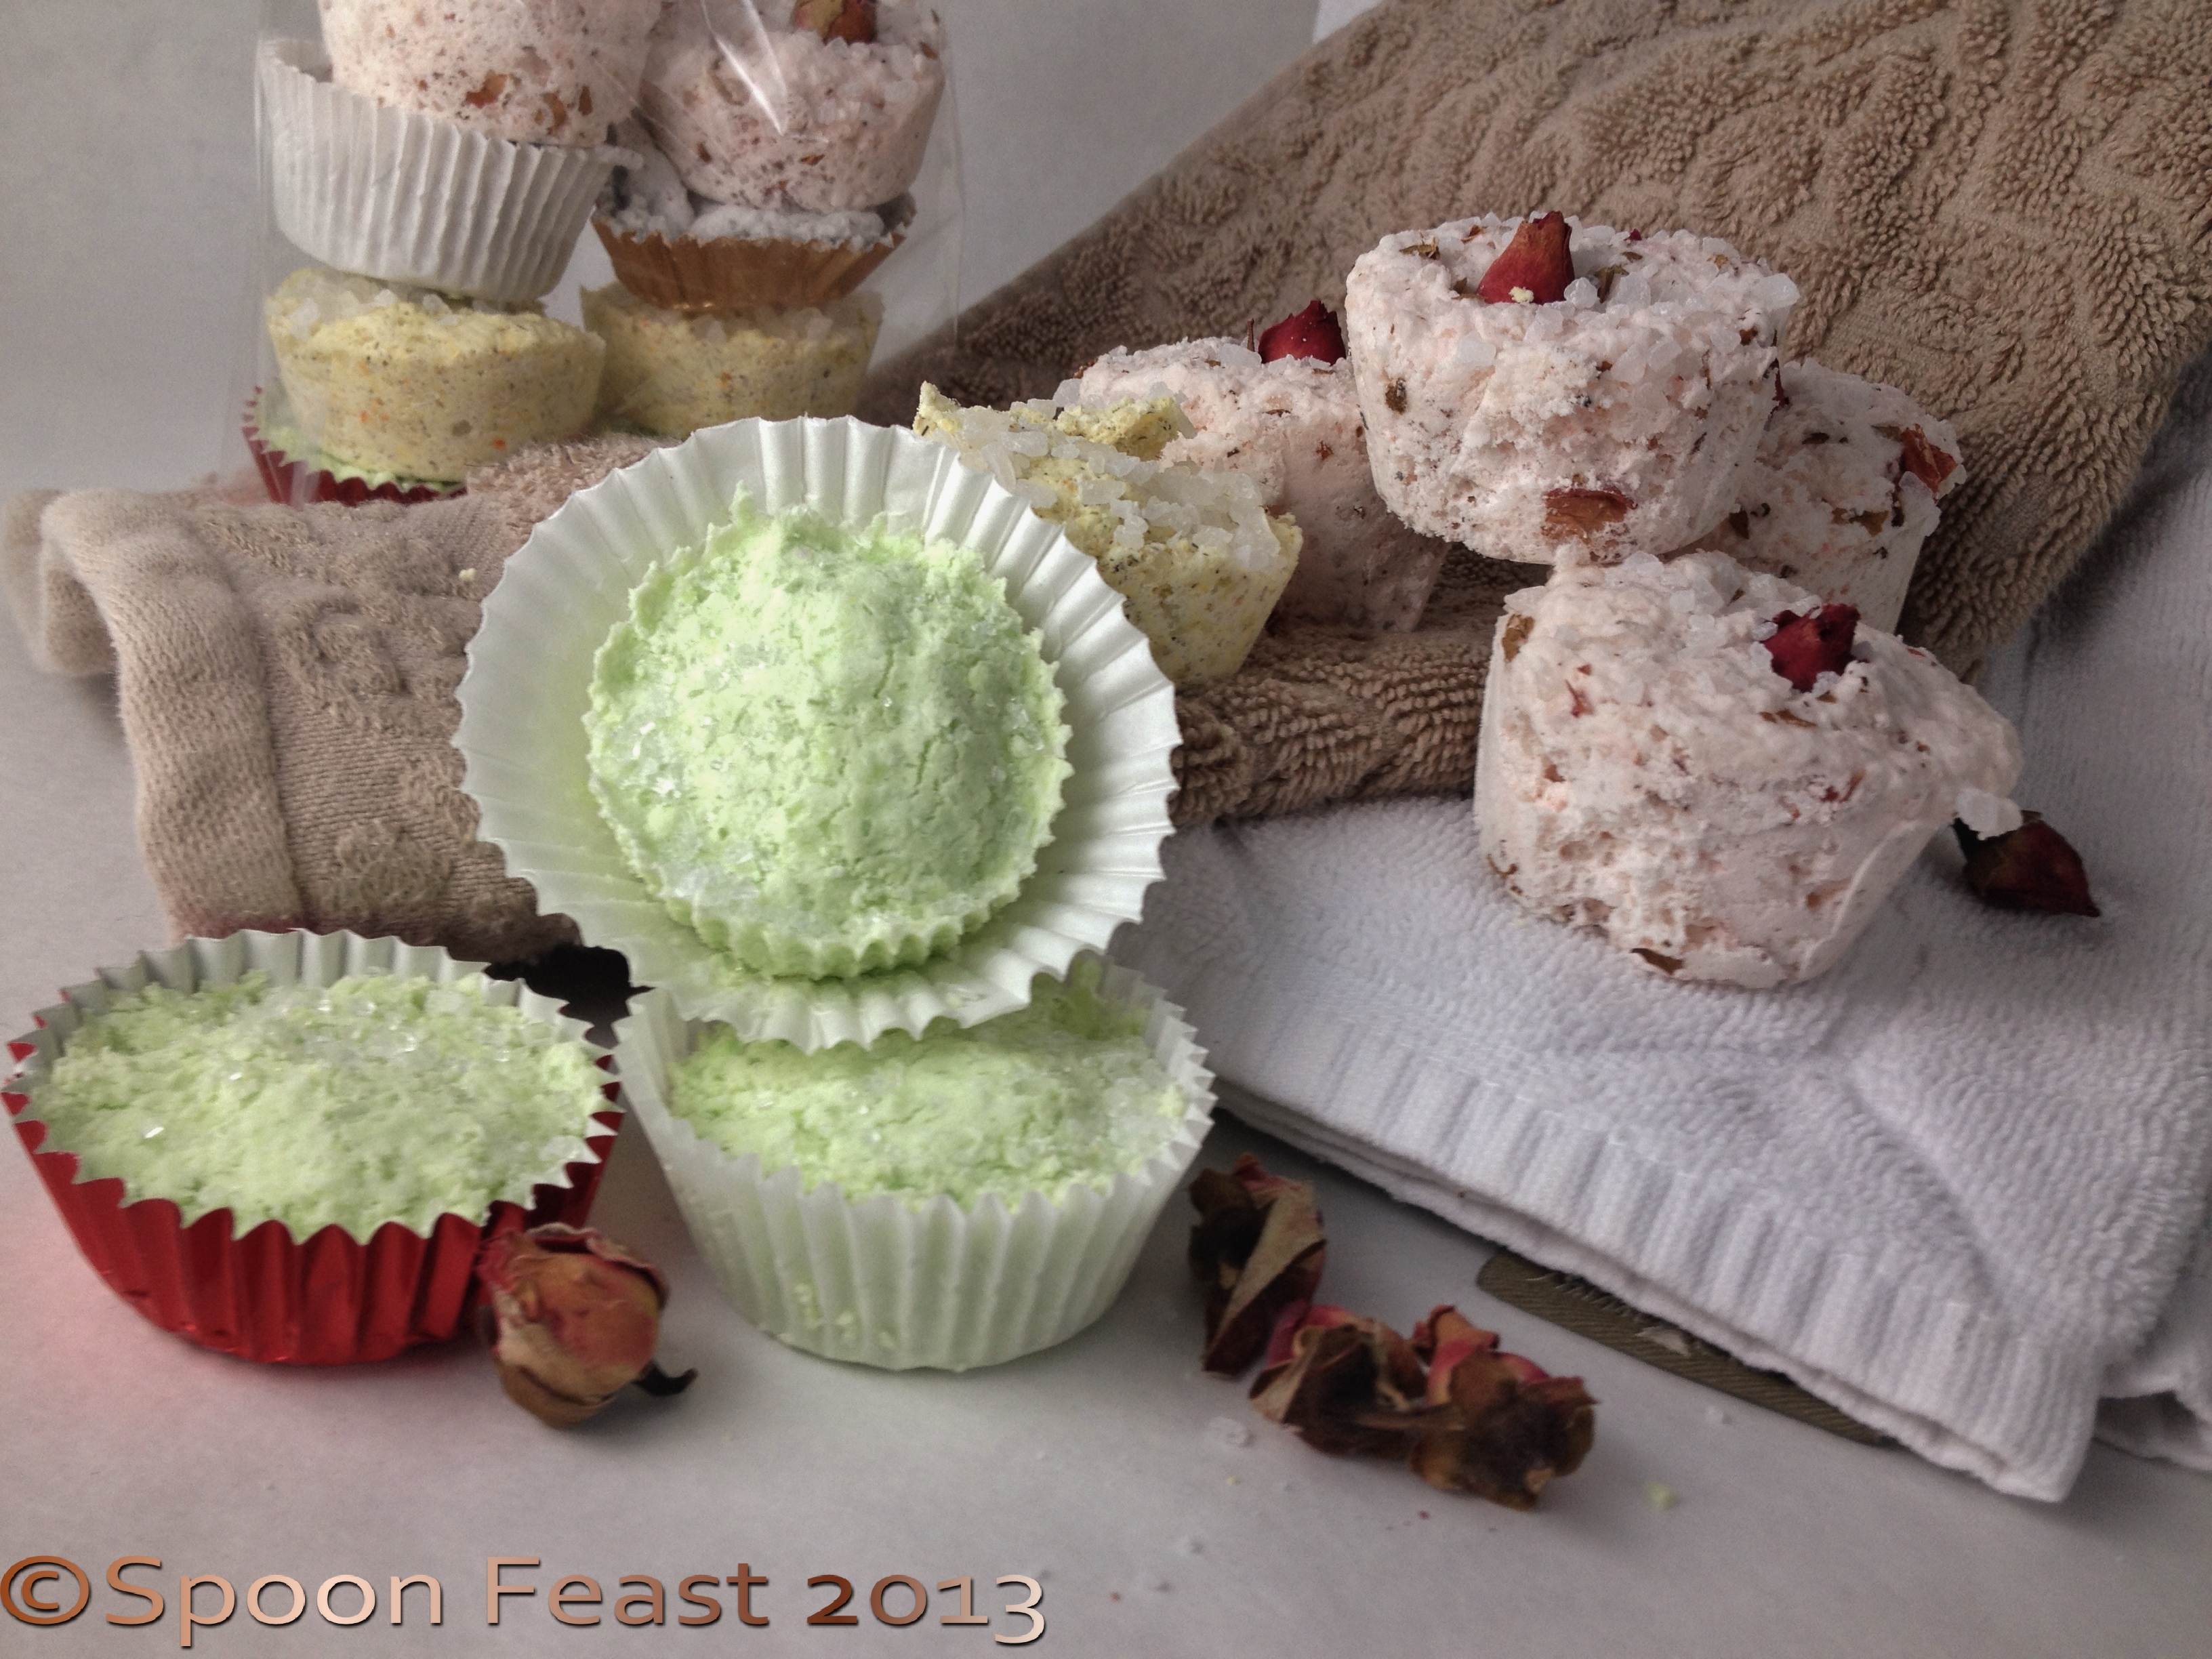
Herbal Bath Fizzes
Nothing relaxes as well as a nice soak in a warm bath especially when that warm bath has an herbal bath fizzy in it.
These are another great gift idea from my kitchen. They are fragrant, pretty and very easy to make. The hardest part is waiting for them to dry. That and not using too much liquid.
This batch recipe makes 8 fizzes the size of mini cup cakes, in fact I use a mini cup cake pan to set them up in. You can use paper liners if you like. If not, be sure to lightly oil the pan so the dried fizzes come out without too much trouble. You can always use any crumbles by the handful in the bath too.

Chai Rose Herbal Bath Fizzy
Powdered green tea, chamomile tea, fine-cut herbs and citrus zest, rose petals, flower petals. Leave flower petals large so they don’t fit down the drain.
Just remember, you don’t want to clog a drain.
In order to be successful making these, you need to understand the science behind what makes them work. When the Herbal Bath Fizzes work, they float around the tub fizzing away like a big Alka-Selser until dissolved. Once dissolved, they leave behind a rich bath full of minerals, skin softeners and stress relieving aromatherapy.
Remember making the volcano lava as a child? You know, mixing the baking soda with the vinegar that produces a huge fizz that rises and flows spending the fizzy energy quickly, depending on how much baking soda you had.
Well basically that’s the same principle here: add the baking soda to an acid, (citric acid), add liquid and watch the fizz begin. So there lies the trick.
The fizz is supposed to happen in the tub. If you add too much liquid to mix the bath fizzes together, they will rise like cupcakes, from a flat batter to a full-blown overflowing, catch-it! mess. Whats the secret? Add only the smallest amount of liquid, only enough to hold the mixture together when it is squeezed together with your hands.
Why? Because it is the liquid that activates the citric acid by liquefying the citric acid and thereby providing an acid base for the baking soda’s reaction of mass expansion. Only use the bare minimum liquid. Measure as directed but only use a tablespoon. I find the liquid is enough for two batches.
Mix the dry ingredients together, making sure there are no lumps.

Mix all dry ingredients, no lumps
Mix the oil and liquid in a separate bowl. Add 20-30 drops of your favorite fragrance, 1-2 drops of food coloring in a small bowl.

Measure liquids in a separate bowl
Use a plastic pipette to measure the drops. Stir it then measure out exactly 1 tablespoon and drop it into the bowl of salts and minerals (the dry stuff) you just mixed without lumps.
The first thing you will notice it how it poofs as the liquid hits the powders. Stir quickly with a spoon to incorporate the wet with the dry, use your hands to mix the final stage and give it a squeeze test.

Watch it puff! Stir quickly to incorporate. Don’t use too much liquid!
If the mixture even holds together a little bit, its good to go.
If it is a bit dry and won’t hold together, sprinkle just a few drops over the surface and mix again with your hands. Give it a squeeze test, then mold it up.
Use silicone molds or cupcake pans with liners, (or spray the cupcake tin with pan spray to prevent sticking. These can really get stuck in hard once they dry out; you have to chisel them out. I found out the hard way.)

Press mixture firmly into molds. Notice how much the batch in the back has puffed! They kept going and going. . .
When filling, only fill 2/3-3/4 full and press the mixture in very firmly. Always allow room for some puffing. Hopefully it will be a minimum.
If you added too much liquid, you will notice they will start rising, and keep rising. I’ve taken half the mix out of risen cups before and doubled the number I was trying to make, then pressed everything back down into the cups again. Only to find they rose wildly again! After wrestling them back into the cups again, I learned to keep an eye.
The problem with them puffing while trying to dry, is that all the puffy gas gets spent so when it hits the water in the tub, instead of getting all fizzy-like, it just melts leaving all the goodness behind. It still has all the great benefits, just not much of a show.
Any broken bits or crumbs can be collected and put in a jar to sprinkle into the bath by the handful.

Green Tea and Rosemary Bath Fizzy
I like to take deep hot water baths so I use two, sometimes three of these.
I love them and so will anyone you give them to, including yourself!
Packaging: Wide mouth canning jars, tins with see through covers, see-through ‘paint cans’, baskets, cellophane bags with ribbons, single acetate bags with adhesive sealing, boxes, Chinese take-out boxes. There are so many ways to package these fizzy gems!
Just another gift idea from my kitchen this year.
Robert says he wants to get a cup of tea and eat one. I told him he would be in for quite a surprise!
Herbal Bath Fizzes

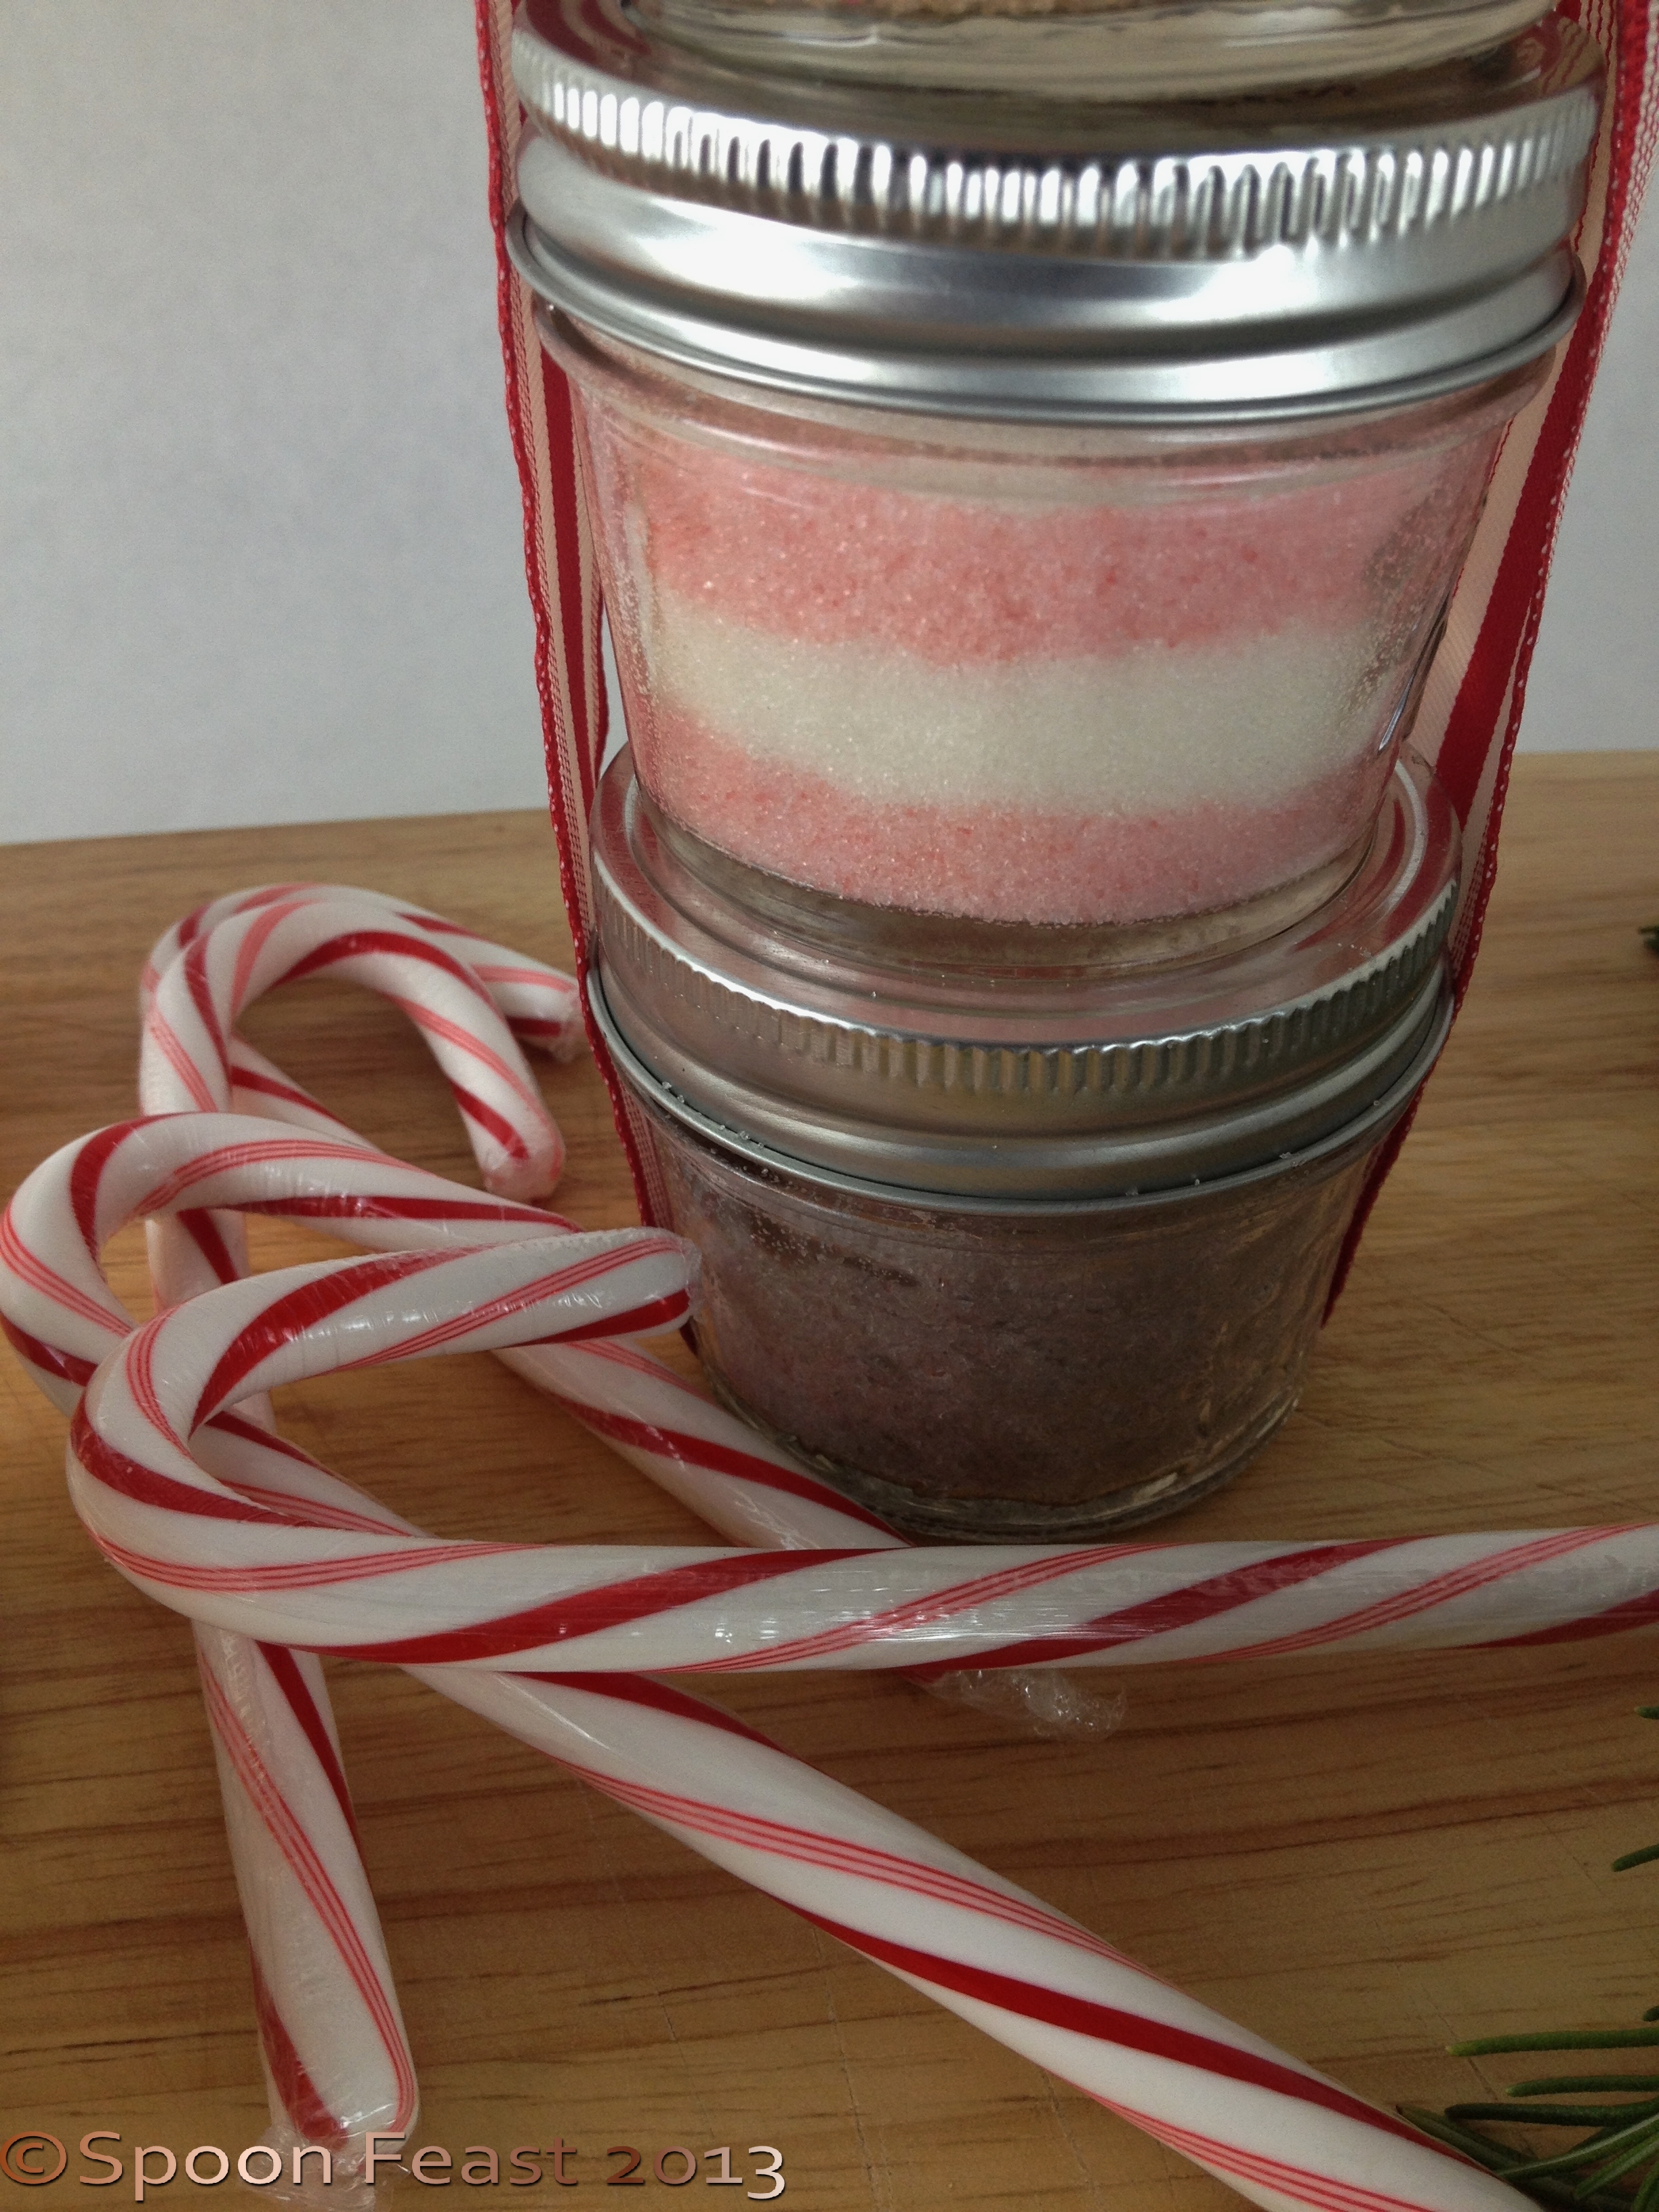
Sugar Scrub Stack
Gifting doesn’t get any easier than this: Sugar Scrubs!
They are super simple and quite inexpensive to make. Choose some nice jars to put them in, create a nifty label and you have a great thoughtful gift. Be sure to make a few extra for you to use too!
Use grape seed, almond, olive or jojoba oil. Don’t use coconut oil as it solidifies in the drain as it cools. Grape seed oil isn’t as “oily” as the others, with olive leaving the “oiliest” feel, which can be quite pleasant on dry skin.
Use your personal preference as to how much oil to add. I prefer only using enough to make the sugar damp and start to hold together as opposed to swimming in oil. I prefer the drier side.
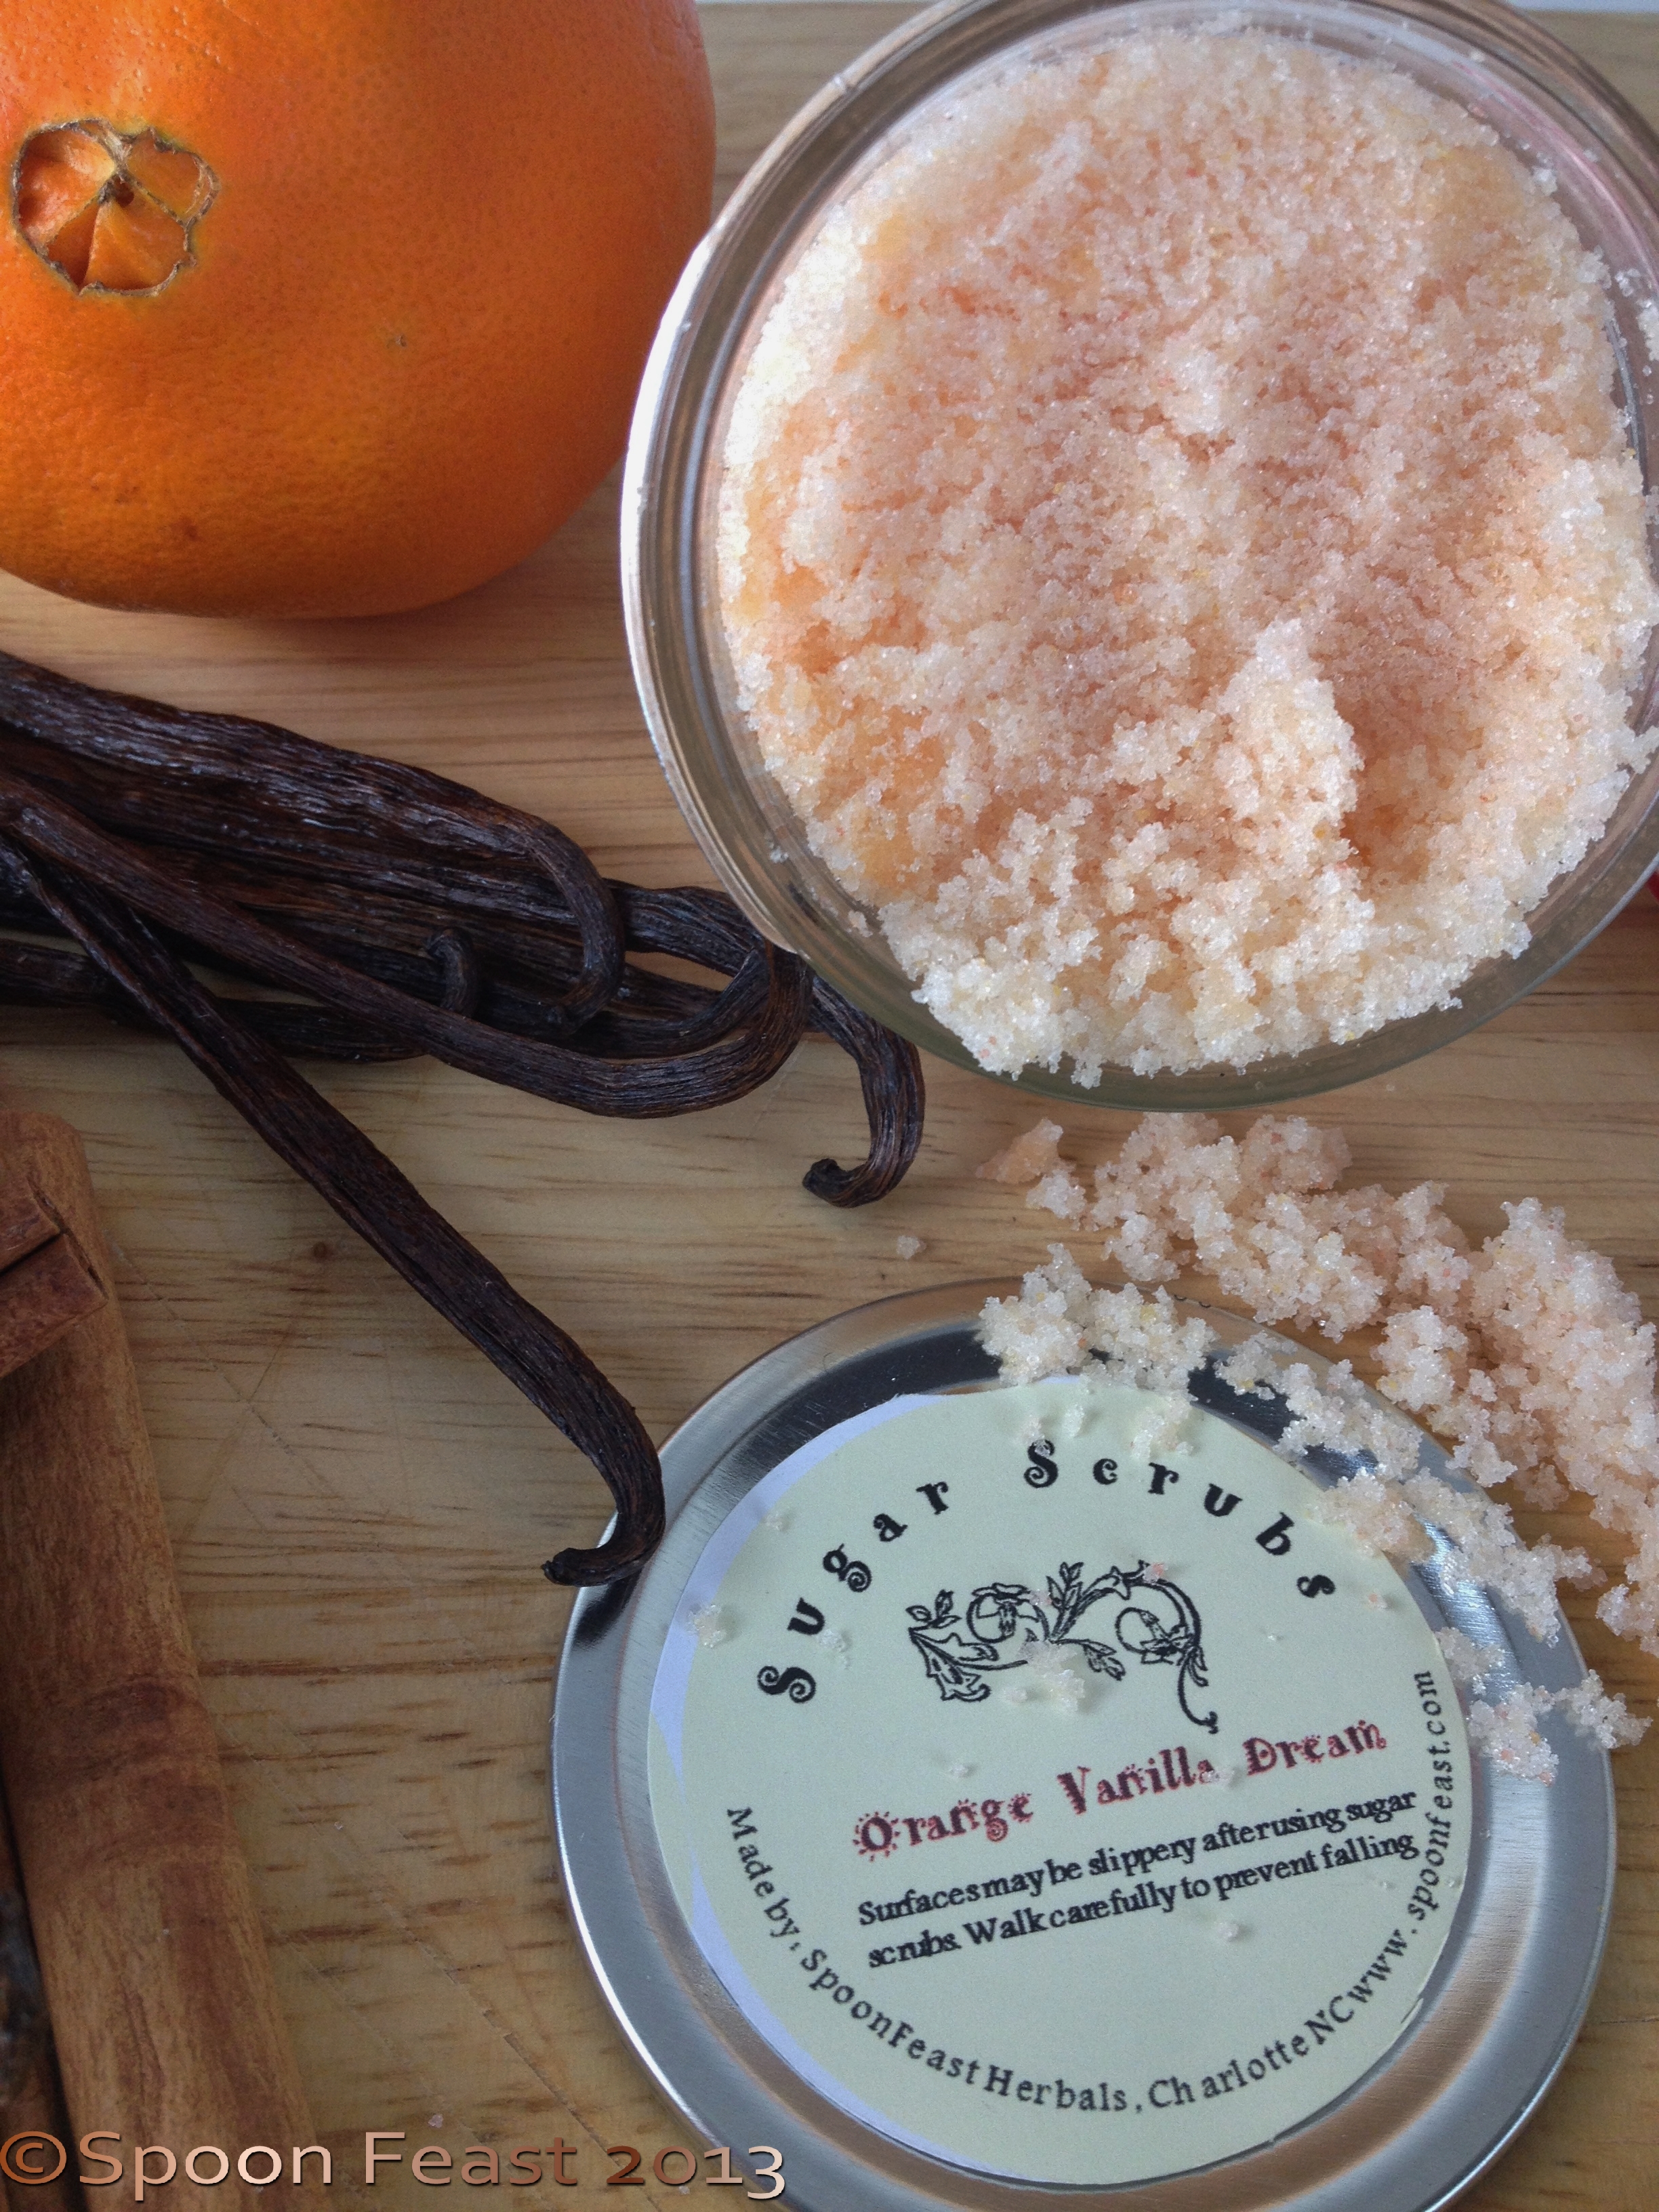
Orange Vanilla Dream Sugar Scrub
When adding peppermint oils, be careful about the scrubs coming in contact with sensitive skin, eyes and private parts. It can sting.
Don’t use more than 3 drops because you don’t want to color your skin! Other choices for colors are raspberry juice, beet juice for a natural product.
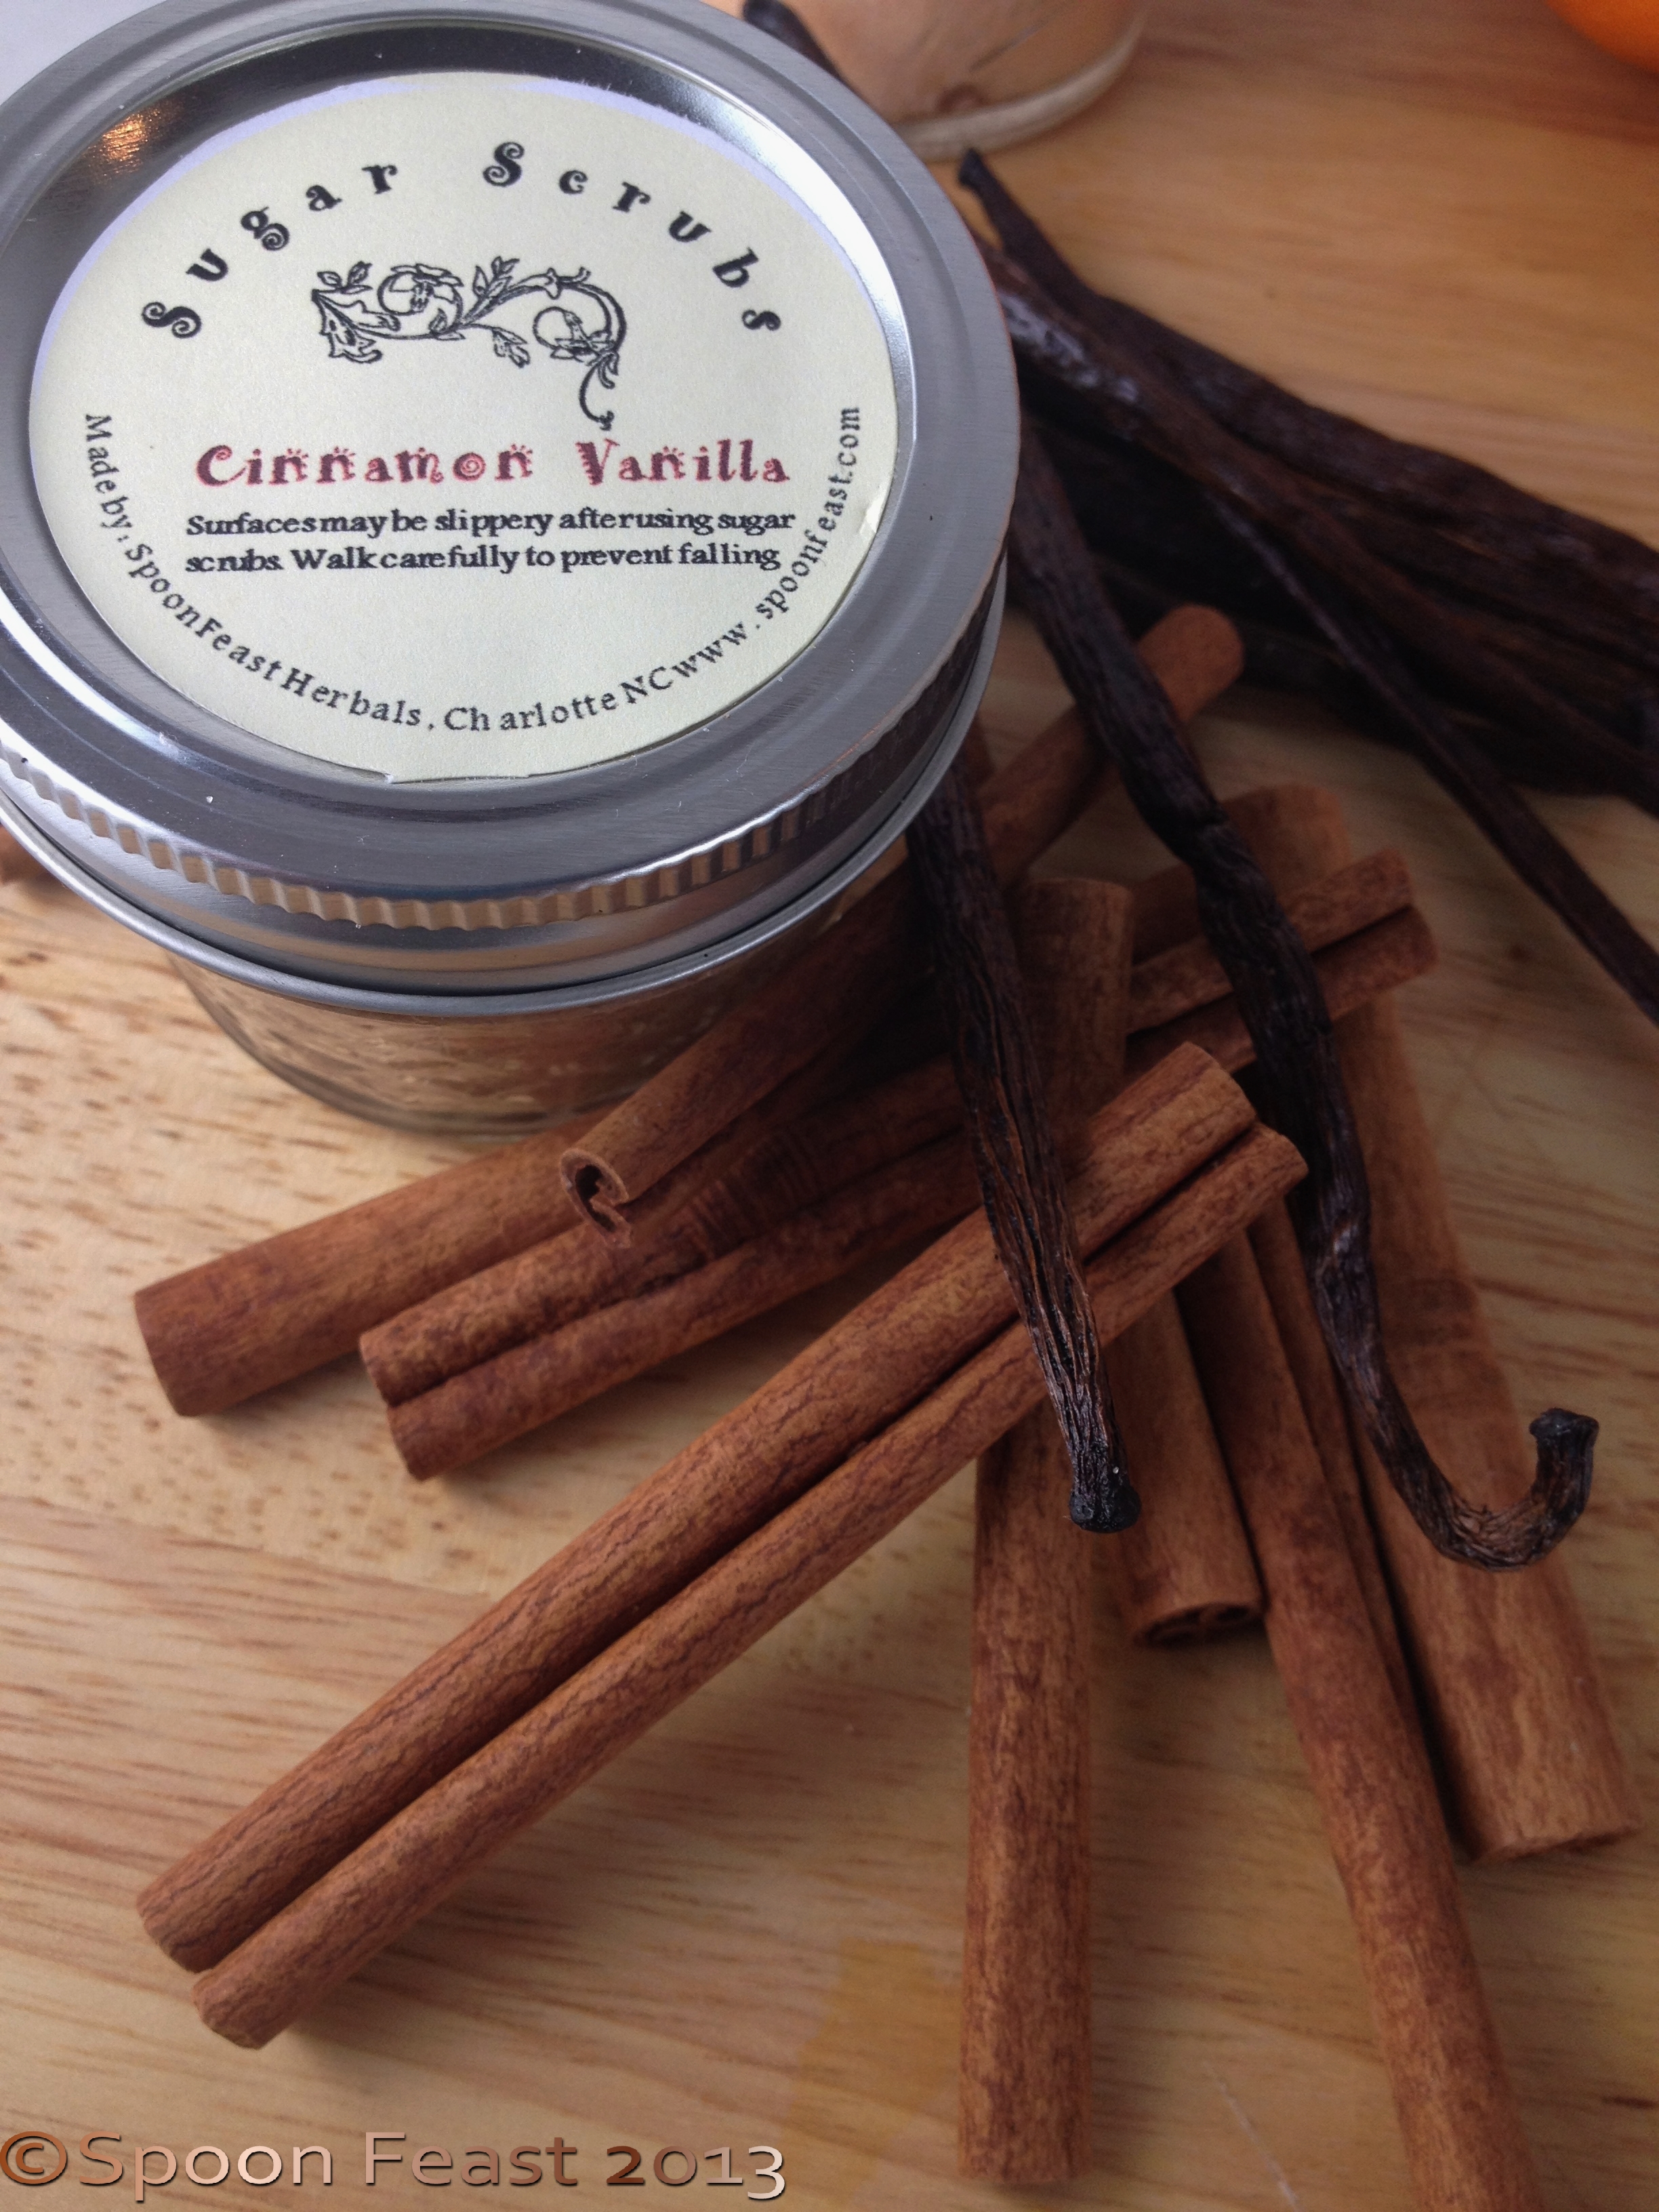
Cinnamon Vanilla Sugar Scrub
Add the sugar to a bowl, add the oil, fragrance and color. Mix and bottle it up in pretty containers.
Make some labels, glue them on, tie some ribbon and you’ve got a lovely gift. I have several jars wrapped under the tree in “Stacks of Sugar Scrub” ready for the last-minute. Teachers, neighbors, hair stylists, manicurists, hostesses, dog walkers, your mail carrier, cat sitters, even baby sitters would enjoy a sugar scrub.

Lavender Rosemary Sugar Scrub
These are the scents I made:
What’s wonderful is the scent lingers on your skin.
Easy , fun, and any leftovers, you get to use!
Peppermint Lift Sugar Scrub
These make great additions to the Spa Basket you have in mind and make nice little thoughtful ditty for those people in your life who could use a little “Thinking of You” gift.
What kind of sugar scrub will you make?

Solid Perfume Lockets
Solid perfume lockets are a beautiful fashion accessory that the women in your life will certainly enjoy.
These are quite easy to whip up in your kitchen too.
I first heard about making these lockets from Rosalee de la Foret in the Learning Herbs Course I’m taking. It was a gift suggestion she thought would be better received than burdock tincture.
I fell in love with the idea and thought it would be rather hard to find lockets.
If you look around flea markets, yard sales and craft stores, you can find a variety of old and new lockets. I was lucky enough to find six of them! These are all new, but now I’ll be keeping my eyes out for lockets everywhere, especially when I get to hit the Parisian flea markets in May.
Oh, did I mention, I’ll be going to Paris in May? I’m taking students, but still, it’s Paris! I’ll have to take a perfume locket so I can smell Parisian and look fashionable too.
Making the solid perfume inside is easy. You can scent the base with your favorite perfume or scent. I like to use essential oils and included in this post is the formula I used to make these solid perfume lockets.
That’s the base. Melt it together over a double boiler.

Melting beeswax and jojoba oil
Once melted add the essential oils or your fragrance.
Here’s the formula I used:
OR
Add 65-70 drops of your chosen fragrance. Yes, you have to use a dropper to measure accurately. So if you don’t have a dropper or plastic pipette, go get some.
Open the lockets and lay them out for easy and fast filling.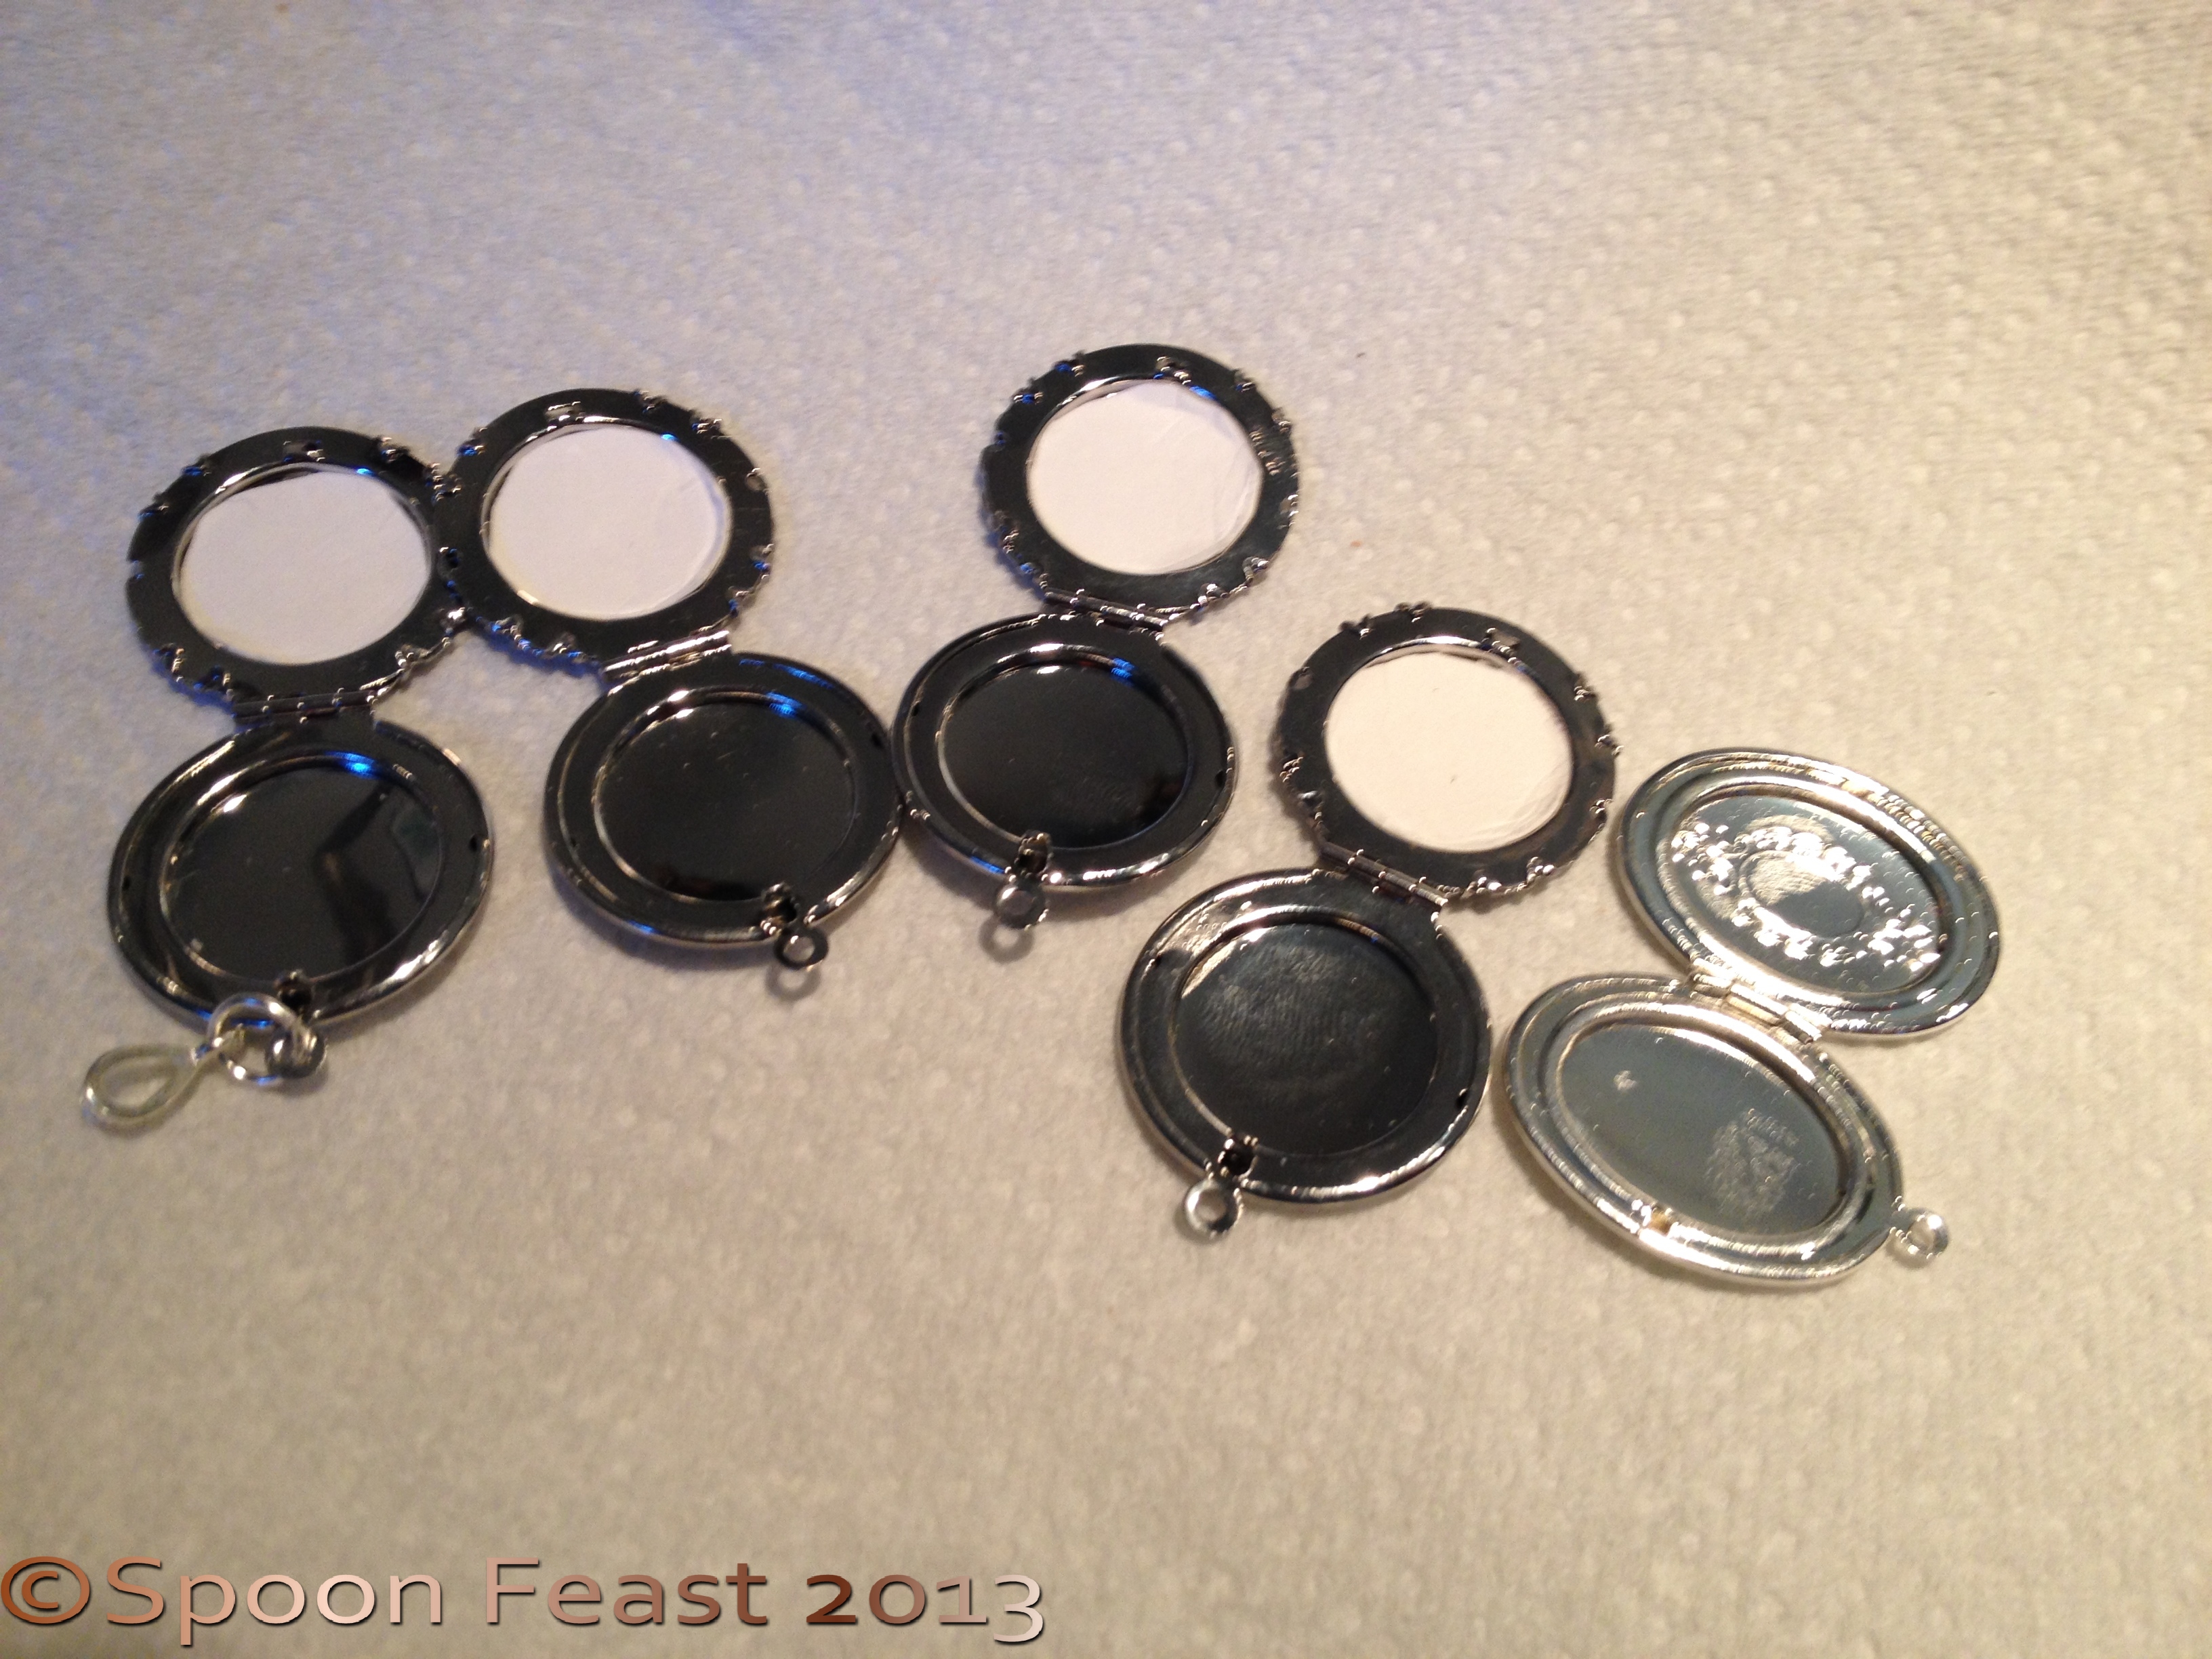
Once the oils have totally melted and the fragrance added, work quickly so the mixture won’t harden before you can pour it. (If that happens, re-warm it!)
Once poured, allow the perfume to solidify before moving, usually 15-45 minutes.

Allow to solidify before moving the lockets
Once the perfume is solid, you can find something to hang it on and enjoy it!
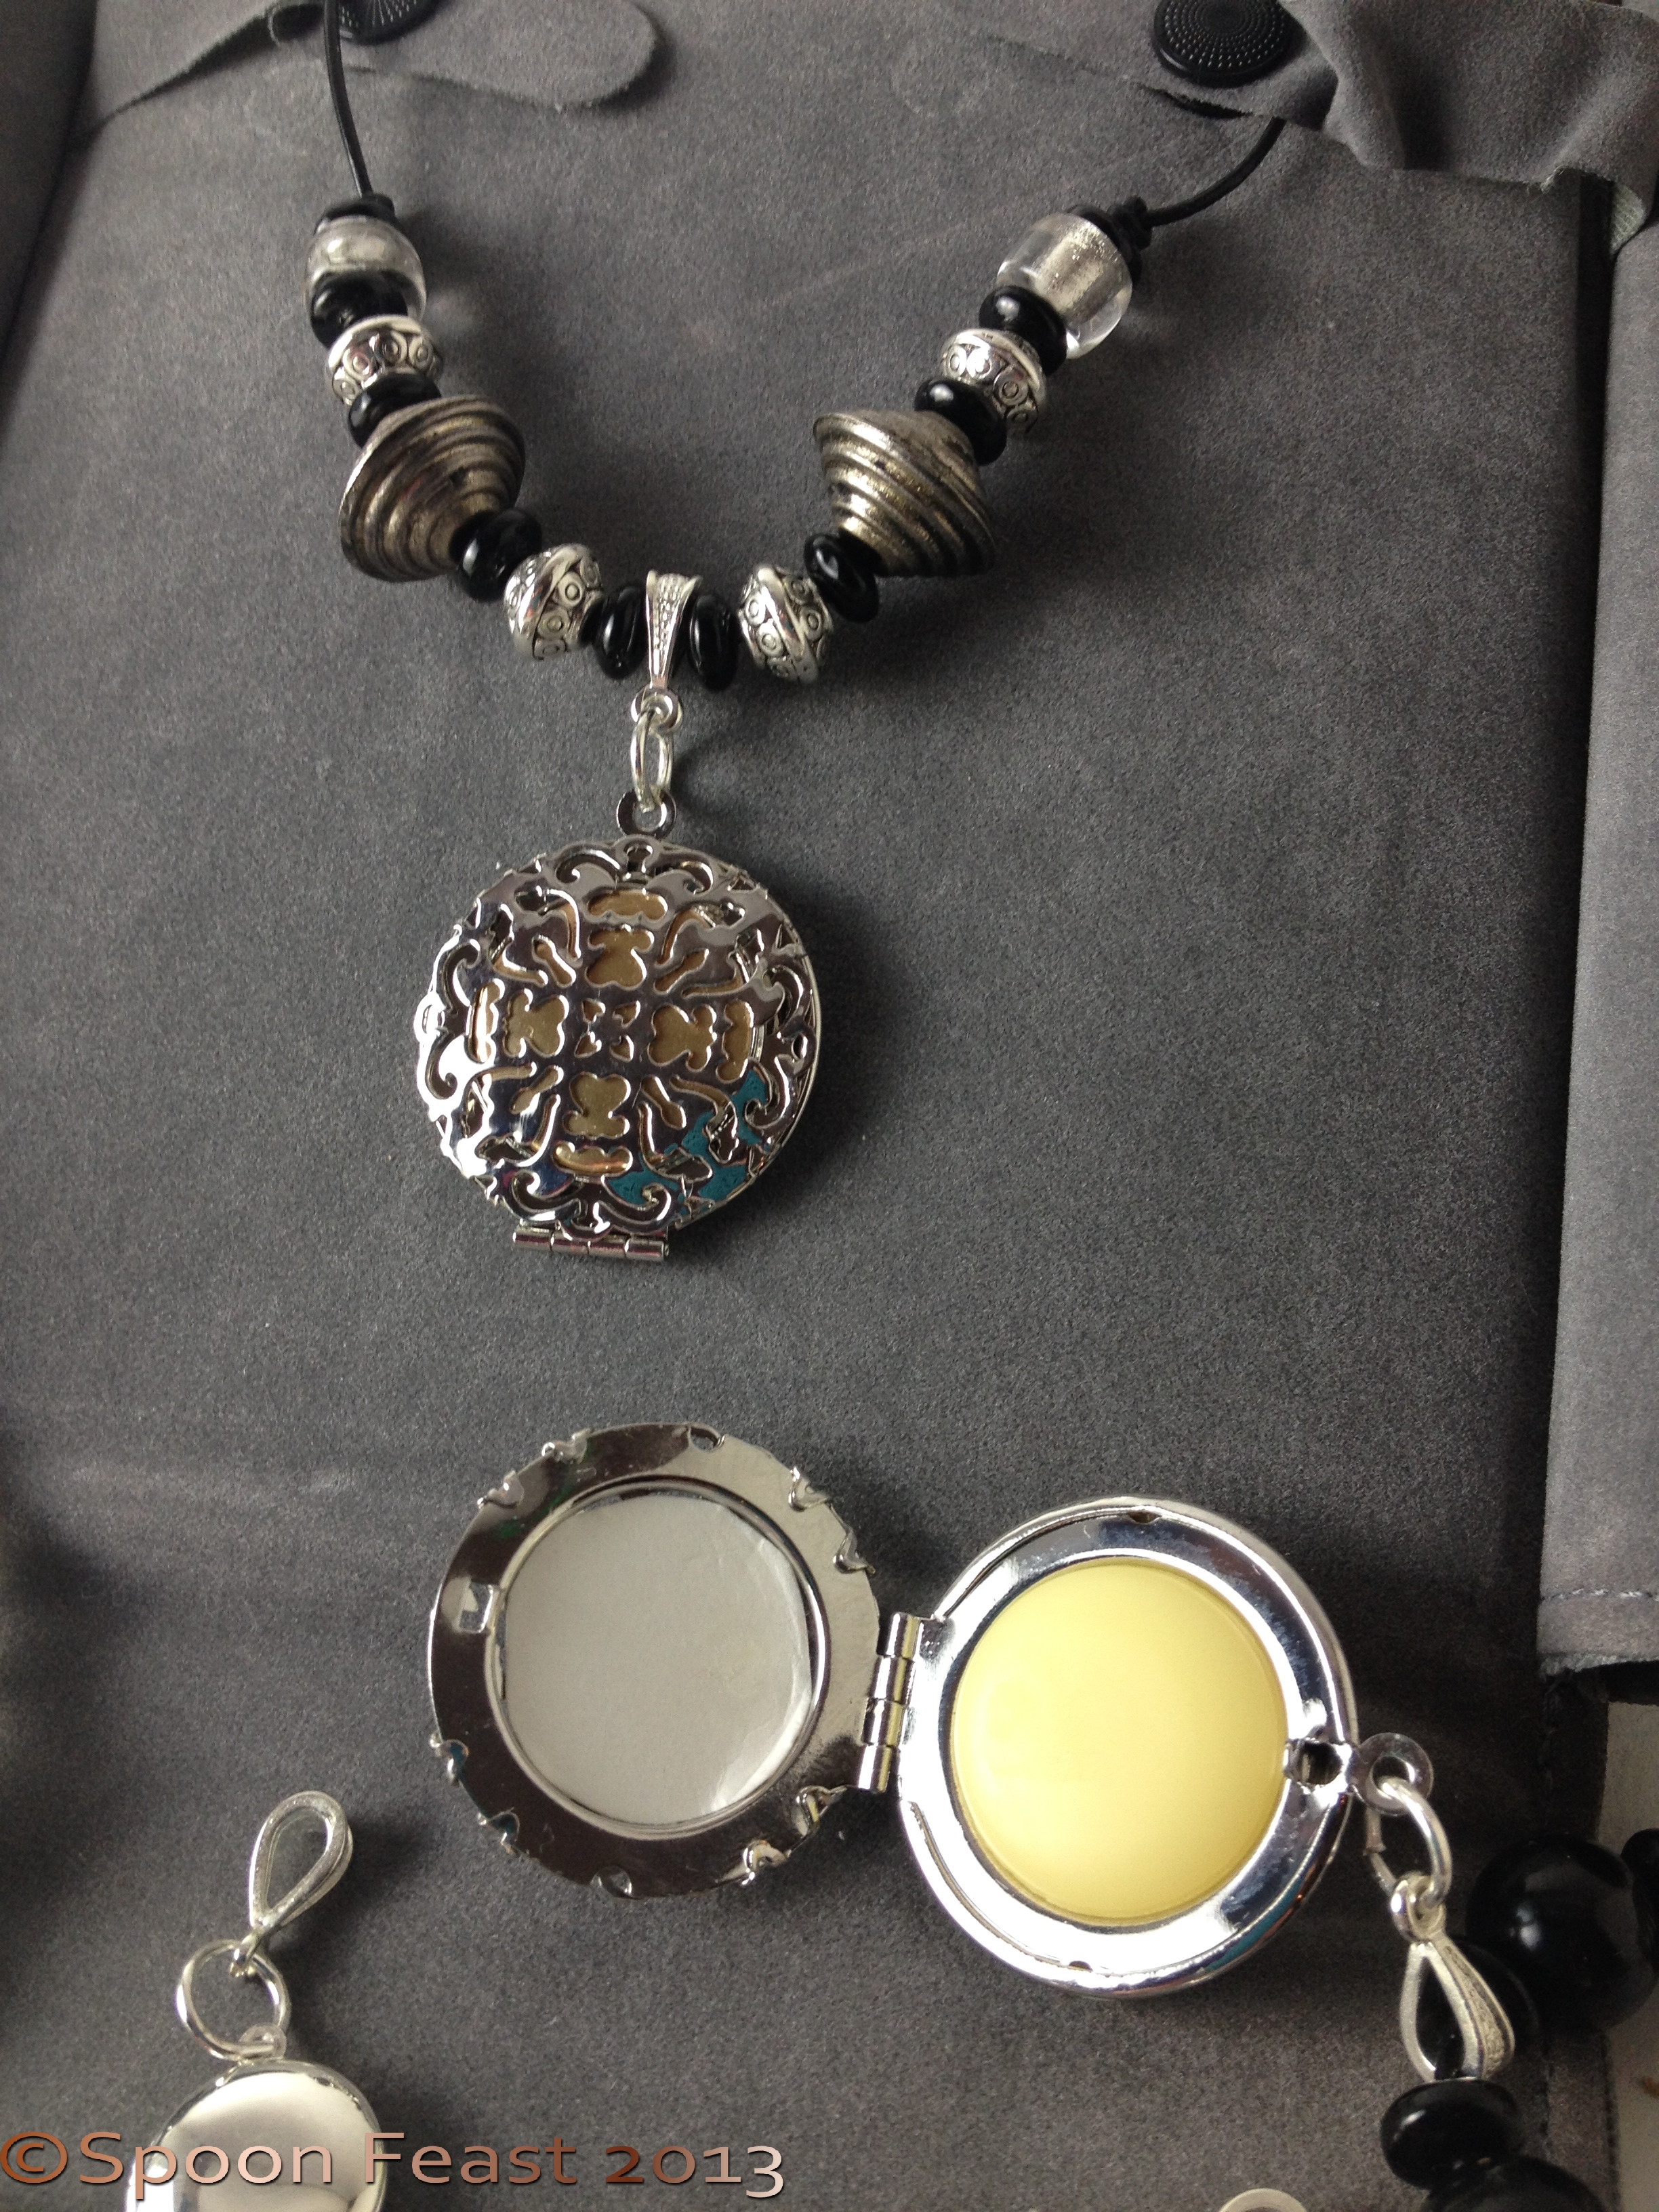
Perfume lockets strung on leather cord with black and silver beads
I’m giving these as gifts to some friends this year. I hope they like them.
Essential oils also have an aromatherapy effect and may not last as long as traditional perfumes. Being a natural product, if you use essential oils, you’ll just have to re-apply it more often.
So wear it around your neck and take a whiff when you feel stressed or want to refresh your mind.
The above formula encourages feelings of well-being and optimism. I encourage you to try it or make up your own. Lavender Rosemary smells real nice too; there are thousands of options.
I think this is a nice idea, thanks Rosalee!
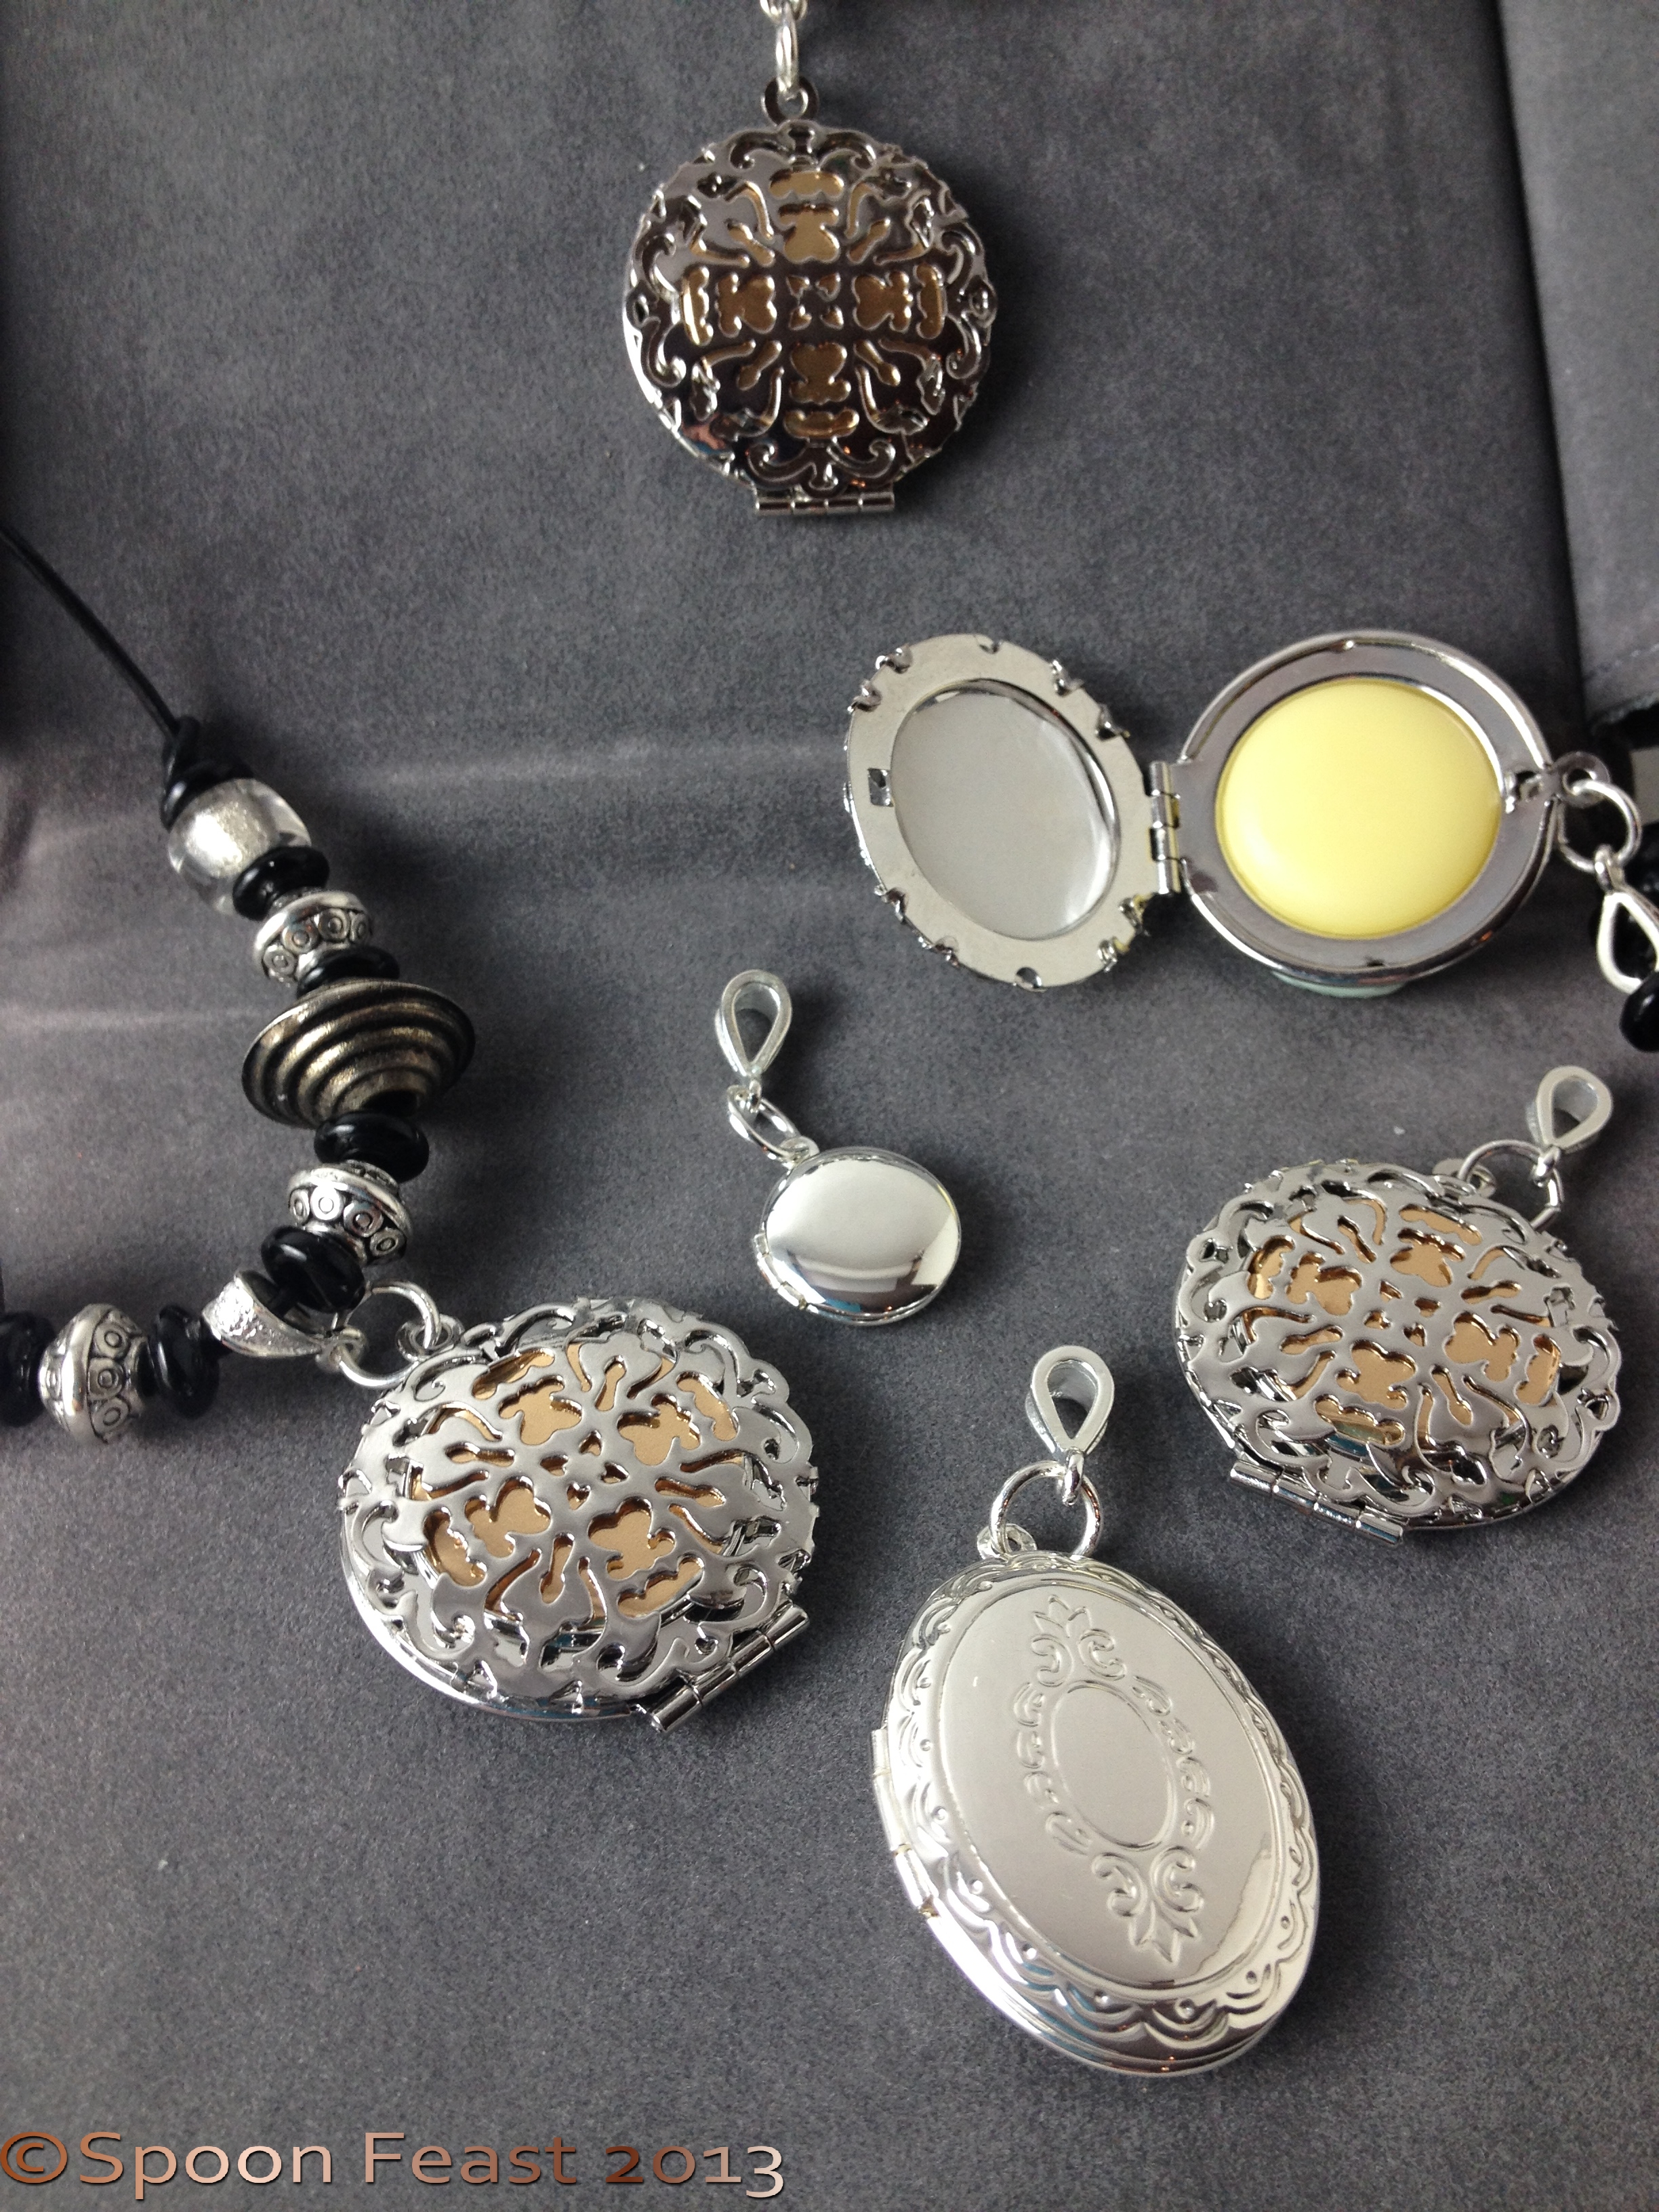
The lockets, the tiny one only took 3 drops to fill

Lips All Natural Soothing Balm, my lip balm!
Soothing lip balm is a must have, simply must have it available all the time.
Addicted? To lip balm? Really? Personally, I don’t think that using lip balm can be addicting. The behavior can be compulsive, but lip balm is not a substance you get addicted to. I talking about the natural products, not the Carmex, Blistex and other chemical crap storms whipped up into a lip balm like substance. In my opinion, since the balm is going onto the lips, the ingredients shouldn’t be petroleum or chemical based.
Since I use it all the time, I am very aware of what the ingredients of my lip balms are. Additionally I also realize the premium lip balms also cost a pretty penny. But now, I make them at home and have a huge supply of soothing lip balm for the cost of what one of the other tubes used to cost.
Some balms have things that make your lips tingle. These can be more drying than they are hydrating. Lips have a thin skin, and they do not have sweat glands. This means lips need to be moisturized. Licking your lips, as everyone knows, is commonly reserved for drooling over food. It is one action that can chap your lips quicker than anything. Stop licking your lips!
Supposedly, using peppermint and other mints in balm, attracts more blood to the area thus causing a “plumping” effect. Not quite as much as jabbing a needle full of plumping materials into your lips. But you certainly won’t end up looking like a platypus or have duck-bill lips. Just nice fresh, kissable lips that would taste good too.
Who doesn’t want that?
A note about tubes: buy the ones that have the “elevator screw” in them so the balm is easy to use.

Buy the tubes with the elevator screw inside them.
Over a double boiler, melt the beeswax. Once melted, add the remaining oils and butters, not the essential oils.

Melt the beeswax. Add the remaining ingredients. The wax will firm up again. Just keep warming everything until it all melts together. Add essential oils after removing from heat.

Fill lip balm tubes to the top. Allow the tubes to cool, then cap, label and enjoy!
Stir until everything is melted. Remove from the heat, stir in the essential oils; mix well.
Pour into tubes or tins, allow to cool before moving it around too much.

Steady lip balm tubes in something to keep them all standing upright
This will make about 10-16 tubes of balm that will keep for about a year in a cool dry place.
When you melt the beeswax, use a dedicated stainless or glass bowl or mason jar. The reason is, it is very difficult to remove all the beeswax from the melting vessel.
If you dedicate tools and utensils for making balms and salves, you won’t have to worry so much about ruining things you use for food.
I bought a small hand mixer to use for lotions and body butters so I don’t have to use my stand mixer.
Line your filling area with parchment or a paper towel to catch any spills or drips. It makes clean up so easy!

Getting ready to make lip balm
Add the essential oils after melting everything. This is so the oils aren’t released by the heat and are retained instead.
Use a glass measuring cup with a pour spout to fill tubes and tins easily.
This balm with Eucalyptus and Lemon Balm is a soothing, healing formula. Perfect for those dry winter days ahead. If you want to change-up the properties a bit, use peppermint essential oil, vanilla extract or any other flavor or scent you would like.
Keep in mind these go on your lips so you be tasting it too. I find adding honey makes the lip balm sticky and while I love honey, I’m not so fond of it, either flavor or feeling wise, on my lips.
Go here; Bulk Apothecary and search for your favorite tube or tin. They also sell supplies so stock up while you’re browsing!
Please let me know how you like the balm. It is my new favorite!
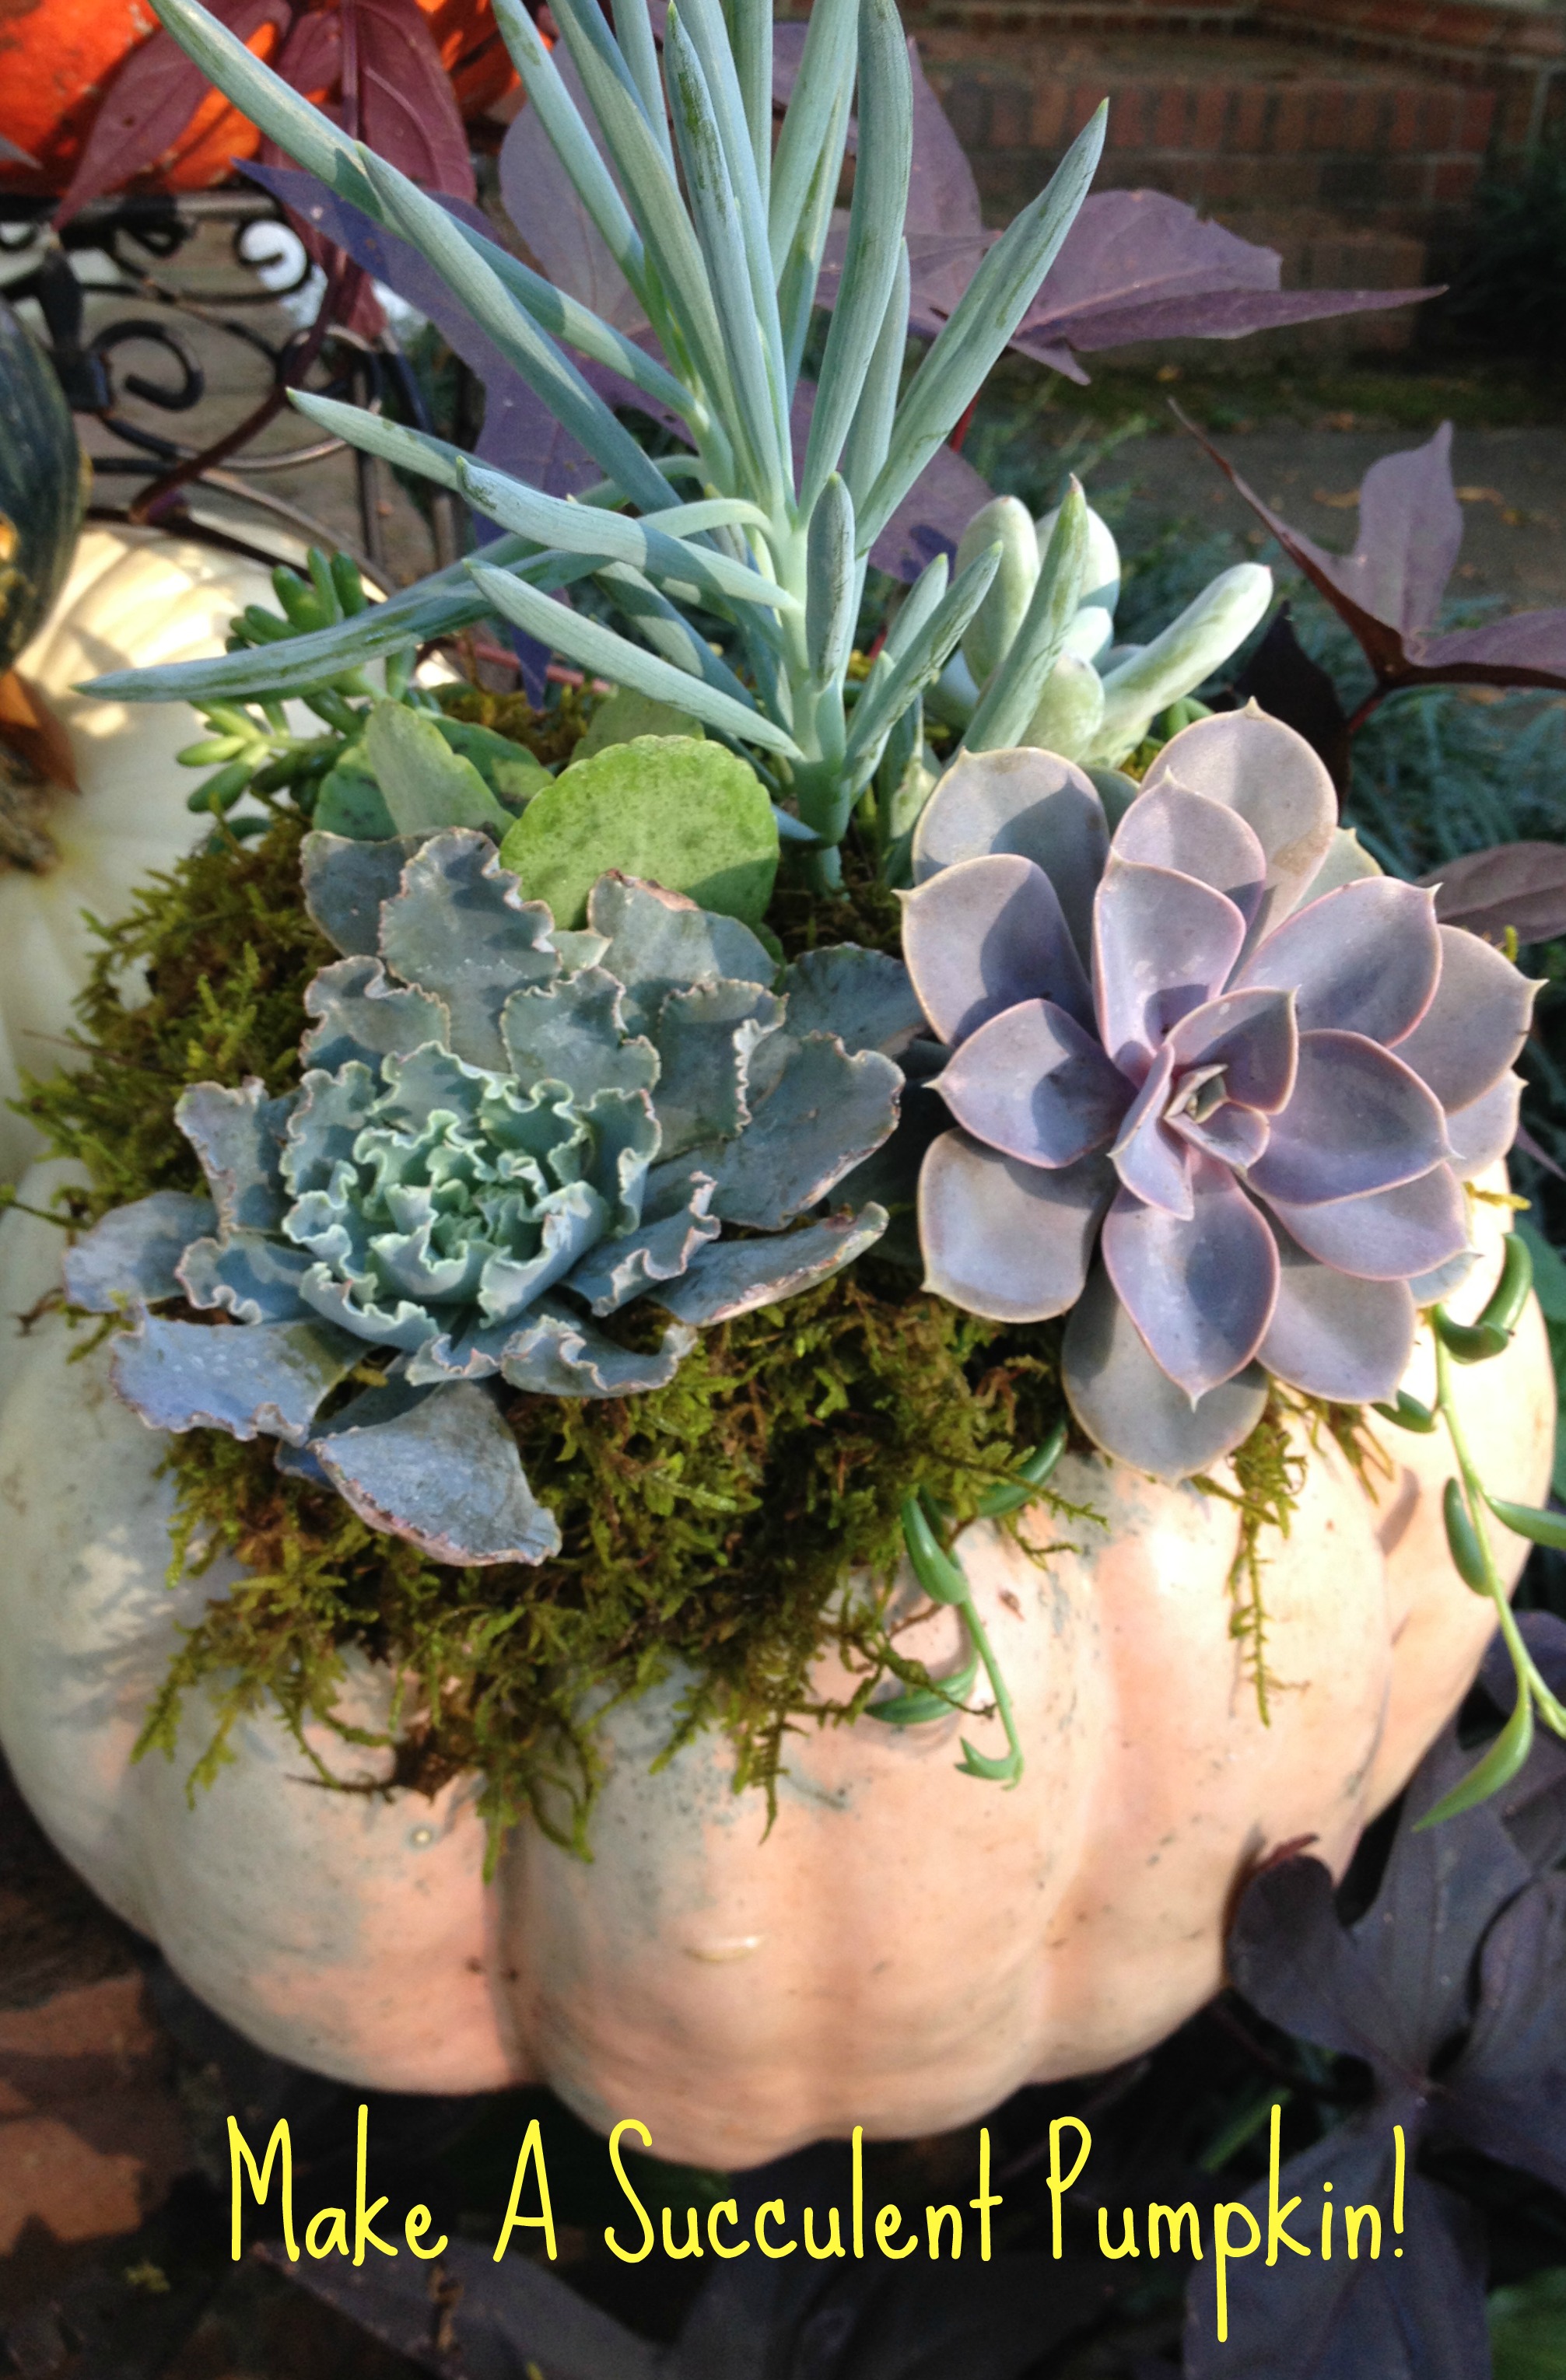
You can make a gorgeous Succulent Pumpkin that will last a long time.
Depending upon where you live, the pumpkin will last typically until Spring. It will naturally mush out by then so be sure to keep a liner under it when you bring it indoors.
If you live in a warm climate, it may last a while; in a cold climate, protect from freezing.
1 largish pumpkin
Choose one that has an indention or depressed area on top. This will hold soil and moss as well as the plants.

Choose a well-indented pumpkin
I choose white or neutral colored pumpkins since they can last until Spring. Orange looks outdated soon after Thanksgiving. Orange is NOT the new black, trust me. No matter how much you may love Halloween or Thanksgiving, orange gets old quick out of season.
Sheet Moss
Various succulents
The rule of thumb:
Choose what you like. Get one or two showstoppers for the thrill
Choose one that will fill in the area between plants as it grows. The spilling one is a great element. My favorite is called “String of Bananas”. It grows fast and cuttings are easy to root.
At the nursery, choose what plants appeal to you and cluster them together. You want smaller plants generally, but look for a variety of texture, shapes, heights, and colors.
You will also need some U-shaped pins to hold things in place.
In a nutshell, here’s what you need:
Wash and dry the pumpkin. Working on a newspaper to collect the soil, remove the selected plants from their pots. Carefully knock off any loose soil. You will see, most have small root balls.
Place the succulents around the pumpkin in a pleasing manner. Use pins to anchor any plants in place being careful not to pierce any leaves of the succulent plants. (Yes, you pin into the pumpkin)
Soak the moss a few minutes in warm water to hydrate. Cover all soil and “nest” the succulents with the damp moss. Pin moss in place so it doesn’t slide off when it dries out.

Use a variety of color and shape
That’s all there is to it!
Succulents like dryer soil so be sure to water every now and then. Protect from freezing below 32°F.
When your pumpkin mushes out, save the plants and replant them in a shallow dish garden until next Fall when you can make another Succulent Pumpkin!

Succulent Pumpkins
