Quince and Gingerbread

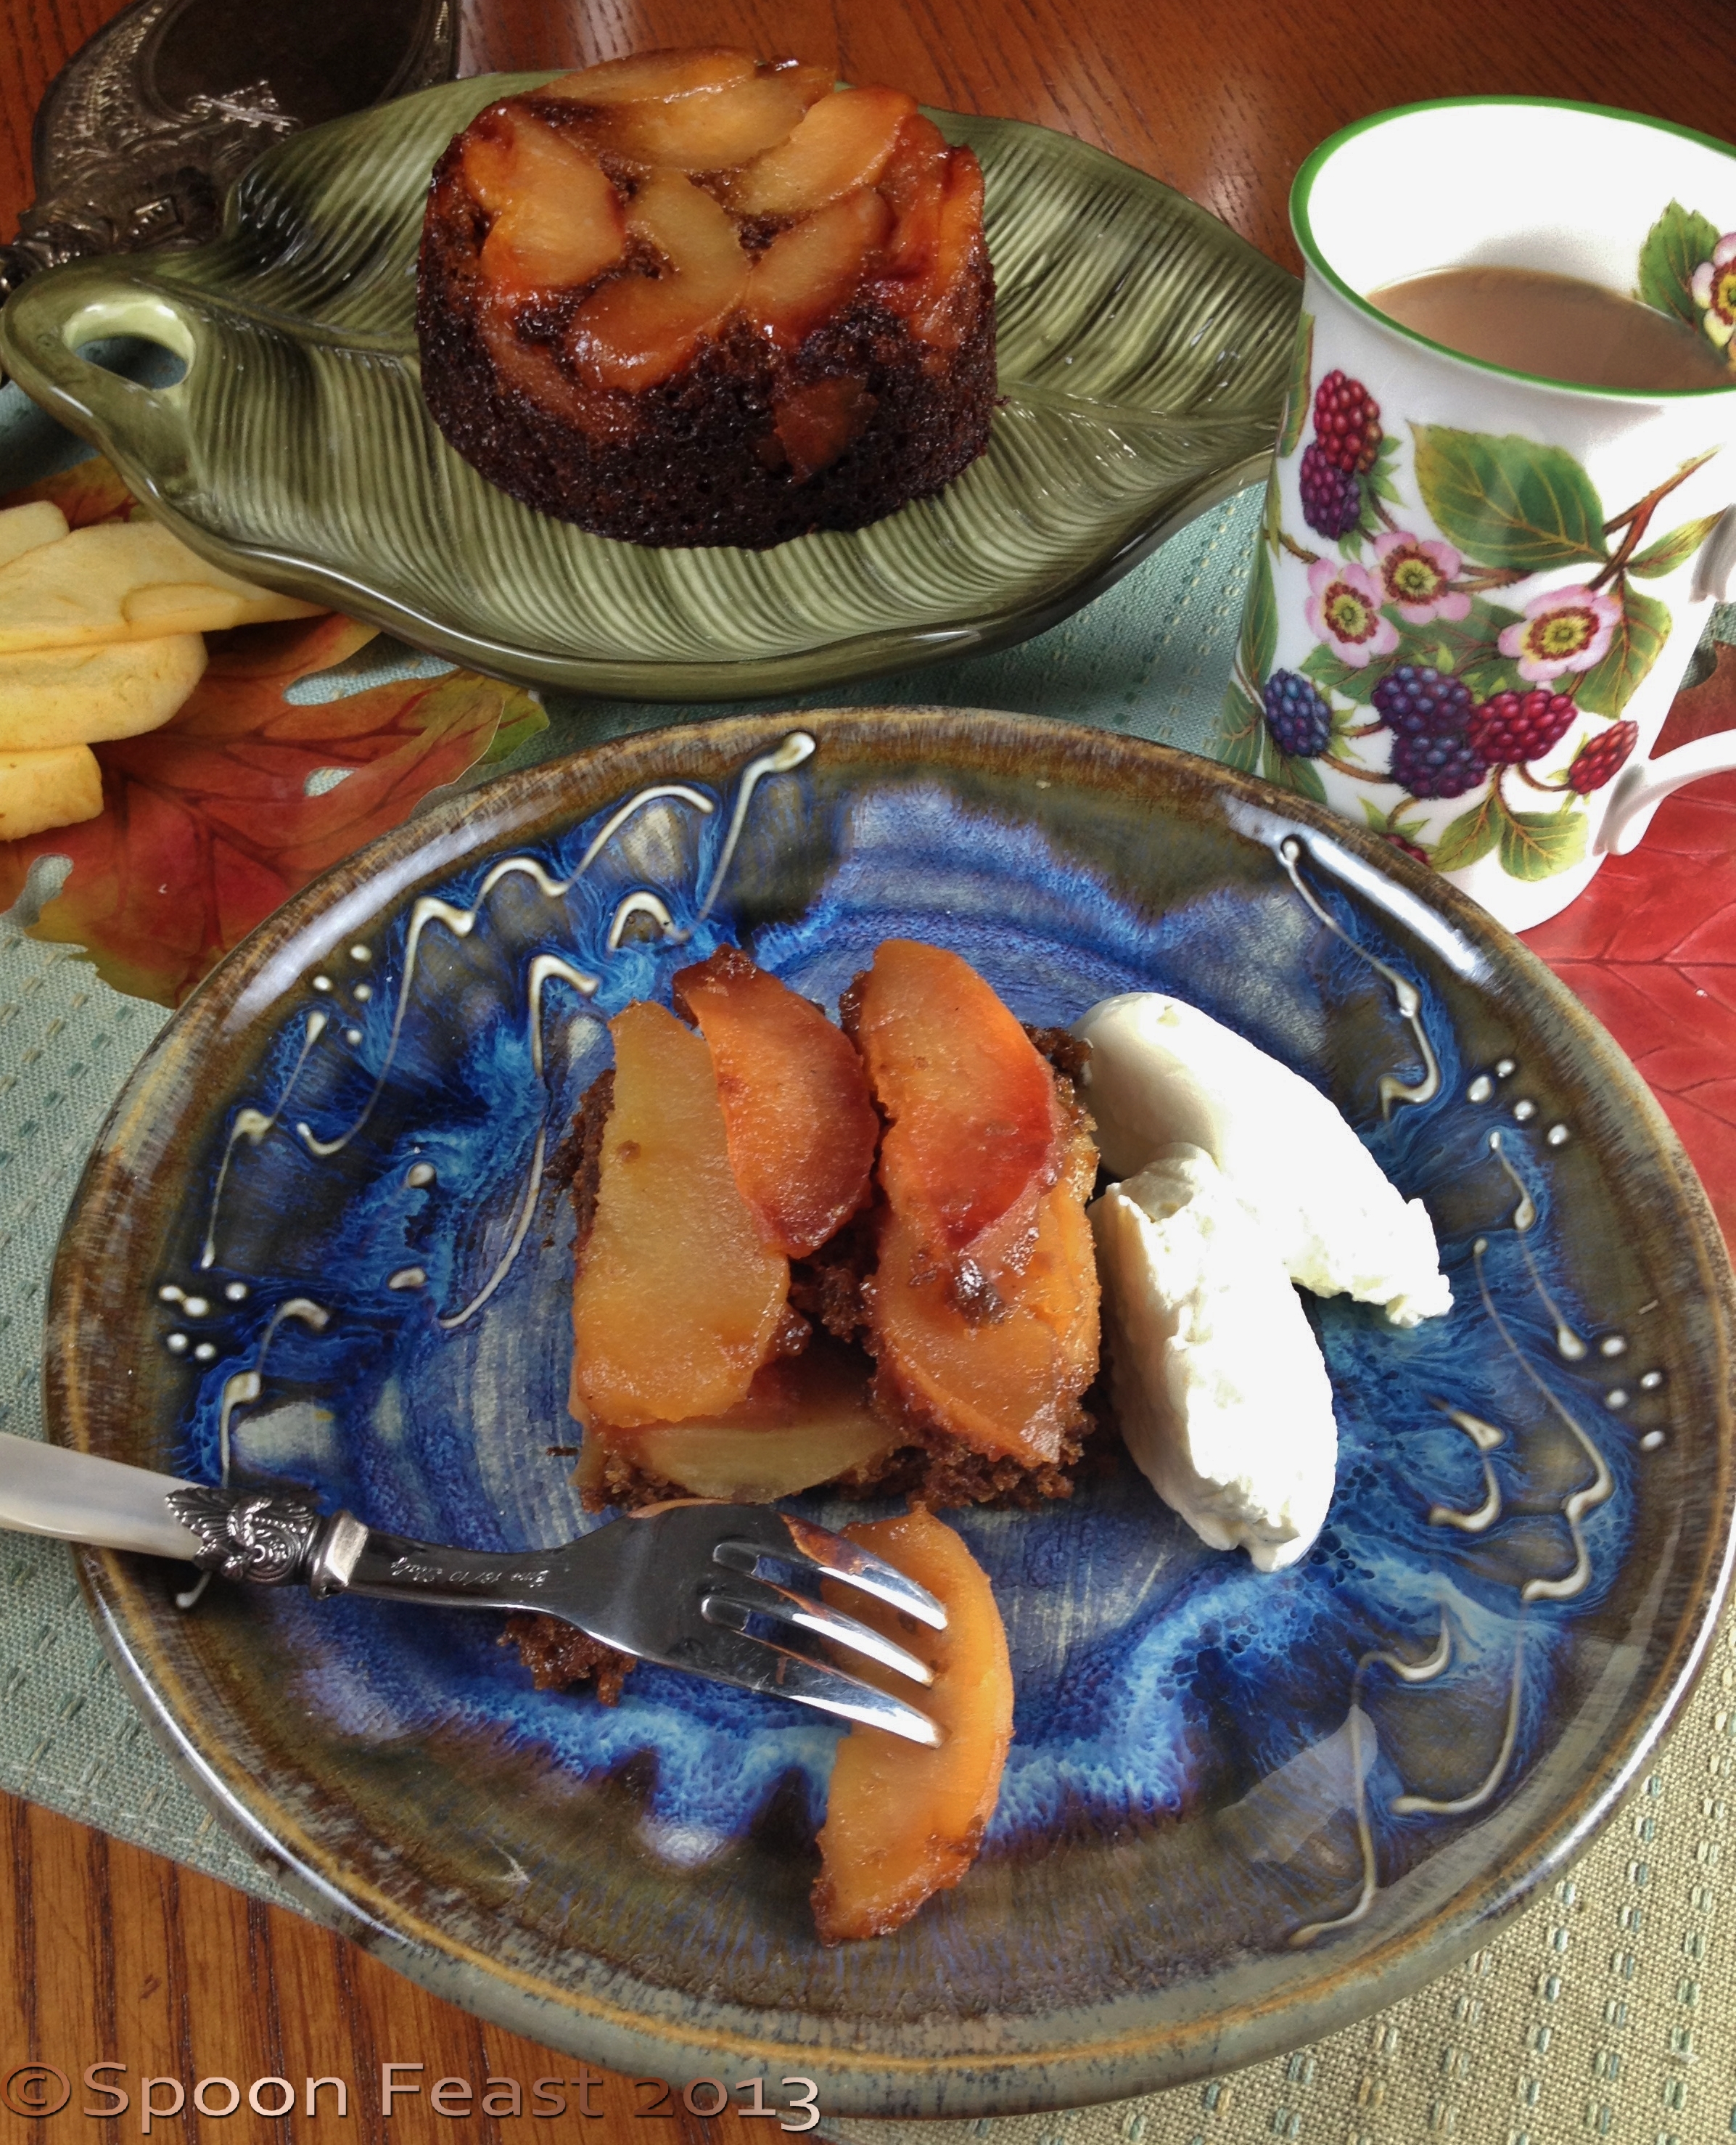
Quince and Gingerbread make such a nice treat! This is like an upside down cake and it tastes so delicious.

In the fall, I like to keep a bowl of fall fruit on the table for not only display, but for nibbling as well. I like to have some quince in the bowl as they give off a lovely fruity aroma when ripe.
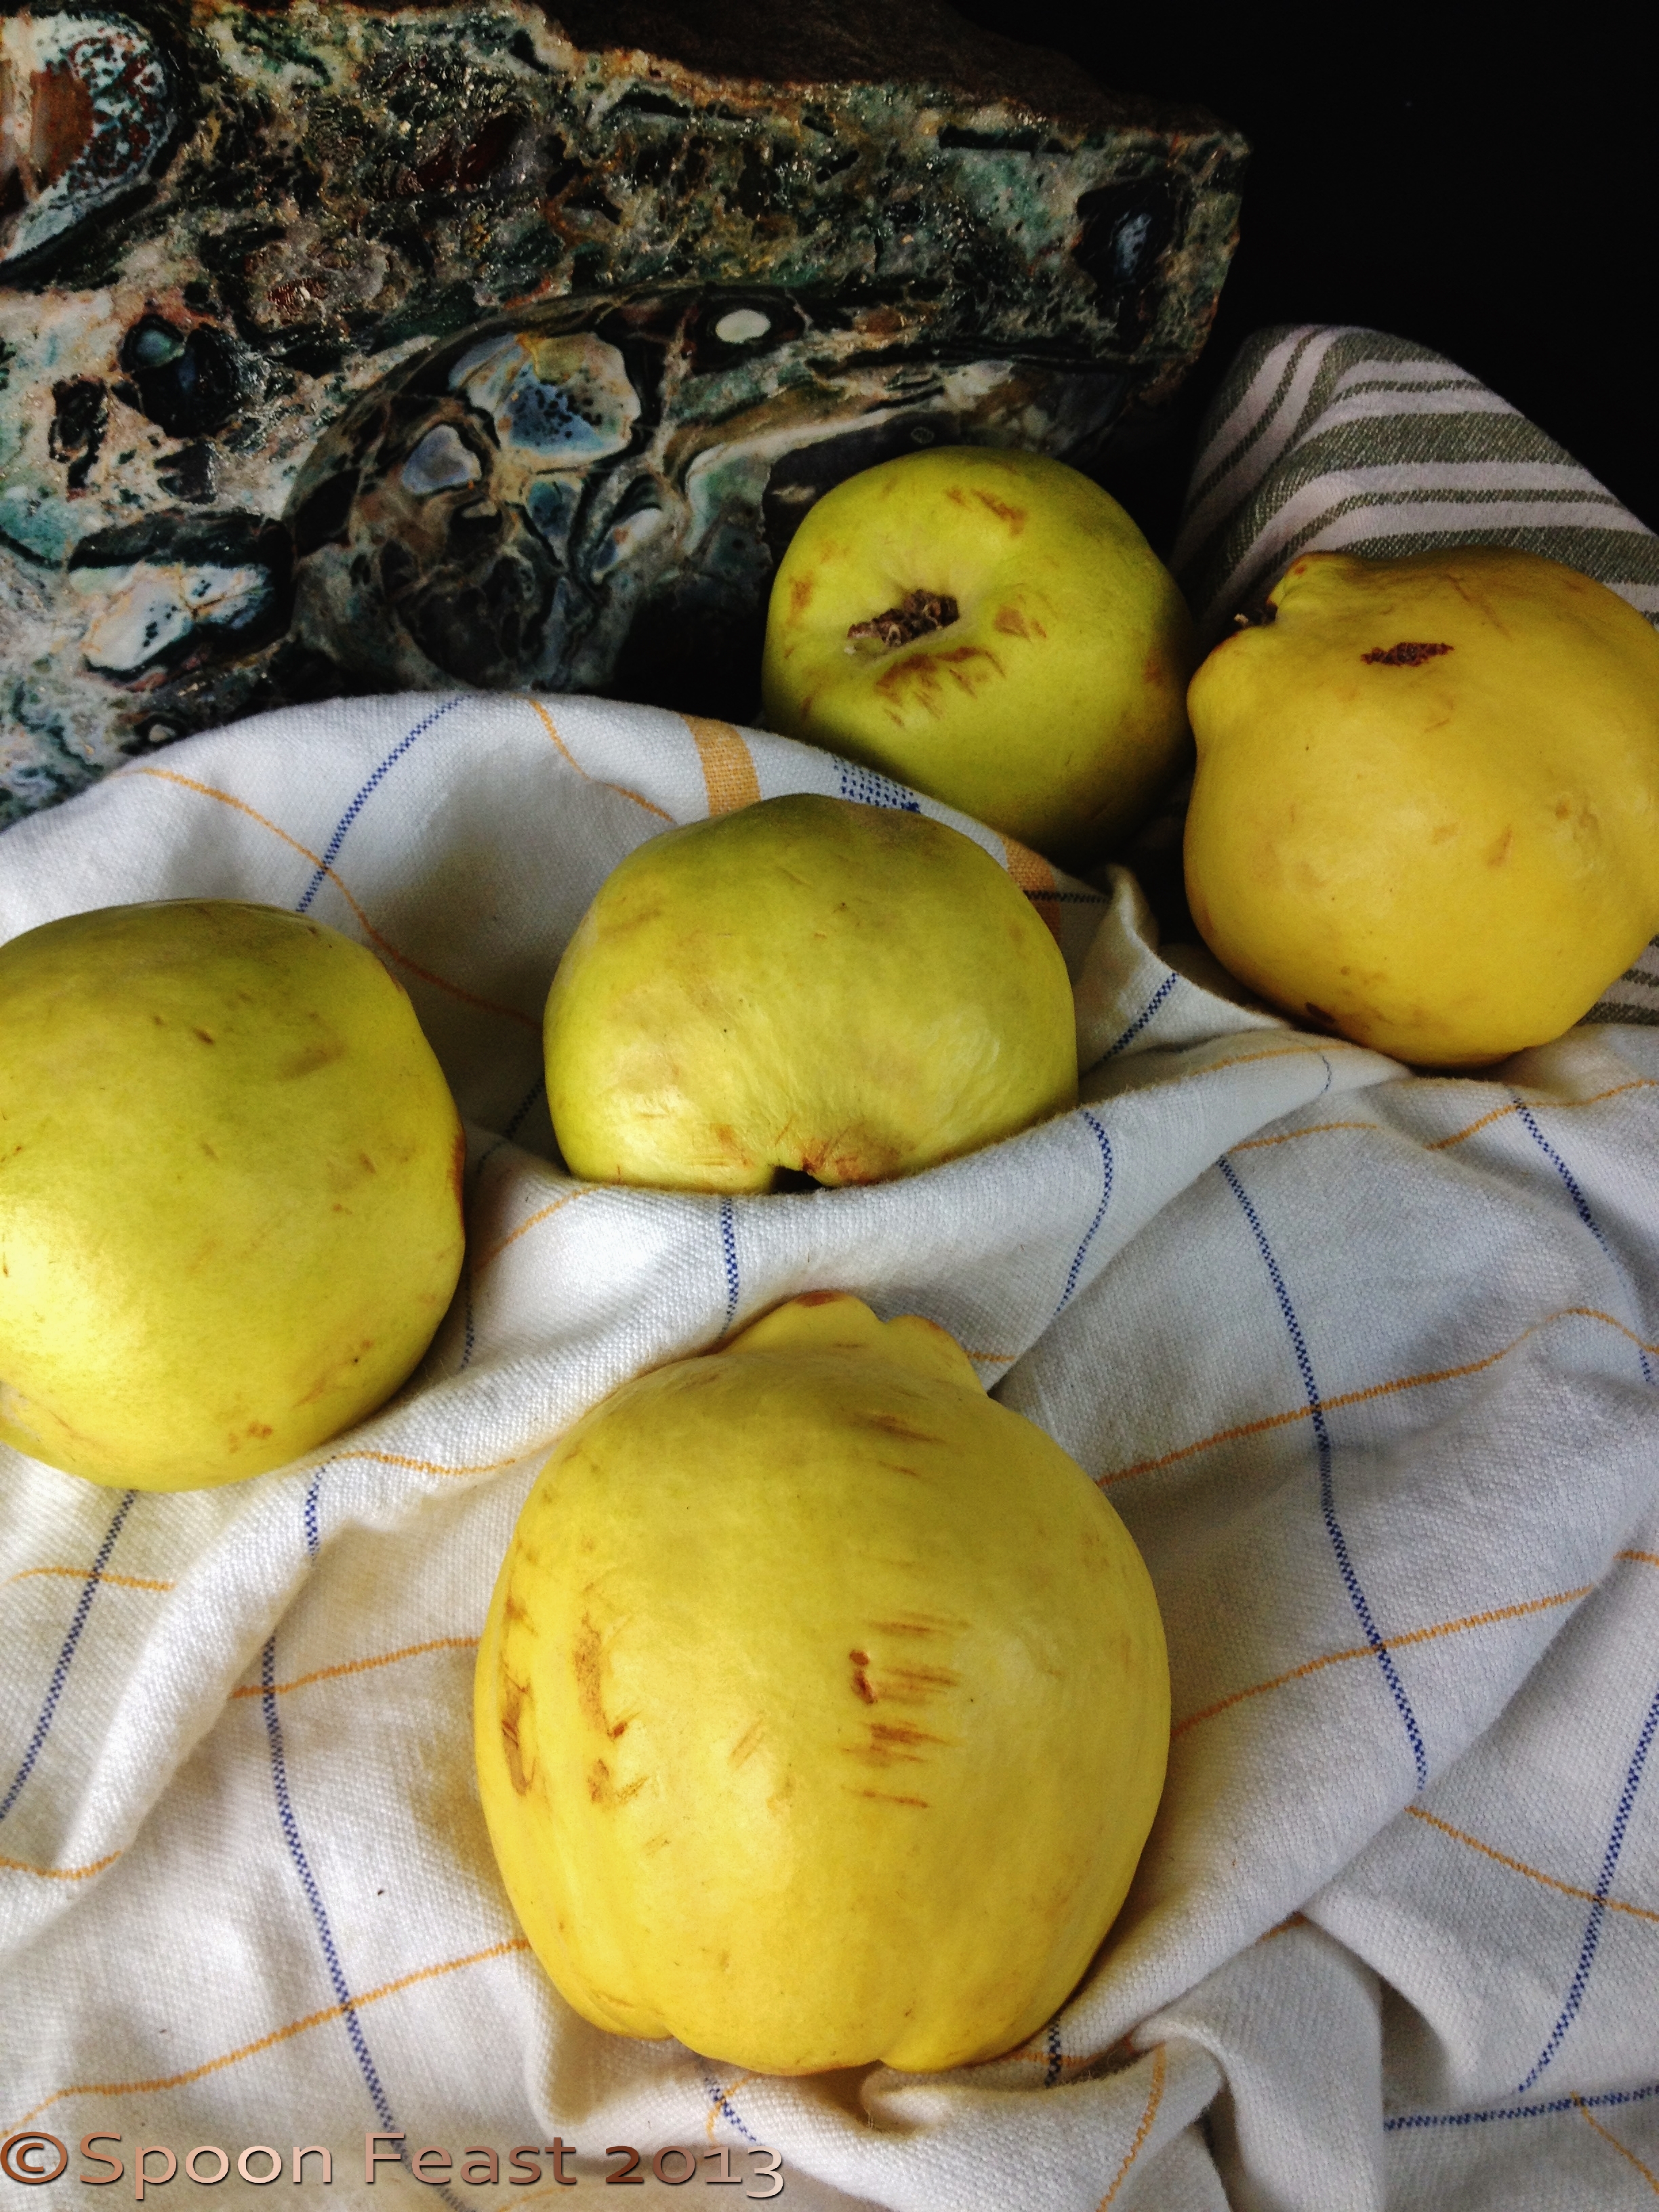
Ripening Quince

Ripening Quince

Quince are similar to a cross between an apple and a pear. They look like fat flat-bottomed pears. Quince are green when unripe and soften to a creamy yellow when ripe. The aroma is also a clue to ripeness. The aroma is captivating and inspires poems  – The Owl and the Pussy Cat by Sir Edward Lear has the two dining on “mince and slices of quince”, cooked slices of course.

Inedible raw, unlike apples or pears, quince take on a lovely mellow flavor and maintain the sweet grainy pear-like texture when cooked. Unlike most apples, quince hold on to their shape when cooked. They don’t turn brown when sliced as apples do.

If you can’t find Quince, you can substitute apples and or pears if you like.

Quince and Gingerbread Cake

Prepare the Quince:

  • 2 pounds peeled, seeded and sliced quince
  • 3/4 cup sugar
  • 1/2 cup water
  • 4 tablespoons whole  butter

Place the water and sugar into a large saute pan, bring to a boil, stir and let boil until the sugar begins to become a light golden brown. Add the butter and the quince, stir to coat then simmer for 8-10 minutes, until the quince are tender and cooked through.

Set aside to cool slightly.

Butter the inside of a, 8″ cake pan or what ever cake pan you want to use. I baked some in large (really large) ramekins and another in a square pan. Whatever pan you use, be sure you have a plate large enough to invert the finished cake onto after baking. (More on this later)

You can choose to use pan spray rather than butter for the pan. This ensures the cake will turn out easily when done.

Pour and place the quince mixture into the bottom of the prepared pan. If you like, arrange the fruit in a decorative manner as this will be the top of the cake when done.

Once the quince are cooling in the prepared pan, make the gingerbread.

Quince and Gingerbread

Quince and Gingerbread

For the Gingerbread:

  • 3/4 cup boiling water
  • 1/2 cup molasses
  • 1 teaspoon baking soda

Add the molasses to the boiling water and stir in the baking soda. Allow this to cool while putting the rest of the cake together.

In a mixing bowl, mix then set aside:

  • 1 1/4 cup all-purpose flour
  • 1 teaspoon baking powder
  • 1 1/2 teaspoons ground ginger
  • 1/2 teaspoon ground cinnamon
  • 1/4 teaspoon non-iodized salt

In the bowl of an electric mixer, cream:

  • 1/4 cup (4 Tablespoons) soft butter
  • 1/2 cup brown sugar
  • 1 large egg yolk
  • 1 Tablespoon vanilla extract

Cream the sugar and butter for about 3 minutes, add 1 large egg yolk and vanilla; process until smooth.

On low-speed, add the flour mixture alternating with the water and molasses mixture. Scrape down the sides of the bowl several times. Mix the batter until smooth.

Pour the batter over the quince in the pan. Bake in a 350°F oven for 30-40 minutes, until a toothpick inserted into the cake comes out clean.

Remove the cake from the oven, allow to cool for 15 minutes. Place a plate on top of the pan and then invert the two so the cake comes out of the pan onto the plate.

To do this maneuver easily, place a kitchen towel, folded long way, on the counter top. Place the warm cake pan on the towel, put the plate you want to invert the cake onto upside down on top of the cake pan. Fold the ends of the towel over the cake pan and the plate. hold tightly, pick it up and flip it over and set it down. slide the towel out from under the plate, then lift off the cake pan and voila! The upside down cake should be correctly displayed.

Serve with whipped cream or vanilla yogurt while still slightly warm.

Ginger has the ability to warm from the inside, the baked sweet and tart quince provide a comforting fall dessert, just perfect when the air gets nippy. I love this with a nice cup of tea.

Quince and Gingerbread

Quince and Gingerbread

In My Kitchen, November 2013

Gearing up for the holidays! I love this time of year, preparing for big family meals, making clever little gifts from the kitchen, cookies and treats galore, is always so much fun!

I was late with the October In My Kitchen so I vowed to be on time with this one. Celia at Fig Jam and Lime Cordial hosts this great gathering of people all over the world sharing what’s “In My Kitchen”. Link back to Celia’s site to join in!

Tonight we are getting our first freeze of the season. The tomato plant that was planted back in April has turned out to be one monster of a plant, producing tomatoes the size of soft balls weighing between 9.5 and 16.4 ounces each! The plant has a basket full that should get harvested before the freeze. I’ll have to pull out my dad’s Green Tomato Chow Chow recipe, after we slice, bread and fry a couple first.

Final Harvest!

Final Harvest!

I enjoy a good fried green now and then, after I’ll try a pie.

I have fresh turmeric in my kitchen this month!

Fresh Turmeric

Fresh Turmeric

I felt so lucky to find it. We’ve been using it for sautes, potatoes rice and all kinds of dishes. You do have to be careful though in that is notoriously famous for staining everything it comes in contact with, bright yellow. Fingers, boards, clothing, so use caution if you  don’t want anything stained by the intense color of fresh turmeric. I put a paper towel down on my cutting board before using fresh turmeric to protect it from stains.

Turmeric is a great healing spice so it is good to find ways to work some into your diet. One of my favorite dished to make with it is an Indian dish called “Aloo Gobi“. This is a dish made from cauliflower and potatoes and is very aromatic and delicious.

I started taking an online course from Rosalee de la Foret in Canada on “The Taste of Herbs.” This course takes 5 months and breaks herbs and spices into 5 categories. You learn about the healing properties and how to use the herbs and spices.

She approaches Traditional Chinese Medicine and Ayurveda concepts with an ease that makes it so understandable.

So far, I find it very informative. I’m glad I signed up.

Rosalee may offer the course again in the Spring so if you are interested, visit the Taste of Herbs website here: http://www.tasteofherbs.com/standby_pages/25720

Below is the blueprint that is the foundation of the course.

Isn’t that interesting?!

I found these adorable little dishes in a shop. I couldn’t resist them. Robert is wondering what I’ll use them for so I’ll have to put on the creative cap to show him how essential they are to have in my kitchen.

Irresistible small dishes

Irresistible small dishes

I have a big bowl of apples!

Fresh Crisp Fall Apples

Fresh Crisp Fall Apples

We gave some out for trick or treats last night along with mandarin oranges and organic lollipops. I drew pumpkin faces on the mandarins. When the kids got to choose, It was surprising how many chose fruit over the candy!

Trick or Treat Goodie Basket: Mandarin Oranges, Crisp Apples and Organic lollies

Trick or Treat Goodie Basket: Mandarin Oranges, Crisp Apples and Organic lollies

We made sure everyone got an orange, even the parents.

And then there was the time this month, I walked into the kitchen and saw a delicious plate set up and I ate it. Only later to realize I ate the photo shoot.

I’ll be cooking and hosting Thanksgiving at my house this year! I am so excited. I’ll have to plan on taking lots of photos and writing lots of posts with ideas for the upcoming holidays.

In the meantime, What’s in your kitchen this month?

I ate the photo shoot

I ate the photo shoot

Green Tomato Chow-Chow

This is my Dad’s Green Tomato Chow-Chow recipe. I think it originates from Nova Scotia, Canada as it is also known as “Nana’s Chow-Chow. It is made only with green tomatoes and onions, vinegar and spices. All my life, I’ve eaten precious rationed portions of this delicious mixture and called it Dad’s Green Tomato Chow-Chow.

I’m here to tell you this is really good stuff.

There are many recipes for chow-chow out there, Southern recipes call for everything left in the garden that is harvested just before the first frost: cabbage, peppers, onions, cucumbers. This one is different. And, it gets better as it ages.

Wash the tomatoes, and there is no peeling or seeding required!

Green Tomato Chow-Chow

Chow Chow PicIngredients:

8 cups chopped green tomatoes

4-6 medium sweet onions, sliced

1/2 cup kosher salt

(use non-iodized salt)

2 cups granulated sugar

1 1/2 cups white vinegar

1 teaspoon turmeric

(If using fresh turmeric, shred about 1 inch of a knob)

Grating fresh turmeric

Grating fresh turmeric

2 Tablespoons Pickling Spice in a bag (I used a tea ball)

Wash and slice the tomatoes and onions.

in a large bowl, sprinkle the salt over the tomatoes and onions; set a plate on top, cover and let this sit overnight. In the morning, rinse the tomatoes and onions to remove the salt. Strain, place into a large pot with the vinegar, sugar, turmeric and pickling spice.

Simmer the tomatoes and onions with pickling spices

Simmer the tomatoes and onions with pickling spices

Green Tomato Chow-chow

Bring to a boil, reduce to an active simmer and then let this simmer for 1 1/2 hours. Stir frequently to prevent sticking.

The entire mixture will cook down to a lovely sweet, tangy concoction with a jam like consistency. This is so good on grilled meats, as a glaze for ham or chicken or as a condiment with cheese.

One of our favorite ways to have it is with beans and cornbread. It makes the meal.

Chow-chow with grilled chicken leg quarters

Chow-chow with grilled chicken leg quarters


This is what it looks like when finished

This is what it looks like when finished

My Dad says this is a real treat because it is only made with the green tomatoes picked just before the first freeze. He says he can’t pick a tomato when it can turn red on the vine. He loves his tomatoes! I know he spoiled me from store-bought tomatoes. Every year, I always grow a plant or two. Sometimes successful, sometimes not. It’s a tradition to grow tomatoes every year.

I’ve encouraged mom to make him a Green Tomato Pie because he has been fascinated with making pies that taste like apple but not using apples. In the past he’s used zucchini and Ritz crackers (separate pies), so I hope he can add green tomato soon.

Another delicious slice of Green Tomato Pie

Another delicious slice of Green Tomato Pie

When I asked mom to make him a pie, he quickly said there weren’t enough greens left and frankly he’d rather have chow-chow.

I’ll have to wrap and send him a bottle to see how he likes it.

#greentomatochowchow #chowchow #southerncooking #pickling #dadsrecipe #southernfoods #passeddownrecipes #recipesfromhome

Jar of Green Tomato Chow-Chow

Jar of Green Tomato Chow-Chow


Green Tomato Pie or “Pied Green Tomatoes”

Final Harvest!

Final Harvest!

With a frost settling in, everyone is scrambling to gather whatever tomatoes are left on the vines.

Faced with a basket of lovely green orbs, here’s what I decided to make with them.

"Pied" Green Tomatoes!Be sure the tomatoes are hard and show no signs of ripening or else they will turn to mush when cooked.

Green Tomato Pie or “Pied” Green Tomatoes

  • 4 cups peeled and cut green tomatoes
  • juice from 1/2 lemon
  • zest from 1 lemon
  • 1 teaspoon cinnamon
  • 1 teaspoon kosher salt
  • 1/4 teaspoon ground cloves
  • 1/4 teaspoon ground nutmeg
  • 1/4 cup raisins
  • 3/4 cup granulated sugar
  • 2 tablespoons instant tapioca
  • 2 Tablespoons butter
  • Pie crust for top and bottom crusts

Use a peeler to remove the skin from the tomatoes. Because they are green, the traditional method of blanching them in boiling water, shocking and then peeling does not work. The green tomatoes are hard, like an apple, so peel them as you would apples. No need to remove seeds, as the seeds are hardly developed.

Chop the tomatoes into bite sized pieces. Put them into a sauce pot with the lemon juice, lemon zest, and salt; bring to a simmer over low heat.

Chopped Green Tomatoes simmering for pie filling

Chopped Green Tomatoes simmering for pie filling

You will notice a lot of juice being released by the tomatoes. Add the cinnamon, nutmeg and cloves.

Stir this mixture often. When you see it come to a boil, add the sugar and simmer for 5-6 minutes. You want the tomatoes to become tender but not mushy.

Add the butter and instant tapioca to the simmering tomato mixture, remove from heat and cool. The tapioca thickens the juices as it cools. You want the mixture to be cool when you put it into the pastry shell.

While the tomato filling is cooling, make your pie dough, roll it out and line your pie tins or tart shells. If using already made (store-bought dough) prepare your pie pans.

Pre-heat your oven to 435°F while you fill the pie shell.

Fill the shells with the cooled tomato filling. Be sure to cut vents into the top crust. Seal the edges of the crust; brush the top with milk and sprinkle with sugar. I like to use raw sugar for the larger crystals.

Green Tomato Pie in the oven

Green Tomato Pie in the oven

Bake in the pre-heated oven for 45 minutes or until the crust is golden brown and the filling is bubbly. You may need to add a foil shield around the crust edge to prevent it from getting too brown. Do this only after the edges are browned already, not when you first put the pie into the oven.

Additionally, place the pie on a sheet pan to catch any drips that may bubble out of the pie during baking. The sheet pan is easier to clean than the oven.

Believe it or not, I couldn’t find a single solitary pie tin of any kind in my kitchen! I used to be a pie making queen. Where are they? All I could find is the fluted tart pans. So I had to use them and put a top crust on anyway. I tried a strusel topping but I didn’t care for the flavor combination with the filling. So I suggest you use a top crust.

If you have a bunch of green tomatoes hanging around, try this pie. It tastes like apple pie made with Granny Smith Green Apples, the texture is the same too.

Whip up some whipped cream, add a dash of cinnamon and serve.

I still have a full basket of green tomatoes so next I’ll be making my Dad’s Green Tomato Chow Chow. Watch for the recipe!

In the meantime, make a Green Tomato Pie. You’ll be pleasantly surprised!

A delicious Green Tomato Pie

A delicious Green Tomato Pie

Another delicious slice of Green Tomato Pie

Another delicious slice of Green Tomato Pie

Green Tomato Pie

Green Tomato Pie

Sauteed Kale with Bacon and Onions

Today I picked up some fresh kale, just picked from the garden, from a friend. Since I was eating alone tonight, I decided that  some bacon would be on the menu. Robert doesn’t eat bacon but I sure do!

Sautéed Kale with Bacon and Onions

  • Fresh Kale
  • 2 slices thick smoked bacon
  • 1/2 sweet onion
  • 1/4 cup malt vinegar
  • Fresh ground pepper
Fresh picked kale

Fresh picked kale

To start, remove the stems from the kale and wash well. Allow it to drain while preparing the bacon and onions.

To make this dish, fry up some bacon, try not to burn the pan because you want the lovely brown bits on the bottom of the pan for all the flavor. In cooking terms this browned bottom is called “fond”.

When the bacon is cooked, remove it from the pan, place it on some paper towels to drain. For this dish, the bacon is best cooked to done but not crispy. However is you want it crispy, have at it.

If there is a lot of grease, pour some off. All you need is a small bit to saute the onions and kale in, not too much.

Slice and saute some sweet onions in the bacon pan. When the onions are soft, deglaze the pan with a splash of malt vinegar, bring to a boil, and loosen all the fond from the pan.

Saute onions in the bacon pan

Saute onions in the bacon pan

Add the washed and stemmed kale, bring to a boil and saute the kale until done. The liquid should be almost gone, but not all gone.

Cut the bacon into matchstick sized bits and fold into the kale. Cook until the kale is tender, about 4-5 minutes.

Grind some fresh pepper and serve.

I just filled a bowl and ate it. If you like, add a dash of hot sauce.

I love greens this way!

Kale with Bacon and Onions

Kale with Bacon and Onions

Thanks for All The Fish

I am going on an alarming rant here, about the condition of the oceans and the fish that swim in them. This is a very sobering situation and it seems there are only a few people talking about this.

It is stated that the entire Pacific Ocean will be completely contaminated with radiation by 2016.

Let that sink in. By 2016, if not sooner.

We should all be very alarmed.

Fukushima has always been a world issue but only a few dedicated heroic Japanese are working non-stop to solve the problem. The brains of the world should step in and assist in trying to figure out what should and could be done.

However, I feel it is already far too late to save the food we get from the oceans. The blue fin tuna being caught off of the California coast are testing positive for radiation.

This is not the radiation we commonly find naturally in food; our bodies have adapted to that. In case you didn’t know, bananas, Brazil nuts have extremely low doses of potassium-40 and we have naturally occurring radiation such as radon and radium. Our bodies have adapted to potassium-40. Potassium does not collect in our bodies, any excess is dumped. And we have adapted our environments to deal with radon.

We are referring to radioactive elements such as cecium-137 which has a half-life of 30 years, and idoine-129 and iodine-131 has a half-life of 8 days as an internal transmitter, while iodine-129 has a half-life of, get this, 15.7 million years. Additionally, Fukushima has dumped radioactive strontium-90 which is also a strong internal transmitter, mimics calcium and collects in bones.

We have not adapted to these elements and they cause cancer. Cecium-137 is hard to avoid due to the environmental and atmospheric  testing of bombs. Cecium-137 enters the body through food and milk. It is chemically similar to potassium and is processed in the body the same as potassium.

Cecium-137 collects in muscles; Iodines in the thyroid and strontium-90 collects in bones. These are not naturally occurring radioactive elements are extremely dangerous. Due to the long half-lives, exposure is cumulative and builds up until one or the other perishes.

Please read this article and series of articles regarding this on the blog Washington’s Post, poke around while you are there and read more.

There are articles, studies and research that back the information up so it’s not just some doomsday freak writing scare tactic articles.

Yes, I’m sure you have heard about the talking heads saying the levels of radiation are harmless and much lower that what we encounter everyday in our natural environments and medical procedures.

To quote the blog “Washington’s Post”

The bottom line is that there is some naturally-occurring background radiation, which can – at times – pose a health hazard (especially in parts of the country with high levels of radioactive radon or radium).

But cesium-137 and radioactive iodine – the two main radioactive substances being spewed by the leaking Japanese nuclear plants – are not naturally-occurring substances, and can become powerful internal emitters which can cause tremendous damage to the health of people who are unfortunate enough to breathe in even a particle of the substances, or ingest them in food or water.

Unlike low-levels of radioactive potassium found in bananas – which our bodies have adapted to over many years – cesium-137 and iodine 131 are brand new, extremely dangerous substances.

And unlike naturally-occurring internal emitters like radon and radium – whose distribution is largely concentrated in certain areas of the country – radioactive cesium and iodine, as well as strontium and other dangerous radionuclides, are being distributed globally through weapons testing and nuclear accidents.

At this point, I’m not sure if there is anything “we” can do except be aware. I predict our time to eat ocean fish from any ocean is limited. In five years, we may not be able to eat any more ocean food.

I went to high School in Tokyo Japan. I still have many friends living there, in Hawaii and Guam. They all express concern and have fears of what the future may bring.

It makes me wonder, would it be safe to live on the coast? Go to the beach? What about walking in the rain?

Life as we know is it going to change. Just as we now bring our own shopping bags as we grocery shop, we’ll need to add a Geiger counter. Hope they make a purse size.

The worlds scientists say it is OK to eat Pacific seafood. Is this to avoid mass panic? Is the issue being glossed over because there isn’t anything anyone can do? What will the future be like in 10 years?

So many questions without answers.

Geiger-Müller radiation detector.

Geiger-Müller radiation detector. (Photo credit: Wikipedia)

What happens when the safe drinking water supply to a city like Tokyo is contaminated with radiation? Where and how does an entire country get relocated?

#6550 Iodine-131 found in ground water

#6550 Iodine-131 found in ground water (Photo credit: Nemo’s great uncle)

Should we just go on about living as if nothing is happening? What do we do? What will you do?

Imagine future generations saying things like, “Can you believe they used to eat these things?”

All I can say, is I’m glad to have had the chance to eat seafood and enjoy it tremendously. I’ll miss it terribly. Thanks for all the fish!

Succulent Pumpkin

Make A Succulent Pumpkin!

You can make a gorgeous Succulent Pumpkin that will last a long time.

Depending upon where you live, the pumpkin will last typically until Spring. It will naturally mush out by then so be sure to keep a liner under it when you bring it indoors.

If you live in a warm climate, it may last a while; in a cold climate, protect from freezing.

This is what you will need to make one:

1 largish pumpkin

Choose one that has an indention or depressed area on top. This will hold soil and moss as well as the plants.

Choose a well-indented pumpkin

Choose a well-indented pumpkin

I choose white or neutral colored pumpkins since they can last until Spring. Orange looks outdated soon after Thanksgiving. Orange is NOT the new black, trust me. No matter how much you may love Halloween or Thanksgiving, orange gets old quick out of season.

Sheet Moss

Various succulents

The rule of thumb:

  • 1 to Thrill

  • 1 to Fill

  • 1 to Spill

Choose what you like. Get one or two showstoppers for the thrill

Choose one that will fill in the area between plants as it grows. The spilling one is a great element. My favorite is called “String of Bananas”. It grows fast and cuttings are easy to root.

At the nursery, choose what plants appeal to you and cluster them together. You want smaller plants generally, but look for a variety of texture, shapes, heights, and colors.

You will also need some U-shaped pins to hold things in place.

In a nutshell, here’s what you need:

  • Pumpkin
  • Succulents
  • Moss and pins

Here’s what you do:

Wash and dry the pumpkin. Working on a newspaper to collect the soil, remove the selected plants from their pots. Carefully knock off any loose soil. You will see, most have small root balls.

Place the succulents around the pumpkin in a pleasing manner. Use pins to anchor any plants in place being careful not to pierce any leaves of the succulent plants. (Yes, you pin into the pumpkin)

Soak the moss a few minutes in warm water to hydrate. Cover all soil and “nest” the succulents with the damp moss. Pin moss in place so it doesn’t slide off when it dries out.

Use a variety of color and shape

Use a variety of color and shape

That’s all there is to it!

Succulents like dryer soil so be sure to water every now and then. Protect from freezing below 32°F.

When your pumpkin mushes out, save the plants and replant them in a shallow dish garden until next Fall when you can make another Succulent Pumpkin!

Succulent Pumpkins

Succulent Pumpkins


In My Kitchen October 2013

Last week we were swimming at the lake, today we are wearing light sweaters and sipping hot tea.

Ahh! Welcome Autumn!

After canning my rear end off last month, its nice to look at something other than mason jars and canning pots. I’m quite sure we will enjoy these things come cooler months.

I got to pull some of my china and other “stuff” out of storage and put into use this lovely oil dispenser. Pottery Oil Can

I really like this one. It was hand-made by an artist in Boca Raton, FL. I adore using well made pottery.

Pumpkins and squash fill my counters. Ready to eat this season.

These various squash found their way into my basket while shopping this weekend.

These various squash found their way into my basket while shopping this weekend.

I love roasting squash and serving it with butter, salt and fresh pepper. Yum.

Yesterday I made Butternut Squash Soup for lunch with Grilled Cheese and Tomato Sandwiches pressed on the Panini press.

We have a lovely pumpkin and fall squash display on the front step.

Stacked Pumpkins on the step

Stacked Pumpkins on the step

I topped one with moss and succulents for accent;

Pumpkin with Moss and Succulents

Pumpkin with Moss and Succulents

we are progressively eating our way through the rest!

While this October edition of In My Kitchen was due a good while back, I’ve been quite busy working on a few things.

For one, I studied my butt off to take the certifying exam for “Certified Dietary Manager” or CDM. I’ve been cramming medical nutritional therapies and medical codes into my head and now that I’ve passed the exam I have more free time to blog.

In My Kitchen now are 6 molds of goat cheese draining,

Goat Cheese Draining

Goat Cheese Draining

2 bread loaves rising, lobster tails, stone crab claws and Mimosa’s for lunch because today is my birthday!

And it’s time to start working on November’s In My Kitchen! Celia of Fig Jam and Lime Cordial, Hosts this wonderful gathering each month. Visit and join in!

Stuffed Mini Pumpkins

Pile of Pumpkins!Autumn is one of the great seasons; watching the color of the leaves turn, the brisk crisp coolness in the air and the emergence of pumpkins and squash in the market.

These various squash found their way into my basket while shopping this weekend.

These various squash found their way into my basket while shopping this weekend.

Today I saw these mini pumpkins and some white pie pumpkins, so I filled my basket.

This stuffed mini pumpkin makes a great little side dish. The best part is you can fill it with a variety of things, from soup to salad or use it to hold grains or a mix of things like I did here.

When using a variety of things inside the pumpkin, remember to cut them small so you can get a bit of everything in one bite.

I think these would make a really pretty side dish on  Thanksgiving table or buffet.

To present them on a platter, think ‘patch patch’ and decorate around the pumpkins with salad greens or Brussels sprouts.

Serve stuffed mini pumpkins on a platter, think "Pumpkin Patch"

Serve stuffed mini pumpkins on a platter, think “Pumpkin Patch”

To prepare the pumpkins, cut the tops off using a sharp knife. Then gently scoop out the insides and discard.

Season the pumpkins inside with salt and pepper and a small bit of fresh butter.

Steam the pumpkins until the inside flesh is tender. Test by using a fork or tip of a paring knife.

Do not poke through the shell to test doneness, that would cause the pumpkin to leak any liquids you put inside.

Once the flesh is done, place the pumpkins upside down on a clean towel and allow them to drain for a few minutes.

Carefully fill each pumpkin with the filling. If serving warm, cover each pumpkin with tin foil and put it in an oven set at 400°F for 30 minutes or until the contents are warm.

If serving the pumpkins cool or at room temperature, chill before filling.

The filling used for these pumpkins is a filling that reflects the changes of the season. Stuffed Pumpkin

Pumpkins Stuffed Roasted Beet, Sweet Potato, Dried Cranberries with Toasted Pecans and Feta Cheese

  • 1 medium-sized beet, roasted, cut into very small cubes
  • 1 medium sweet potato, roasted, cut into very small cubes
  • 1/4 cup toasted pecan pieces
  • 1/4 cup finely chopped dried cranberries
  • 2 tablespoons crumbled feta cheese

Keeping the vegetables separate as you cut them, roast them for about 10 minutes in a 350°F oven or until each cube is done through.

Chop the toasted nuts and dried cranberries then combine them in a bowl, add the beets and potatoes as they finish roasting. Mix together and sprinkle in the feta cheese. Adjust seasonings with salt and pepper. A touch in cinnamon or ginger is a very nice addition and fragrant too.

Either cool the mixture to serve cold or warm the mixture then stuff the pumpkins. Cover with the pumpkin “lid”, wrap in foil and warm in the oven.

Use spatulas to lift the cooked pumpkins because the skin gets delicate and tears easily.

Honey Peppercorn Vinaigrette

Honey Peppercorn Vinaigrette

  • 1/2 cup white balsamic vinegar or white wine vinegar
  • 1 tablespoon honey
  • 1 tablespoon ground mixed peppercorns, use pink, white, dried green, black and Szechuan peppercorns for maximum interest
  • 1 clove garlic, minced
  • 1/2 Tablespoon shallot, minced
  • 1 teaspoon kosher salt
  • 1 cup good quality vegetable oil

Combine all ingredients except the oil in a large bowl, whisk together. Add the oil and whisk to combine. Adjust seasonings, stir or shake just before serving.

Top the stuffed pumpkins with a bit of Honey Peppercorn Vinaigrette just before serving and add a bit to the stuffing for added moisture.

I hope you try making these stuffed mini pumpkins this season. Personally I love squashes of all kinds and look forward to  this time of year.

Happy Fall!

Plated stuffed mini pumpkin

Strawberry Basil Balsamic Jam

Strawberries and basil

Strawberries and basil

This Strawberry Basil Balsamic Jam captures the essence of fresh summer fruit. It is easy to make, it just takes some time.

You can store this jam in the refrigerator or you can process it using a safe water-bath canning method to store it in the pantry for up to 1 year.

Try to hide a jar in the back of the cabinet for a cold winter night in January or February or if you get snowed in. Pour it over some goat cheese, toast up some great bread, slice an apple and summer will come alive again in your mouth.

if you are one of those who think strawberry jam is far too sweet, try this one. The herbal element as well as the complex acid from the balsamic really takes a plain strawberry jam and turns it into an amazing treat.

Leaving the strawberries whole, this creates a delicious strawberry compote perfect for desserts, ice cream and goat or cream cheese. Puree the berries for a more jam like consistency.

Strawberry Basil Balsamic Jam

  • 1# fresh strawberries, stemmed and cleaned; cut as desired
  • 3 cups sugar
  • 2 large sprigs of fresh basil
  • 2 Tablespoons balsamic vinegar
  • 1/4 cup chopped basil leaves
  • pinch of kosher salt

Combine the berries with the sugar and large sprigs of basil. Stir well. Allow to marinade for 2 hours, stir often. You will notice the sugar will melt and there will be considerable syrup in the bowl.

Place this into a heavy bottomed stainless pot, add the balsamic vinegar, turn the heat to high and bring the mixture to a boil. Stir frequently to prevent scorching. Then the mixture boils, skim any foam that forms on the surface.

Reduce the heat and simmer actively until the mixture thickens to the desired consistency, about 20 minutes.

Place a plate in the freezer. Once cold, pour a spoonful of hot jam onto the plate and replace it in the freezer until the jam cools.

Run your finger through the cooled jam. If it remains separated and does not run or run back together, it will maintain a jam like consistency. If not, keep cooking longer. Chill some down to really evaluate the consistency. Even if it remains a bit runny, it makes great syrup and dessert sauce. The flavor is so delicious!

Ladle the hot jam into hot sterilized jars, cap and either process in a water-bath canner to store at room temperature or refrigerate once the jars cool.

I am not an expert canner so I would advise following expert advice on how to process your jars in a water-bath canner. I do know that if you use a pressure canner, you will have mushy fruit, so be sure to only use a water bath canner or a “granny bath” – I love that term!

This jam has a lovely complex flavor. We find it delightful on toast, over oatmeal or French toast, we even enjoy it on cheese platters with a glass of wine in the evening.

I packed some in small 4 ounce jars so they would be easy to take just a few servings on picnics, tailgating or on the go meals.Compotes on cheese platter

Make some before all the summer berries are gone! Those of you in climates just warming into your Summer, make this with the fresh berries, you’ll be glad you did!